Day105.尚医通项目: 后台前端搭建、Elementui、增删改查、分页条件查询、批量删除
目录
一、后台前端搭建
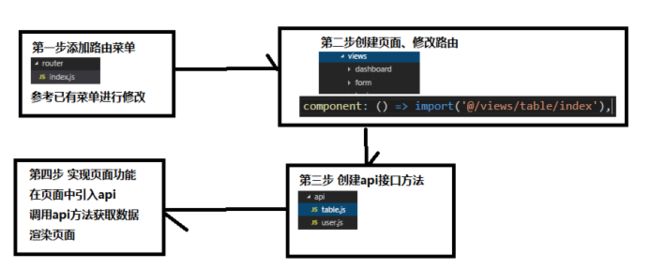
前台开发步骤:
二、登录改造
1、后端添加方法
2、修改前端
三、医院设置列表基本实现
分页条件查询实现
四、删除医院设置
五、新增医院设置
六、医院设置修改实现
七、医院设置批量删除
一、后台前端搭建
1、确认前端所在位置
2、前端工程选型:Elementui
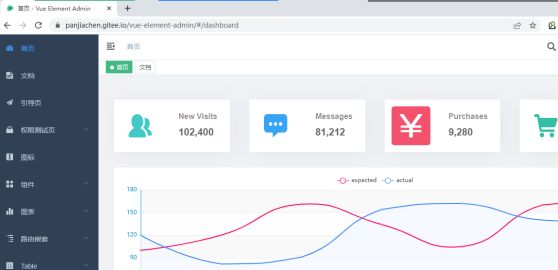
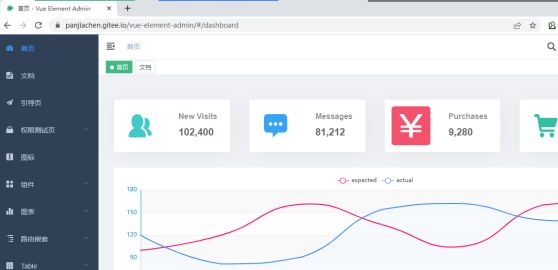
而 vue-element-admin 是基于element-ui 的一套后台管理系统集成方案。
饿了么UI:Elementui
官网:Element - The world's most popular Vue UI framework
功能:https://panjiachen.github.io/vue-element-admin-site/zh/guide/#功能
GitHub地址:GitHub - PanJiaChen/vue-element-admin: A magical vue admin https://panjiachen.github.io/vue-element-admin
项目在线预览:https://panjiachen.gitee.io/vue-element-admin
3、工程搭建
标准方式
(1)工程包解压后复制到工程目录,重命名为 yygh-admin
(2)进入工程目录,根据配置文件下载依赖:npm install
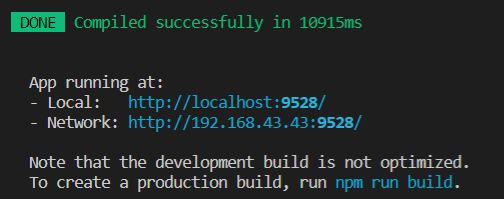
(3)运行命令启动:npm run dev
已经下好依赖方式
(1)工程包解压后复制到工程目录,重命名为 yygh-admin
(2)运行命令启动:npm run dev
修改总配置文件中30行,语法检查
4、项目目录介绍
├── build // 构建脚本
├── mock // 所有模拟数据
├── node_modules // 项目依赖模块├── public // 通用页面元素
├── src //项目源代码
└── tests //测试目录env.development:开发环境配置
env.production:运行时配置文件(生产环境)
vue.config.js:总配置文件
src
├── api // 前后端对接接口方法目录
├── assets // 静态资源目录(图片等)
├── components // 各种公共组件,非公共组件在各自view下维护
├── icons // 小图标├── layout // 页面布局
├── router // 路由表,路由配置目录
├── store // 存储
├── styles // 各种样式
├── utils // 公共工具,非公共工具,在各自view下维护
├── views // 前端所有页面组件,视图目录
├── App.vue //***项目顶层组件***
├── main.js //***项目入口文件***
└── permission.js //认证入口
前台开发步骤:
二、登录改造
1、后端添加方法
根据请求信息,添加方法
    //实现模拟登录
    @ApiOperation(value = "模拟登录")
    @PostMapping("login")//注意请求方式
    // {"code":20000,"data":{"token":"admin-token"}}
    public R login(){
        return R.ok().data("token","admin-token");
    }
    @ApiOperation(value = "模拟获取用户信息")
    @GetMapping("info")
    //{"code":20000,"data":{"roles":["admin"],
    //"introduction":"I am a super administrator",
    //"avatar":"https://wpimg.wallstcn.com/f778738c-e4f8-4870-b634-56703b4acafe.gif",
    //"name":"Super Admin"}}
    public R info(){
        Map map = new HashMap<>();
        map.put("roles","admin");
        map.put("introduction","I am a super administrator");
        map.put("avatar","https://wpimg.wallstcn.com/f778738c-e4f8-4870-b634-56703b4acafe.gif");//头像
        map.put("name","Super Admin");
        return R.ok().data(map);
    }
2、修改前端
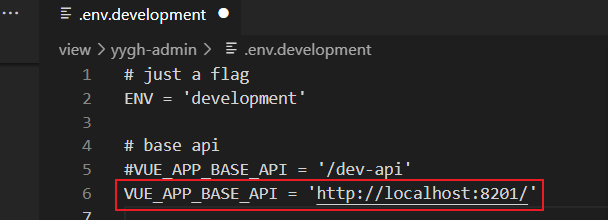
1. 修改env.development 请求路径
VUE_APP_BASE_API = 'http://localhost:8201/'
2. 修改api接口方法 请求路径
原因:工具类中进行了封装,根据启动指令读取配置文件
3、测试
分析:
1. 请求路径拼错了(排除)2. 跨域问题:在访问中、协议、ip地址、端口号中有一个发生变化,就会发生跨域问题
解决:controller 类上添加 @CrossOrigin 注解
成功
三、医院设置列表基本实现
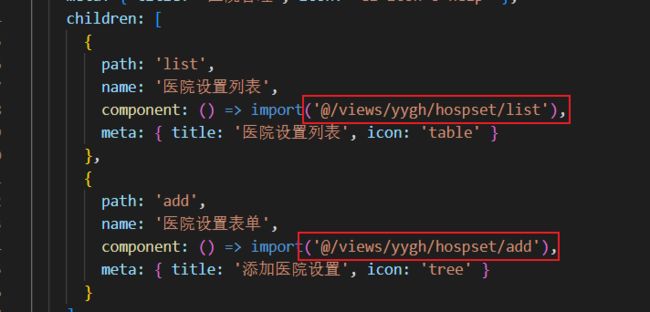
1. 添加路由设置菜单 router
  {
    path: '/yygh/hospset',
    component: Layout,
    redirect: '/yygh/hospset/list',
    name: 'hosp',
    meta: { title: '医院管理', icon: 'el-icon-s-help' },
    children: [
      {
        path: 'list',
        name: '医院设置列表',
        component: () => import('@/views/yygh/hospset/list'),
        meta: { title: '医院设置列表', icon: 'table' }
      },
      {
        path: 'add',
        name: '医院设置表单',
        component: () => import('@/views/yygh/hospset/add'),
        meta: { title: '添加医院设置', icon: 'tree' }
      }
    ]
  },
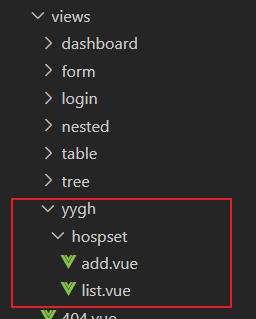
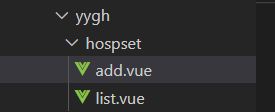
2. 创建页面,修改路由
3. api 方法搭建
import request from '@/utils/request'
//提取请求路径
const api_name = '/admin/hosp/hospitalSet'

export default{
    //分页条件查询医院设置
    pageQuery(page,limit,searchObj){
        return request({
            url: `${api_name}/pageQuery/${page}/${limit}`,//插值表达式
            method: 'post',
            data:searchObj  //使用json方式传递数据
          })
    }
}
4. 实现页面
(1) 添加页面元素
    医院设置列表


          {{ (page - 1) * limit + scope.$index + 1 }}


          {{ scope.row.status === 1 ? "可用" : "不可用" }}


            修改

          删除
(2) JS实现
(3) 改造JS
data() {
    return {
      listLoading: true, //表格加载状态
      list: [], //表格数据
      page: 1, //当前页
      limit: 10, //每页记录数
      total:0,//总记录数
      searchObj: {} //查询条件
    };
  },
  created() {
    this.fetchData();
  },
  methods: {
    //分页条件查询 添加默认传参 es6新特性
    fetchData(page=1) {
        this.page = page
      hospsetApi
        .pageQuery(this.page, this.limit, this.searchObj)
        .then(response => {
          console.log(response);
          this.list = response.data.pageModel.records;
          this.total = response.data.pageModel.total
          this.listLoading = false;
        });
    }
  }
分页条件查询实现
(1) 顶部添加页面元素
           医院设置列表


            查询
            清空
(2) 清空实现js
        //清空
        resetData() {
            this.searchObj = {};
            this.fetchData();
        },
四、删除医院设置
1. 添加api接口方法
    //医院设置删除
    removeById(id){
        return request({
            url: `${api_name}/${id}`,//插值表达式
            method: 'delete'
            })
    },
2. 页面实现js方法
    //删除
    removeDataById(id){
        hospsetApi.removeById(id).then(response=>{
            this.fetchData();
        })
    }
3. 优化删除 (确认提示框)
        //删除
        removeDataById(id) {
            this.$confirm("此操作将永久删除该数据, 是否继续?", "提示", {
                confirmButtonText: "确定",
                cancelButtonText: "取消",
                type: "warning",
            }).then(() => {
                    //删除
                    hospsetApi.removeById(id).then((response) => {
                        this.fetchData();
                    });

                    this.$message({
                        type: "success",
                        message: "删除成功!",
                    });
                })
                .catch(() => {
                    this.$message({
                        type: "info",
                        message: "已取消删除",
                    });
                });
        },
五、新增医院设置
1. 实现接口api
    //新增医院设置
    removeById(hospitalSet){
        return request({
            url: `${api_name}}`,//插值表达式
            method: 'post',
            data:hospitalSet
            })
    }
2. 实现页面 (新增与修改共用)
(1) 复制页面元素
    医院设置表单


        保存
(2) js实现
六、医院设置修改实现
注意:修改与新增 共用一张表单
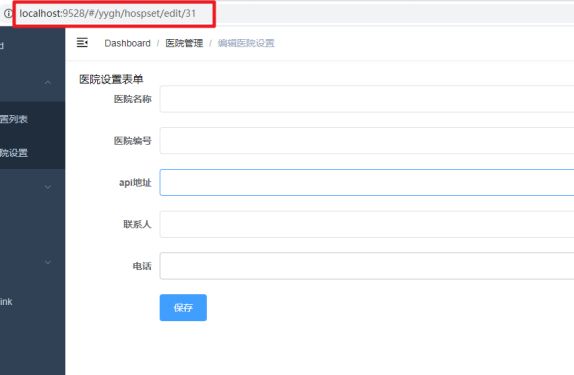
1. 确认入口
2. 添加隐藏路由
      {
        path: 'edit/:id',
        name: 'HospSetEdit',
        component: () => import('@/views/yygh/hospset/add'),
        meta: { title: '编辑医院设置', noCache: 'tree' },
        hidden: true
      }
3. 实现数据回显
(1) 添加api接口方法
    //根据id进行查询
    getById(id){
        return request({
            url: `${api_name}/getById/${id}`,//插值表达式
            method: 'get'
            })
    },
(2) js实现
    created () {
        //判断id数据是否存在
        if(this.$route.params&&this.$route.params.id){
            //注意,获取参数用route,不是router
            //console.log(this.$route.params.id);
            //数据回显
            hospsetApi.getById(this.$route.params.id).then(response=>{
                this.hospset = response.data.hospitalSet
            })
        }

    },
4. 实现修改保存
(1) 新增api接口
    //修改医院设置
    update(hospitalSet){
        return request({
            url: `${api_name}/update`,
            method: 'post',
            data: hospitalSet  //用json
            })
    },
(2) 页面js实现
        methods: {
        //保存
        saveOrUpdate(){
            //新增与修改的区别:vu对象是否存在id
            this.saveBtnDisabled = true
            if (!this.hospset.id) {
                //新增
                this.saveHospset()
            } else {
                //编辑
                this.updateHospset()
            }

        },
        //修改
        updateHospset(){
            hospsetApi.update(this.hospset).then(response=>{
                this.$message({
                    type: "success",
                    message: "修改成功!",
                });
                //页面跳转,用router
                this.$router.push({path:'/yygh/hospset/list'})
            });
        },
        //新增
七、医院设置批量删除
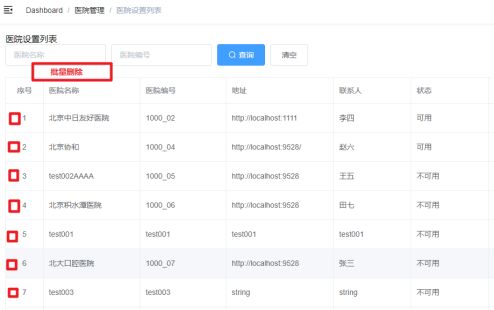
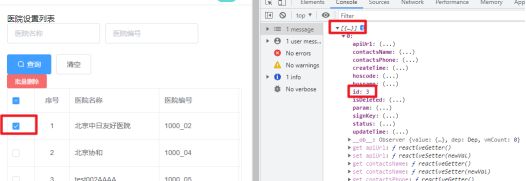
- 给表格添加复选框,可以拿到选择的对象
- 点击“批量删除”按钮,获取所有选择对象的id,存入集合
1、创建api接口方法
    //批量删除医院设置
    batchRemove(idList){
        return request({
            url: `${api_name}/batchRemove`,//插值表达式
            method: 'delete',
            data: idList
            })
},2、实现页面改造 (参考官方文档)
批量删除
3、实现复选框选择方法
    data() {
        return {
            listLoading: true, //表格加载状态
            list: [], //表格数据
            page: 1, //当前页
            limit: 5, //每页记录数
            total: 0,
            searchObj: {}, //查询条件
            multipleSelection: [], // 批量选择中选择的记录列表(批量删除)
        };
    },
    ...
    methods: {
        ....
        //复选框选择方法
        handleSelectionChange(selection) {
            console.log(selection);
            this.multipleSelection = selection;
        },
4、批量删除js实现
//批量删除
        removeRows() {
            this.$confirm("此操作将永久删除该数据, 是否继续?", "提示", {
                confirmButtonText: "确定",
                cancelButtonText: "取消",
                type: "warning",
            })
                .then(() => {
                    //1.创建参数对象idList
                    let idList = [];
                    //2.遍历multipleSelection对象,取出id
                    for (let i = 0; i < this.multipleSelection.length; i++) {
                        let hospset = this.multipleSelection[i];
                        let id = hospset.id;
                        //3.存入idList
                        idList.push(id);
                    }
                    console.log(idList);

                    //4.调接口进行批量删除
                    hospsetApi.batchRemove(idList).then((response) => {
                        this.fetchData();
                        this.$message({
                            type: "success",
                            message: "删除成功!",
                        });
                    });
                })
                .catch(() => {
                    this.$message({
                        type: "info",
                        message: "已取消删除",
                    });
                });
        },