wsl安装英特尔openvino
一、安装miniconda
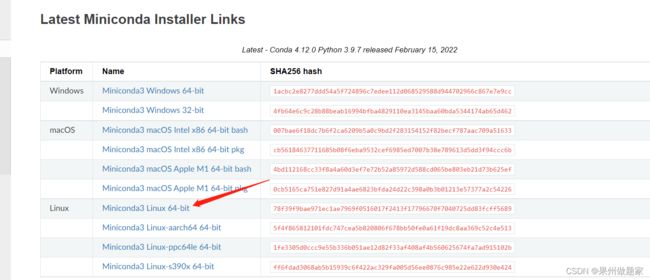
从miniconda官网安装下载器
~/miniconda3/bin/conda init bash

source ~/.bashrc
二、配置conda源,创建环境
sudo apt-get update

sudo apt-get upgrade

vi .condarc
default_channels:
- http://mirrors.tuna.tsinghua.edu.cn/anaconda/pkgs/main
- http://mirrors.tuna.tsinghua.edu.cn/anaconda/pkgs/r
- http://mirrors.tuna.tsinghua.edu.cn/anaconda/pkgs/msys2
custom_channels:
conda-forge: https://mirrors.tuna.tsinghua.edu.cn/anaconda/cloud
msys2: https://mirrors.tuna.tsinghua.edu.cn/anaconda/cloud
bioconda: https://mirrors.tuna.tsinghua.edu.cn/anaconda/cloud
menpo: https://mirrors.tuna.tsinghua.edu.cn/anaconda/cloud
pytorch: https://mirrors.tuna.tsinghua.edu.cn/anaconda/cloud
pytorch-lts: https://mirrors.tuna.tsinghua.edu.cn/anaconda/cloud
simpleitk: https://mirrors.tuna.tsinghua.edu.cn/anaconda/cloudconda update --all
!!!重启terminal后再创建环境!一定要重启terminal!!!
conda create -n openvivo_env_py37 python=3.7.13注意,支持的版本为3.7.13及以下的。
三、离线安装
下载离线安装包
Download Intel® Distribution of OpenVINO™ Toolkit
安装jupyter lab,启动
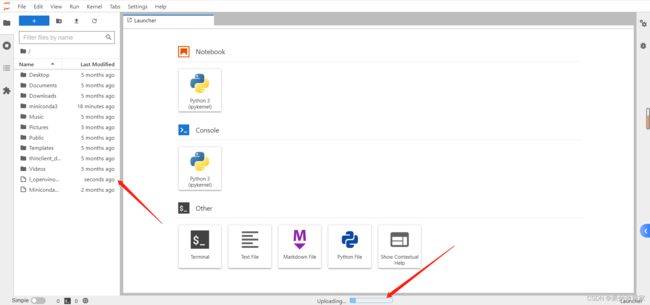
利用jupyter lab上传安装包。
tar -xvf l_openvino_toolkit_p_2021.4.752.tgz
cd l_openvino_toolkit_p_2021.4.752
sh install.sh
enter
accept
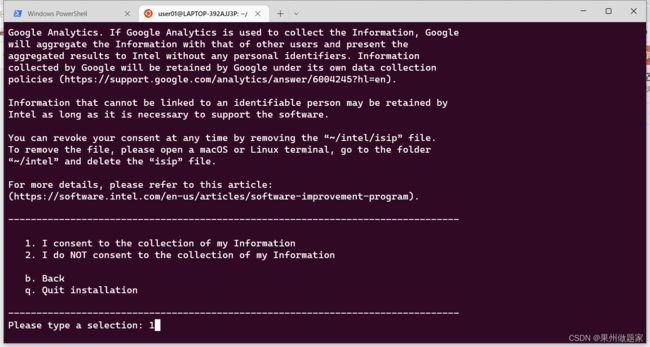
1
出了一些小问题,需要sudo权限
但是不是sudo 的问题
pcilib: Cannot open /proc/bus/pci
lspci: Cannot find any working access method.
需要: pip install grpcio
同时,pip配置华为源
vi /home/user01/.config/pip/pip.conf
添加如下内容
[global]
index-url = https://repo.huaweicloud.com/repository/pypi/simple
trusted-host = repo.huaweicloud.com
timeout = 120
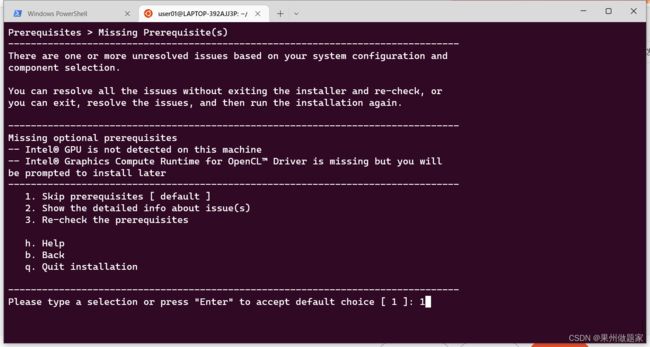
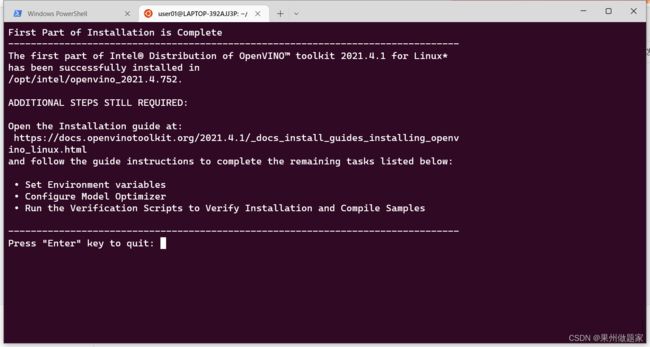
跳过预处理
1
1 接受
1
设置环境变量
配置模型文件
https://docs.openvinotoolkit.org/2021.4.1/_docs_install_guides_installing_openv
ino_linux.html
先按照官网说明配置
-
Go to the
install_dependenciesdirectory:cd /opt/intel/openvino_2021/install_dependencies
-
Run a script to download and install the external software dependencies:
sudo -E ./install_openvino_dependencies.sh
Once the dependencies are installed, continue to the next section to set your environment variables.
Step 2: Install External Software Dependencies
Note
If you installed the Intel® Distribution of OpenVINO™ to a non-default directory, replace /opt/intel with the directory in which you installed the software.
These dependencies are required for:
-
Intel-optimized build of OpenCV library
-
Deep Learning Inference Engine
-
Deep Learning Model Optimizer tools
-
Go to the
install_dependenciesdirectory:cd /opt/intel/openvino_2021/install_dependencies
-
Run a script to download and install the external software dependencies:
sudo -E ./install_openvino_dependencies.sh
Once the dependencies are installed, continue to the next section to set your environment variables.
Step 3: Configure the Environment
You must update several environment variables before you can compile and run OpenVINO™ applications. Set persistent environment variables as follows, using vi (as below) or your preferred editor:
-
Open the
.bashrcfile in/home/:vi ~/.bashrc
-
Press the i key to switch to insert mode.
-
Add this line to the end of the file:
source /opt/intel/openvino_2021/bin/setupvars.sh

特别注意:如果此时环境变量生效不能成功,则需要关闭所有terminial或者重启wsl电脑,
如果这句话不加入 ~/.bashrc,则每次运行需要额外生效一次环境变量。
-
Save and close the file: press the Esc key and type
:wq. -
To verify the change, open a new terminal. You will see
[setupvars.sh] OpenVINO environment initialized.Optional: If you don’t want to change your shell profile, you can run the following script to temporarily set your environment variables for each terminal instance when working with OpenVINO™:
source /opt/intel/openvino_2021/bin/setupvars.sh
The environment variables are set. Next, you will configure the Model Optimizer.
Step 4: Configure the Model Optimizer
Note
Since the TensorFlow framework is not officially supported on CentOS*, the Model Optimizer for TensorFlow can’t be configured and run on that operating system.
The Model Optimizer is a Python*-based command line tool for importing trained models from popular deep learning frameworks such as Caffe*, TensorFlow*, Apache MXNet*, ONNX* and Kaldi*.
The Model Optimizer is a key component of the Intel Distribution of OpenVINO toolkit. Performing inference on a model (with the exception of ONNX and nGraph models) requires running the model through the Model Optimizer. When you run a pre-trained model through the Model Optimizer, your output is an Intermediate Representation (IR) of the network. The Intermediate Representation is a pair of files that describe the whole model:
-
.xml: Describes the network topology -
.bin: Contains the weights and biases binary data
For more information about the Model Optimizer, refer to the Model Optimizer Developer Guide.
-
Go to the Model Optimizer prerequisites directory:
cd /opt/intel/openvino_2021/deployment_tools/model_optimizer/install_prerequisites
-
Run the script to configure the Model Optimizer for Caffe, TensorFlow 2.x, MXNet, Kaldi, and ONNX:
sudo ./install_prerequisites.sh
-
Optional: You can choose to configure each framework separately instead. If you see error messages, make sure you installed all dependencies. From the Model Optimizer prerequisites directory, run the scripts for the model frameworks you want support for. You can run more than one script.
Note
You can choose to install Model Optimizer support for only certain frameworks. In the same directory are individual scripts for Caffe, TensorFlow 1.x, TensorFlow 2.x, MXNet, Kaldi, and ONNX (install_prerequisites_caffe.sh, etc.).
The Model Optimizer is configured for one or more frameworks.
You have now completed all required installation, configuration, and build steps in this guide to use your CPU to work with your trained models.
To enable inference on other hardware, see below:
-
Steps for Intel® Processor Graphics (GPU)
-
Steps for Intel® Neural Compute Stick 2
-
Steps for Intel® Vision Accelerator Design with Intel® Movidius™ VPUs
Or proceed to the Start Using the Toolkit section to learn the basic OpenVINO™ toolkit workflow and run code samples and demo applications.
Step 5 (Optional): Configure Inference on non-CPU Devices:
Optional: Steps for Intel® Processor Graphics (GPU)
The steps in this section are required only if you want to enable the toolkit components to use processor graphics (GPU) on your system.
-
Go to the install_dependencies directory:
cd /opt/intel/openvino_2021/install_dependencies/
-
Install the Intel® Graphics Compute Runtime for OpenCL™ driver components required to use the GPU plugin and write custom layers for Intel® Integrated Graphics. The drivers are not included in the package. To install, run this script:
sudo -E ./install_NEO_OCL_driver.sh
Note
To use the Intel® Iris® Xe MAX Graphics, see the Intel® Iris® Xe MAX Graphics with Linux* page for driver installation instructions.
The script compares the driver version on the system to the current version. If the driver version on the system is higher or equal to the current version, the script does not install a new driver. If the version of the driver is lower than the current version, the script uninstalls the lower version and installs the current version with your permission:
Higher hardware versions require a higher driver version, namely 20.35 instead of 19.41. If the script fails to uninstall the driver, uninstall it manually. During the script execution, you may see the following command line output:
Add OpenCL user to video group
Ignore this suggestion and continue.
You can also find the most recent version of the driver, installation procedure and other information on the Intel® software for general purpose GPU capabilities site.
-
Optional: Install header files to allow compilation of new code. You can find the header files at Khronos OpenCL™ API Headers.
You’ve completed all required configuration steps to perform inference on processor graphics. Proceed to the Start Using the Toolkit section to learn the basic OpenVINO™ toolkit workflow and run code samples and demo applications.
至此就安装全部完成了。
