基于opencv 的OCR小票识别(1)
文章目录
- 需求
- 分析
-
- 目标
- 实现方法
- 开始
-
- 进行小票区域检测识别
- 检测
- 轮廓处理
- 进行变换
-
- opencv的 透视变换
- 下一步
- 代码
需求
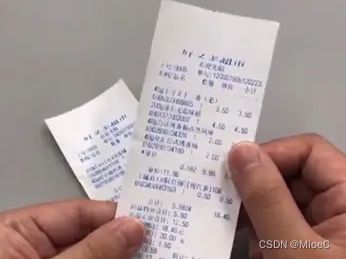
今天在超市购物的时候,发现一个新的需求,能不能通过拍照识别的方式进行记账,于是开始行动,干起来。
分析
目标
- 对购物小票进行拍照,可以识别出购物的内容,并自动进行记账
- 能对购物内容进行分类,如小票记录,洗衣液, 冰淇淋,自动分类为生活用品, 餐饮支出
实现方法
- 进行小票的目标识别
- 获取小票内容,进行透视变换
- 运用ORC框架进行内容识别
- 利用文本分类网络进行分类
- 将数据存入数据库,前端展示
开始
进行小票区域检测识别
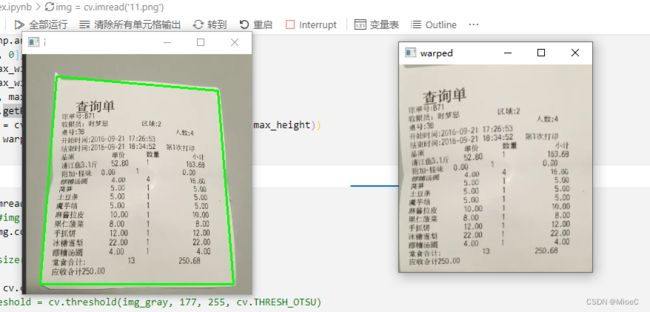
- 一般拍的不会那么正, 我们需要进行检测,执行透视变换,变成正的摆放
检测
-灰度化, 去噪, 边缘检测算法
img_gray = cv.cvtColor(img, cv.COLOR_BGR2GRAY)
# ret, threshold = cv.threshold(img_gray, 177, 255, cv.THRESH_OTSU)
kernel = cv.getStructuringElement(cv.MORPH_RECT, (5, 5))
img_gray = cv.erode(img_gray, kernel)
img_gray = cv.GaussianBlur(img_gray, (5, 5), 0)
res = cv.Canny(img_gray, 75, 200)
轮廓处理
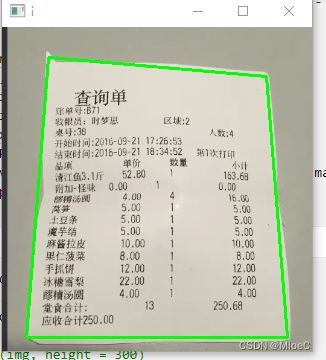
- 运用轮廓
- 利用近似轮廓获取正方形选区,将区域最大的放入选区数组
- 绘制选区
# 获得近似轮廓
cnts, tre = cv.findContours(res, cv.RETR_LIST, cv.CHAIN_APPROX_SIMPLE)
# 获得轮廓排序
cnts = sorted(cnts, key=cv.contourArea, reverse=True)[:5]
for cnt in cnts:
    peri = cv.arcLength(cnt, True)
    approx = cv.approxPolyDP(cnt, 0.01 * peri, True)
    if len(approx) == 4:
        screenCnt = approx
        break
cv.drawContours(img, [screenCnt], -1, (0, 255, 0), 2)
进行变换
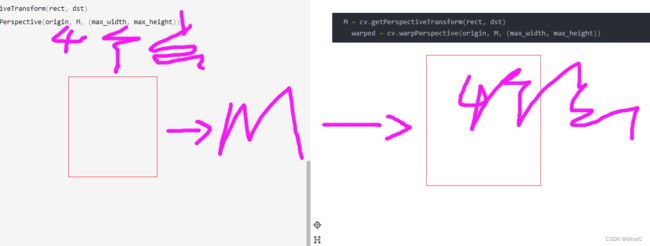
- 主要运用opencv的透视变换
  M = cv.getPerspectiveTransform(rect, dst)
    warped = cv.warpPerspective(origin, M, (max_width, max_height))
- 需要变换前和变换后的四个坐标点。
opencv的 透视变换
参考
M = cv.getPerspectiveTransform(rect, dst)
warped = cv.warpPerspective(origin, M, (max_width, max_height))
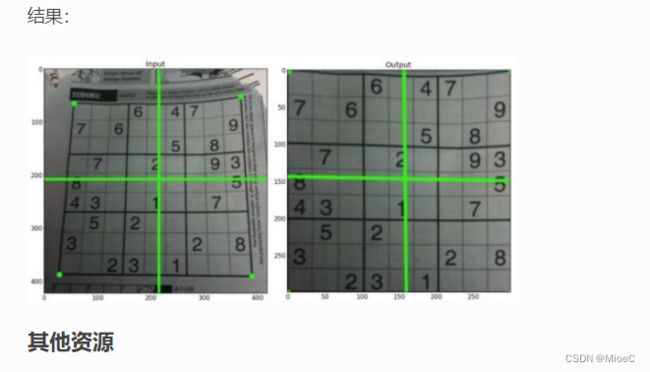
- 参考代码:
img = cv.imread('sudoku.png')
rows,cols,ch = img.shape
pts1 = np.float32([[56,65],[368,52],[28,387],[389,390]])
pts2 = np.float32([[0,0],[300,0],[0,300],[300,300]])
M = cv.getPerspectiveTransform(pts1,pts2)
dst = cv.warpPerspective(img,M,(300,300))
plt.subplot(121),plt.imshow(img),plt.title('Input')
plt.subplot(122),plt.imshow(dst),plt.title('Output')
plt.show()
下一步
进行OCR框架安装和文字识别
代码
# %%
import cv2 as cv
import numpy as np


# %%
def resize(img, height=None, width= None):
    target = None
    (h, w) = img.shape[:2]
    if height == None and width == None:
        return img
    if height:
        w = int(w * (height/float(h)))
    else:
        h = int(h * (width/float(w)))
    target = cv.resize(img, (w, h), interpolation= cv.INTER_AREA)
    return target

# %%
def order_point(target):
    rect = np.zeros((4, 2), dtype= 'float32')
    print(target)
    s = target.sum(axis = 1)
    rect[0] = target[np.argmin(s)]
    rect[2] = target[np.argmax(s)]

    diff = np.diff(target, axis=1)

    rect[1] = target[np.argmin(diff)]
    rect[3] = target[np.argmax(diff)]
    return rect

# %%
def transform(origin, target):
    rect = order_point(target)
    (tl, tr, br, bl) = rect;
    width_A = np.sqrt(((tr[0] - tl[0])** 2) + ((tr[1] - tl[1]) ** 2))
    width_B = np.sqrt(((br[0] - bl[0])** 2) + ((br[1] - bl[1]) ** 2))
    max_width = max(int(width_A), int(width_B))

    height_A = np.sqrt(((tr[0] - br[0])** 2) + ((tr[1] - br[1]) ** 2))
    height_B = np.sqrt(((tl[0] - bl[0])** 2) + ((tl[1] - bl[1]) ** 2))
    max_height = max(int(height_A), int(height_B))

    dst = np.array([
        [0, 0],
        [max_width - 1, 0],
        [max_width - 1, max_height - 1],
        [0, max_height]], dtype= 'float32')
    M = cv.getPerspectiveTransform(rect, dst)
    warped = cv.warpPerspective(origin, M, (max_width, max_height))
    return warped

# %%
img = cv.imread('11.png')
ratio = 1 #img.shape[0] / 300 # h/500 ,高度比例
origin = img.copy()

# img = resize(img, height = 300)

img_gray = cv.cvtColor(img, cv.COLOR_BGR2GRAY)
# ret, threshold = cv.threshold(img_gray, 177, 255, cv.THRESH_OTSU)
kernel = cv.getStructuringElement(cv.MORPH_RECT, (5, 5))
img_gray = cv.erode(img_gray, kernel)
img_gray = cv.GaussianBlur(img_gray, (5, 5), 0)
res = cv.Canny(img_gray, 75, 200)
# 获得近似轮廓
cnts, tre = cv.findContours(res, cv.RETR_LIST, cv.CHAIN_APPROX_SIMPLE)
# 获得轮廓排序
cnts = sorted(cnts, key=cv.contourArea, reverse=True)[:5]
for cnt in cnts:
    peri = cv.arcLength(cnt, True)
    approx = cv.approxPolyDP(cnt, 0.01 * peri, True)
    if len(approx) == 4:
        screenCnt = approx
        break
cv.drawContours(img, [screenCnt], -1, (0, 255, 0), 2)

warped = transform(origin, screenCnt.reshape(4, 2) * ratio)
cv.imshow("origin", origin)
cv.imshow("i", img)
cv.imshow("warped", warped)
cv.waitKey(0)
cv.destroyAllWindows()

