深度学习(三):yolov5环境配置及使用
目录
0 前言
1 环境配置
1.1 python环境
1.2 官方github的样例
1.2.1 打印检测结果
1.2.2 展示检测结果
2 运用detect.py进行检测
2.1 网络摄像头
2.2 将检测过程可视化
3 运用train.py进行训练
3.1 第一次报错
3.2 换一条命令
3.3 对比上面两条命令的数据集
3.4 第一次报错解决一半
未完
0 前言
电脑:RTX3070、cuda-11.0,系统ubuntu18.04
官网:https://github.com/ultralytics/yolov5
yolov5注释大神:https://github.com/SCAU-HuKai/yolov5-5.x-annotations
其CSDN:https://blog.csdn.net/qq_38253797/article/details/119043919
1 环境配置
1.1 python环境
下载代码:
git clone https://github.com/ultralytics/yolov5进入到下载目录:
#创建python3.7的环境
conda create -n yolov5py37 python=3.7

#安装gpu版本的pytorch
#官网链接:https://pytorch.org/get-started/previous-versions/
pip install torch==1.7.1+cu110 torchvision==0.8.2+cu110 torchaudio==0.7.2 -f https://download.pytorch.org/whl/torch_stable.html
#上面这个命令安装的包:
    torch==1.7.1+cu110
    torchvision==0.8.2+cu110
    torchaudio==0.7.2

#安装其他需要的包
pip install -r requirements.txt
#安装包的版本可能不固定,但都是满足要求的版本
1.2 官方github的样例
1.2.1 打印检测结果
创建文件inference.py
import torch

# Model
model = torch.hub.load('ultralytics/yolov5', 'yolov5s')  # or yolov5m, yolov5l, yolov5x, custom

# Images
img = 'https://ultralytics.com/images/zidane.jpg'  # or file, Path, PIL, OpenCV, numpy, list

# Inference
results = model(img)

# Results
results.print()  # or .show(), .save(), .crop(), .pandas(), etc.
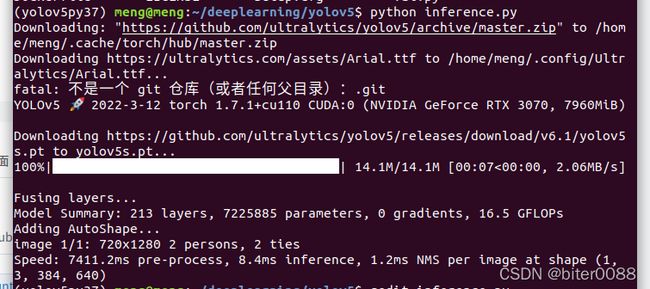
在1.1的python环境中执行,终端打印输出的有yolov5软件信息、计算机硬件信息、下载.pt模型文件、模型概况、图像、检测结果。
python inference.py(yolov5py37) meng@meng:~/deeplearning/yolov5$ python inference.py
Downloading: "https://github.com/ultralytics/yolov5/archive/master.zip" to /home/meng/.cache/torch/hub/master.zip
Downloading https://ultralytics.com/assets/Arial.ttf to /home/meng/.config/Ultralytics/Arial.ttf...
fatal: 不是一个 git 仓库(或者任何父目录):.git
YOLOv5 2022-3-12 torch 1.7.1+cu110 CUDA:0 (NVIDIA GeForce RTX 3070, 7960MiB)
Downloading https://github.com/ultralytics/yolov5/releases/download/v6.1/yolov5s.pt to yolov5s.pt...
100%|█████████████████████████████████████| 14.1M/14.1M [00:07<00:00, 2.06MB/s]
Fusing layers...
Model Summary: 213 layers, 7225885 parameters, 0 gradients, 16.5 GFLOPs
Adding AutoShape...
image 1/1: 720x1280 2 persons, 2 ties
Speed: 7411.2ms pre-process, 8.4ms inference, 1.2ms NMS per image at shape (1, 3, 384, 640)
 1.2.2 展示检测结果
inference.py最后一行,将print改为show
2 运用detect.py进行检测
可选择的命令有:
python detect.py --source 0 # webcam
img.jpg # image
vid.mp4 # video
path/ # directory
path/*.jpg # glob
'https://youtu.be/Zgi9g1ksQHc' # YouTube
'rtsp://example.com/media.mp4' # RTSP, RTMP, HTTP stream
执行上面的命令会自动从最新的yolov5官网下载模型文件,并且将检测结果存在runs/detect
2.1 网络摄像头
给电脑插一个相机(usb相机即可),笔记本可能会自带摄像头
python detect.py --source 0下面第二行应该是可以调整的参数,检测效果来看,帧率挺高的。
(yolov5py37) meng@meng:~/deeplearning/yolov5$ python detect.py --source 0
detect: weights=yolov5s.pt, source=0, data=data/coco128.yaml, imgsz=[640, 640], conf_thres=0.25, iou_thres=0.45, max_det=1000, device=, view_img=False, save_txt=False, save_conf=False, save_crop=False, nosave=False, classes=None, agnostic_nms=False, augment=False, visualize=False, update=False, project=runs/detect, name=exp, exist_ok=False, line_thickness=3, hide_labels=False, hide_conf=False, half=False, dnn=False
YOLOv5  v6.1-28-gc6b4f84 torch 1.7.1+cu110 CUDA:0 (NVIDIA GeForce RTX 3070, 7960MiB)

Fusing layers...
Model Summary: 213 layers, 7225885 parameters, 0 gradients, 16.5 GFLOPs
1/1: 0...  Success (inf frames 640x480 at 30.00 FPS)

0: 480x640 1 person, 1 cup, 2 chairs, 2 tvs, Done. (0.501s)
------------------------省略
2.2 将检测过程可视化
python detect.py --visualize上面这条命令使用的数据是默认图片,终端将检测的步骤打印输出:
在runs/detect/expn下面将步骤保存下来,如下:
下图是stage0:stage0_Conv_features.png,其他png类推
关于.npy格式文件,如:stage0_Conv_features.npy。打开方式为:新建一个python文件如下,new.py;
import numpy as np
test=np.load("/home/meng/deeplearning/yolov5/runs/detect/exp6/bus/stage0_Conv_features.npy")
print(test)
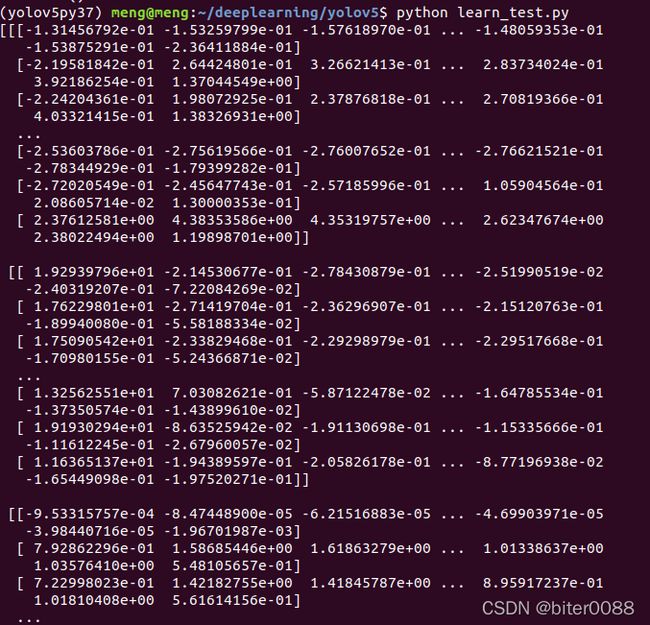
运行python new.py即可看到里面的矩阵数据,但数据挺多的:
3 运用train.py进行训练
3.1 第一次报错
python train.py --data coco.yaml --cfg yolov5n.yaml --weights '' --batch-size 128报错为:
Traceback (most recent call last):
  File "train.py", line 643, in
    main(opt)
  File "train.py", line 539, in main
    train(opt.hyp, opt, device, callbacks)
  File "train.py", line 227, in train
    prefix=colorstr('train: '), shuffle=True)
  File "/home/meng/deeplearning/yolov5/utils/datasets.py", line 109, in create_dataloader
    prefix=prefix)
  File "/home/meng/deeplearning/yolov5/utils/datasets.py", line 433, in __init__
    assert nf > 0 or not augment, f'{prefix}No labels in {cache_path}. Can not train without labels. See {HELP_URL}'
AssertionError: train: No labels in /home/meng/deeplearning/datasets/coco/train2017.cache. Can not train without labels. See https://github.com/ultralytics/yolov5/wiki/Train-Custom-Data
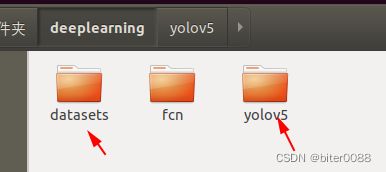
删除和yolov5在同一级目录的刚下载的数据集:
3.2 换一条命令
参考:Train Custom Data · ultralytics/yolov5 Wiki · GitHub
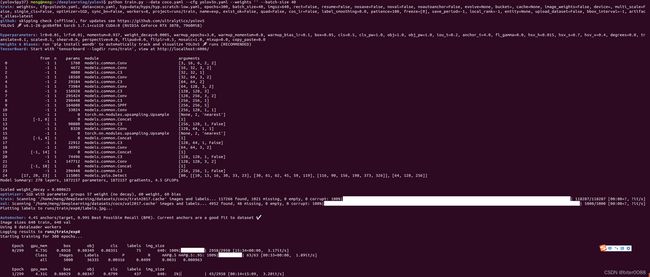
python train.py --img 640 --batch 16 --epochs 3 --data coco128.yaml --weights yolov5s.pt可以跑通,尽管也报:Dataset not found, missing paths: ['/home/meng/deeplearning/datasets/coco128/images/train2017']
meng@meng:~/deeplearning/yolov5$ python train.py --img 640 --batch 16 --epochs 3 --data coco128.yaml --weights yolov5s.pt
train: weights=yolov5s.pt, cfg=, data=coco128.yaml, hyp=data/hyps/hyp.scratch-low.yaml, epochs=3, batch_size=16, imgsz=640, rect=False, resume=False, nosave=False, noval=False, noautoanchor=False, evolve=None, bucket=, cache=None, image_weights=False, device=, multi_scale=False, single_cls=False, optimizer=SGD, sync_bn=False, workers=8, project=runs/train, name=exp, exist_ok=False, quad=False, cos_lr=False, label_smoothing=0.0, patience=100, freeze=[0], save_period=-1, local_rank=-1, entity=None, upload_dataset=False, bbox_interval=-1, artifact_alias=latest
github: skipping check (offline), for updates see https://github.com/ultralytics/yolov5
YOLOv5  v6.1-28-gc6b4f84 torch 1.7.1+cu110 CUDA:0 (NVIDIA GeForce RTX 3070, 7960MiB)

hyperparameters: lr0=0.01, lrf=0.01, momentum=0.937, weight_decay=0.0005, warmup_epochs=3.0, warmup_momentum=0.8, warmup_bias_lr=0.1, box=0.05, cls=0.5, cls_pw=1.0, obj=1.0, obj_pw=1.0, iou_t=0.2, anchor_t=4.0, fl_gamma=0.0, hsv_h=0.015, hsv_s=0.7, hsv_v=0.4, degrees=0.0, translate=0.1, scale=0.5, shear=0.0, perspective=0.0, flipud=0.0, fliplr=0.5, mosaic=1.0, mixup=0.0, copy_paste=0.0
Weights & Biases: run 'pip install wandb' to automatically track and visualize YOLOv5  runs (RECOMMENDED)
TensorBoard: Start with 'tensorboard --logdir runs/train', view at http://localhost:6006/

Dataset not found, missing paths: ['/home/meng/deeplearning/datasets/coco128/images/train2017']
Downloading https://ultralytics.com/assets/coco128.zip to coco128.zip...
100%|█████████████████████████████████████████████████████████████████████████████████████████████████████████████████████████████████████████████████████████████████████████████████████████████████████████████████████████████████████████| 6.66M/6.66M [00:02<00:00, 2.44MB/s]
Dataset autodownload success, saved to /home/meng/deeplearning/datasets


                 from  n    params  module                                  arguments
  0                -1  1      3520  models.common.Conv                      [3, 32, 6, 2, 2]
  1                -1  1     18560  models.common.Conv                      [32, 64, 3, 2]
  2                -1  1     18816  models.common.C3                        [64, 64, 1]
  3                -1  1     73984  models.common.Conv                      [64, 128, 3, 2]
  4                -1  2    115712  models.common.C3                        [128, 128, 2]
  5                -1  1    295424  models.common.Conv                      [128, 256, 3, 2]
  6                -1  3    625152  models.common.C3                        [256, 256, 3]
  7                -1  1   1180672  models.common.Conv                      [256, 512, 3, 2]
  8                -1  1   1182720  models.common.C3                        [512, 512, 1]
  9                -1  1    656896  models.common.SPPF                      [512, 512, 5]
 10                -1  1    131584  models.common.Conv                      [512, 256, 1, 1]
 11                -1  1         0  torch.nn.modules.upsampling.Upsample    [None, 2, 'nearest']
 12           [-1, 6]  1         0  models.common.Concat                    [1]
 13                -1  1    361984  models.common.C3                        [512, 256, 1, False]
 14                -1  1     33024  models.common.Conv                      [256, 128, 1, 1]
 15                -1  1         0  torch.nn.modules.upsampling.Upsample    [None, 2, 'nearest']
 16           [-1, 4]  1         0  models.common.Concat                    [1]
 17                -1  1     90880  models.common.C3                        [256, 128, 1, False]
 18                -1  1    147712  models.common.Conv                      [128, 128, 3, 2]
 19          [-1, 14]  1         0  models.common.Concat                    [1]
 20                -1  1    296448  models.common.C3                        [256, 256, 1, False]
 21                -1  1    590336  models.common.Conv                      [256, 256, 3, 2]
 22          [-1, 10]  1         0  models.common.Concat                    [1]
 23                -1  1   1182720  models.common.C3                        [512, 512, 1, False]
 24      [17, 20, 23]  1    229245  models.yolo.Detect                      [80, [[10, 13, 16, 30, 33, 23], [30, 61, 62, 45, 59, 119], [116, 90, 156, 198, 373, 326]], [128, 256, 512]]
Model Summary: 270 layers, 7235389 parameters, 7235389 gradients, 16.5 GFLOPs

Transferred 349/349 items from yolov5s.pt
Scaled weight_decay = 0.0005
optimizer: SGD with parameter groups 57 weight (no decay), 60 weight, 60 bias
train: Scanning '/home/meng/deeplearning/datasets/coco128/labels/train2017' images and labels...128 found, 0 missing, 2 empty, 0 corrupt: 100%|███████████████████████████████████████████████████████████████████████████████████████████████| 128/128 [00:00<00:00, 11289.71it/s]
train: New cache created: /home/meng/deeplearning/datasets/coco128/labels/train2017.cache
val: Scanning '/home/meng/deeplearning/datasets/coco128/labels/train2017.cache' images and labels... 128 found, 0 missing, 2 empty, 0 corrupt: 100%|█████████████████████████████████████████████████████████████████████████████████████████████████████| 128/128 [00:00
训练结果如下:
3.3 对比上面两条命令的数据集
这是3.1指令对应的数据集文件:coco.yaml。
# YOLOv5  by Ultralytics, GPL-3.0 license
# COCO 2017 dataset http://cocodataset.org by Microsoft
# Example usage: python train.py --data coco.yaml
# parent
# ├── yolov5
# └── datasets
#     └── coco  ← downloads here


# Train/val/test sets as 1) dir: path/to/imgs, 2) file: path/to/imgs.txt, or 3) list: [path/to/imgs1, path/to/imgs2, ..]
path: ../datasets/coco  # dataset root dir
train: train2017.txt  # train images (relative to 'path') 118287 images
val: val2017.txt  # val images (relative to 'path') 5000 images
test: test-dev2017.txt  # 20288 of 40670 images, submit to https://competitions.codalab.org/competitions/20794

# Classes
nc: 80  # number of classes
names: ['person', 'bicycle', 'car', 'motorcycle', 'airplane', 'bus', 'train', 'truck', 'boat', 'traffic light',
        'fire hydrant', 'stop sign', 'parking meter', 'bench', 'bird', 'cat', 'dog', 'horse', 'sheep', 'cow',
        'elephant', 'bear', 'zebra', 'giraffe', 'backpack', 'umbrella', 'handbag', 'tie', 'suitcase', 'frisbee',
        'skis', 'snowboard', 'sports ball', 'kite', 'baseball bat', 'baseball glove', 'skateboard', 'surfboard',
        'tennis racket', 'bottle', 'wine glass', 'cup', 'fork', 'knife', 'spoon', 'bowl', 'banana', 'apple',
        'sandwich', 'orange', 'broccoli', 'carrot', 'hot dog', 'pizza', 'donut', 'cake', 'chair', 'couch',
        'potted plant', 'bed', 'dining table', 'toilet', 'tv', 'laptop', 'mouse', 'remote', 'keyboard', 'cell phone',
        'microwave', 'oven', 'toaster', 'sink', 'refrigerator', 'book', 'clock', 'vase', 'scissors', 'teddy bear',
        'hair drier', 'toothbrush']  # class names


# Download script/URL (optional)
download: |
  from utils.general import download, Path

  # Download labels
  segments = False  # segment or box labels
  dir = Path(yaml['path'])  # dataset root dir
  url = 'https://github.com/ultralytics/yolov5/releases/download/v1.0/'
  urls = [url + ('coco2017labels-segments.zip' if segments else 'coco2017labels.zip')]  # labels
  download(urls, dir=dir.parent)

  # Download data
  urls = ['http://images.cocodataset.org/zips/train2017.zip',  # 19G, 118k images
          'http://images.cocodataset.org/zips/val2017.zip',  # 1G, 5k images
          'http://images.cocodataset.org/zips/test2017.zip']  # 7G, 41k images (optional)
download(urls, dir=dir / 'images', threads=3) 最下面有可选择下载的数据集,看出来19G、1G、7G比较大。对应执行3.1命令后,没有成功下载好(后缀为.cache)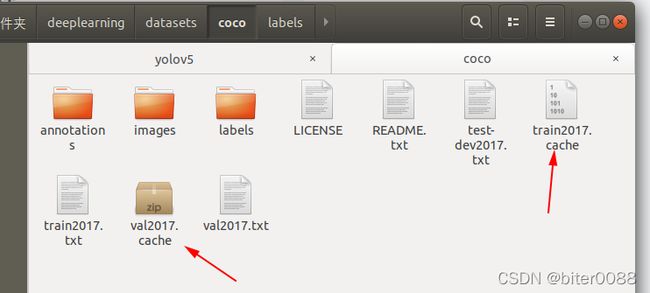
相对比3.2指令对应的数据集文件coco128.yaml;文件中下载的数据在最后一行,没有直接标大小,感觉也不是很大(后来程序运行成功发现确实不大)
# YOLOv5  by Ultralytics, GPL-3.0 license
# COCO128 dataset https://www.kaggle.com/ultralytics/coco128 (first 128 images from COCO train2017) by Ultralytics
# Example usage: python train.py --data coco128.yaml
# parent
# ├── yolov5
# └── datasets
#     └── coco128  ← downloads here


# Train/val/test sets as 1) dir: path/to/imgs, 2) file: path/to/imgs.txt, or 3) list: [path/to/imgs1, path/to/imgs2, ..]
path: ../datasets/coco128  # dataset root dir
train: images/train2017  # train images (relative to 'path') 128 images
val: images/train2017  # val images (relative to 'path') 128 images
test:  # test images (optional)

# Classes
nc: 80  # number of classes
names: ['person', 'bicycle', 'car', 'motorcycle', 'airplane', 'bus', 'train', 'truck', 'boat', 'traffic light',
        'fire hydrant', 'stop sign', 'parking meter', 'bench', 'bird', 'cat', 'dog', 'horse', 'sheep', 'cow',
        'elephant', 'bear', 'zebra', 'giraffe', 'backpack', 'umbrella', 'handbag', 'tie', 'suitcase', 'frisbee',
        'skis', 'snowboard', 'sports ball', 'kite', 'baseball bat', 'baseball glove', 'skateboard', 'surfboard',
        'tennis racket', 'bottle', 'wine glass', 'cup', 'fork', 'knife', 'spoon', 'bowl', 'banana', 'apple',
        'sandwich', 'orange', 'broccoli', 'carrot', 'hot dog', 'pizza', 'donut', 'cake', 'chair', 'couch',
        'potted plant', 'bed', 'dining table', 'toilet', 'tv', 'laptop', 'mouse', 'remote', 'keyboard', 'cell phone',
        'microwave', 'oven', 'toaster', 'sink', 'refrigerator', 'book', 'clock', 'vase', 'scissors', 'teddy bear',
        'hair drier', 'toothbrush']  # class names


# Download script/URL (optional)
download: https://ultralytics.com/assets/coco128.zip
3.4 第一次报错解决一半
将3.3中coco.yaml文件里面的链接文件提前下载下来
http://images.cocodataset.org/zips/train2017.zip # 19G, 118k images
http://images.cocodataset.org/zips/val2017.zip   # 1G, 5k images
http://images.cocodataset.org/zips/test2017.zip
解压到这个文件夹下
同时将coco.yaml 中download部分删除掉(备份好)。
训练:
python train.py --data coco.yaml --cfg yolov5n.yaml --weights '' --batch-size 128这时可以正常找到图片文件,但是cuda out of memory了;我的显存只有8g
RuntimeError: CUDA out of memory. Tried to allocate 200.00 MiB (GPU 0; 7.77 GiB total capacity; 5.70 GiB already allocated; 177.62 MiB free; 5.92 GiB reserved in total by PyTorch)修改batch-size为16,可以运行,gpu_memory占用
![]()
修改为40,gpu_mem占用:
![]()
训练效果如下:(现在这样的参数--挺慢的)


