CSS3之Flexbox布局
CSS3为我们提供了一种可伸缩的灵活的web页面布局方式-flexbox布局,它具有很强大的功能,可以很轻松实现很多复杂布局,在它出现之前,我们经常使用的布局方式是浮动或者固定宽度+百分比来进行布局,代码量较大且难以理解。
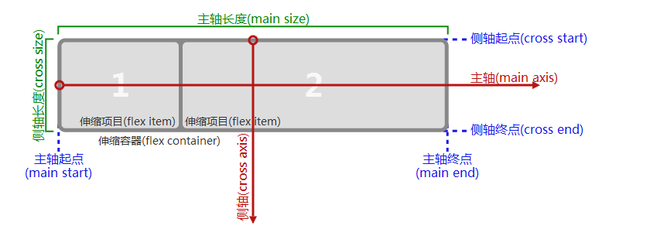
为了更好理解flexbox布局,这里首先要介绍几个概念:
如果所示:
(1)主轴(侧轴),flexbox布局里面将一个可伸缩容器按照水平和垂直方向分为主轴或侧轴,如果你想让这个容器中的可伸缩项目在水平方向上可伸缩展开,那么水平方向上就是主轴,垂直方向上是侧轴,反之亦然;
(2)主轴(侧轴)长度,当确定了哪个是主轴哪个是侧轴之后,在主轴方向上可伸缩容器的尺寸(宽或高)就被称作主轴长度,侧轴方向上的容器尺寸(宽或高)就被称作侧轴长度;
(3)主轴(侧轴)起点,主轴(侧轴)终点,例如主轴方向是水平方向,通常在水平方向上网页布局是从左向右的,那么可伸缩容器的左border就是主轴起点,右border就是主轴终点,侧轴是在垂直方向,通常是从上到下的,所以上border就是侧轴起点,下border就是侧轴终点;
(4)伸缩容器:如果要构建一个可伸缩的盒子,这些可伸缩的项目必须要由一个display:flex的属性的盒子包裹起来,这个盒子就叫做伸缩容器;
(5)伸缩项目:包含在伸缩容器中需要进行伸缩布局的元素被称作伸缩项目;
明确以上概念之后就可以来构建flexbox布局了;
第一步,构建一个flexbox容器,并在容器中放置几个可伸缩项目,如下:
css代码:
.flex-container{
            display:flex;
            width:600px;
            height:230px;
            background-color: #ccc;
        }
.flex-item{
            background-color:blue;
            width: 100px;
            margin: 5px;
        }
HTML代码:
<div class="flex-container">
       <div class="flex-item ">A</div>
       <div class="flex-item ">B</div>
       <div class="flex-item ">A</div>
       <div class="flex-item ">B</div>
   </div>
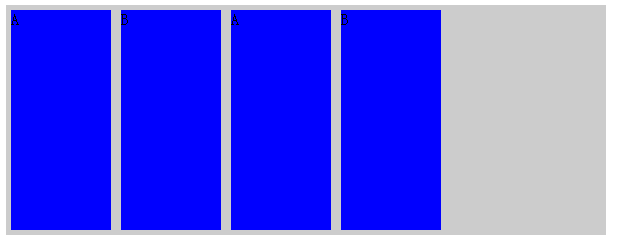
效果如下:
其中四个可伸缩的项目在水平方向上被排列成了一行,同时可伸缩项目相左对齐;
display:flex代表这个容器是一个可伸缩容器,还可以取值为inline-flex,两者的区别在于前者将这个容器渲染为块级元素,后者将其渲染为内联元素。
这里有几个默认的属性虽然没有设置,但是默认值确实起作用了,它们是:
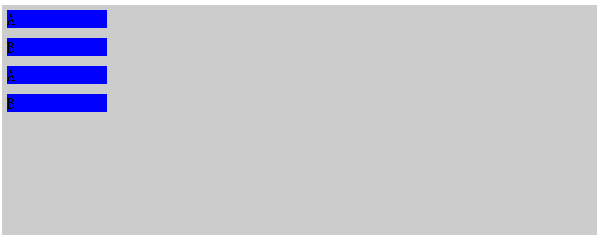
flex-direction属性,它的取值为row,column,column-reverse,row-reverse,默认值是row,表示在水平方向上展开可伸缩项,如果取column代表在垂直方向上展开可伸缩项目,column-reverse,row-reverse代表相反方向,通俗讲,flex-direction属性就是用来定义主轴侧轴方向的。给以上效果添加flex-direction:column效果如下:
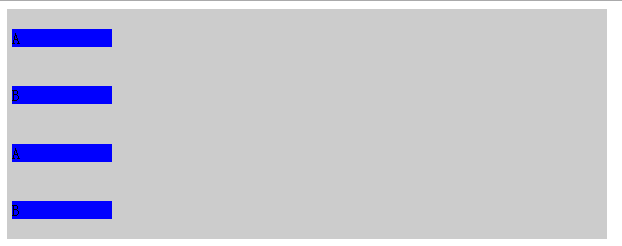
justify-content属性,用来表示可伸缩项目在主轴方向上的对齐方式,可以取值为flex-start,flex-end,center,space-between,space-around,其中flex-start,flex-end,表示相对于主轴起点和终点对齐,center表示居中对齐,space-between表示两端对齐并将剩余空间在主轴方向上进行平均分配,space-around表示居中对齐然后在主轴方向上将剩余空间平均分配
justify-content:space-between
css代码:
.flex-container{
            display:flex;
            width:600px;
            height:230px;
            background-color: #ccc;
            justify-content: space-between;
        }
.flex-item{
            background-color:blue;
            width: 100px;
            margin: 5px;
        }
效果如下:
可以看到它将各个可伸缩项目在主轴方向上两端对齐并平分了剩余空间;
justify-content:space-around
css代码:
.flex-container{
            display:flex;
            width:600px;
            height:230px;
            background-color: #ccc;
            justify-content: space-around;
        }
.flex-item{
            background-color:blue;
            width: 100px;
            margin: 5px;
        }
效果如下:
可以看到这个属性让可伸缩项目沿着主轴方向进行了居中对齐并且均分了剩余空间;
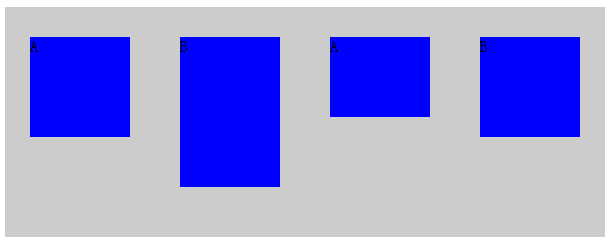
align-items属性:该属性是用来表示可伸缩项目在侧轴方向上的对齐方式,可取的值有flex-start,flex-end,center,baseline,stretch,需要解释的是baseline值,它是按照一个计算出来的基准线然后让这些项目沿这个基准线对齐,基准线的计算取决于可伸缩项目的尺寸及内容,如下:
align-items:baseline;
css代码:
.flex-container{
            display:flex;
            flex-direction: row;
            width:600px;
            height:230px;
            background-color: #ccc;
            justify-content: space-around;
            align-items:baseline;
        }
        .flex-item{
            background-color:blue;
            width: 100px;
            margin: 5px;;
        }
        .a{
            margin-top: 10px;
            height: 100px;
        }
        .b{
            margin-top: 20px;
            height: 150px;
        }
        .c{
            margin-top: 30px;
            height: 80px;
        }
HTML代码:
 <div class="flex-container">
       <div class="flex-item a">A</div>
       <div class="flex-item b">B</div>
       <div class="flex-item c">A</div>
       <div class="flex-item a">B</div>
   </div>
效果如下:
可以看到四个可伸缩项目在侧轴方向上(垂直方向)高度不一,margin不一样,但是最后都按照计算出来的一个基准线对齐;
align-items:stretch;
这个是取值会让可伸缩项目在侧轴方向上进行拉伸,前提是这些项目在侧轴方向上没有设置尺寸,否则会按照你设置的尺寸来渲染。
css代码:
.flex-container{
            display:flex;
            flex-direction: row;
            width:600px;
            height:230px;
            background-color: #ccc;
            justify-content: space-around;
            align-items:stretch;
        }
        .flex-item{
            background-color:blue;
            width: 100px;
            /*height: 100px;*/
            margin: 5px;;
        }
HTML代码:
<div class="flex-container">
       <div class="flex-item ">A</div>
       <div class="flex-item ">B</div>
       <div class="flex-item ">A</div>
       <div class="flex-item ">B</div>
   </div>
效果如下:
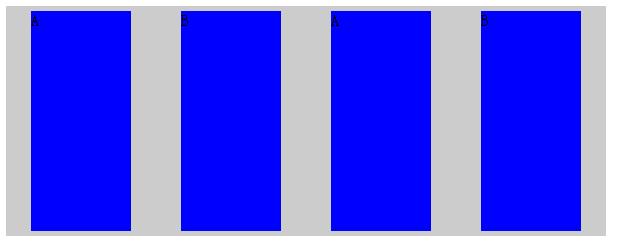
可以看到这些可伸缩项目在侧轴方向上被拉伸了,因为在垂直方向上没有设置高度。
到目前为止,我们所有的伸缩项目都是在一行或者一列上进行的,并没有进行换行和换列,flex-wrap属性表示是否支持换行或者换列,它有nowrap,wrap,wrap-reverse三个取值,nowrap是默认值,表示不换行或者换列,wrap表示换行或者换列,wrap-reverse表示支持换行或者换列,但是会沿着相反方向进行排列(如主轴是垂直方向换行后就按照先下后上的顺序来排列伸缩项)
css代码:
.flex-container{
            display:flex;
            flex-direction: row;
            width:600px;
            height:230px;
            background-color: #ccc;
            justify-content: space-around;
            align-items:baseline;
            flex-wrap: wrap;
        }
        .flex-item{
            background-color:blue;
            width: 100px;
            height: 70px;
            margin: 5px;;
        }
HTML代码:
<div class="flex-container">
    <div class="flex-item ">A</div>
    <div class="flex-item ">B</div>
    <div class="flex-item ">A</div>
    <div class="flex-item ">B</div>
    <div class="flex-item ">A</div>
    <div class="flex-item ">B</div>
    <div class="flex-item ">A</div>
    <div class="flex-item ">B</div>
</div>
效果如下:
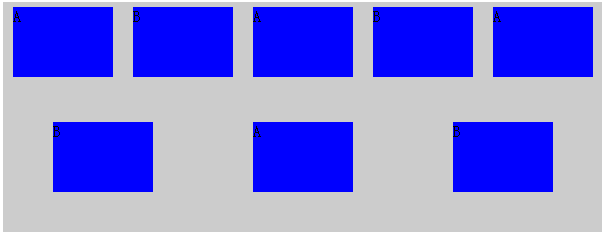
可以看到伸缩项增多之后一行难以放下的时候会接着换行。wrap属性保证换行后按照正常的从上到下顺序排列
align-content属性用来表示换行之后各个伸缩行的对齐方式,它的取值有 stretch,flex-start,flex-end,center,space-between,space-around,意义和align-items属性取值意义相同,上面我们将7个伸缩项目分成了两行来排列,
将css代码添加align-content属性,html代码不变,如下:
CSS代码:
.flex-container{
            display:flex;
            flex-direction: row;
            width:600px;
            height:230px;
            background-color: #ccc;
            justify-content: space-around;
            align-items:baseline;
            flex-wrap: wrap;
            align-content: space-between;
        }
        .flex-item{
            background-color:blue;
            width: 100px;
            height: 70px;
            margin: 5px;;
        }
效果如下:
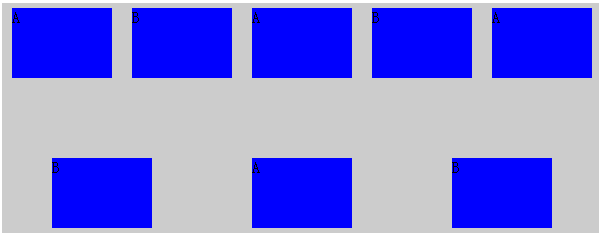
可以看到两个伸缩行在侧轴(垂直)方向上两端对齐了。
flex-flow属性,该属性是个复属性,它是flex-direction和flex-wrap的复合属性,flex-direction:row;flex-wrap:wrap就等同于flex-flow:row wrap
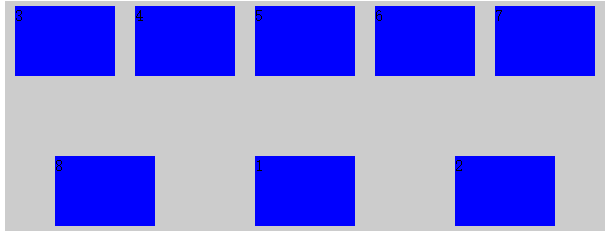
order属性,该属性用来表示伸缩项目的排列方式,正常情况下伸缩项目会按照主轴起点到主轴终点排列,遇到换行或者换列会按照从侧轴起点到终点进行排列(除非设置了某些 对齐方式的reverse),但是某些情况下这种默认显示顺序不符合要求,可以采用给伸缩项添加order属性来指定排列顺序,默认情况下,每个伸缩项的order都是0,改属性可正可负,越大的值会被排列在越后面。
css代码:
 .flex-container{
            display:flex;
            width:600px;
            height:230px;
            background-color: #ccc;
            justify-content: space-around;
            align-items:baseline;
            flex-flow: row wrap;
            align-content: space-between;

        }
        .flex-item{
            background-color:blue;
            width: 100px;
            height: 70px;
            margin: 5px;;
        }
        .order1{
            order:1;
        }
        .order2{
            order:2;
        }
HTML代码:
<div class="flex-container">
    <div class="flex-item order1">1</div>
    <div class="flex-item  order2">2</div>
    <div class="flex-item ">3</div>
    <div class="flex-item ">4</div>
    <div class="flex-item ">5</div>
    <div class="flex-item ">6</div>
    <div class="flex-item ">7</div>
    <div class="flex-item ">8</div>
</div>
效果如下:
默认情况下,会按照HTML的顺序1-8进行显示,但是由于给div1和2设置了大于0的order,所以他们被放在了最后显示(因为其他没有被设置的div的order默认属性都是0)
margin属性在flexbox布局中有很强大的作用,如果给某个可伸缩项设置某个方向上的margin为auto,那么这个可伸缩项就会在这个方向上占用该方向的剩余空间来作为自己的这个方向上的margin。
css代码:
.flex-container{
            display:flex;
            width:600px;
            height:230px;
            background-color: #ccc;
            justify-content: space-around;
            align-items:baseline;
            flex-flow: row wrap;
            align-content: space-between;

        }
        .flex-item{
            background-color:blue;
            width: 100px;
            height: 70px;
            margin: 5px;;
        }
        .a{
            margin-right:auto;
        }
HTML代码:
<div class="flex-container">
    <div class="flex-item a">1</div>
    <div class="flex-item  ">2</div>
    <div class="flex-item ">3</div>

</div>
效果如下:
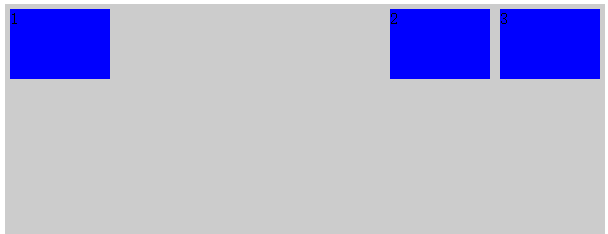
由于给伸缩项1添加了margin-right为auto,所以它独占了本行的剩余空间作为它的right margin值。
利用这个特性,我们在flexbox布局中很容易实现可伸缩元素的垂直水平居中,
css代码;
.flex-container{
            display:flex;
            width:600px;
            height:230px;
            background-color: #ccc;
            justify-content: space-around;
            align-items:baseline;
            flex-flow: row wrap;
            align-content: space-between;

        }
        .flex-item{
            background-color:blue;
            width: 100px;
            height: 70px;
            margin: 5px;;
        }
        .a{
            margin:auto;
        }
HTML代码:
<div class="flex-container">
    <div class="flex-item a">1</div>
</div>
效果如下:
align-self属性,该属性是给各个可伸缩项设置自己的在侧轴上的对齐方式的,之前在容器上设置的align-item属性是作为一个整体设置的,所有的元素对齐方式都一样,align-self属性会覆盖之前的align-item属性,让每个可伸缩项在侧轴上具有不同的对齐方式,取值和align-item相同:
css代码:
.flex-container{
            display:flex;
            flex-direction: row;
            width:600px;
            height:230px;
            background-color: #ccc;
            justify-content: space-around;
            align-items:baseline;
            align-content: space-between;

        }
        .flex-item{
            background-color:blue;
            width: 100px;
            height: 70px;
            margin: 5px;;
        }
        .a{
            align-self:flex-start ;
        }
        .b{
            align-self:flex-end;
        }
        .c{
            align-self:center;
        }
html代码:
<div class="flex-container">
    <div class="flex-item a">1</div>
    <div class="flex-item  b">2</div>
    <div class="flex-item c">3</div>

</div>
效果如下:
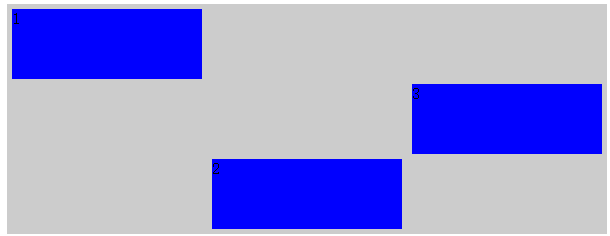
可以看到三个伸缩项在侧轴上被赋予了不同的对齐方式。
flex属性,这个属性是加在伸缩项上面的,它定义了伸缩项如何分配主轴尺寸,通常取值为auto或者数字,auto浏览器会自动均分,数字会按照伸缩项所占的数字比重来分配空间,
这个属性会覆盖伸缩项在主轴上设定的尺寸,当给主轴上伸缩项设定了尺寸(宽或高)和这个属性的时候,事实上还是会按照这个属性来进行空间分配。
css代码:
.flex-container{
            display:flex;
            flex-direction: row;
            width:600px;
            height:230px;
            background-color: #ccc;
            justify-content: space-around;
            align-items:baseline;
            align-content: space-between;

        }
        .flex-item{
            background-color:blue;
            width: 100px;
            height: 70px;
            margin: 5px;;
        }
        .a{
            align-self:flex-start ;
            flex:1;
        }
        .b{
            align-self:flex-end;
            flex:2;
        }
        .c{
            align-self:center;
            flex:1;
        }
HTML代码:
<div class="flex-container">
    <div class="flex-item a">1</div>
    <div class="flex-item  b">2</div>
    <div class="flex-item c">3</div>

</div>
效果如下:
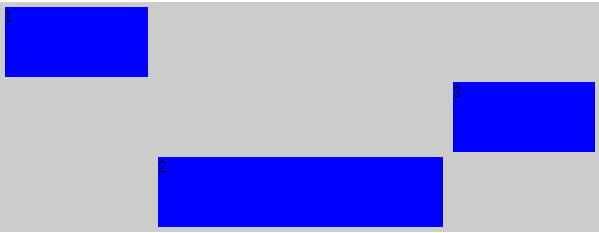
可以看到伸缩项尽管设置了宽度,但是最终还是按照我们设置的flex比例对水平空间进行了分割。
