KubeSphere - 搭建 Redis 集群
一、KubeSphere - 搭建 Redis 集群
上篇文章我们介绍了使用KubeSphere 在k8s 中创建 mysql 主从复制结构,本篇文章我们借助 KubeSphere 在k8s 中搭建Redis 集群,下面是上篇文章的地址:
https://blog.csdn.net/qq_43692950/article/details/122819844
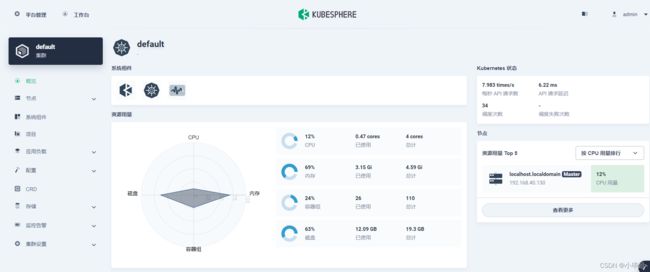
在实验开始前,请确保已经安装完成了k8s 及 kubesphere 环境:
二、创建 redis.conf 配制字典

为配制起个名称:
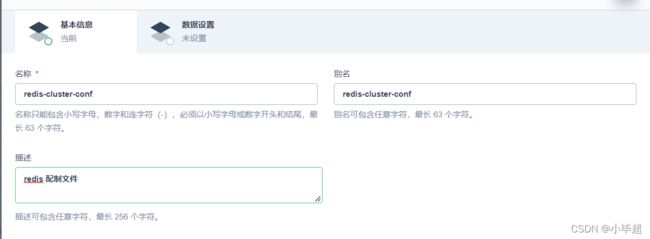
添加数据,键为 redis.conf,值写入以下内容:
cluster-enabled yes
cluster-config-file nodes.conf
cluster-node-timeout 5000
cluster-require-full-coverage no
cluster-migration-barrier 1
appendonly yes
三、创建 redis 服务
点击创建,选择有状态服务:
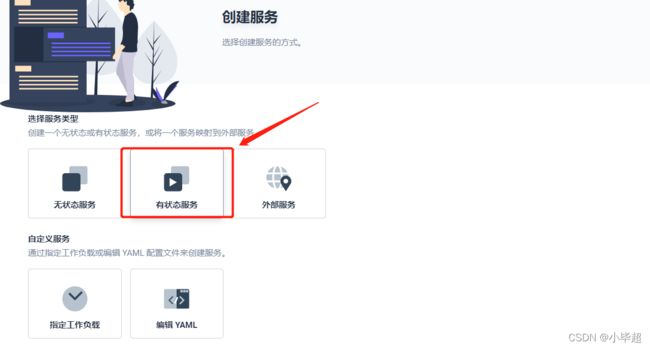
同样为服务创建一个名称:

下面容器数量我们选择6个,搭建一个三主三从的结构:

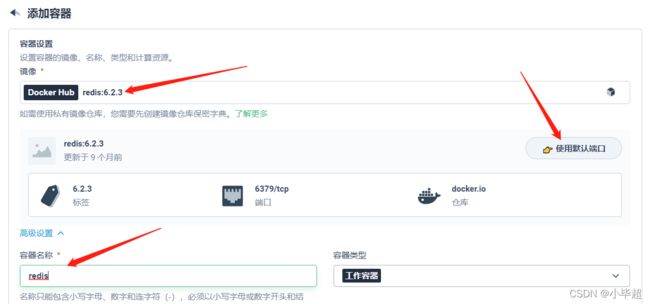
镜像我选择的是redis:6.2.3版本的,使用默认的端口,并根据自己服务的大小,合理设置资源限制:
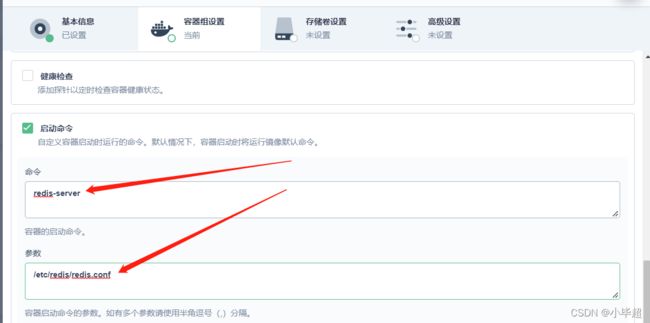
还要指定 redis 的启动命令: redis-server /etc/redis/redis.conf
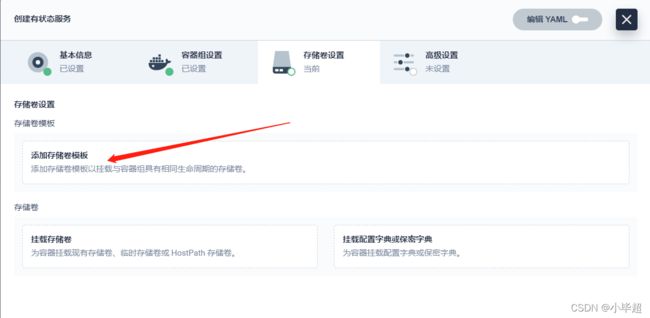
点击下一步后,这里我们要选择存储卷模板,让不同的容器对应不同的存储卷:
选择存储类型、访问模式、及容器大小,并挂载到redis 的 /data :

然后再选择挂载配制,挂载redis.conf :
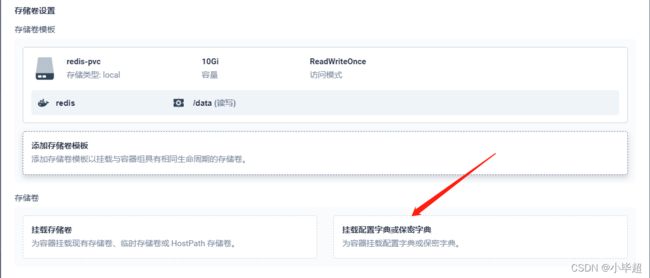
选择上面创建的配制字典,并挂载到 /etc/redis 下:
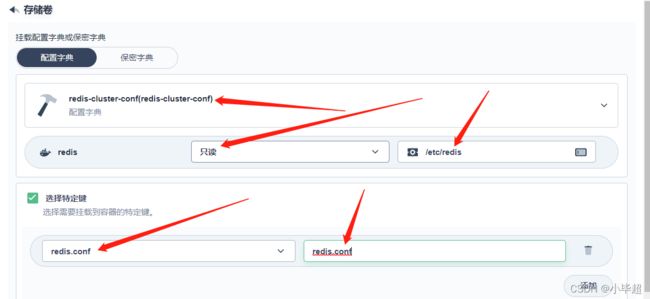
然后下一步,创建,点击该服务进入详情,即可看到创建的容器:
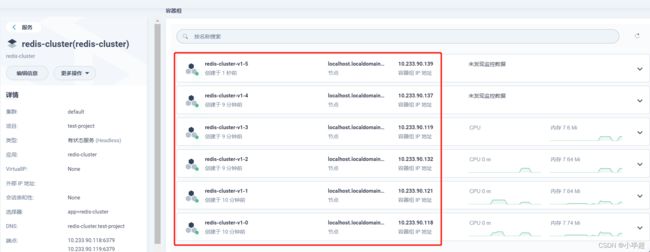
因为我们都是采用有状态的方式,默认就使用了Headless,所以每个redis 的访问,我们都可以使用dns 域名的方式,格式为:
(podname).(headless server name).(namespace).svc.cluster.local
在这里我们通过: 容器名称.服务的DNS.svc.cluster.local :
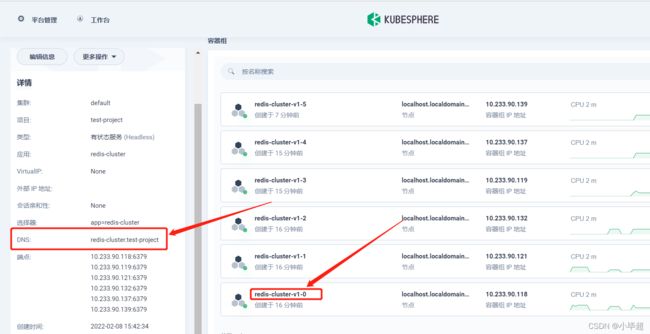
所以访问 redis-cluster-v1-0 的redis 的话,直接访问 redis-cluster-v1-0.redis-cluster.test-project.svc.cluster.local:6379 即可,比如进入 redis-cluster-v1-2 的终端,链接上面这个地址:

所以下面我们就可以通过域名进行redis集群的初始化工作,随便进入一个redis 节点的终端下,输入一下命令,进行集群的初始化:
redis-cli --cluster create redis-cluster-v1-0.redis-cluster.test-project.svc.cluster.local:6379 redis-cluster-v1-0.redis-cluster.test-project.svc.cluster.local:6379 redis-cluster-v1-0.redis-cluster.test-project.svc.cluster.local:6379 redis-cluster-v1-0.redis-cluster.test-project.svc.cluster.local:6379 redis-cluster-v1-0.redis-cluster.test-project.svc.cluster.local:6379 redis-cluster-v1-0.redis-cluster.test-project.svc.cluster.local:6379 --cluster-replicas 1
下面输入yes,使用这种分片方案:
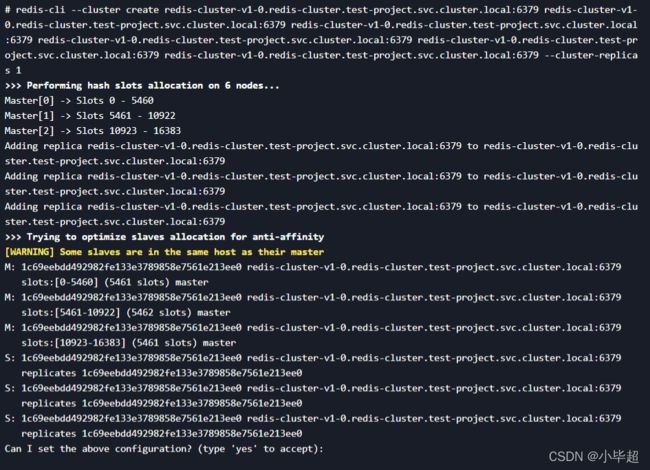
到这会发现出现了错误:
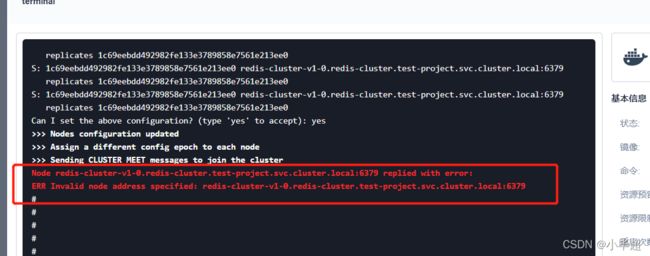
这是因为 redis 对域名支持的不太好,可以使用 ip + port 的方式,但是在k8s 中容器宕机是会自动启动的,启动后的ip 有可能会发生变化,因此在k8s 中 使用 ip + port 的方式初始化集群还是不可取的,那有什么办法呢?此时我们可以使用 Redis-tribe工具,不过 Redis-tribe 不建议和redis 安装在一起,可以新起一个 Ubuntu 容器,专门用于进行K8S集群内部某些服务的管理控制。
四、Redis-tribe 初始化Redis 集群
已经有人打包好了 Redis-tribe 的镜像,我们可以直接使用,这个主要参考了下面这篇文章:
https://blog.csdn.net/wangmiaoyan/article/details/106193388
选择创建服务,直接选择以yml 的方式

输入以下内容,注意namespace 填写你的项目名称,不然不在一个namespace下,在容器组中找不到该容器。
apiVersion: apps/v1
kind: Deployment
metadata:
  namespace: test-project
  labels:
    app: redis-cluster-tools
  name: redis-cluster-tools
spec:
  replicas: 1
  selector:
    matchLabels:
      app: redis-cluster-tools
  template:
    metadata:
      labels:
        app: redis-cluster-tools
      name: pos-redis
    spec:
     containers:
     - name: pos-redis
       image: sunnywang/redis-tools-ubuntu:v0.5.1
       imagePullPolicy: IfNotPresent
       args:
       - /bin/bash
       - -c
       - sleep 3600
点击创建后,在容器组中就可以看到创建的容器。

点击终端进入容器内,初始化master 节点,注意修改为你的域名格式:
redis-trib.py create `dig +short redis-cluster-v1-0.redis-cluster.test-project.svc.cluster.local`:6379 `dig +short redis-cluster-v1-1.redis-cluster.test-project.svc.cluster.local`:6379 `dig +short redis-cluster-v1-2.redis-cluster.test-project.svc.cluster.local`:6379
然后为master 添加副本节点:
redis-trib.py replicate --master-addr `dig +short redis-cluster-v1-0.redis-cluster.test-project.svc.cluster.local`:6379 --slave-addr `dig +short redis-cluster-v1-3.redis-cluster.test-project.svc.cluster.local`:6379
redis-trib.py replicate --master-addr `dig +short redis-cluster-v1-1.redis-cluster.test-project.svc.cluster.local`:6379 --slave-addr `dig +short redis-cluster-v1-4.redis-cluster.test-project.svc.cluster.local`:6379
redis-trib.py replicate --master-addr `dig +short redis-cluster-v1-2.redis-cluster.test-project.svc.cluster.local`:6379 --slave-addr `dig +short redis-cluster-v1-5.redis-cluster.test-project.svc.cluster.local`:6379
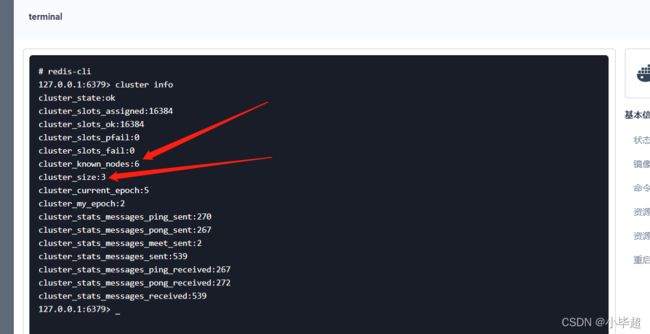
下面随便进入一个redis 终端中查看集群的状态:
cluster info
喜欢的小伙伴可以关注我的个人微信公众号,获取更多学习资料!


