月初公司安排了一个小程序开发程序
之前盲人摸象般的了解过一些小程序开发
本次开发对小程序有一些更立体的认识
页面说明(请原谅截图中因保护隐私被隐藏和修改后的不合理样式):
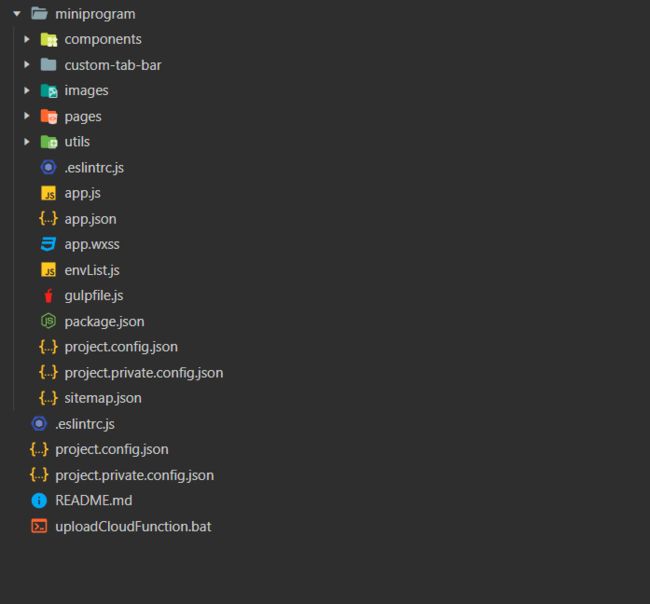
0:小程序新页面添加及目录结构说明
    a) components:组件,本次开发中没有使用到我就不展开细说了
    b) custom-tab-bar:小程序底部的fixed菜单,非自带
    c) images:小程序用到的所有图片,你也可以按需增加,非自带
    d) pages:小程序所有页面,初始化有一个index和logo,可以按需增删改
    e) utils:所有工具类js,本项目封装了时间格式等js
    f) app.js:全局js,可定义一些整个js可以使用的变量或者js。在pages/xxx.js中用'const app = getApp();'引入之后再xxx.js中就可以用app.customFunctionName()的方式来引用你自定义的变量或方法了
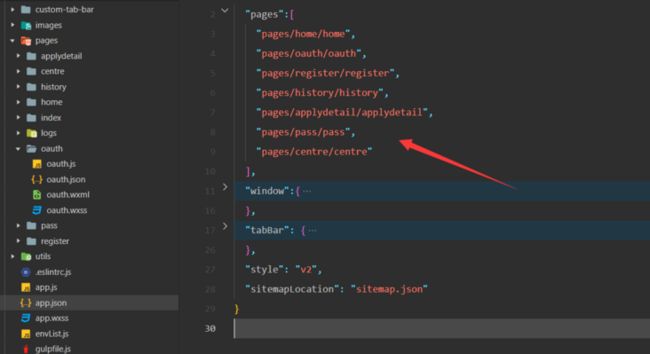
    g) app.json:全局配置,可以增加页面(.pages),增加顶部([.window](https://developers.weixin.qq.com/miniprogram/dev/reference/configuration/page.html))和底部([.tabBar](https://developers.weixin.qq.com/miniprogram/dev/framework/ability/custom-tabbar.html))的配置信息,在pages[]中添加一个路径之后,pages文件夹下会自动创建一个同名指向的文件,比较快捷方便。另,**pages里面的第一个路径会被默认为小程序的主页**
    h) app.wxss 全局样式
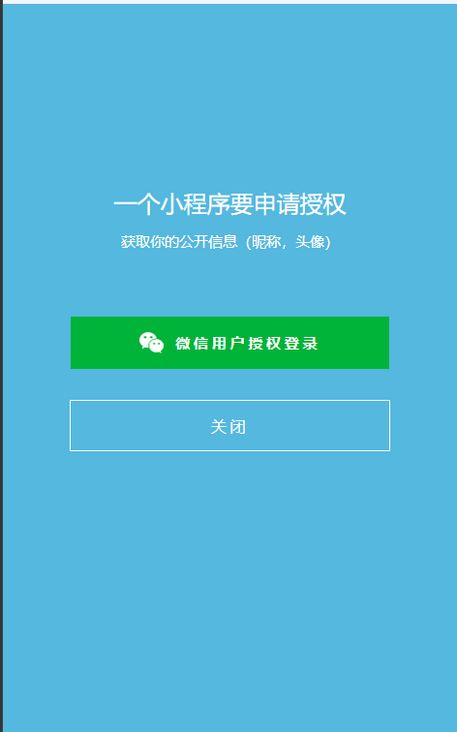
1:微信授权页面 (app.json : pages:[ "pages/oauth/oauth"])
功能:
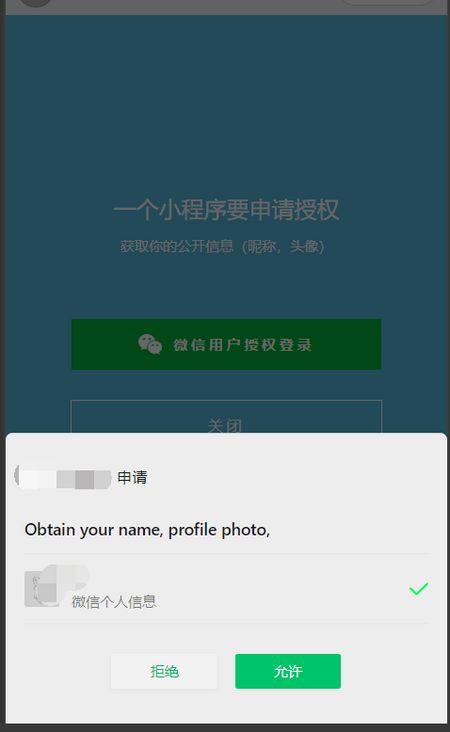
    a)点击授权按钮询问用户是否授权
    b)获取授权后,使用wx.login拿到code后调用我们自己开发的API获取token(小程序的其余接口均需要该token才能发起调用
    c)页面给一个显式按钮,点击后退出小程序(按需,因为毕竟大多数习惯使用小程序的人,更喜欢用右上角的关闭按钮)
样式图(改后):
踩坑点:
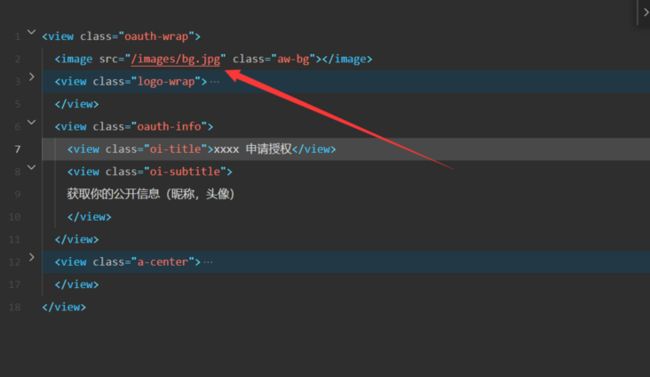
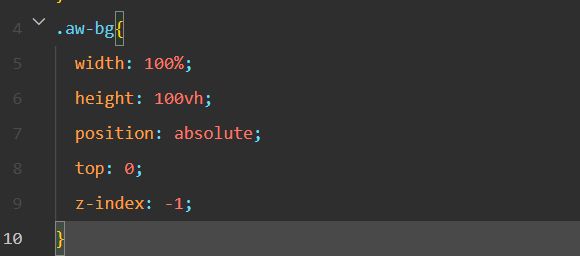
1:背景图(截图已替换成纯色背景)不能直接用background:url(相对路径(../../images/...))不能用,只能用https的完整路径。或者在.wxml中用
2:微信授权按钮里有一个微信的icon,宽高不管怎么调总有一点变形,之后才知道image标签有内置的固定宽高,需要加属性mode让image宽或者高自适应
/**
wxml:
3:接口请求的阻塞,等接口有返回之后才接着往下走
const app = getApp();
Page({
  //授权登录
  // 授权获取用户信息
  goOauth(){
    wx.getSetting({//获取用户授权信息
      success:(res)=> {
        if (!res.authSetting['scope.userInfo']) {//是否有拿到用授权访问个人信息scope.userInfo
          wx.authorize({
            scope: 'scope.userInfo',
            success:(res)=> {
              this.getUserinfo()
            }
          })
        }else{
          this.getUserinfo()
        }
      }
    })
  },
  getUserinfo(){
    wx.getUserProfile({
      desc:'必须授权后才能继续使用',
      success:res=>{
          let user=res.userInfo
          //设置本地缓存,把用户信息缓存到本地
          wx.setStorageSync('user',user);
          // 登录成功后去跳转
          let logincallback = this.oauthPassed;
          app.wx_gettoken(logincallback);
      }
  })
  },
  // 获取到用户授权后跳转至首页home
  oauthPassed(data){
    wx.setStorageSync("isunbind",null);
    //跳转至首页(首页有tabBar,不能用navigateTo)
    wx.switchTab({
      url: '../home/home'
    })
  },
})
另附app.js的app.wx_gettoken
 const utils = require('utils/util')
App({
  globalData: {
    currentDate:"",
    currentTime:"",
    currentDateTime:"",
  },
  // 微信login获取接口token
 wx_gettoken(callback){
  wx.login({
      success (res) {
        if (res.code) {
          let url="https://xxxx/intoSchool/onLogin";
          let data={
            code: res.code
          }
          utils.requestPromise(url,data).then((res)=>{
            if(res.data&&res.data.token){//成功
              wx.setStorageSync('logintoken',res.data.token);
              callback()
            }
          })
        } else {
          console.log('登录失败!' + res.errMsg)
        }
      }
    })
  },
  // 获取用户信息
  wx_getuserinfo(callback){
    const token=wx.getStorageSync('logintoken');
    wx.request({
      url: 'https://xxxx/intoSchool/user/getUserInfo',
      data: {
        token :token
      },
      header: {
        'content-type': 'application/x-www-form-urlencoded'
      },
      method:"POST",
      success (res) {
        if(res.data){//成功
          callback(res.data)
        }
      }
    })
  },
  //
  checkNull(itemVal,title) {
    if (typeof itemVal == "undefined" || itemVal == null || itemVal === "") {
      wx.showModal({
        title,
        icon: 'none'
      })
      return false
    }
    return true
  },
  checkRule(itemVal, rule,title) {
      let result = rule.test(itemVal);
      if (!result) {
        wx.showModal({
          title,
          icon: 'none'
        })
        return false
      }
      return true
  },
})
2:首页(app.json : pages:[ "pages/home/home"])
踩坑点:
1:自定义tabBar
我建议大家无官网直接下载demo后复制代码。官网,滑到底部,有demo
根据官网步骤
1:复制第0点的custom-tab-bar文件夹index.js中应暴露为component;其余可以按需配一些背景或者字体颜色等,图片路径及点击后跳转路径如下,不能以'../'开头
Component({
  data: {
    selected: 0,
    color: "#666",
    selectedColor: "#333",
    list: [{
      pagePath: "/pages/home/home",
      iconPath: "/images/1.png",
      selectedIconPath: "/images/1-1.png",
      text: "首页"
    }, {
      pagePath: "/pages/centre/centre",
      iconPath: "/images/2.png",
      selectedIconPath: "/images/2-1.png",
      text: "我的"
    }]
  },

  attached() {
  },
  methods: {
    switchTab(e) {
      const data = e.currentTarget.dataset
      const url = data.path
      wx.switchTab({url})
      this.setData({
        selected: data.index
      })
    }
  }
})
2:app.json 中配置tabBar信息
{"tabBar": {
    "custom": true,
    "list": [{
      "pagePath": "pages/home/home",
      "text": "首页"
    }, {
      "pagePath": "pages/centre/centre",
      "text": "我的"
    }]
  }}
app.json的配置会被custom-tab-bar文件夹下的配置所覆盖,但是里面的list为必填且菜单个数应该和实际菜单数目一致
3:home.js和centre.js中需要在进入页面是高亮当前tab
//centre.js
onShow(){
    //...
    // 底部tabbar高亮当前
    if (typeof this.getTabBar === 'function' &&
      this.getTabBar()) {
      this.getTabBar().setData({
      selected: 1
      })
    }
    //...
}
//home.js
onShow(){
    //...
    // 底部tabbar高亮当前
    if (typeof this.getTabBar === 'function' &&
      this.getTabBar()) {
      this.getTabBar().setData({
      selected: 0
      })
    }
    //...
}
更新中。。。
