7-Spring Boot的安全管理
一、Spring Security基础
1.Spring Security介绍
a.Spring Security是基于Spring生态圈的,用于提供安全访问控制解决方案的框架。
b.Spring Security的安全管理有两个重要概念,分别是Authentication(认证)和Authorization(授权)。
2.Spring Boot整合Spring Security实现的安全管理功能
a.MVC Security是Spring Boot整合Spring MVC框架搭建的Web应用的安全管理。
b.WebFlux Security是Spring Boot整合Spring WebFlux框架搭建的Web应用的安全管理。
c.OAuth2是大型项目的安全管理框架,可以实现第三方认证、单点登录等功能。
d.Actuator Security用于对项目的一些运行环境提供安全监控,例如Health健康信息、Info运行信息等,它主要作为系统指标供运维人员查看管理系统的运行情况。
二、Spring Security入门
1.基础环境搭建
a.创建Spring Boot项目
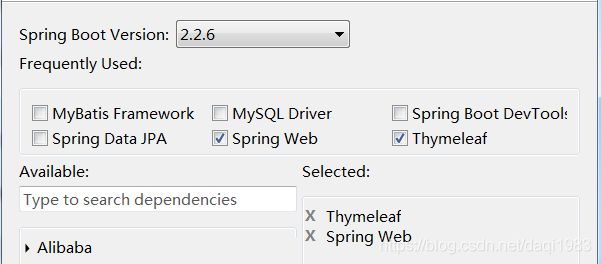
引入Web和Thymeleaf的依赖启动器
b.引入页面Html资源文件
在项目的resources下templates目录中,引入案例所需的资源文件,项目结构如下
c.编写Web控制层
@Controller
public class FilmController {

    //  影片详情页
    @GetMapping("/detail/{type}/{path}")
    public String toDetail(@PathVariable("type")String type, @PathVariable("path")String path) {

        return "detail/"+type+"/"+path;

    }

}
至此,使用Spring Boot整合Spring MVC框架实现了一个传统且简单的Web项目,
目前项目没有引入任何的安全管理依赖,也没有进行任何安全配置,
项目启动成功后,通过http://localhost:8080访问首页,单击影片进入详情详情页。
2.开启安全管理效果测试
a.添加spring-boot-starter-security启动器
一旦项目引入spring-boot-starter-security启动器,MVC Security和WebFlux Security负责的安全功能都会立即生效
    org.springframework.boot
    spring-boot-starter-security
b.项目启动测试
项目启动时会在控制台Console中自动生成一个安全密码
如果是热部署重启项目,可能不会有安全密码,那就关闭项目,再启动
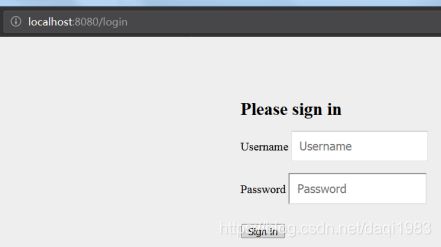
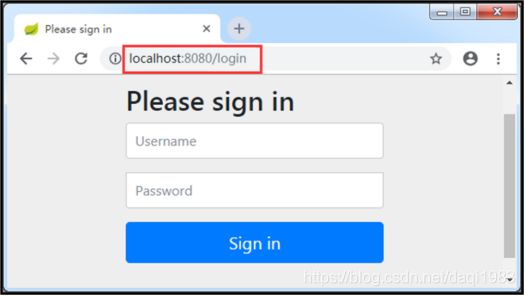
浏览器访问http://localhost:8080/查看项目首页,会跳转到一个默认登录页面。
因为添加了Security依赖后,会进行spring security的自动化配置,需要先登录,才能访问首页,Spring Security会自带一个默认的登录页面。
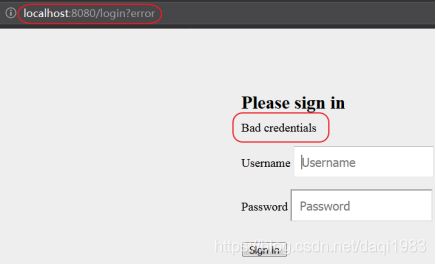
随意输入一个错误的用户名和密码,会出现错误提示
Security会默认提供一个可登录的用户信息,其中用户名为user,密码随机生成,
这个密码会随着项目的每次启动随机生成并打印在控制台上,在登录页面输入用户名和密码。
这种默认安全管理方式存在诸多问题,例如:
只有唯一的默认登录用户user、密码随机生成且过于暴露、登录页面及错误提示页面不是我们想要的等。
三、MVC Security安全配置
1.MVC Security安全配置简介
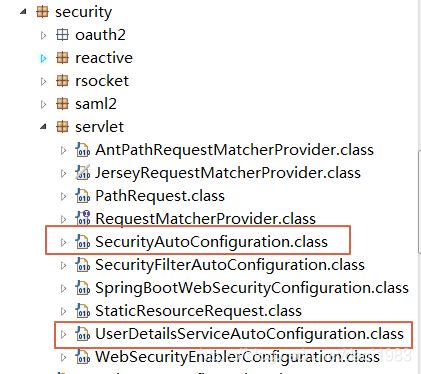
项目引入spring-boot-starter-security依赖启动器,MVC Security安全管理功能就会自动生效,其默认的安全配置是在SecurityAutoConfiguration和UserDetailsServiceAutoConfiguration中实现的。
SecurityAutoConfiguration导入并自动化配置SpringBootWebSecurityConfiguration用于启动Web安全管理.
UserDetailsServiceAutoConfiguration用于配置用户身份信息.
这两个类的位置:
先看spring-boot-autoconfigure-2.0.7.RELEASE.jar下的/META-INF/spring.factories文件,发现org.springframework.boot.autoconfigure.security.servlet.SecurityAutoConfiguration,\
org.springframework.boot.autoconfigure.security.servlet.UserDetailsServiceAutoConfiguration,\
发现在org.springframework.boot.autoconfigure.security.servlet这个包下,
2.关闭Sercurity提供的Web应用默认安全配置
1.要完全关闭Security提供的Web应用默认安全配置,可以自定义WebSecurityConfigurerAdapter类型的Bean组件以及自定义UserDetailsService、AuthenticationProvider或AuthenticationManager类型的Bean组件。
2.另外,可以通过自定义WebSecurityConfigurerAdapter类型的Bean组件来覆盖默认访问规则。
3.WebSecurityConfigurerAdapter类的主要方法及说明
| 方法 |
描述 |
| configure(AuthenticationManagerBuilder auth) |
定制用户认证管理器来实现用户认证 |
| configure(HttpSecurity http) |
定制基于HTTP请求的用户访问控制 |
四、自定义用户认证
1.内存身份认证
a.自定义WebSecurityConfigurerAdapter配置类
@EnableWebSecurity
public class SecurityConfig extends WebSecurityConfigurerAdapter {

}
注:
@EnableWebSecurity注解是一个组合注解,主要包括@Configuration注解、@Import({WebSecurityConfiguration.class, SpringWebMvcImportSelector.class})注解和@EnableGlobalAuthentication注解
b.使用内存进行身份认证
SecurityConfig类中重写configure(AuthenticationManagerBuilder auth)方法,并在该方法中使用内存身份认证的方式自定义了认证用户信息。定义用户认证信息时,设置了两个用户名和密码以及对应的角色信息。
@EnableWebSecurity
public class SecurityConfig extends WebSecurityConfigurerAdapter{

    @Override
    protected void configure(AuthenticationManagerBuilder auth) throws Exception {
        BCryptPasswordEncoder encoder = new BCryptPasswordEncoder();
        auth.inMemoryAuthentication().passwordEncoder(encoder)
                .withUser("shitou").password(encoder.encode("123456")).roles("common")
                .and()
                .withUser("李四").password(encoder.encode("123456")).roles("vip");
    }

}
c.效果测试
重启项目进行效果测试,项目启动成功后,仔细查看控制台打印信息,发现没有默认安全管理时随机生成的密码了。通过浏览器访问http://localhost:8080/
2.JDBC身份认证
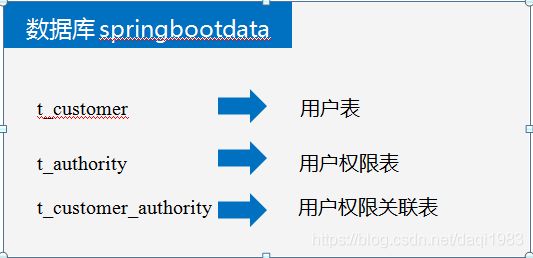
a.数据准备
# 选择使用数据库
USE springbootdata;

# 创建表t_customer并插入相关数据
DROP TABLE IF EXISTS `t_customer`;
CREATE TABLE `t_customer` (
  `id` int(20) NOT NULL AUTO_INCREMENT,
  `username` varchar(200) DEFAULT NULL,
  `password` varchar(200) DEFAULT NULL,
  `valid` tinyint(1) NOT NULL DEFAULT '1',
  PRIMARY KEY (`id`)
) ENGINE=InnoDB AUTO_INCREMENT=4 DEFAULT CHARSET=utf8;

INSERT INTO `t_customer` VALUES ('1', 'shitou', '$2a$10$5ooQI8dir8jv0/gCa1Six.GpzAdIPf6pMqdminZ/3ijYzivCyPlfK', '1');
INSERT INTO `t_customer` VALUES ('2', '李四', '$2a$10$5ooQI8dir8jv0/gCa1Six.GpzAdIPf6pMqdminZ/3ijYzivCyPlfK', '1');

# 创建表t_authority并插入相关数据
DROP TABLE IF EXISTS `t_authority`;
CREATE TABLE `t_authority` (
  `id` int(20) NOT NULL AUTO_INCREMENT,
  `authority` varchar(20) DEFAULT NULL,
  PRIMARY KEY (`id`)
) ENGINE=InnoDB AUTO_INCREMENT=3 DEFAULT CHARSET=utf8;

INSERT INTO `t_authority` VALUES ('1', 'ROLE_common');
INSERT INTO `t_authority` VALUES ('2', 'ROLE_vip');

# 创建表t_customer_authority并插入相关数据
DROP TABLE IF EXISTS `t_customer_authority`;
CREATE TABLE `t_customer_authority` (
  `id` int(20) NOT NULL AUTO_INCREMENT,
  `customer_id` int(20) DEFAULT NULL,
  `authority_id` int(20) DEFAULT NULL,
  PRIMARY KEY (`id`)
) ENGINE=InnoDB AUTO_INCREMENT=5 DEFAULT CHARSET=utf8;

INSERT INTO `t_customer_authority` VALUES ('1', '1', '1');
INSERT INTO `t_customer_authority` VALUES ('2', '2', '2');
b.添加JDBC连接数据库的依赖启动器
    org.springframework.boot
    spring-boot-starter-jdbc


    mysql
    mysql-connector-java
    runtime
c.进行数据库连接配置
spring.datasource.url=jdbc:mysql://localhost:3306/springbootdata?serverTimezone=UTC
spring.datasource.username=root
spring.datasource.password=root
d.使用JDBC进行身份认证
在SecurityConfig 类中的configure(AuthenticationManagerBuilder auth)方法中使用JDBC身份认证的方式进行自定义用户认证,使用JDBC身份认证时,首先需要对密码进行编码设置(必须与数据库中用户密码加密方式一致);然后需要加载JDBC进行认证连接的数据源DataSource;最后,执行SQL语句,实现通过用户名username查询用户信息和用户权限。
    @Autowired
    private DataSource dataSource;
    @Override
    protected void configure(AuthenticationManagerBuilder auth) throws Exception {

        BCryptPasswordEncoder encoder = new BCryptPasswordEncoder();
        String userSQL ="select username,password,valid from t_customer "+ "where username = ?";
        String authoritySQL="select c.username,a.authority from t_customer c, "+"t_authority a,t_customer_authority ca where "+"ca.customer_id=c.id and ca.authority_id=a.id and c.username =?";
       auth.jdbcAuthentication().passwordEncoder(encoder).dataSource(dataSource)
      .usersByUsernameQuery(userSQL).authoritiesByUsernameQuery(authoritySQL);

}
e.效果测试
先停止运行再启动或者直接relaunch下。在浏览器中http://localhost:8080/
如果热部署,可能出现下面错误
比如a bean of type 'javax.sql.DataSource' that could not be found.
3.UserDetailsService 身份认证
a.要用到jpa和redis,所以加入两个依赖,如下:
    org.springframework.boot
    spring-boot-starter-data-jpa


    org.springframework.boot
    spring-boot-starter-data-redis
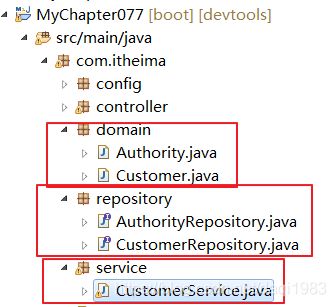
b.处理类要用到其他类,项目结构如下
c.上述类的主要代码如下:
@Entity(name = "t_authority ")
public class Authority implements Serializable{

    private static final long serialVersionUID = 1L;

    @Id
    @GeneratedValue(strategy = GenerationType.IDENTITY)
    private Integer id;

    private String authority ;


}
@Entity(name = "t_customer")
public class Customer implements Serializable{
private static final long serialVersionUID = 1L;
@Id
@GeneratedValue(strategy = GenerationType.IDENTITY)
private Integer id;
private String username;
private String password;
}public interface AuthorityRepository extends JpaRepository {
@Query(value = "select a.* from t_customer c,t_authority a,t_customer_authority ca where ca.customer_id=c.id and ca.authority_id=a.id and c.username =?1",nativeQuery = true)
public List findAuthoritiesByUsername(String username);
} public interface CustomerRepository extends JpaRepository {
Customer findByUsername(String username);
} //CustomerService业务处理类,用来通过用户名获取用户及权限信息
@Service
public class CustomerService {
@Autowired
private CustomerRepository customerRepository;
@Autowired
private AuthorityRepository authorityRepository;
@Autowired
private RedisTemplate redisTemplate;
// 业务控制:使用唯一用户名查询用户信息
public Customer getCustomer(String username){
Customer customer=null;
Object o = redisTemplate.opsForValue().get("customer_"+username);
if(o!=null){
customer=(Customer)o;
}else {
customer = customerRepository.findByUsername(username);
if(customer!=null){
redisTemplate.opsForValue().set("customer_"+username,customer);
}
}
return customer;
}
// 业务控制:使用唯一用户名查询用户权限
public List getCustomerAuthority(String username){
List authorities=null;
Object o = redisTemplate.opsForValue().get("authorities_"+username);
if(o!=null){
authorities=(List)o;
}else {
authorities=authorityRepository.findAuthoritiesByUsername(username);
if(authorities.size()>0){
redisTemplate.opsForValue().set("authorities_"+username,authorities);
}
}
return authorities;
} d.定义UserDetailsService用于封装认证用户信息
UserDetailsService是Security提供的进行认证用户信息封装的接口,该接口提供的loadUserByUsername(String s)方法用于通过用户名加载用户信息。使用UserDetailsService进行身份认证的时,自定义一个UserDetailsService接口的实现类,通过loadUserByUsername(String s)方法调用用户业务处理类中已有的方法进行用户详情封装,返回一个UserDetails封装类,来供Security认证使用。
自定义一个接口实现类UserDetailsServiceImpl进行用户认证信息UserDetails封装,重写了UserDetailsService接口的loadUserByUsername(String s)方法,在该方法中,使用CustomerService业务处理类获取用户的用户信息和权限信息,并通过UserDetails进行认证用户信息封装。
@Service
public class UserDetailsServiceImpl implements UserDetailsService {

    @Autowired
    private CustomerService customerService;

    @Override
    public UserDetails loadUserByUsername(String s) throws UsernameNotFoundException {

        // 通过业务方法获取用户及权限信息
        Customer customer = customerService.getCustomer(s);
        List authorities = customerService.getCustomerAuthority(s);

        // 对用户权限进行封装
        List list = authorities.stream().map(authority -> new SimpleGrantedAuthority(authority.getAuthority())).collect(Collectors.toList());

        // 返回封装的UserDetails用户详情类
        if(customer!=null){
            UserDetails userDetails= new User(customer.getUsername(),customer.getPassword(),list);
            return userDetails;
        } else {
            // 如果查询的用户不存在(用户名不存在),必须抛出此异常
            throw new UsernameNotFoundException("当前用户不存在!");
        }

    }

}
e.在SecurityConfig中使用UserDetailsService进行身份认证
    @Autowired
    private UserDetailsServiceImpl userDetailsService;

    @Override
    protected void configure(AuthenticationManagerBuilder auth) throws Exception {

        BCryptPasswordEncoder encoder = new BCryptPasswordEncoder();
        auth.userDetailsService(userDetailsService).passwordEncoder(encoder);

    }
f.效果测试
重启项目进行效果测试,项目启动成功后,通过浏览器访问http://localhost:8080/
五、自定义用户授权管理
1.自定义用户访问控制
a.在自定义配置类SecurityConfig中重写configure(HttpSecurity http)方法
@Override
protected void configure(HttpSecurity http) throws Exception {
    http.authorizeRequests()
        .antMatchers("/").permitAll()
        .antMatchers("/detail/common/**").hasRole("common")
        .antMatchers("/detail/vip/**").hasRole("vip")
        .anyRequest().authenticated()
        .and()
        .formLogin();
}
路径是“/”,直接放行。
路径是"/detail/common/**",只有用户角色是common才允许访问。
路径是"/detail/vip/**",只有用户角色是vip才允许访问。
其他请求要先登录认证后才放行。
b.效果测试
重启项目进行效果测试,项目启动成功后,通过浏览器访问http://localhost:8080/
项目首页单击普通电影或者VIP专享电影名称查询电影详情
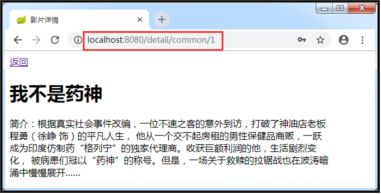
在此登录界面输入普通用户的用户名和密码,访问普通电影
在项目首页中单击VIP专享电影名称查看影片详情,
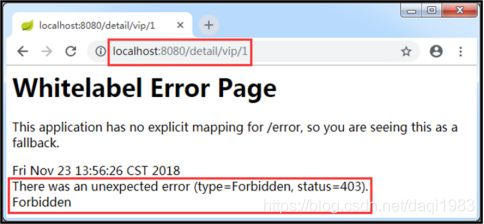
在查看VIP电影详情时,页面会出现403 Forbidden的错误信息
2.自定义用户登录
a.在项目的resources/ templates目录下创建login/login.html,核心代码如下
用户登录界面
通过
