ubuntu16.04 编译Android AOSP源码 android10
现在编译低版本估计会被喷,所以用的android10,12预览版都出来了
前期准备
手里一台mac,一台windows,只有这两台机器配置高,
经过查证,mac编译坑比较多,所以最后选择了虚拟机使用ubuntu16.04编译
前期准备
虚拟机配置:
内存14g ,最少要给10
cpu 16核
硬盘 300g固态,编译后产物+源码实测接近250g,加上系统占用什么的,给300g比较放心
后期因为给的核心多吃了亏,make的时候用的-j16,但是提示14g内存不够,最后老老实实用的-j4编译的
用16核心编译了1个半小时,然后提示内存不足,然后换4核心编译差不多一个小时就搞定了,所以如果上32g内存,估计两个小时就能编译出来,而且是首次编译
系统安装
这个就不多说了,选择镜像傻瓜式操作,记得安装好系统后设置系统不要休眠,不要锁屏,后面有许多费时操作,休眠可能耽误事
系统环境准备
系统安装好,第一件事就是换国内源:先备份
sudo cp /etc/apt/sources.list /etc/apt/sources.list.bak
sudo vi /etc/apt/sources.list
修改源为以下:
deb-src http://archive.ubuntu.com/ubuntu xenial main restricted #Added by software-properties
deb http://mirrors.aliyun.com/ubuntu/ xenial main restricted
deb-src http://mirrors.aliyun.com/ubuntu/ xenial main restricted multiverse universe #Added by software-properties
deb http://mirrors.aliyun.com/ubuntu/ xenial-updates main restricted
deb-src http://mirrors.aliyun.com/ubuntu/ xenial-updates main restricted multiverse universe #Added by software-properties
deb http://mirrors.aliyun.com/ubuntu/ xenial universe
deb http://mirrors.aliyun.com/ubuntu/ xenial-updates universe
deb http://mirrors.aliyun.com/ubuntu/ xenial multiverse
deb http://mirrors.aliyun.com/ubuntu/ xenial-updates multiverse
deb http://mirrors.aliyun.com/ubuntu/ xenial-backports main restricted universe multiverse
deb-src http://mirrors.aliyun.com/ubuntu/ xenial-backports main restricted universe multiverse #Added by software-properties
deb http://archive.canonical.com/ubuntu xenial partner
deb-src http://archive.canonical.com/ubuntu xenial partner
deb http://mirrors.aliyun.com/ubuntu/ xenial-security main restricted
deb-src http://mirrors.aliyun.com/ubuntu/ xenial-security main restricted multiverse universe #Added by software-properties
deb http://mirrors.aliyun.com/ubuntu/ xenial-security universe
deb http://mirrors.aliyun.com/ubuntu/ xenial-security multiverse
修改后
然后
sudo apt-get update
sudo apt-get upgrade
开始安装各种软件,vim,git
sudo apt-get install vim
sudo apt-get install git
git config --global  user.email "邮箱" //git的邮箱
git config --global  user.name "用户名" //git的用户名
安装openjdk8,官方说明安卓10需要用 open jdk 8,但是ubuntu16.04内置的是11
sudo add-apt-repository ppa:openjdk-r/ppa
sudo apt-get update
sudo apt-get install openjdk-8-jdk
安装完成查看当前版本
java -version结果

安装python3.7,
不再赘述,百度即可,最后记得把默认的python3指向python3.7
![]()
安装编译源码需要的依赖
sudo su
apt-get install git gnupg flex bison gperf build-essential zip curl libc6-dev libncurses5-dev:i386 x11proto-core-dev libx11-dev:i386 libreadline6-dev:i386  libgl1-mesa-dev g++-multilib tofrodos python-markdown libxml2-utils xsltproc zlib1g-dev:i386 dpkg-dev
apt-get install libx11-dev:i386 libreadline6-dev:i386 libgl1-mesa-dev g++-multilib
apt-get install -y git flex bison gperf build-essential libncurses5-dev:i386
apt-get install tofrodos python-markdown libxml2-utils xsltproc zlib1g-dev:i386
apt-get install git-core gnupg flex bison gperf build-essential
apt-get install zip curl zlib1g-dev gcc-multilib g++-multilib
apt-get install libc6-dev-i386
apt-get install lib32ncurses5-dev x11proto-core-dev libx11-dev
apt-get install libgl1-mesa-dev libxml2-utils xsltproc unzip m4
apt-get install lib32z-dev ccache
apt-get install libssl-dev
apt-get install ccache
其实第一条就安装完了,但是保险起见我又找了一下其他人的,对比了一下基本一致,就是下面的,然后就又装了一次,很快啊,如果一样,就啥都不装,没啥副作用
如果编译的时候报错提示有命令not found,再安装即可,我编译过程中使用上面的依赖,没有发生缺失情况
此依赖是16.04的其他版本不保证一样
下载源码
先安装源码同步工具
sudo curl https://storage.googleapis.com/git-repo-downloads/repo > /usr/bin/repo
sudo chmod a+x /usr/bin/repo
由于不可多说的原因,我们选用清华源进行源码下载更新同步
下载初始包,或者用工具下载:https://mirrors.tuna.tsinghua.edu.cn/aosp-monthly/aosp-latest.tar
下载好的初始包(100G左右),在home目录建个源码目录,用普通用户,不要用root
cd ~
mkdir androidSource
然后把下载好的aosp-latest.tar复制到androidSource目录,进行解压,记得用普通用户,编译源码的时候如果用root用户会报错,所以要用普通用户解压,要不然回头还得改文件的所有者,解压完删除aosp-latest.tar,解压视cpu而定,我用了十来分钟
tar xvf aosp-latest.tar
rm aosp-latest.tar
然后同步源码,进入解压出来的aosp目录,
cd ~/androidSource/aosp
repo sync -j8
repo sync -j8(8代表8个线程同步,国内建议j4),非常耗时,网不好可能是好几个小时级别,建议中间干其他的去
第一次是没问题的。后来我在另一个机器编译aosp的时候在这一步我遇到了一个错误:
Fetching: 100% (733/733), done in 12m21.816s
Garbage collecting: 100% (733/733), done in 2.479s
info: A new version of repo is available
warning: repo is not tracking a remote branch, so it will not receive updates
repo reset: error: Entry 'command.py' not uptodate. Cannot merge.
fatal: Could not reset index file to revision 'v2.17.3^0'.
看起来是代码同步完了,但是merge报错,因为command.py 不是最新的。处理方式如下
cd ./repo/repo
git pull
cd -
repo sync
为啥我也不知道没找到原因

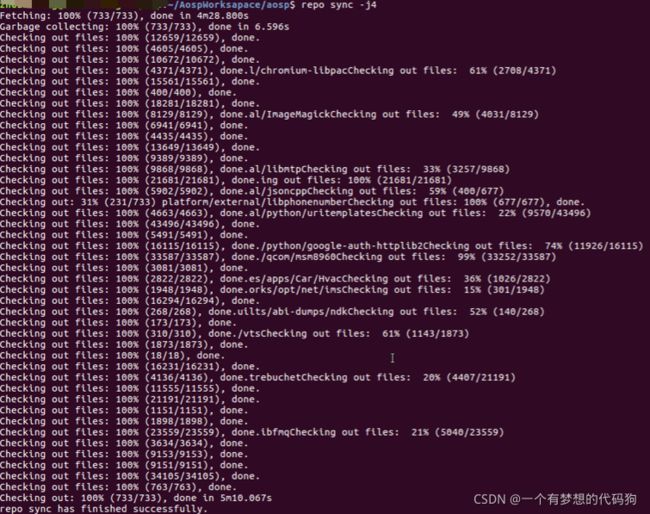
此时就完事了 ls 可以看到代码都有了
![]()
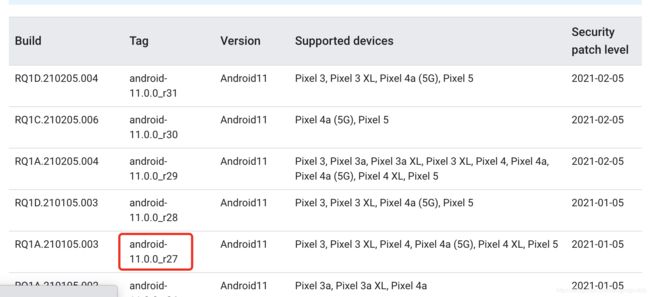
然后切换到想要编译的源码分支tag
repo init -u https://aosp.tuna.tsinghua.edu.cn/platform/manifest -b android-10.0.0_r5
repo sync --current-branch
repo sync --current-branch也比较耗时
android-10.0.0_r5 不是固定的,你可以编译其他分支版本,详情见:https://source.android.com/setup/start/build-numbers
上了列出了所有版本
编译源码
经过上面的操作,现在源码是android-10.0.0_r5版本的最新源码,就可以编译了
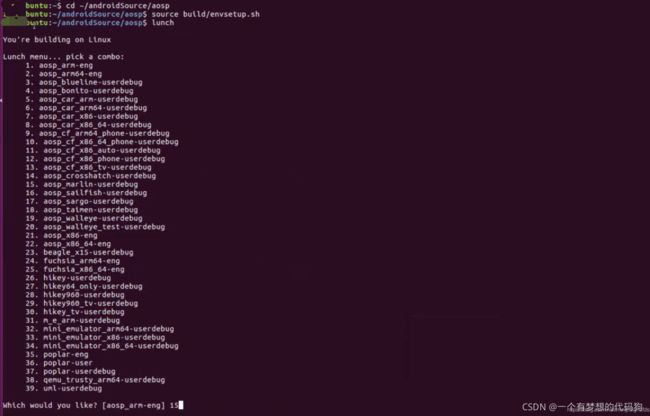
进入源码目录,导入环境变量
cd ~/androidSource/aosp
source build/envsetup.sh
选择你要编译的设备
lunch我要编译的是pixel xl
所以选择的15,直接命令行键入15即可
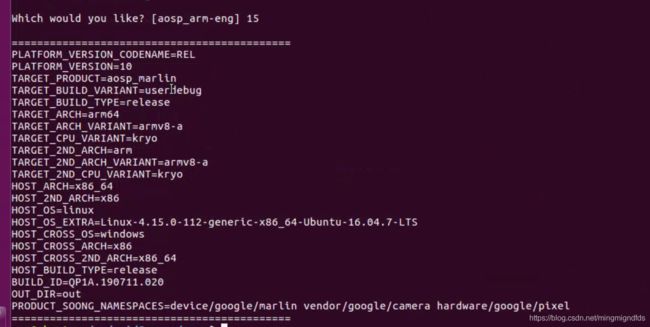
然后开始编译,此处也有个坑,如果你内存14g一下,建议用4个线程编译,或者和我一样,用全线程编译,等提示内存不够再减也行,稳妥起见建议 make -j4
make -j4 //j后面数字几就是多少线程,最多不超过你的cpu总线程编译过程错误处理
遇到的第一个错误就是提示文件not found,原因是切换过分支编译,但是文件没删除完,例如:
FAILED: out/soong/.bootstrap/build.ninja
out/soong/.minibootstrap/minibp -t -l out/.module_paths/Android.bp.list -b out/soong -n out -d out/soong/.bootstrap/build.ninja.d -o out/soong/.bootstrap/build.ninja Android.bp
internal error: could not open symlink hardware/qcom/sm8150p/Android.bp; its target (data/ipacfg-mgr/os_pickup.bp) cannot be opened
internal error: could not open symlink hardware/qcom/sm8150p/Android.bp; its target (data/ipacfg-mgr/os_pickup.bp) cannot be opened
out/build-aosp_arm64-cleanspec.ninja is missing, regenerating...
out/build-aosp_arm64.ninja is missing, regenerating...
[432/966] including hardware/qcom/sm7250/Android.mk ...
hardware/qcom/power/Android.mk:3: error: hardware/qcom/sm7250/Android.mk: No such file or directory
12:11:02 ckati failed with: exit status 1就是类似此种情况,你会发现hardware/qcom/sm8150p 和hardware/qcom/sm7250目录下面啥也没有,就有个空的mk或者bp
解决方案:大胆的删除sm8150p和sm7250目录即可
遇到的第二个错误,如果你用我上面的步骤,就已经规避了,那就是提示当前是root用户编译
FAILED: [W][2021-02-19T13:15:59+0800][25793] void cmdline::logParams(nsjconf_t *)():250 Process will be UID/EUID=0 in the global user namespace, and will have user root-level access to files
[W][2021-02-19T13:15:59+0800] void cmdline::logParams(nsjconf_t *)():260 Process will be GID/EGID=0 in the global user namespace, and will have group root-level access to files
原因是因为使用了root用户编译
解决方案:首先确认整个aosp目录的所有者是不是你的普通用户,如果不是就修改,然后再用普通用户从source build/envsetup.sh开始重新编译,记得删除 aosp下面的out目录,此目录是编译产物,如果不删除,容易引起其他错误
cd ~/androidSource/aosp //如果在aosp目录,就不用执行
rm -rf out  //删除输出产物
mkdir out
ls -all //查看当前文件所有者是不是你的普通用户,如果当时解压源码用的是普通用户,就是
chown -R yourUserName ~/androidSource/aosp //修改整个aosp目录为你的普通用户名字,如果上一步文件所有者是你的普通用户,就不用执行修改
遇到的第三个错误,就是内存不够
OpenJDK 64-Bit Server VM warning: INFO: os::commit_memory(0x000000008ba00000, 390070272, 0) failed; error='Not enough space' (errno=12)
#
# There is insufficient memory for the Java Runtime Environment to continue.
# Native memory allocation (mmap) failed to map 390070272 bytes for committing reserved memory.
# An error report file with more information is saved as:
# /home/zzm/androidSource/aosp/hs_err_pid37148.log
[ 63% 1468/2330] Target Java: out/target/common/obj/APPS/Dialer_intermediates/classes-full-debug.jar
Note: Generating a Provider for com.android.dialer.glidephotomanager.impl.GlidePhotoManagerImpl. Prefer to run the dagger processor over that class instead.
Note: [1] Wrote GeneratedAppGlideModule with: []
14:19:58 ninja failed with: exit status 1
此种情况直接重新执行,执行的时候减少线程数就行了,我刚开始是-j16,后来换成-j8还是不行,最后换成了-j4,即
make -j4正常这个错误不用删除out目录重新编译,但是如果你继续编译后遇到了奇奇怪怪的错误,可以参考第二个错误的处理方式,重新编译
编译完成
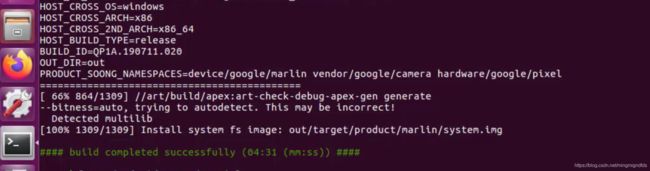
最后一行白字显示镜像位置,编译后的所有镜像如下图
ls -all out/target/product/marlin | grep img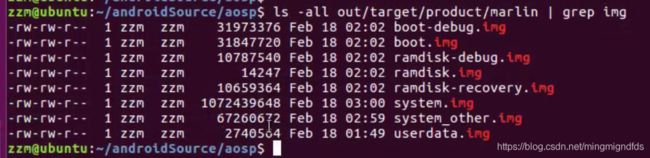
制作镜像包刷机
刷自己编译的镜像之前,先下载你的手机对应的官方镜像,然后解压替换自己编译出来的即可,例如我编译的是android-10.0.0_r5,还是上面的查询网址

去Factory Images for Nexus and Pixel Devices | Google Play services下载QP1A.191005.007.A1对应的镜像:
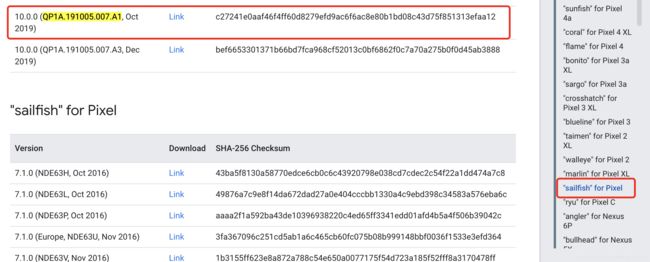
千万不要下错手机型号,因为其他型号也有QP1A.191005.007.A1
然后解压下载的压缩包,替换image-...zip里面的截图中的三个文件即可

此时手机重启到bootloader,执行flash-all.sh即可
adb reboot bootloader
./flash-all.sh
如果不行,可以先刷一下下载的官方包,然后再刷你修改后的包