Springboot整合Mybatis-Plus (最新)
Springboot整合Mybatis-Plus (最新)
本文目录
-
- Springboot整合Mybatis-Plus (最新)
-
- 入门
- 主键生成策略
-
- ASSIGN_ID(雪花算法)
- ASSIGN_UUID(不含中划线的UUID)
- AUTO(数据库 ID 自增)
- INPUT(手动给ID值)
- NONE(无状态)
- 更新操作
- 自动填充
- 乐观锁
- 查询操作
- 分页查询
- 逻辑删除
- 条件构造器
- 代码生成器
入门
Mybatis-Plus(简称MP)是一个 Mybatis 的增强工具,在 Mybatis 的基础上只做增强不做改变,为简化开发、提高效率而生。
之所以说效率高,是因为它给我们封装好了实现简单CRUD的方法我们只需直接调用。另外扩展也很方便,没有帮我们实现的功能我们可以自己写上去。
springboot整合mybatis-plus步骤:
-
加入依赖
<dependency>
    <groupId>com.baomidougroupId>
    <artifactId>mybatis-plus-boot-starterartifactId>
    <version>3.4.1version>
dependency>
【注意】
一、mybatis依赖跟mybatis-plus依赖不用同时加,防止避免冲突。
二、还需要加入数据库等驱动,就像配置mybatis时一样
-
创建mapper接口,继承MP提供的父类BaseMapper
T是你要操作的bean对象 package com.mapper; import com.baomidou.mybatisplus.core.mapper.BaseMapper; import com.entity.Person; import org.apache.ibatis.annotations.Mapper; @Mapper public interface UserMapperPlus extends BaseMapper<User> { /** * 许多简单的CRUD操作MP自动帮我们实现了 * 但是我们需要保证 有Person这个表 * 也就是说,你给T赋予了什么值就要有什么表 */ } -
指定mapper扫描器后进行使用
@Autowired
private UserMapperPlus userMapperPlus;

@RequestMapping("/plus")
public List<Person> selectList(){
    // 参数是一个wrapper,条件构造器,这里先设置为null
    return userMapperPlus.selectList(null);
}
主键生成策略
我们可以通过 @TableId 注解的 type 属性来设置主键 id 的增长策略,MP一共有如下几种主键策略,可根据情况配置。

ASSIGN_ID(雪花算法)
如果不设置 type 值,默认则使用 IdType.ASSIGN_ID 策略生成全局唯一64位id。该策略会使用雪花算法自动生成主键 ID,主键类型为 Long 或 String(分别对应 MySQL 的表字段为 BIGINT 和 VARCHAR)
雪花算法(SnowFlake)是 Twitter 开源的分布式 id 生成算法。其核心思想就是:使用一个 41 bit 作为毫秒数,10bit作为机器ID(5bit数据中心,5bit机器ID),12bit作为毫秒内的流水号,最后还有一个符号位,永远为0
ASSIGN_UUID(不含中划线的UUID)
如果使用 IdType.ASSIGN_UUID 策略,则会自动生成不含中划线的 UUID 作为主键。主键类型为 String,对应 MySQL 的表字段为 VARCHAR(32)
AUTO(数据库 ID 自增)
跟数据库提供的自动递增的策略一样,但前提是数据库中的表中要设置id为自增的
INPUT(手动给ID值)
Person person = new Person();
person.setId(1); // 手动给ID
person.setName("codekiang");
person.setPwd("123");
return userMapperPlus.insert(person);
NONE(无状态)
声明该表无主键
附:全局策略配置
假设我们希望默认全部都使用 AUTO 策略(数据库 ID 自增),那么可以在 application.properties 中添加如下配置进行修改:
mybatis-plus.global-config.db-config.id-type=auto
更新操作
MP会根据字段来动态拼接sql,你只需要设置好要修改的字段。
@RequestMapping("/update")
public int update(){
    Person person = new Person();
    person.setId(1L);
    person.setName("hahaha");
    person.setPwd("111");
    return userMapperPlus.updateById(person);
}
自动填充
在项目开发中,很多时候需要记录创建跟修改字段的时间,实现的方式有多种,但MP提供的方式会更好更方便一点。
实现步骤:
-
实体类的属性上添加 @TableField 注解,告诉MP该属性要进行填充
@Data public class Person { @TableId(type = IdType.ASSIGN_ID) private Long id; private String name; private String pwd; @TableField(fill = FieldFill.INSERT) private Date createTime; @TableField(fill = FieldFill.INSERT_UPDATE) private Date updateTime; } -
编写处理器来处理此注解.
处理器需要继承MetaObjectHandler 并实现其insertFill跟updateFill 方法
// 将这个处理器加入IOC容器中 @Component public class MybatisPlusHandler implements MetaObjectHandler { // 插入时的填充策略 @Override public void insertFill(MetaObject metaObject) { // 第一个参数为要填充的属性,第二个参数为填充的值 this.setFieldValByName("createTime", new Date(), metaObject); this.setFieldValByName("updateTime", new Date(), metaObject); } // 更新时的填充策略 @Override public void updateFill(MetaObject metaObject) { this.setFieldValByName("updateTime", new Date(), metaObject); } }【注意】因为updateTime是插入及更新时都要填充,所以它在两个方法中都要setFieldValByName
乐观锁
乐观锁:顾名思义十分乐观,它总是认为不会出现问题,无论干什么都不会去上锁。如果出现了问题,再次更新值测试
悲观锁:顾名思义十分悲观,它总是认为会出现问题,无论干什么都会去上锁。
乐观锁实现机制:
- 实现乐观锁需要在表中有个version字段来记录每一步操作
- 取出记录时,获取version
- 更新时,带上这个version。
set version = 新version where version = 旧version - 如果version不等于旧version则更新失败
简单来说就是:每次操作都会根据之前的version来做标记,如果version对的上就更新,然后version也随着更新,这样可以防止多线程时被其他线程抢先执行。
在项目中使用乐观锁步骤:
-
在实体类该属性的方面加上**@Version**注解
@Version private Integer version; -
自定义配置类中注册乐观锁插件
@Configuration
public class MybatisPlusConfig {
    @Bean
    public MybatisPlusInterceptor mybatisPlusInterceptor(){
        MybatisPlusInterceptor interceptor = new MybatisPlusInterceptor();
        interceptor.addInnerInterceptor(new OptimisticLockerInnerInterceptor());
        return interceptor;
    }
}
注意旧版本的OptimisticLockerInnerInterceptor方式需要修改成以上的新方式
-
测试
@RequestMapping("/update")
public int update(){
    // 【注意】乐观锁需要先查询再更新才会生效
    Person person = userMapperPlus.selectById(2L);
    person.setName("aaa");
    person.setPwd("ss");
    return userMapperPlus.updateById(person);
}
查询操作
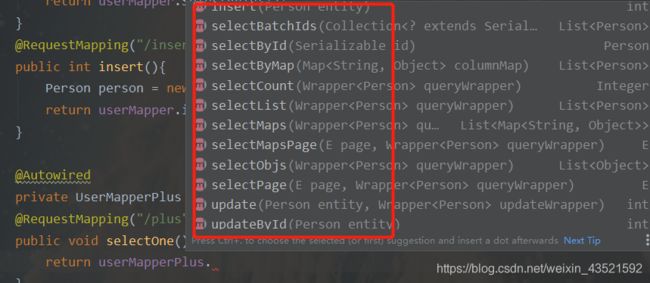
selectById:通过id查找单个实体类
selectList:通过条件构造器查找多个实体类
selectBatchIds:通过一个Collection查询多个实体类
selectByMap:通过map查找查询多个实体类
@RequestMapping("/select")
public List<Person> selectTest(){
    HashMap<String, Object> hashMap = new HashMap<>();
    hashMap.put("name", "aaa");
    hashMap.put("pwd", "ss");
    return userMapperPlus.selectByMap(hashMap);
}
selectCount:通过条件构造器查询满足条件的记录数量
selectPage:通过MP封装好的Page对象跟条件构造器进行分页查询
分页查询
实现步骤:
-
在自定义配置类中注册分页插件
@Bean public MybatisPlusInterceptor mybatisPlusInterceptor(){ MybatisPlusInterceptor interceptor = new MybatisPlusInterceptor(); interceptor.addInnerInterceptor(new PaginationInnerInterceptor()); return interceptor; } -
直接使用MP封装好的Page对象
@RequestMapping("/page")
public Page<Person> page(){
    Page<Person> page = new Page<>(1, 2);
    return userMapperPlus.selectPage(page, null);
}
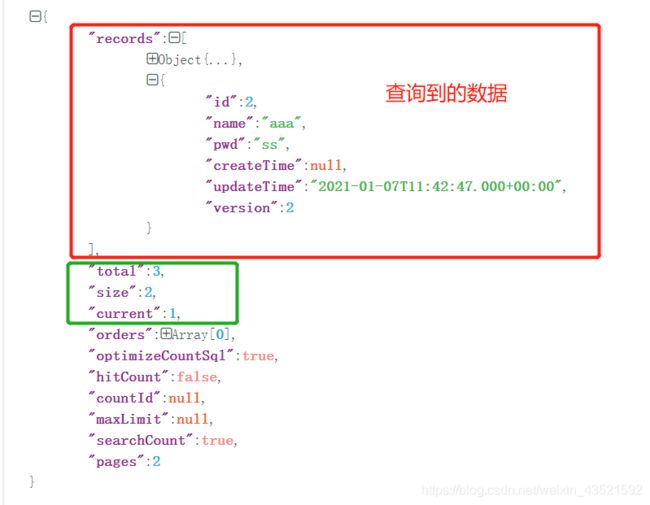
此时你会看到,它返回的是一个json数据:(经过处理得下图)

包含了很多信息,我们可以通过page对象来使用这些信息
@RequestMapping("/page")
public void page(){
    // 第一个参数为当前页,第二个参数为页面大小
    Page<Person> page = new Page<>(1, 2);
    userMapperPlus.selectPage(page, null);

    System.out.println("查询到的数据:");
    page.getRecords().forEach(System.out::println); // 查询到的数据 page.getRecords()

    System.out.println("查询到数据的数量:" + page.getTotal());
}
逻辑删除
物理删除:直接从数据库的表中删除记录。
逻辑删除:在数据库的表中多加一个字段,用1来代表该数据已经被删除。
在实际项目中一般不会使用物理删除,而会使用逻辑删除,这样可以防止一些用户错删,同时也可以保护数据。
MP实现逻辑删除步骤:
-
在实体类中增加 @TableLogic 注解
@TableLogic private Integer deleted; -
注册逻辑删除插件
@Bean public MybatisPlusInterceptor mybatisPlusInterceptor(){ MybatisPlusInterceptor interceptor = new MybatisPlusInterceptor(); interceptor.addInnerInterceptor(new PaginationInnerInterceptor()); return interceptor; } -
在配置文件中设置逻辑删除的值
mybatis-plus: global-config: db-config: logic-delete-field: 1 # 被删除后deleted的值 logic-not-delete-value: 0 # 没删除前deleted的值 -
测试删除
@RequestMapping("/delete")
public int delete(){
   return userMapperPlus.deleteById(1L);
}
条件构造器
条件构造器:用于生成 sql 的 where 条件, entity 属性也用于生成 sql 的 where 条件
MP只是帮我们封装了一些简单的CRUD,而对于复杂一点的我们可以使用条件构造器来对where语句进行复杂一点的行为。
简单使用
@RequestMapping("/wrapper")
public Person wrapper(){
    QueryWrapper<Person> wrapper = new QueryWrapper<>();
    // 第一个参数为列名,第二个参数为要查找的值
    wrapper .eq("name", "aaa")
        	.eq("pwd", "ss");
    return userMapperPlus.selectOne(wrapper);
}
模糊查询
@RequestMapping("/wrapper")
public Person wrapper(){
    QueryWrapper<Person> wrapper = new QueryWrapper<>();
    // 第一个参数为列名,第二个参数为要查找的值
    wrapper QueryWrapper<Person> wrapper = new QueryWrapper<>();
	wrapper.like("name", "a");
    return userMapperPlus.selectList(wrapper);
}
@RequestMapping("/wrapper")
public Person wrapper(){
    QueryWrapper<Person> wrapper = new QueryWrapper<>();
    wrapper.likeLeft("name", "a"); // 百分号在左边 即 a%
    return userMapperPlus.selectList(wrapper);
}

wrapper包括了QueryWrapper跟UpdateWrapper。执行查询操作就用QueryWrapper、执行更新就用UpdateWrapper。
条件构造器各API详解:
-
allEq:全部eq(或个别isNull)
例1:
allEq({id:1,name:"老王",age:null})—>id = 1 and name = '老王' and age is null例2:
allEq({id:1,name:"老王",age:null}, false)—>id = 1 and name = '老王' -
eq:等于、ne:不等于、gt:大于、ge:大于等于、lt:小于、le:小于等于
eq("name", "老王")—>name = '老王' -
bwtween、notBetween
between("age", 18, 30)—>age between 18 and 30 -
like、likeLeft、LifeRight、notLike (left则说明百分号在左边)
-
isNull、isNotNull
isNull("name")—>name is null -
in、notIn
in("age",{1,2,3})—>age in (1,2,3) -
inSql、notInSql 子查询
例:
inSql("id", "select id from table where id < 3")—>id in (select id from table where id < 3) -
groupBy
例:
groupBy("id", "name")—>group by id,name -
orderByAsc、orderByDesc
例:
orderByAsc("id", "name")—>order by id ASC,name ASC -
orderBy
例:
orderBy(true, false, "id", "name")—>order by id ASC,name DESC -
having
例1:
having("sum(age) > 10")—>having sum(age) > 10例2:
having("sum(age) > {0}", 11)—>having sum(age) > 11 -
or:主动调用
or表示紧接着下一个方法不是用and连接!(不调用or则默认为使用and连接)例:
eq("id",1).or().eq("name","老王")—>id = 1 or name = '老王' -
exists、notExists
代码生成器
AutoGenerator 是 MyBatis-Plus 的代码生成器,通过 AutoGenerator 可以快速生成 Entity、Mapper、Mapper XML、Service、Controller 等各个模块的代码,极大的提升了开发效率。
下面将演示自动生成我们上面辛辛苦苦建的包,写的代码。
实现步骤:
-
添加代码生成器 和 模板引擎依赖
MyBatis-Plus 从
3.0.3之后移除了代码生成器与模板引擎的默认依赖,需要手动添加相关依赖;MyBatis-Plus 支持 Velocity(默认)、Freemarker、Beetl,用户可以选择自己熟悉的模板引擎,如果都不满足您的要求,可以采用自定义模板引擎。<dependency> <groupId>com.baomidougroupId> <artifactId>mybatis-plus-generatorartifactId> <version>3.4.1version> dependency> <dependency> <groupId>org.apache.velocitygroupId> <artifactId>velocity-engine-coreartifactId> <version>2.2version> dependency> -
编写配置
@SpringBootApplication
@MapperScan("com.mapper")
class test {

    public static void main(String[] args){
        autoGenerator();
        SpringApplication.run(test.class, args);

    }

    public static void autoGenerator(){
        // 1. 构造 代码自动生成器 对象
        AutoGenerator generator = new AutoGenerator();

        // 2. 配置策略
        GlobalConfig gc = new GlobalConfig();
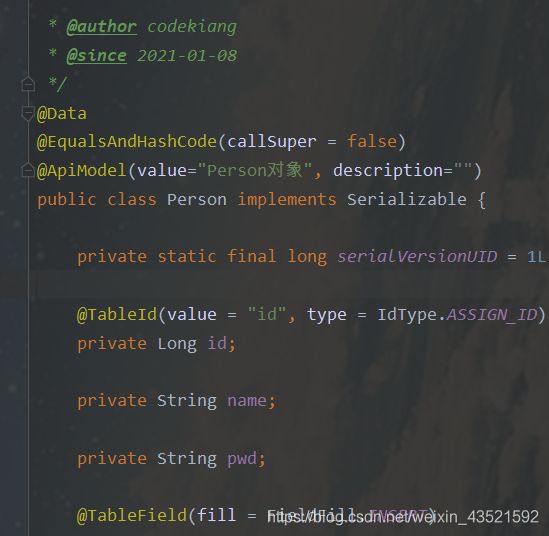
        //  2.1 全局配置
        String projectPath = System.getProperty("user.dir"); // 当前项目的路径
        gc.setOutputDir(projectPath + "\\03-Mybatis\\src\\main\\java"); //输出文件路径
        gc.setAuthor("codekiang"); // 设置作者
        gc.setIdType(IdType.ASSIGN_ID); // 设置主键的类型
        gc.setSwagger2(true); // 是否使用Swagger2
        gc.setOpen(false); // 是否打开资源管理器
        gc.setFileOverride(true); // 是否文件覆盖
        gc.setServiceName("%sService");  // 默认service接口名IXXXService 自定义指定之后就不会用I开头了
        gc.setControllerName("%sController");
        gc.setServiceImplName("%sServiceImpl");
        gc.setMapperName("%sMapper");
        gc.setXmlName("%sMapper");
        generator.setGlobalConfig(gc); // 设置全局配置
        //  2.2 设置数据源配置
        DataSourceConfig dsc = new DataSourceConfig();
        dsc.setDbType(DbType.MYSQL); // 指定数据库类型
        dsc.setUrl("jdbc:mysql://localhost:3306/jdbc_demo?useSSL=false&serverTimezone=UTC");
        dsc.setDriverName("com.mysql.cj.jdbc.Driver");
        dsc.setUsername("root");
        dsc.setPassword("5642818");
        generator.setDataSource(dsc);
        // 2.3 包的配置
        PackageConfig pc = new PackageConfig();
        pc.setModuleName("autoGenerator"); // 包名
        pc.setParent("com"); // 指定父包
        pc.setController("controller"); // 控制器所在的包名
        pc.setService("service"); // service接口所在的包名
        pc.setServiceImpl("service.impl"); // service实现类所在的包名
        pc.setMapper("mapper"); // mapper所在的包名
        pc.setEntity("entity"); // 实体类所在的包名
        pc.setXml("xml"); // xml所在的包名
        generator.setPackageInfo(pc);
        // 2.4 策略配置
        StrategyConfig sc = new StrategyConfig();
        sc.setNaming(NamingStrategy.underline_to_camel); // 表名命名规则,下划线跟驼峰互相转换
        sc.setColumnNaming(NamingStrategy.underline_to_camel); // 列名命名的规则
        sc.setInclude("person"); // 需要生成的表名(可传多个值)
        sc.setEntityLombokModel(true); // 是否开启lombok
        sc.setLogicDeleteFieldName("deleted"); // 逻辑删除字段
        TableFill createTime = new TableFill("create_time", FieldFill.INSERT);
        TableFill updateTime = new TableFill("update_time", FieldFill.INSERT_UPDATE);
        ArrayList<TableFill> fillList = new ArrayList<>();
        fillList.add(createTime);
        fillList.add(updateTime);
        sc.setTableFillList(fillList); // 设置填充自动与规则
        sc.setVersionFieldName("version"); // 设置乐观锁
        generator.setStrategy(sc);

        // 执行代码生器
        generator.execute();
    }

}


