Spring——spring集成mybatis
目录
1.spring集成mybatis相关说明
2.实现步骤
2.1实现步骤说明
2.2准备数据库,MySQL 创建新建表 Student
2.3 maven 依赖 pom.xml
2.4 实体类(Student)
2.5定义 StudentDao 接口和对应的mapper映射文件
2.6 编写MyBatis主配置文件
2.7定义 Service 接口和实现类
2.8 编写Spring配置文件
2.8.1 加载外部属性配置文件
2.8.2声明数据源
2.8.3 注册SqlSessionFactoryBean
2.8.4 定义Mapper扫描配置器MapperScannerConfigurer
2.8.5 向Service中注入相关的接口名
2.9 编写测试方法
2.9.1 测试方法1
2.9.2 测试方法2
1.spring集成mybatis相关说明
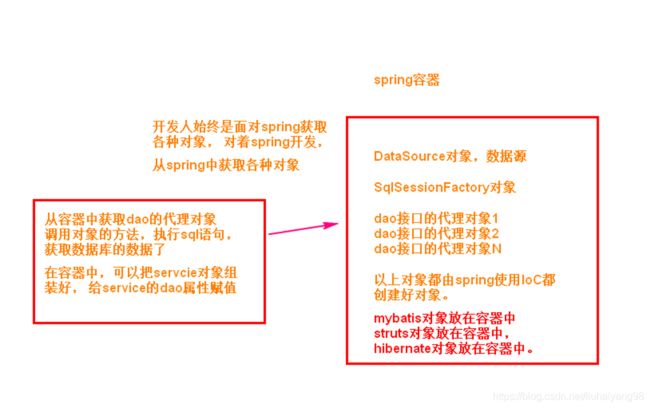
将 MyBatis 与 Spring 进行整合,主要解决的问题就是将SqlSessionFactory 对象交由 Spring 来管理。所以,该整合,只需要将SqlSessionFactory 的对象生成器 SqlSessionFactoryBean 注册在 Spring 容器中,再将其注入给 Dao 的实现类即可完成整合。
实现 Spring 与 MyBatis 的整合常用的方式:扫描的 Mapper 动态代理Spring 像插线板一样,mybatis 框架是插头,可以容易的组合到一起。插线板 spring 插上 mybatis,两个框架就是一个整体。
使用mybatis,需要创建mybatis框架中的某些对象,使用这些对象,就可以使用mybatis提供的功能了。
对于mybatis执行sql语句,需要用到的对象有:
1. SqlSessionFactory对象,只有创建了SqlSessionFactory对象,才能调用openSession()方法得到SqlSession对象。
2. dao接口的代理对象,例如StudentDao接口,需要的代理对象为:SqlSeesion.getMapper(StudentDao.class)。
3. 数据源DataSource对象,使用一个更强大、功能更多的连接池对象代替mybatis自己的PooledDataSource。
2.实现步骤
2.1实现步骤说明
Spring集成mybatis
实现步骤:
1.使用mysql库,创建表。
2.创建maven项目。
3.添加gav (依赖级)
    Spring依赖、mybatis依赖、mysql驱动、junit依赖
    mybatis-spring依赖(mybatis网站上提供的,用来在spring项目中,创建mybatis对象)
    spring有关事务的依赖。

    mybatis和spring整合的时候,事务自动提交的。
4.创建实体Student
5.创建Dao接口和mapper文件写sql语句
6.写mybatis主配置文件
7.创建service接口和他的实现类
8.创建spring的配置文件
    1)声明数据源DataSource,使用的是阿里的Druid连接池
    2)声明SqlSessionFactoryBean类,在这个类内部创建的是SqlSessionFactory对象。
    3)声明MapperScannerConfiguration类,在内部创建dao代理对象,创建的对象放都到Spring容器中。
    4)声明Service对象,把3)中的dao赋值给service属性
9.测试dao访问数据库
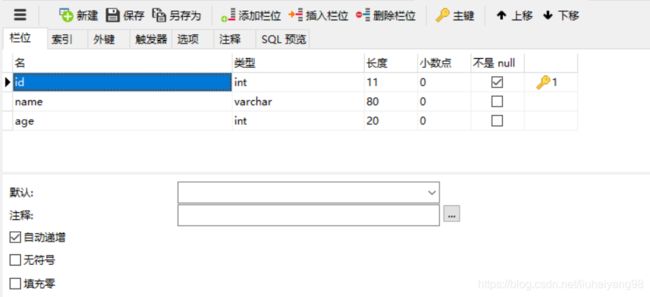
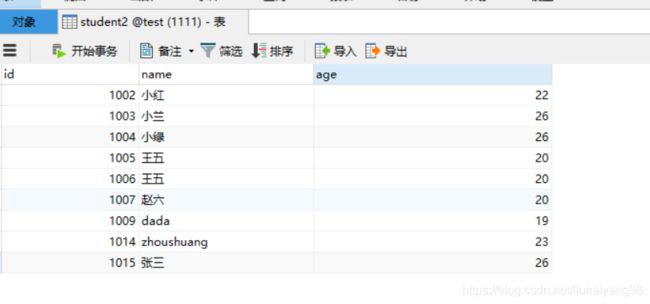
2.2准备数据库,MySQL 创建新建表 Student
2.3 maven 依赖 pom.xml
  org.springframework
  spring-context
  5.2.5.RELEASE
  org.springframework
  spring-tx
  5.2.5.RELEASE


  org.springframework
  spring-jdbc
  5.2.5.RELEASE
  org.mybatis
  mybatis
  3.5.1
  org.mybatis
  mybatis-spring
  1.3.1
  mysql
  mysql-connector-java
  5.1.9
  com.alibaba
  druid
  1.1.12
  junit
  junit
  4.11
  test
        src/main/java

          **/*.properties
          **/*.xml

        false
2.4 实体类(Student)
package com.liuhaiyang.domain;

public class Student {
    private Integer id;
    private String name;
    private Integer age;

     //set和get方法以及tostring、构造方法等
}
2.5定义 StudentDao 接口和对应的mapper映射文件
package com.liuhaiyang.dao;

import com.liuhaiyang.domain.Student;

import java.util.List;

public interface StudentDao {
    int insertStudent(Student student);
    List selectStudent();
}
insert into student2(name,age) values (#{name},#{age})
2.6 编写MyBatis主配置文件
2.7定义 Service 接口和实现类
package com.liuhaiyang.service;

import com.liuhaiyang.domain.Student;

import java.util.List;

public interface StudentService {
    int addSttudent(Student student);
    List selectStudent();
}
package com.liuhaiyang.service.impl;

import com.liuhaiyang.dao.StudentDao;
import com.liuhaiyang.domain.Student;
import com.liuhaiyang.service.StudentService;
import org.springframework.beans.factory.annotation.Autowired;
import org.springframework.beans.factory.annotation.Qualifier;
import org.springframework.stereotype.Component;
import org.springframework.stereotype.Service;

import java.util.List;

@Service("studentService")
public class StudentServiceImpl implements StudentService {
   // @Autowired(required = false)
   // @Qualifier("studentDao")
    private StudentDao studentDao=null;

    public void setStudentDao(StudentDao studentDao) {
        this.studentDao = studentDao;
    }

    @Override
    public int addSttudent(Student student) {
        int a=studentDao.insertStudent(student);
        System.out.println("本次执行结果影响了"+a+"行");
        return  a;
    }

    @Override
    public List selectStudent() {
        List stu=studentDao.selectStudent();
        return stu;
    }
}
2.8 编写Spring配置文件
jdbc.properties配置文件(数据库的相关消息)
jdbc.url=jdbc:mysql://localhost:3306/test?useUnicode=true&characterEncoding=utf-8
jdbc.username=root
jdbc.password=123456(数据库密码)
2.8.1 加载外部属性配置文件
2.8.2声明数据源
2.8.3 注册SqlSessionFactoryBean
2.8.4 定义Mapper扫描配置器MapperScannerConfigurer
2.8.5 向Service中注入相关的接口名
2.9 编写测试方法
2.9.1 测试方法1
@Test
    public void tset02(){
        //StudentDao操作,和属于mybatis内容
        String config="application.xml";
        ApplicationContext app=new ClassPathXmlApplicationContext(config);
        StudentDao student=(StudentDao) app.getBean("studentDao");  //这个是由容器创建的。主要是容器的第三个模块
        Student stu=new Student();
        stu.setName("张三");
        stu.setAge(26);
        int a=student.insertStudent(stu);
        System.out.println(a);
    }
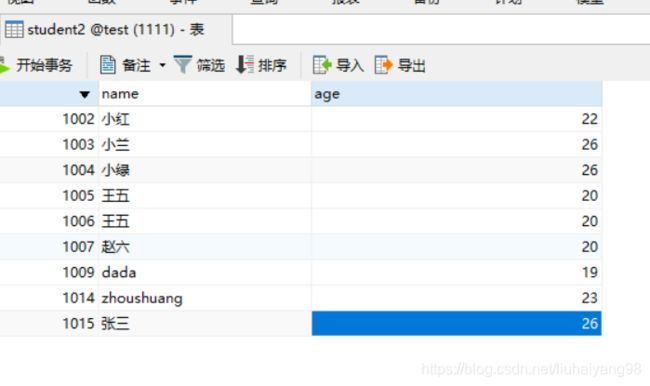
结果截图:
2.9.2 测试方法2
 @Test
    public void test03(){
        //StudentService操作的,是将mybatis和Spring结合起来
        String config="application.xml";
        ApplicationContext app=new ClassPathXmlApplicationContext(config);
        StudentService service=(StudentService) app.getBean("studentService");
        List students=service.selectStudent();
        for (Student student:students) System.out.println(student);

    }
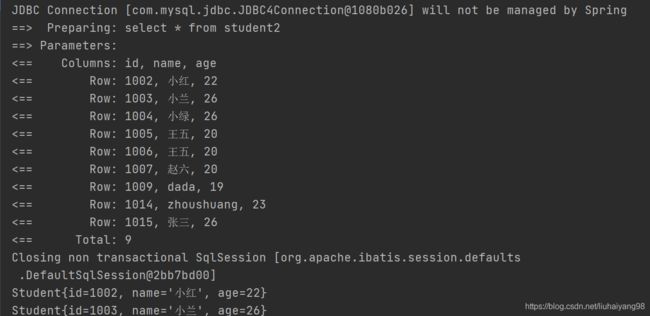
结果截图:
