springboot自动配置流程,以及实现自定义springboot starter
SpringBoot starter机制:
SpringBoot starter是一种常重要的机制,能抛以前繁杂的配置,将其统一集成进 tarter,应用者只需要在 maven starter中引入依赖。SpringBoot能自动扫描要加载的信息并启动相的认配置, starer让我们探脱了各种依赖的处理,需要配置种信息的国 SpringBoot动通过 classpath路径下的类发现需要的Bean,并注册进容器, SpringBoot提供了针对日常企业应用研发各种场的 spring--starter-boot-依起模块,所有这依赖模块都遵着约定成俗的默认配置,并允许我们调整这些配置即约走大于配置的理念。
为什么要自定义starter?
在我们的日常开发工作中,经有一些独立于业之外的配置模块,我们经常将其放到一个特定的包下,然后如一个工程需要用这块功能的时,需要代码硬贝到一个工程,重新集成一遍,麻至极如果我们这些可独立于业务代之外的功配置模块封装成一个个 starter,爱用的时候只需要其在pom中引用依可,再由 SpringBoot为我们完成自动配,就非常轻松了。
一、springboot自动配置原理
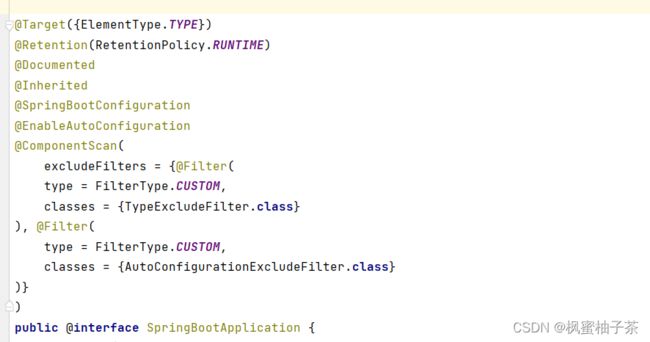
首先找到springboot项目的启动类,查看核心注解 @SpringBootApplication
可以看到 @SpringBootApplication 的底层注解有三个,其他四个是元注解,用来自定义注解的
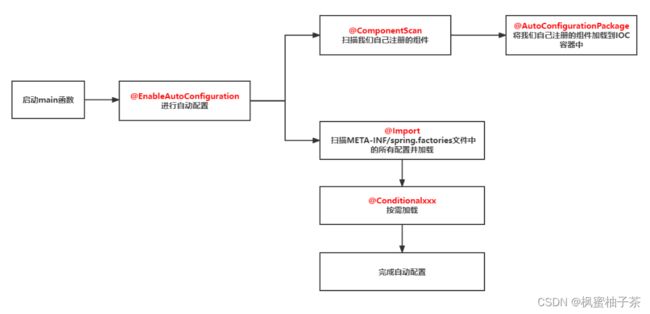
@SpringBootApplication 注解组成:
二、自定义starter
1、新建项目
项目命名采用SpringBoot官方的建议:
官方的命名为 spring-boot-starter-xxx ,我们自定义的尽量采用 xxx-spring-boot-starter (便于区别)。
【引入依赖】:
            org.springframework.boot
            spring-boot-autoconfigure
            2.7.3


            org.springframework.boot
            spring-boot-configuration-processor
            2.7.3
            true
2、自定义一个简单实体,配置信息
@EnableConfigurationProperties //开启支持配置文件
@ConfigurationProperties(prefix = "simplebean") //配置前缀
public class SimpleBean {
    private Integer id;
    private String name;

    public Integer getId() {
        return id;
    }

    public void setId(Integer id) {
        this.id = id;
    }

    public String getName() {
        return name;
    }

    public void setName(String name) {
        this.name = name;
    }

    @Override
    public String toString() {
        return "SimpleBean{" +
                "id=" + id +
                ", name='" + name + '\'' +
                '}';
    }
}
3、自动配置类
@Configuration
public class MyAutoConfiguration {

    static {
        System.out.println("MyAutoConfiguration init……");
    }

    @Bean
    public SimpleBean simpleBean() {
        return new SimpleBean();
    }
}
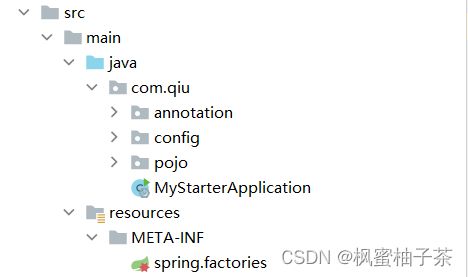
4、resources文件下新建目录 META-INF 并添加文件spring.factories
5、测试
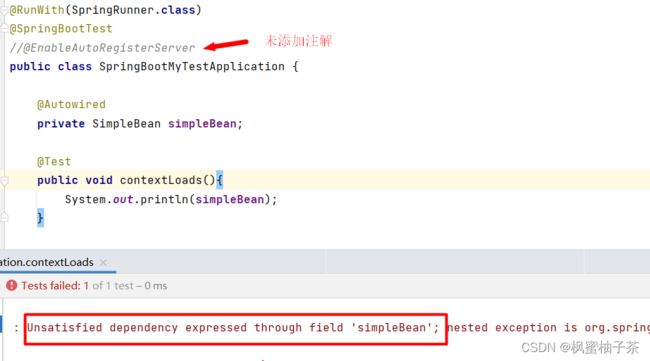
@RunWith(SpringRunner.class)
@SpringBootTest
public class SpringBootMyTestApplication {

    @Autowired
    private SimpleBean simpleBean;

    @Test
    public void contextLoads(){
        System.out.println(simpleBean);
    }

}
配置文件:
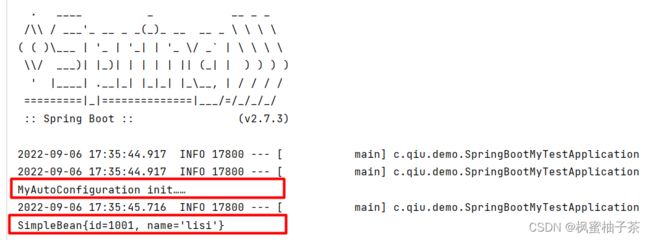
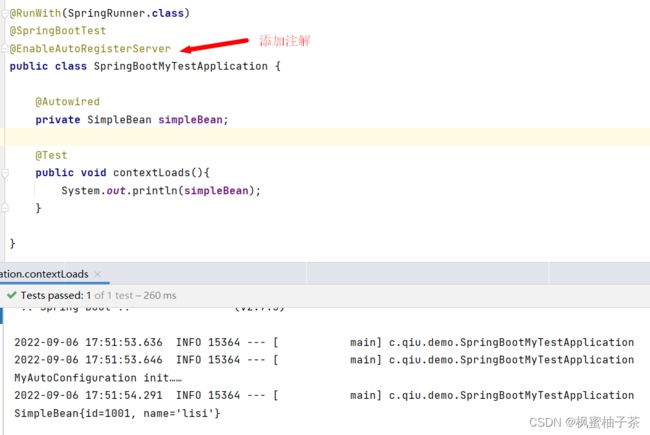
【结果】
自此已经完成了一个简单的stater定义实现!现在有一个新的需求,要求能控制是否自动配置,别着急,我们再升级改造一下!
6、实现控制是否开启自动配置
引入一个标记类
/**
 * 自动配置标记类
 */
public class ConfigMarker {
}
再自定义一个注解 @ EnableAutoRegisterServer
@Target(ElementType.TYPE)
@Retention(RetentionPolicy.RUNTIME)
@Import(ConfigMarker.class) //生成对应的实例,导入
public @interface EnableAutoRegisterServer {
}
自动配置类引入一个新注解 @ConditionalOnBean
@Configuration
@ConditionalOnBean(ConfigMarker.class) //需要存在某些对象才生成当前bean
public class MyAutoConfiguration {

    static {
        System.out.println("MyAutoConfiguration init……");
    }

    @Bean
    public SimpleBean simpleBean() {
        return new SimpleBean();
    }
}
继续测试
OK!完结 撒花……
