SpringBoot 自动配置之自定义 starter
文章目录
- 前言
- 一、mybatis starter
- 二、自定义 redis-starter
-
- 创建模块
- 初始化 Jedis Bean
-
- 创建 RedisAutoConfiguration:
- 创建 RedisProperties:
- 创建 META-INF/spring.factories 文件
- 演示
-
- 输出 Jedis
- 操作 Jedis
- 总结
前言
SpringBoot 提供了很多的 starter,但是有一些 starter 并没有提供,而这些技术又期望跟 SpringBoot 进行整合,所以他们自己提供了起步依赖。
本章将以 redis-starter 为例,讲解 SpringBoot 的自定义 starter。
一、mybatis starter
前言中我们提到了有一部分技术自己提供了起步依赖以跟 SpringBoot 整合,而 mybatis 就自己提供了一个 starter。
在 mvnrepository 中找到 MyBatis Spring Boot Starter 的坐标。

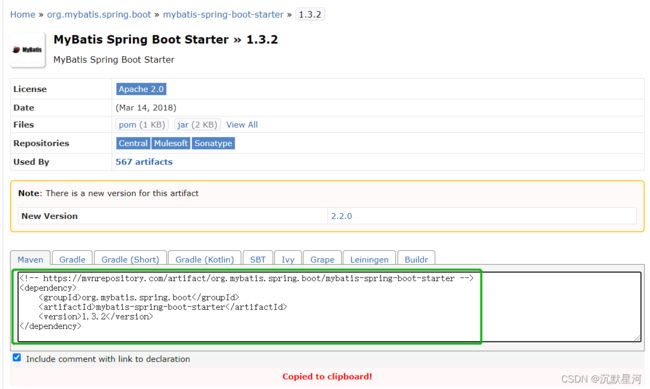
点进去之后我们选择用的最多的 1.3.2 版本
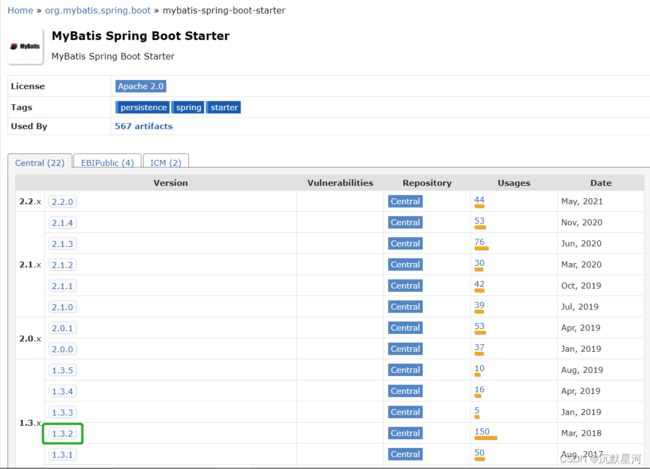
把坐标复制下来添加到 pom.xml 中
<dependency>
    <groupId>org.mybatis.spring.bootgroupId>
    <artifactId>mybatis-spring-boot-starterartifactId>
    <version>1.3.2version>
dependency>

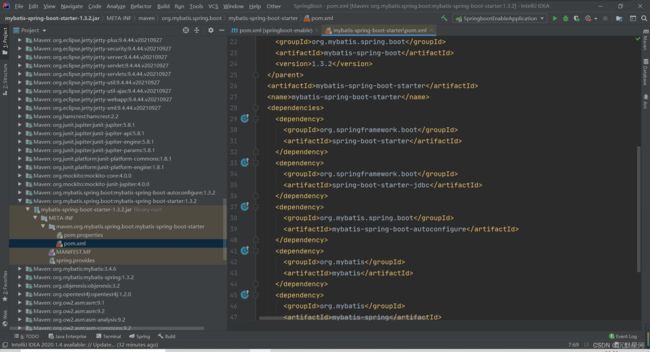
进入 mybatis 提供的起步依赖后我们可以看到起步依赖中包含的坐标,其中有一个坐标是 mybatis-spring-boot-autoconfigure,从名字上我们就可以猜到这是 mybatis 进行自动配置的一个坐标,mybatis-starter 包含了这个自动配置的坐标,将来只要引入了 mybatis 自动配置的坐标,那么其中包含配置的就都能加载到了。

我们可以打开对应的 jar 看一下:
- mybatis-starter
mybatis-starter 的 jar 中没有代码,其中只定义了一个 pom.xml 整合依赖:
- mybatis-spring-boot-autoconfigure
这个 jar 中有一个 MybatisAutoConfiguration 配置类,它是 mybatis 的自动配置类,其中定义了很多的 Bean。

那么这个自动配置类要想被 Spring 识别,并且加载其中定义的 Bean 的话,mybatis 的做法是在 jar 中定义了一个 META-INF 文件夹。
文件夹中有一个 spring.factories 文件,文件内定义了键为 EnableAutoConfiguration,值为 MybatisAutoConfiguration,就是我们上面看到的那个配置类。

这样做的话就可以在 SpringBoot 启动时加载到 META-INF 中的 spring.factories 文件,识别到自动配置的类,配置类中定义的 Bean 就会被 Spring 加载到 IOC 容器中。
这就是 mybatis 起步依赖的书写过程。
二、自定义 redis-starter
上面讲了 mybtais 起步依赖的书写过程,我们现在可以参考他的规则自己定义一个起步依赖。
步骤如下:
- 创建 redis-spring-boot-autoconfigure 模块
- 创建 redis-spring-boot-starter 模块,并依赖 redis-spring-boot-autoconfigure 模块。
- 在 redis-spring-boot-autoconfigure 模块中初始化 Jedis 的 Bean。并定义 META-INF /spring.factories 文件。
- 在测试模块中引入自定义的 redis-starter 依赖,测试获取 Jedis 的 Bean,操作 redis。
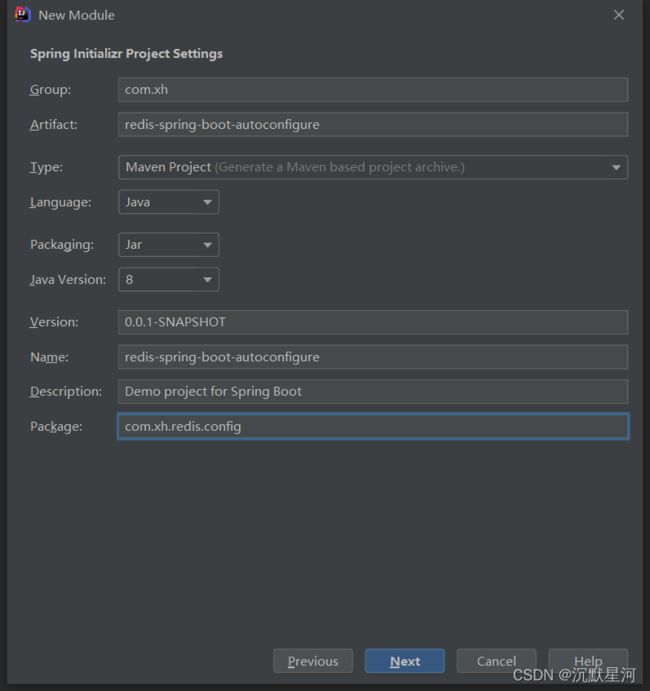
创建模块
创建 redis-spring-boot-autoconfigure 模块,这个模块我们后期用来编写配置类。
创建 redis-spring-boot-starter 模块。

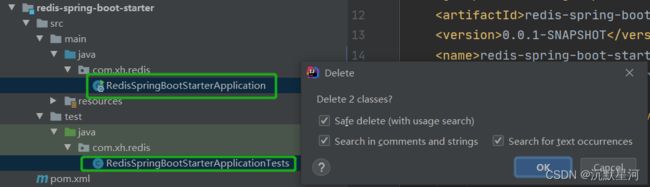
项目创建完成后我们把没用的文件都删掉,并且把启动类和测试类也删掉:

修改 starter 模块中的 pom.xml,引入 autoconfigure。
<project xmlns="http://maven.apache.org/POM/4.0.0" xmlns:xsi="http://www.w3.org/2001/XMLSchema-instance"
         xsi:schemaLocation="http://maven.apache.org/POM/4.0.0 https://maven.apache.org/xsd/maven-4.0.0.xsd">
    <modelVersion>4.0.0modelVersion>
    <parent>
        <groupId>org.springframework.bootgroupId>
        <artifactId>spring-boot-starter-parentartifactId>
        <version>2.6.1version>
        <relativePath/>
    parent>
    <groupId>com.xhgroupId>
    <artifactId>redis-spring-boot-starterartifactId>
    <version>0.0.1-SNAPSHOTversion>
    <name>redis-spring-boot-startername>
    <description>Demo project for Spring Bootdescription>
    <properties>
        <java.version>1.8java.version>
    properties>
    <dependencies>
        <dependency>
            <groupId>org.springframework.bootgroupId>
            <artifactId>spring-boot-starterartifactId>
        dependency>


        <dependency>
            <groupId>com.xhgroupId>
            <artifactId>redis-spring-boot-autoconfigureartifactId>
            <version>0.0.1-SNAPSHOTversion>
        dependency>
    dependencies>
project>
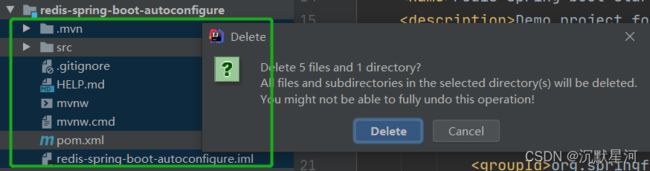
autoconfigure 模块也如法炮制把没有用的东西删除掉,并且把启动类和测试类也删掉:

修改 autoconfigure 模块中的 pom.xml,并引入 Jedis 的依赖。
<project xmlns="http://maven.apache.org/POM/4.0.0" xmlns:xsi="http://www.w3.org/2001/XMLSchema-instance"
         xsi:schemaLocation="http://maven.apache.org/POM/4.0.0 https://maven.apache.org/xsd/maven-4.0.0.xsd">
    <modelVersion>4.0.0modelVersion>
    <parent>
        <groupId>org.springframework.bootgroupId>
        <artifactId>spring-boot-starter-parentartifactId>
        <version>2.6.1version>
        <relativePath/>
    parent>
    <groupId>com.xhgroupId>
    <artifactId>redis-spring-boot-autoconfigureartifactId>
    <version>0.0.1-SNAPSHOTversion>
    <name>redis-spring-boot-autoconfigurename>
    <description>Demo project for Spring Bootdescription>
    <properties>
        <java.version>1.8java.version>
    properties>
    <dependencies>
        <dependency>
            <groupId>org.springframework.bootgroupId>
            <artifactId>spring-boot-starterartifactId>
        dependency>


        <dependency>
            <groupId>redis.clientsgroupId>
            <artifactId>jedisartifactId>
        dependency>
    dependencies>
project>
初始化 Jedis Bean
创建 RedisAutoConfiguration:
在 autoconfigure 模块中创建并编写 RedisAutoConfiguration:
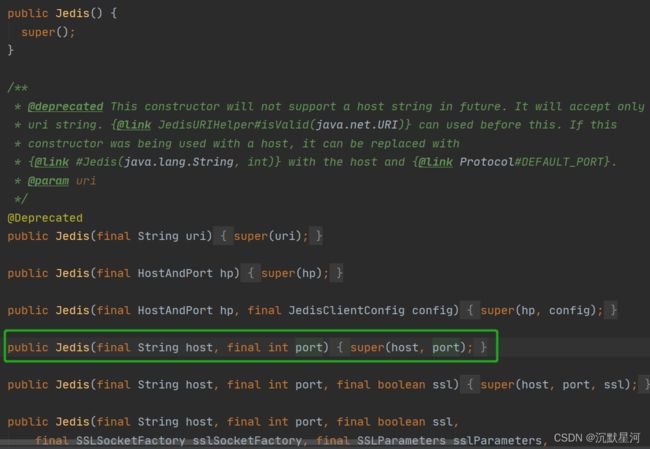
Jedis 提供的很多构造方法,我们使用其中两个参数(host,port)的构造方法:
package com.xh.redis.config;

import org.springframework.context.annotation.Configuration;
import redis.clients.jedis.Jedis;

@Configuration
public class RedisAutoConfiguration {

    /**
     * 提供 Jeids 的 Bean
     */
    public Jedis jedis(){
        return new Jedis("locahost", 6379);
    }
}
但是这么写的话创建出来 Jedis 客户端将来只能操作本机的 Redis,这样显然是不行的,我们需要用户去指定相应的参数。
创建 RedisProperties:
package com.xh.redis.config;

import org.springframework.boot.context.properties.ConfigurationProperties;

/** 读取配置文件中的主机名和端口号 */
@ConfigurationProperties(prefix = "redis")
public class RedisProperties {
    /** 如果用户不配置,那么默认为本机 */
    private String host = "localhost";
    private int port = 6379;

    public String getHost() {
        return host;
    }

    public void setHost(String host) {
        this.host = host;
    }

    public int getPort() {
        return port;
    }

    public void setPort(int port) {
        this.port = port;
    }
}
修改 RedisAutoConfiguration,动态创建 Jedis:
package com.xh.redis.config;

import org.springframework.boot.context.properties.EnableConfigurationProperties;
import org.springframework.context.annotation.Bean;
import org.springframework.context.annotation.Configuration;
import redis.clients.jedis.Jedis;

@Configuration
/** 启用 RedisProperties */
@EnableConfigurationProperties(RedisProperties.class)
public class RedisAutoConfiguration {

    /**
     * 提供 Jeids 的 Bean
     */
    @Bean
    public Jedis jedis(RedisProperties redisProperties){
        return new Jedis(redisProperties.getHost(), redisProperties.getPort());
    }
}
创建 META-INF/spring.factories 文件
在上个章节中的 @EnableAutoConfiguration 注解 节点中我们看到了 SpringBoot 是如何使用 META-INF/spring.factories 文件的,在这里这里可以参考一下。
在 resources 目录下创建 META-INF/spring.factories:

编写 spring.factories,key 为 @EnableAutoConfiguration 注解的全限定名,value 是我们编写的 RedisAutoConfiguration 的全限定名:
org.springframework.boot.autoconfigure.EnableAutoConfiguration=\
  com.xh.redis.config.RedisAutoConfiguration
演示
通过上面的步骤我们已经自定义好了 redis-starter,下面我们可以找一个测试工程去获取 Jedis。
这里我就不重新创建模块了,我们用上个章节创建好的 enable 模块进行演示。
输出 Jedis
修改 enable 模块的 pom.xml 文件,引入我们自定义的 redis-starter:
        <dependency>
            <groupId>com.xhgroupId>
            <artifactId>redis-spring-boot-starterartifactId>
            <version>0.0.1-SNAPSHOTversion>
        dependency>
在启动类中获取 Jedis 并输出:
Jedis jedis = context.getBean(Jedis.class);
System.out.println(jedis);
启动项目,成功输出:

操作 Jedis
想要操作得先把本机的 Redis 启动:

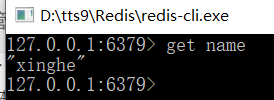
在操作之前我们使用命令查看本机的 redis 有没有数据:
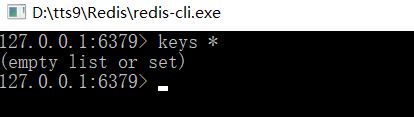
可以看到当前 redis 中是没有数据的。
接下来我们在启动类中往 redis 中插入数据并输出:
jedis.set("name", "xinghe");
String name = jedis.get("name");
System.out.println(name);
没有问题,正常输出:

查看 redis 的客户端,可以看到数据存进去了:
接下来我们在 enable 模块中定义 redis 的信息,看一下我们的 RedisProperties 是否可以读取到:
比如我们定义一个 port 为 6666,当然这个配置肯定是不对的,这里只是看一下我们的配置是否生效:
redis.port=6666
启动可以看到配置生效了,但是由于我们配置的端口不对,他是连接不上的。

为了方便后面的测试,我们先把配置的 6666 端口删除。
接下来我们可以在 autoconfigure 模块的 RedisAutoConfiguration 类中定义一些条件注解:
package com.xh.redis.config;

import org.springframework.boot.autoconfigure.condition.ConditionalOnClass;
import org.springframework.boot.autoconfigure.condition.ConditionalOnMissingBean;
import org.springframework.boot.context.properties.EnableConfigurationProperties;
import org.springframework.context.annotation.Bean;
import org.springframework.context.annotation.Configuration;
import redis.clients.jedis.Jedis;

@Configuration
/** 启用 RedisProperties */
@EnableConfigurationProperties(RedisProperties.class)
/** 当环境中存在 Jedis,加载 Bean */
@ConditionalOnClass(Jedis.class)
public class RedisAutoConfiguration {

    /**
     * 提供 Jeids 的 Bean
     */
    @Bean
    /** 如果没有一个名叫 jedis 的 Bean,提供这个 Bean */
    @ConditionalOnMissingBean(name = "jedis")
    public Jedis jedis(RedisProperties redisProperties){
        System.out.println("RedisProperties...");
        return new Jedis(redisProperties.getHost(), redisProperties.getPort());
    }
}
启动输出,可以看到我们的 “RedisProperties…” 正常输出了,证明我们的条件注解也生效了,并且 Jedis 也被创建出来了:

为了测试 @ConditionalOnMissingBean,我们可以在引导类中添加一个 Jedis 的 Bean,然后运行项目看一下是否还会输出。
    @Bean
    public Jedis jedis(){
        return new Jedis("localhost", 6379);
    }
启动项目,可以看到我们的 “RedisProperties…” 并没有输出,证明 @ConditionalOnMissingBean 也生效了。

我们编写的代码到这里就演示完了,接下来我们可以看一下 SpringBoot 中 redis 的定义过程:
打开 org.springframework.boot.autoconfigure.data.redis.RedisAutoConfiguration,可以看到他的定义跟我们基本是一样的,只不过 SpringBoot 提供的更加严谨以及全面:
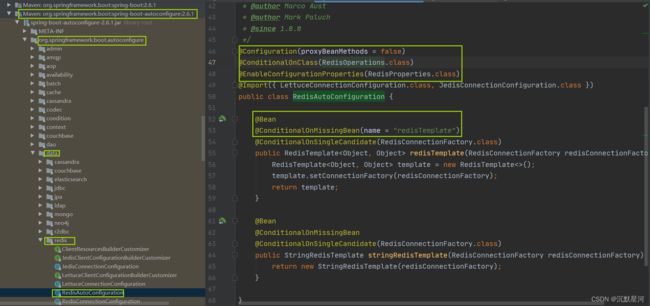
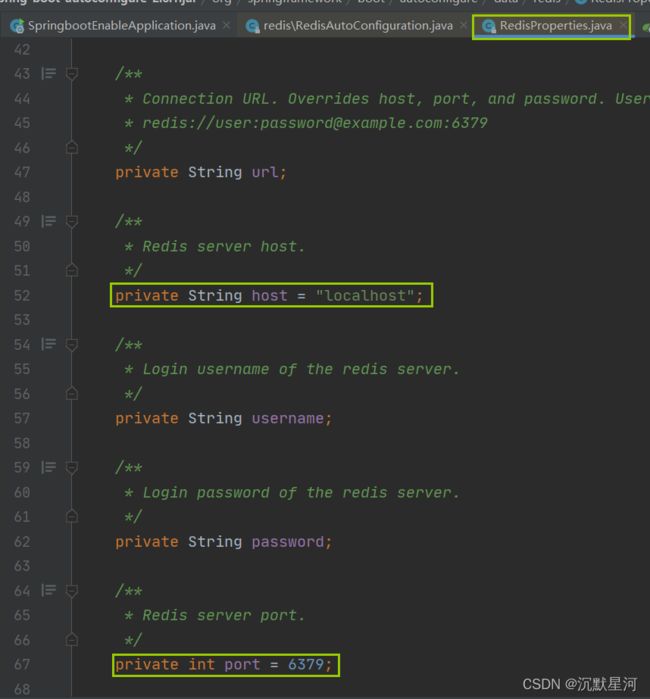
可以看到他也定义了一个 RedisProperties,进入之后可以看到他里面也定义了 host 和 port,并且指定了默认值。
总结
本章讲解了 SpringBoot 如何自定义 starter,并且实现了自定义的流程,感兴趣的朋友可以继续拓展一下其他有意思的属性~
下期见!