在线相册的前后端交互
在线相册的前后端交互
- 纯前端的代码
-
- index.html 文件
- css 文件
- 展示效果
- 通过模板引擎实现提交相册的功能
-
- 拟好思路
- 搭建项目环境
- 服务器端代码
-
- ThymeleafConfig 类
- LoadServlet 类
- UploadServlet 类
- 客户端代码
-
- form 表单用于提交图片
- html 模板文件
- 最终展示结果
- 总结流程
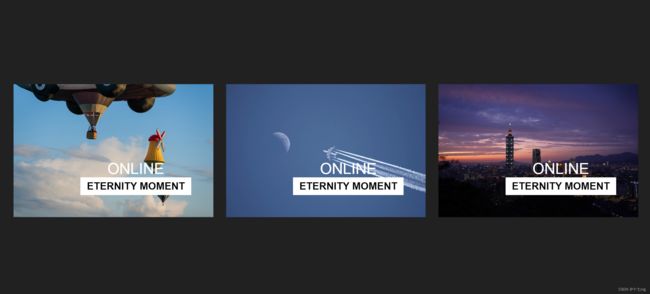
纯前端的代码
index.html 文件
<head>
    <meta charset="UTF-8">
    <title>相册title>
    <link rel="stylesheet" href="./style.css">
head>
<body>

<figure class="sample">
    <img src="image/1.jpg" alt="sample1" />
    <figcaption>
        <div>
            <h2>Onlineh2>
            <h4>Eternity Momenth4>
        div>
    figcaption>
    <a href="image/1.jpg">a>
figure>

<figure class="sample">
    <img src="image/2.jpg" alt="sample2" />
    <figcaption>
        <div>
            <h2>Onlineh2>
            <h4>Eternity Momenth4>
        div>
    figcaption>
    <a href="image/2.jpg">a>
figure>

<figure class="sample">
    <img src="image/3.jpg" alt="sample3" />
    <figcaption>
        <div>
            <h2>Onlineh2>
            <h4>Eternity Momenth4>
        div>
    figcaption>
    <a href="image/3.jpg">a>
figure>

body>
css 文件
/* sample 部分的整体样式 */
.sample {
    font-family: 'Raleway', Arial, sans-serif;
    position: relative;
    overflow: hidden;
    margin: 10px;
    min-width: 230px;
    max-width: 315px;
    width: 100%;
    color: #ffffff;
    text-align: center;
    font-size: 16px;
    background-color: #000000;
}

.sample *,
.sample *:before,
.sample *:after {
    -webkit-box-sizing: border-box;
    box-sizing: border-box;
    /* 当过了 0.55s 过渡效果 */
    -webkit-transition: all 0.55s ease;
    transition: all 0.55s ease;
}

/* 图片部分的样式 */
.sample img {
    max-width: 100%;
    backface-visibility: hidden;
    vertical-align: top;
}

/* figcaption 用作文档中插图的图像,带有一个标题 */
.sample figcaption {
    position: absolute;
    bottom: 25px;
    right: 25px;
    padding: 5px 10px 10px;
}

/* 绘制线条 */
    .sample figcaption:before,
    .sample figcaption:after {
    height: 2px;
    width: 400px;
    position: absolute;
    content: '';
    background-color: #ffffff;
}

/* 上面一条线 */
.sample figcaption:before {
    top: 0;
    left: 0;
    -webkit-transform: translateX(100%);
    transform: translateX(100%);
}

/* 下面一条线 */
.sample figcaption:after {
    bottom: 0;
    right: 0;
    -webkit-transform: translateX(-100%);
    transform: translateX(-100%);
}

/* 绘制线条 */
    .sample figcaption div:before,
    .sample figcaption div:after {
    width: 2px;
    height: 300px;
    position: absolute;
    content: '';
    background-color: #ffffff;
}

/* 左面一条线 */
    .sample figcaption div:before {
    top: 0;
    left: 0;
    -webkit-transform: translateY(100%);
    transform: translateY(100%);
}

/* 右面一条线 */
    .sample figcaption div:after {
    bottom: 0;
    right: 0;
    -webkit-transform: translateY(-100%);
    transform: translateY(-100%);
}

/* 文字部分 */
    .sample h2,
    .sample h4 {
    margin: 0;
    text-transform: uppercase;
}

.sample h2 {
    font-weight: 400;
}

.sample h4 {
    display: block;
    font-weight: 700;
    background-color: #ffffff;
    padding: 5px 10px;
    color: #000000;
}

.sample a {
    position: absolute;
    top: 0;
    bottom: 0;
    left: 0;
    right: 0;
}

/* 当鼠标放到图片时的效果, .hover 仅演示需要,可自行取消 */
.sample:hover img,
.sample.hover img {
    zoom: 1;
    filter: alpha(opacity=50);
    -webkit-opacity: 0.5;
    opacity: 0.5;
}

.sample:hover figcaption:before,
.sample.hover figcaption:before,
.sample:hover figcaption:after,
.sample.hover figcaption:after,
.sample:hover figcaption div:before,
.sample.hover figcaption div:before,
.sample:hover figcaption div:after,
.sample.hover figcaption div:after {
    -webkit-transform: translate(0, 0);
    transform: translate(0, 0);
}

.sample:hover figcaption:before,
.sample.hover figcaption:before,
.sample:hover figcaption:after,
.sample.hover figcaption:after {
    /* 过渡延时 0.15s */
    -webkit-transition-delay: 0.15s;
    transition-delay: 0.15s;
}

/* 背景仅演示作用 */
html {
    height: 100%;
}

body {
    background-color: #212121;
    display: flex;
    justify-content: center;
    align-items: center;
    flex-flow: wrap;
    margin: 0;
    height: 100%;
}

.link {
    color: white;
    text-decoration: none;
    /* 加上简单的过渡效果 */
    transition: all 0.5s;
}

.link:hover {
    background-color: rgb(149, 147, 147);;
}
展示效果
通过模板引擎实现提交相册的功能
拟好思路
POST 请求:从客户端往服务器上传本地图片
POST 请求通过 form 表单,来实现提交(点击提交按钮)
GET 请求: 客户端从服务器中显示图片数据
GET 请求不需要通过代码构造请求(开启 / 刷新浏览器页面)
POST 响应:服务器接收客户端上传过来的图片,返回一个 html 页面
POST 响应通过 Servlet 代码完成,并重定向到 GET 响应的页面中。
GET 响应:服务器给客户端返回一个 html 页面
GET 响应通过 Servlet 代码以及 html 模板文件来实现
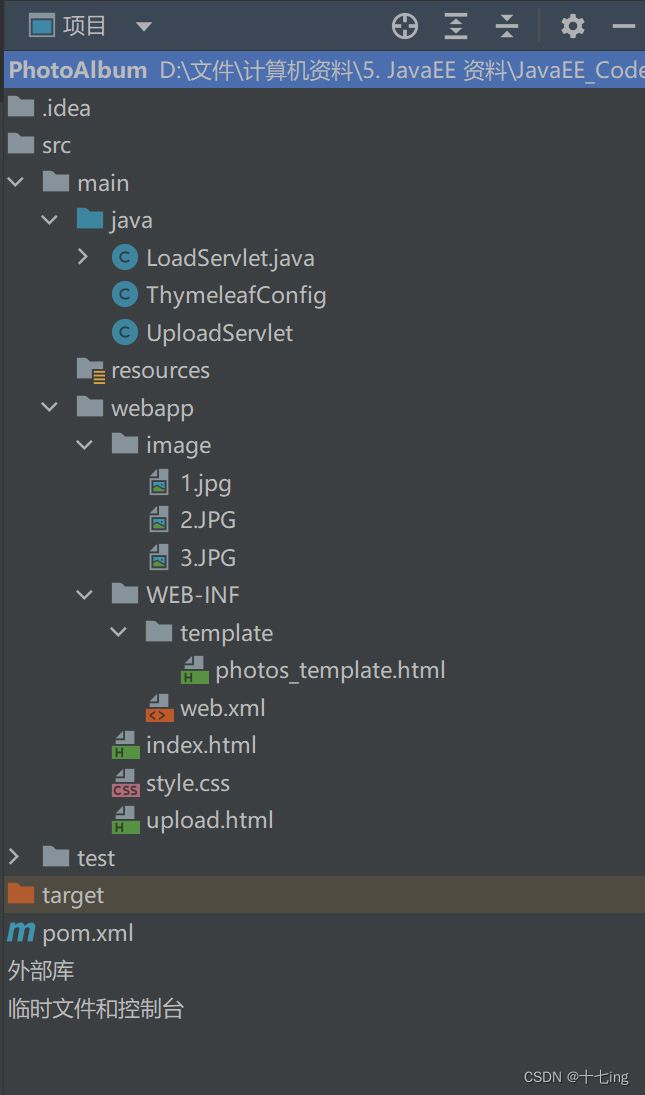
搭建项目环境
服务器端代码
ThymeleafConfig 类
ThymeleafConfig 类用于初始化 TemplateEngine 模板引擎。
@WebListener
public class ThymeleafConfig implements ServletContextListener {
    /**
     * ServletContext 初始化后,会调用此方法
     */
    @Override
    public void contextInitialized(ServletContextEvent servletContextEvent) {
        ServletContext context = servletContextEvent.getServletContext();

        // 1. 创建一个 TemplateEngine 的实例
        TemplateEngine engine = new TemplateEngine();

        // 2. 创建一个 ServletContextTemplateResolver 的实例
        ServletContextTemplateResolver resolver = new ServletContextTemplateResolver(context);
        resolver.setPrefix("WEB-INF/template/");
        resolver.setSuffix(".html");
        resolver.setCharacterEncoding("UTF-8");

        // 3. 把 resolver 和 engine 关联起来
        engine.setTemplateResolver(resolver);

        // 4. 把创建好的 engine 对象放到 ServletContext 对象中去
        context.setAttribute("engine", engine);
        System.out.println("TemplateEngine 初始化完毕!");

    }

    @Override
    public void contextDestroyed(ServletContextEvent servletContextEvent) {

    }
}
LoadServlet 类
LoadServlet 类 用于处理 GET 请求,并做出 GET 响应。
class Photo {
    public String name;
    public String url;
}

@WebServlet("/load")
public class LoadServlet extends HttpServlet {
    @Override
    protected void doGet(HttpServletRequest req, HttpServletResponse resp) throws ServletException, IOException {
        resp.setContentType("text/html; charset = UTF-8");
        List<Photo> photoList = loading();
        String linkSubmit = "http://127.0.0.1:8080/PhotoAlbum/upload.html";

        // 将前端代码 ${photos} 和 后端代码 photos 联系起来
        WebContext webContext = new WebContext(req, resp, this.getServletContext());
        webContext.setVariable("photos", photoList);
        webContext.setVariable("link_submit", linkSubmit);

        // 从 ServletContext 对象中取出初始化后的 TemplateEngine 实例
        ServletContext context = this.getServletContext();
        TemplateEngine engine = (TemplateEngine) context.getAttribute("engine");

        // 完成模板的最后渲染
        // 下面的 photos_template 表示的是模板文件,去掉了 html 后缀
        String html = engine.process("photos_template", webContext);
        resp.getWriter().write(html);

    }

    /**
     * loading 方法用来扫描 /webapp/image 这个目录,并将所有的文件当作对象,放入一个顺序表中
     */
    private List<Photo> loading() {
        List<Photo> photoList = new ArrayList<>();

        // /webapp/image 这个目录 是当前存放在项目中的目录,并不是绝对路径
        ServletContext context = this.getServletContext();
        // 我们需要通过 getRealPath 这个方法,将 webapp 下面的目录,转换成磁盘的绝对路径
        String path = context.getRealPath("/image");
        // 如果不理解绝对路径,打印出来,看一下,就明白了,其实是从系统盘开始,一直往下搜寻而已
        System.out.println(path);

        // 根据 path 路径,就可以看里面有哪些图片文件了
        File root = new File(path);
        // listFiles 方法,返回一个 File 类型的数组
        File[] files = root.listFiles();
        for (File f : files) {
            Photo photo = new Photo();
            photo.name = f.getName();
            photo.url = "image/" + f.getName();
            photoList.add(photo);
        }

        return photoList;
    }
}
UploadServlet 类
UploadServlet 类 用于处理 POST 请求,并做出 POST 响应。
@MultipartConfig
@WebServlet("/upload")
public class UploadServlet extends HttpServlet {
    @Override
    protected void doPost(HttpServletRequest req, HttpServletResponse resp) throws ServletException, IOException {

        // 1. 从 req 对象中,读取 Part 对象 ( 这其实就是在读取 HTTP 请求上传过来的图片 )
        Part part = req.getPart("photo");

        // 2. 把图片放到指定路径中
        // 这里依然要获取磁盘上的绝对路径
        ServletContext context = this.getServletContext();
        String path = context.getRealPath("/image");
        part.write(path + "/" + part.getSubmittedFileName());

        // 3. 从上传页面重定向加载页面
        resp.sendRedirect("load");

    }
}
客户端代码
form 表单用于提交图片
form 表单用于提交图片,也就是发起 POST 请求。
DOCTYPE html>
<html lang="en">
<head>
    <meta charset="UTF-8">
    <meta http-equiv="X-UA-Compatible" content="IE=edge">
    <meta name="viewport" content="width=device-width, initial-scale=1.0">
    <title>上传图片title>
head>
<body>

    <form action="upload" method="POST" enctype="multipart/form-data">
        <input type="file" name="photo">
        <input type="submit" value="提交图片">
    form>

body>
html>
html 模板文件
虽然 html 模板文件,说起来是一个崭新的模板,但它的代码逻辑实际上是根据自己的需求,对原来纯前端代码进行了改进。可以对比前后两个的改动之处。
此外,这里的 html 模板文件,一定要与服务器端的代码约定好,每一个变量、路径…都需要约定好。否则,页面的最终显示效果就达不到预期要求,很大可能,浏览器直接就会报错,这里就不演示了…
最后,我们一定要明确,这样的 html 模板文件是用来干什么的?
在 Web 开发中,它就是用来,让服务器端返回一个复杂的 html 页面的,模板的唯一意义:也就是被服务器端用代码进行覆盖的!
只有深刻理解了模板文件的意义,才能够使用 Java 代码将其联系起来,这也是基于模板引擎实现 Web 开发最关键所在。
<head>
    <meta charset="UTF-8">
    <title>相册title>
    <link rel="stylesheet" href="./style.css">
head>
<body>


    <figure class="sample" th:each="photo : ${photos}">
        <img th:src="${photo.url}" alt="sample1" />
        <figcaption>
            <div>
                <h2 th:text="${photo.name}">h2>
            div>
        figcaption>
        <a th:href="${photo.url}">a>
    figure>


    <a th:href="${link_submit}" class="link">点击提交图片a>
body>
最终展示结果
总结流程
- 搭建项目环境(引入依赖,创建好目录)
- 把纯前端的代码拷贝到项目中
- 基于纯前端代码,稍作改动,实现 html 页面模板
- 基于 Listener 监听器,初始化模板引擎,在 ServletContext 中,构造一个TemplateEngine 实例,以备后用
- 实现 Servlet 业务代码,通过 doGet 方法处理 GET 请求,doPost 方法处理 POST 请求。