kubeadm部署k8s高可用集群
1. 配置清单
- 注意这里环境master最少3台。
| 设备 | IP |
|---|---|
| master1 | 192.168.2.10 |
| master2 | 192.168.2.20 |
| master3 | 192.168.2.30 |
| node1 | 192.168.2.40 |
| VIP | 192.168.2.100 |
2. k8s节点Host及防火墙配置
- master1、master2、master3、node1机器进行如下配置:
###添加host解析:
vim /etc/hosts
添加以下内容:
192.168.2.10 master1
192.168.2.20 master2
192.168.2.30 master3
192.168.2.40 node1
##关闭selinux
setenforce 0
sed -i '/SELINUX/s/enforcing/disabled/g'  /etc/sysconfig/selinux
##关闭防火墙
systemctl   stop     firewalld.service
systemctl   disable   firewalld.service
##时间同步
yum install ntpdate -y
ntpdate  pool.ntp.org
##修改对应节点的主机名:
每个节点执行这条命令即可,注意这条命令网卡名需要根据实际情况填写
hostname `cat /etc/hosts|grep $(ifconfig ens33|grep broadcast|awk '{print $2}')|awk '{print $2}'`;su
##关闭swap分区
swapoff -a
sed -ri 's/.*swap.*/#&/g' /etc/fstab
3. linux内核参数设置和优化:
- master1、master2、master3、node1机器进行如下配置
##开启ipvs模块
cat > /etc/sysconfig/modules/ipvs.modules <<EOF
#!/bin/sh
modprobe -- ip_vs
modprobe -- ip_vs_rr
modprobe -- ip_vs_wrr
modprobe -- ip_vs_sh
modprobe -- nf_conntrack_ipv4
EOF
##开启执行权限并执行ipvs.modules&&确认ipvs模块加载成功
chmod 755 /etc/sysconfig/modules/ipvs.modules && bash /etc/sysconfig/modules/ipvs.modules && lsmod | grep -e ip_vs -e nf_conntrack_ipv4
##安装ipset、ipvsadm
yum install -y ipset ipvsadm
##各节点内核调整,将桥接的IPv4流量传递到iptables的链
cat > /etc/sysctl.d/k8s.conf << EOF
net.bridge.bridge-nf-call-ip6tables = 1
net.bridge.bridge-nf-call-iptables = 1
net.ipv4.ip_nonlocal_bind = 1
net.ipv4.ip_forward = 1
EOF
sysctl --system
4. 安装docker
- master1、master2、master3、node1机器进行如下配置
##下载yum源
wget -O /etc/yum.repos.d/docker-ce.repo https://mirrors.aliyun.com/docker-ce/linux/centos/docker-ce.repo
##安装docker
yum  -y install docker-ce
##启动并开机自启
systemctl  start docker && systemctl enable docker
## 各节点配置docker加速器并修改成k8s驱动
vi /etc/docker/daemon.json
{
  "exec-opts": ["native.cgroupdriver=systemd"],
  "log-driver": "json-file",
  "log-opts": {
    "max-size": "100m"
  },
  "storage-driver": "overlay2",
  "storage-opts": [
    "overlay2.override_kernel_check=true"
  ]
}
##重启docker
systemctl restart docker
5. 所有master节点安装haproxy和keepalived服务
yum -y install haproxy keepalived
6. 修改master1节点keepalived配置文件
mv /etc/keepalived/keepalived.conf /etc/keepalived/keepalived.conf.bak
vim /etc/keepalived/keepalived.conf
! Configuration File for keepalived
 global_defs {
 notification_email {
      [email protected]
 }
    notification_email_from [email protected]
    smtp_server 127.0.0.1
    smtp_connect_timeout 30
    router_id LVS_DEVEL
 }
 vrrp_script chk_haproxy {
    script "/data/sh/check_haproxy.sh"   检测脚本路径
   interval 2
   weight 2
 }
 # VIP1
 vrrp_instance VI_1 {
     state  MASTER
     interface ens33       指定网卡
     virtual_router_id 151    虚拟路由id
     priority 100              优先级,优先级越高那个为master
     advert_int 5
     nopreempt
     authentication {
         auth_type  PASS
         auth_pass  2222
     }
     virtual_ipaddress {
         192.168.2.100    VIP地址
     }
     track_script {
     chk_haproxy
    }
 }
7. 修改master2和master3节点keeplived配置文件
- master2配置文件如下:
mv  /etc/keepalived/keepalived.conf /etc/keepalived/keepalived.conf.bak
vim /etc/keepalived/keepalived.conf
! Configuration File for keepalived
 global_defs {
 notification_email {
      [email protected]
 }
    notification_email_from [email protected]
    smtp_server 127.0.0.1
    smtp_connect_timeout 30
    router_id LVS_DEVEL
 }
 vrrp_script chk_haproxy {
    script "/data/sh/check_haproxy.sh"   检测脚本路径
   interval 2
   weight 2
 }
 # VIP1
 vrrp_instance VI_1 {
     state  BACKUP
     interface ens33       指定网卡
     virtual_router_id 151    虚拟路由id
     priority 90              优先级,优先级越高那个为master
     advert_int 5
     nopreempt
     authentication {
         auth_type  PASS
         auth_pass  2222
     }
     virtual_ipaddress {
         192.168.2.100    VIP地址
     }
     track_script {
     chk_haproxy
    }
 }
- master3配置文件如下:
mv  /etc/keepalived/keepalived.conf /etc/keepalived/keepalived.conf.bak
scp -r 192.168.2.20:/etc/keepalived/keepalived.conf /etc/keepalived/
vim /etc/keepalived/keepalived.conf
##里面的除了优先级修改为80其他和master2配置文件一下修改如下:
priority 80
8. master节点haproxy配置文件都一样如下:
mv /etc/haproxy/haproxy.cfg /etc/haproxy/haproxy.cfg.bak
vim /etc/haproxy/haproxy.cfg
global
    log /dev/log    local0
    log /dev/log    local1 notice
    pidfile     /var/run/haproxy.pid
    chroot /var/lib/haproxy
    stats socket /var/run/haproxy-admin.sock mode 660 level admin
    stats timeout 30s
    user haproxy
    group haproxy
    daemon
    nbproc 1
defaults
    log     global
    timeout connect 5000
    timeout client  10m
    timeout server  10m
listen  admin_stats
    bind 0.0.0.0:10080
    mode http
    log 127.0.0.1 local0 err
    stats refresh 30s
    stats uri /status
    stats realm welcome login\ Haproxy
    stats auth admin:123456
    stats hide-version
    stats admin if TRUE
listen kube-master
    bind 0.0.0.0:8443
    mode tcp
    option tcplog
    balance source
    server master1 192.168.2.10:6443 check inter 2000 fall 2 rise 2 weight 1
    server master2 192.168.2.20:6443 check inter 2000 fall 2 rise 2 weight 1
    server master2 192.168.2.30:6443 check inter 2000 fall 2 rise 2 weight 1
9. 每台master节点编写健康监测脚本
mkdir -p /data/sh
vim /data/sh/check_haproxy.sh
#!/bin/bash
#2022-4-13
#auto check haprox process
netstat -ntlp | grep 8443 > /dev/null
if [ $? -ne 0 ];then
systemctl stop keepalived.service
fi
chmod +x /data/sh/check_haproxy.sh  添加执行权限
10. master节点启动keepalived和haproxy服务并加入开机启动
systemctl start haproxy && systemctl enable haproxy
systemctl start keepalived && systemctl enable keepalived
11. 查看VIP地址
##下面的命令在master1上查看
[root@master1 ~]# ip add
1: lo: <LOOPBACK,UP,LOWER_UP> mtu 65536 qdisc noqueue state UNKNOWN group default qlen 1000
    link/loopback 00:00:00:00:00:00 brd 00:00:00:00:00:00
    inet 127.0.0.1/8 scope host lo
       valid_lft forever preferred_lft forever
    inet6 ::1/128 scope host
       valid_lft forever preferred_lft forever
2: ens33: <BROADCAST,MULTICAST,UP,LOWER_UP> mtu 1500 qdisc pfifo_fast state UP group default qlen 1000
    link/ether 00:0c:29:37:25:9c brd ff:ff:ff:ff:ff:ff
    inet 192.168.2.10/24 brd 192.168.2.255 scope global noprefixroute ens33
       valid_lft forever preferred_lft forever
    inet 192.168.2.100/32 scope global ens33
       valid_lft forever preferred_lft forever
    inet6 fe80::20c:29ff:fe37:259c/64 scope link
       valid_lft forever preferred_lft forever
12. 配置k8s各节点的yum源
cat>>/etc/yum.repos.d/kubernetes.repo<<EOF
[kubernetes]
name=Kubernetes
baseurl=https://mirrors.aliyun.com/kubernetes/yum/repos/kubernetes-el7-x86_64
enabled=1
gpgcheck=0
repo_gpgcheck=0
gpgkey=https://mirrors.aliyun.com/kubernetes/yum/doc/yum-key.gpg
EOF
13. 安装软件kubeadm、kubectl、kubelet
- 安装的kubeadm、kubectl和kubelet要和kubernetes版本一致
- 注意:kubelet加入开机启动之后不手动启动,要不然会报错,初始化集群之后集群会自动启动kubelet服务
yum install -y kubeadm-1.20.4 kubelet-1.20.4 kubectl-1.20.4
##启动kubelet并开机自启
systemctl enable kubelet.service && systemctl start kubelet.service
14. 获取kubeadm默认配置文件并修改
- 注意这个配置是在master1节点配置
kubeadm config print init-defaults > kubeadm-init.yaml
vim kubeadm-init.yaml

apiVersion: kubeadm.k8s.io/v1beta2
bootstrapTokens:
- groups:
  - system:bootstrappers:kubeadm:default-node-token
  token: abcdef.0123456789abcdef
  ttl: 24h0m0s
  usages:
  - signing
  - authentication
kind: InitConfiguration
localAPIEndpoint:
  advertiseAddress: 192.168.2.10    #指定本机IP地址
  bindPort: 6443      #api端口号
nodeRegistration:
  criSocket: /var/run/dockershim.sock
  name: master1    #本机主机名
  taints:
  - effect: NoSchedule
    key: node-role.kubernetes.io/master
---
apiServer:
  timeoutForControlPlane: 4m0s
apiVersion: kubeadm.k8s.io/v1beta2
certificatesDir: /etc/kubernetes/pki
clusterName: kubernetes
controlPlaneEndpoint: "192.168.2.100:8443" #vip地址:haproxy监听端口
controllerManager: {}
dns:
  type: CoreDNS
etcd:
  local:
    dataDir: /var/lib/etcd
imageRepository: registry.aliyuncs.com/google_containers  #指定镜像仓库地址
kind: ClusterConfiguration
kubernetesVersion: v1.20.4  #指定k8s版本
networking:
  dnsDomain: cluster.local
  podSubnet: 10.244.0.0/16   #指定创建pod的IP地址范围
  serviceSubnet: 10.10.0.0/16 #指定创建service的IP地址范围
scheduler: {}
15. master1下载镜像
kubeadm config images pull --config kubeadm-init.yaml
[config/images] Pulled registry.aliyuncs.com/google_containers/kube-apiserver:1.20.4
[config/images] Pulled registry.aliyuncs.com/google_containers/kube-controller-manager:1.20.4
[config/images] Pulled registry.aliyuncs.com/google_containers/kube-scheduler:1.20.4
[config/images] Pulled registry.aliyuncs.com/google_containers/kube-proxy:1.20.4
[config/images] Pulled registry.aliyuncs.com/google_containers/pause:3.2
[config/images] Pulled registry.aliyuncs.com/google_containers/etcd:3.4.13-0
[config/images] Pulled registry.aliyuncs.com/google_containers/coredns:1.7.0
16. 执行kubeadm init初始化安装Master
kubeadm init --config kubeadm-init.yaml  --upload-certs

[init] Using Kubernetes version: v1.20.4
[preflight] Running pre-flight checks
	[WARNING SystemVerification]: this Docker version is not on the list of validated versions: 20.10.14. Latest validated version: 19.03
[preflight] Pulling images required for setting up a Kubernetes cluster
[preflight] This might take a minute or two, depending on the speed of your internet connection
[preflight] You can also perform this action in beforehand using 'kubeadm config images pull'
[certs] Using certificateDir folder "/etc/kubernetes/pki"
[certs] Generating "ca" certificate and key
[certs] Generating "apiserver" certificate and key
[certs] apiserver serving cert is signed for DNS names [kubernetes kubernetes.default kubernetes.default.svc kubernetes.default.svc.cluster.local master1] and IPs [10.10.0.1 192.168.2.10 192.168.2.100]
[certs] Generating "apiserver-kubelet-client" certificate and key
[certs] Generating "front-proxy-ca" certificate and key
[certs] Generating "front-proxy-client" certificate and key
[certs] Generating "etcd/ca" certificate and key
[certs] Generating "etcd/server" certificate and key
[certs] etcd/server serving cert is signed for DNS names [localhost master1] and IPs [192.168.2.10 127.0.0.1 ::1]
[certs] Generating "etcd/peer" certificate and key
[certs] etcd/peer serving cert is signed for DNS names [localhost master1] and IPs [192.168.2.10 127.0.0.1 ::1]
[certs] Generating "etcd/healthcheck-client" certificate and key
[certs] Generating "apiserver-etcd-client" certificate and key
[certs] Generating "sa" key and public key
[kubeconfig] Using kubeconfig folder "/etc/kubernetes"
[endpoint] WARNING: port specified in controlPlaneEndpoint overrides bindPort in the controlplane address
[kubeconfig] Writing "admin.conf" kubeconfig file
[endpoint] WARNING: port specified in controlPlaneEndpoint overrides bindPort in the controlplane address
[kubeconfig] Writing "kubelet.conf" kubeconfig file
[endpoint] WARNING: port specified in controlPlaneEndpoint overrides bindPort in the controlplane address
[kubeconfig] Writing "controller-manager.conf" kubeconfig file
[endpoint] WARNING: port specified in controlPlaneEndpoint overrides bindPort in the controlplane address
[kubeconfig] Writing "scheduler.conf" kubeconfig file
[kubelet-start] Writing kubelet environment file with flags to file "/var/lib/kubelet/kubeadm-flags.env"
[kubelet-start] Writing kubelet configuration to file "/var/lib/kubelet/config.yaml"
[kubelet-start] Starting the kubelet
[control-plane] Using manifest folder "/etc/kubernetes/manifests"
[control-plane] Creating static Pod manifest for "kube-apiserver"
[control-plane] Creating static Pod manifest for "kube-controller-manager"
[control-plane] Creating static Pod manifest for "kube-scheduler"
[etcd] Creating static Pod manifest for local etcd in "/etc/kubernetes/manifests"
[wait-control-plane] Waiting for the kubelet to boot up the control plane as static Pods from directory "/etc/kubernetes/manifests". This can take up to 4m0s
[kubelet-check] Initial timeout of 40s passed.
[apiclient] All control plane components are healthy after 69.514239 seconds
[upload-config] Storing the configuration used in ConfigMap "kubeadm-config" in the "kube-system" Namespace
[kubelet] Creating a ConfigMap "kubelet-config-1.20" in namespace kube-system with the configuration for the kubelets in the cluster
[upload-certs] Storing the certificates in Secret "kubeadm-certs" in the "kube-system" Namespace
[upload-certs] Using certificate key:
6d36ec5d811f3d7fd7b632a9c7d462d2ab7d632af383a6a76cf7b716bca9ab47
[mark-control-plane] Marking the node master1 as control-plane by adding the labels "node-role.kubernetes.io/master=''" and "node-role.kubernetes.io/control-plane='' (deprecated)"
[mark-control-plane] Marking the node master1 as control-plane by adding the taints [node-role.kubernetes.io/master:NoSchedule]
[bootstrap-token] Using token: abcdef.0123456789abcdef
[bootstrap-token] Configuring bootstrap tokens, cluster-info ConfigMap, RBAC Roles
[bootstrap-token] configured RBAC rules to allow Node Bootstrap tokens to get nodes
[bootstrap-token] configured RBAC rules to allow Node Bootstrap tokens to post CSRs in order for nodes to get long term certificate credentials
[bootstrap-token] configured RBAC rules to allow the csrapprover controller automatically approve CSRs from a Node Bootstrap Token
[bootstrap-token] configured RBAC rules to allow certificate rotation for all node client certificates in the cluster
[bootstrap-token] Creating the "cluster-info" ConfigMap in the "kube-public" namespace
[kubelet-finalize] Updating "/etc/kubernetes/kubelet.conf" to point to a rotatable kubelet client certificate and key
[addons] Applied essential addon: CoreDNS
[endpoint] WARNING: port specified in controlPlaneEndpoint overrides bindPort in the controlplane address
[addons] Applied essential addon: kube-proxy

Your Kubernetes control-plane has initialized successfully!

To start using your cluster, you need to run the following as a regular user:

  mkdir -p $HOME/.kube
  sudo cp -i /etc/kubernetes/admin.conf $HOME/.kube/config
  sudo chown $(id -u):$(id -g) $HOME/.kube/config

Alternatively, if you are the root user, you can run:

  export KUBECONFIG=/etc/kubernetes/admin.conf

You should now deploy a pod network to the cluster.
Run "kubectl apply -f [podnetwork].yaml" with one of the options listed at:
  https://kubernetes.io/docs/concepts/cluster-administration/addons/

You can now join any number of the control-plane node running the following command on each as root:

  kubeadm join 192.168.2.100:8443 --token abcdef.0123456789abcdef \
    --discovery-token-ca-cert-hash sha256:61ecc3e8bdf3daf98678d19f6468418423094909bf531c1a8f7d09a98f10828b \
    --control-plane --certificate-key 6d36ec5d811f3d7fd7b632a9c7d462d2ab7d632af383a6a76cf7b716bca9ab47

Please note that the certificate-key gives access to cluster sensitive data, keep it secret!
As a safeguard, uploaded-certs will be deleted in two hours; If necessary, you can use
"kubeadm init phase upload-certs --upload-certs" to reload certs afterward.

Then you can join any number of worker nodes by running the following on each as root:

kubeadm join 192.168.2.100:8443 --token abcdef.0123456789abcdef \
    --discovery-token-ca-cert-hash sha256:61ecc3e8bdf3daf98678d19f6468418423094909bf531c1a8f7d09a98f10828b
17. 将master2、master3加入k8s集群
##在master2、master3执行以下命令
kubeadm join 192.168.2.100:8443 --token abcdef.0123456789abcdef \
    --discovery-token-ca-cert-hash sha256:61ecc3e8bdf3daf98678d19f6468418423094909bf531c1a8f7d09a98f10828b \
    --control-plane --certificate-key 6d36ec5d811f3d7fd7b632a9c7d462d2ab7d632af383a6a76cf7b716bca9ab47
##注意每个人创建的token值不一样需要在master1执行初始化时显示的这条命令复制过来执行
18. 将所有node节点加入k8s集群
##下面这条命令在node1执行
kubeadm join 192.168.2.100:8443 --token abcdef.0123456789abcdef \
    --discovery-token-ca-cert-hash sha256:61ecc3e8bdf3daf98678d19f6468418423094909bf531c1a8f7d09a98f10828b
##  注意每个人创建的token值不一样需要在master1执行初始化时显示的这条命令复制过来执行
19. 所有master节点执行以下命令
mkdir -p $HOME/.kube
sudo cp -i /etc/kubernetes/admin.conf $HOME/.kube/config
sudo chown $(id -u):$(id -g) $HOME/.kube/config
##设置master环境变量
echo "export KUBECONFIG=/etc/kubernetes/admin.conf" >> /etc/profile
source /etc/profile
##在master配置k8s命令自动补全
source <(kubectl completion bash) && echo 'source <(kubectl completion bash)' >> /root/.bashrc
##在任意master节点查看集群状态
kubectl get nodes
NAME      STATUS     ROLES                  AGE     VERSION
master1   NotReady   control-plane,master   14m     v1.20.4
master2   NotReady   control-plane,master   3m38s   v1.20.4
master3   NotReady   control-plane,master   94s     v1.20.4
node1     NotReady   <none>                 12m     v1.20.4
20. 安装网络插件flanneld
##以下命令在任意一台master节点执行即可
#下载kube-flannel.yml
wget https://raw.githubusercontent.com/coreos/flannel/master/Documentation/kube-flannel.yml
#部署flannel网络
kubectl apply -f kube-flannel.yml
#过一分钟左右查看各节点状态,变为Ready说明网络打通了
kubectl get nodes
NAME      STATUS   ROLES                  AGE     VERSION
master1   Ready    control-plane,master   20m     v1.20.4
master2   Ready    control-plane,master   8m42s   v1.20.4
master3   Ready    control-plane,master   6m38s   v1.20.4
node1     Ready    <none>                 17m     v1.20.4
21. 查看所有pod是否变为Running
[root@master1 ~]# kubectl get pod --all-namespaces
NAMESPACE     NAME                              READY   STATUS    RESTARTS   AGE
kube-system   coredns-7f89b7bc75-fh949          1/1     Running   0          21m
kube-system   coredns-7f89b7bc75-wwww4          1/1     Running   0          21m
kube-system   etcd-master1                      1/1     Running   0          22m
kube-system   etcd-master2                      1/1     Running   0          10m
kube-system   etcd-master3                      1/1     Running   0          8m40s
kube-system   kube-apiserver-master1            1/1     Running   0          22m
kube-system   kube-apiserver-master2            1/1     Running   0          10m
kube-system   kube-apiserver-master3            1/1     Running   0          8m44s
kube-system   kube-controller-manager-master1   1/1     Running   1          22m
kube-system   kube-controller-manager-master2   1/1     Running   0          10m
kube-system   kube-controller-manager-master3   1/1     Running   0          8m43s
kube-system   kube-flannel-ds-bcdrb             1/1     Running   0          4m12s
kube-system   kube-flannel-ds-dwdp8             1/1     Running   0          4m12s
kube-system   kube-flannel-ds-m58fc             1/1     Running   0          4m12s
kube-system   kube-flannel-ds-w9d4t             1/1     Running   0          4m12s
kube-system   kube-proxy-5bwm7                  1/1     Running   0          21m
kube-system   kube-proxy-9g977                  1/1     Running   0          10m
kube-system   kube-proxy-bbxpp                  1/1     Running   0          19m
kube-system   kube-proxy-nrkdc                  1/1     Running   0          8m44s
kube-system   kube-scheduler-master1            1/1     Running   1          22m
kube-system   kube-scheduler-master2            1/1     Running   0          10m
kube-system   kube-scheduler-master3            1/1     Running   0          8m44s
##如果不是Running输入下面命令查看pod报错信息
kubectl describe pod  <报错pod名称> -n <报错pod所属命名空间>
22. 去除Master节点污点,使其可以分配Pod资源
##下面的命令在任意一台master执行即可
kubectl taint nodes --all node-role.kubernetes.io/master-
23. 部署dashboard
##下载dashboard的部署yaml文件
wget https://raw.githubusercontent.com/kubernetes/dashboard/v2.0.0-rc5/aio/deploy/recommended.yaml
##2)修改文件recommended.yaml的39行内容,#因为默认情况下,service的类型是cluster IP,需更改为NodePort的方式,便于访问,也可映射到指定的端口。
vim  recommended.yaml
spec:
  type: NodePort
  ports:
    - port: 443
      targetPort: 8443
      nodePort: 31001
  selector:
    k8s-app: kubernetes-dashboard

##部署dashboard
kubectl   apply -f recommended.yaml
##查看dashboard部署是否成功
kubectl get pod -n kubernetes-dashboard
NAME                                         READY   STATUS    RESTARTS   AGE
dashboard-metrics-scraper-74db988864-kslc7   1/1     Running   0          40s
kubernetes-dashboard-7bbb9b5fc6-9jrjk        1/1     Running   0          40s
##上面这条命令需要几分钟pod状态才变成Running,因为需要下载镜像
#创建Dashboard的管理用户;
kubectl create serviceaccount dashboard-admin -n kube-system
#将创建的dashboard用户绑定为管理用户;
kubectl create clusterrolebinding dashboard-cluster-admin --clusterrole=cluster-admin --serviceaccount=kube-system:dashboard-admin
#获取刚刚创建的用户对应的Token名称;
kubectl get secrets -n kube-system | grep dashboard
#查看Token的详细信息;
kubectl describe secrets -n kube-system $(kubectl get secrets -n kube-system | grep dashboard |awk '{print $1}')
24.登录dashboard
-
打开浏览器输入任意masterIP地址:31001
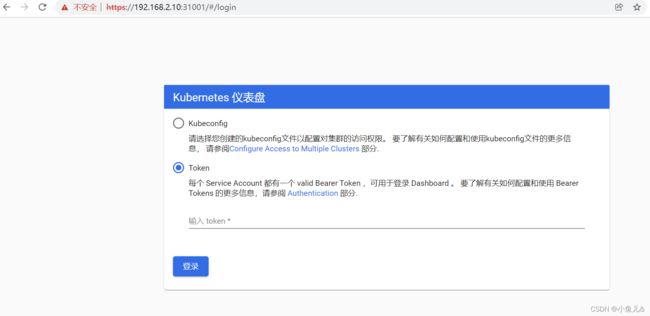
-
上面的token值在master上输入kubectl describe secrets -n kube-system $(kubectl get secrets -n kube-system | grep dashboard |awk ‘{print $1}’)可以得到结果。
-
输入token值进来点击Node查看各个节点信息。

25. 验证
- 把master1服务器关机查看一下服务是否可以正常运行。
##master1关机后正常情况下VIP地址会跳到master2机器上
[root@master2 ~]# ip add
1: lo: <LOOPBACK,UP,LOWER_UP> mtu 65536 qdisc noqueue state UNKNOWN group default qlen 1000
    link/loopback 00:00:00:00:00:00 brd 00:00:00:00:00:00
    inet 127.0.0.1/8 scope host lo
       valid_lft forever preferred_lft forever
    inet6 ::1/128 scope host
       valid_lft forever preferred_lft forever
2: ens33: <BROADCAST,MULTICAST,UP,LOWER_UP> mtu 1500 qdisc pfifo_fast state UP group default qlen 1000
    link/ether 00:0c:29:96:cf:51 brd ff:ff:ff:ff:ff:ff
    inet 192.168.2.20/24 brd 192.168.2.255 scope global noprefixroute ens33
       valid_lft forever preferred_lft forever
    inet 192.168.2.100/32 scope global ens33
       valid_lft forever preferred_lft forever
    inet6 fe80::20c:29ff:fe96:cf51/64 scope link
       valid_lft forever preferred_lft forever
3: docker0: <NO-CARRIER,BROADCAST,MULTICAST,UP> mtu 1500 qdisc noqueue state DOWN group default
    link/ether 02:42:ad:42:2f:de brd ff:ff:ff:ff:ff:ff
    inet 172.17.0.1/16 brd 172.17.255.255 scope global docker0
       valid_lft forever preferred_lft forever
4: flannel.1: <BROADCAST,MULTICAST,UP,LOWER_UP> mtu 1450 qdisc noqueue state UNKNOWN group default
    link/ether 66:94:21:c0:15:3c brd ff:ff:ff:ff:ff:ff
    inet 10.244.2.0/32 scope global flannel.1
       valid_lft forever preferred_lft forever
    inet6 fe80::6494:21ff:fec0:153c/64 scope link
       valid_lft forever preferred_lft forever
##从上面信息可以看到VIP地址飘逸成功,查看各个pod是否正常。
[root@master2 ~]# kubectl get pod --all-namespaces
NAMESPACE              NAME                                         READY   STATUS    RESTARTS   AGE
kube-system            coredns-7f89b7bc75-fh949                     1/1     Running   1          2d1h
kube-system            coredns-7f89b7bc75-wwww4                     1/1     Running   1          2d1h
kube-system            etcd-master1                                 1/1     Running   1          2d1h
kube-system            etcd-master2                                 1/1     Running   1          2d1h
kube-system            etcd-master3                                 1/1     Running   1          2d1h
kube-system            kube-apiserver-master1                       1/1     Running   1          2d1h
kube-system            kube-apiserver-master2                       1/1     Running   1          2d1h
kube-system            kube-apiserver-master3                       1/1     Running   1          2d1h
kube-system            kube-controller-manager-master1              1/1     Running   2          2d1h
kube-system            kube-controller-manager-master2              1/1     Running   1          2d1h
kube-system            kube-controller-manager-master3              1/1     Running   1          2d1h
kube-system            kube-flannel-ds-bcdrb                        1/1     Running   1          2d1h
kube-system            kube-flannel-ds-dwdp8                        1/1     Running   1          2d1h
kube-system            kube-flannel-ds-m58fc                        1/1     Running   1          2d1h
kube-system            kube-flannel-ds-w9d4t                        1/1     Running   1          2d1h
kube-system            kube-proxy-5bwm7                             1/1     Running   1          2d1h
kube-system            kube-proxy-9g977                             1/1     Running   1          2d1h
kube-system            kube-proxy-bbxpp                             1/1     Running   1          2d1h
kube-system            kube-proxy-nrkdc                             1/1     Running   1          2d1h
kube-system            kube-scheduler-master1                       1/1     Running   2          2d1h
kube-system            kube-scheduler-master2                       1/1     Running   1          2d1h
kube-system            kube-scheduler-master3                       1/1     Running   1          2d1h
kubernetes-dashboard   dashboard-metrics-scraper-74db988864-kslc7   1/1     Running   1          2d1h
kubernetes-dashboard   kubernetes-dashboard-7bbb9b5fc6-9jrjk        1/1     Running   1          2d1h
可以看的到pod都是Running状态。
##查看各个节点状态:
[root@master2 ~]# kubectl get nodes
NAME      STATUS     ROLES                  AGE    VERSION
master1   NotReady   control-plane,master   2d1h   v1.20.4
master2   Ready      control-plane,master   2d1h   v1.20.4
master3   Ready      control-plane,master   2d1h   v1.20.4
node1     Ready      <none>                 2d1h   v1.20.4
#可以看的出来master1状态为NotReady