简单前后端分离的token验证流程
文章目录
- 前言
- 一、后端流程
-
- 0 实体类user和DTO类UserDTO
- 1 引入jwt依赖
- 2 编写jwt工具类
- 3 前后端token验证流程
-
- 1 后端登陆接口和数据处理,返给前端token
-
- 1controlle层
- 2 service层次(这里的getone函数是mybatis-plus service层函数,因为结合使用了mybatis-plus所以dao层函数不用定义了)
- 2 后端自定义jwt拦截器 并注册拦截器
-
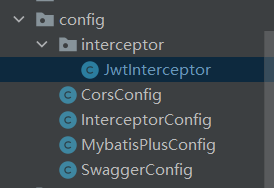
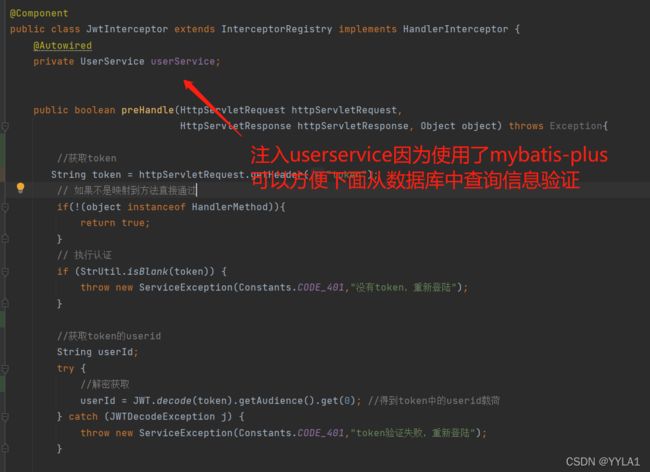
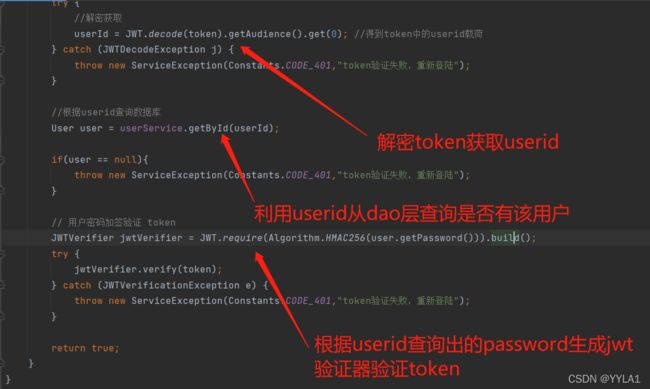
- 1 自定义jwt拦截器
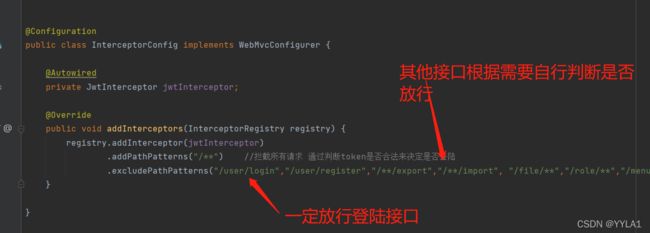
- 2 注册jwt拦截器(记得放行登陆接口)
- 一.五 设定统一返回类后后端返给前端的信息数据
- 二、前端流程
-
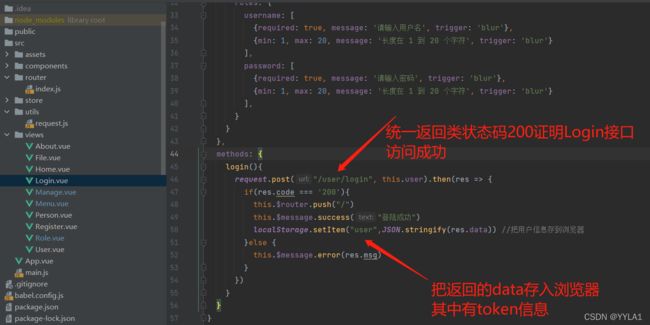
- 1.在登陆请求成功后把后端返回数据存储到浏览器
- 2 定义request.js 统一处理发送的请求为其加上token -------------------------------------------------------------------------统一处理响应 若包含统一返回类code为 token未验证成功code 401 则让用户到登陆页面重新登陆
- 三、加餐(基于上述分离流程增加简单的vue隐藏菜单)
-
- 1 首先观察我们登录时后端的返回结果
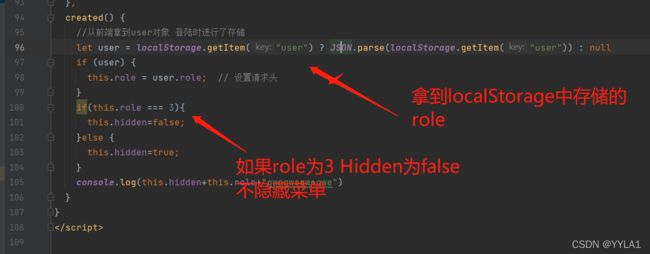
- 2 在Aside.vue 侧边栏中进行代码编写
- 总结
前言
本篇简单的token验证流程是学习自程序员青戈
程序员青戈的个人博客
最好熟悉mybatis-plus、
前端使用vue
一、后端流程
0 实体类user和DTO类UserDTO
前端登陆时后端把前端数据封装成DTO进行操作(这时的DTO中没有token)
然后设置好TOKEN后再把DTO返回给前端
1 引入jwt依赖
            com.auth0
            java-jwt
            3.10.3


            cn.hutool
            hutool-all
            5.7.20


            org.apache.poi
            poi-ooxml
            4.1.2
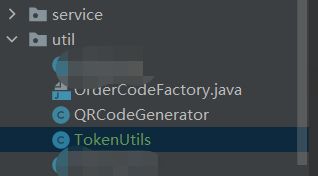
2 编写jwt工具类
import cn.hutool.core.date.DateUtil;
import com.auth0.jwt.JWT;
import com.auth0.jwt.algorithms.Algorithm;

import java.util.Date;

public class TokenUtils {
    /**
     * 生成Token
     * @return
     */
    public static String getToken(String userId,String sign){   //以password作为签名
        return JWT.create().withAudience(userId) // 将 user id 保存到 token 里面.作为载荷
                .withExpiresAt(DateUtil.offsetHour(new Date(),2)) //使用huttool里的util设置两小时过期
                .sign(Algorithm.HMAC256(sign)); // 以 password 作为 token 的密钥
    };
}
3 前后端token验证流程
前端发送登陆请求 – > 后端登陆接口接受 -->后端数据处理后返给前端token
–> 前端将token存储后 -->每次请求都带着这个token去访问 —>后端设置jwtoken拦截器 -->只放行登陆接口 -->如果前端访问别的接口必须带有token
–> 否则被拦截器拦截 并让前端回复到登陆页面
1 后端登陆接口和数据处理,返给前端token
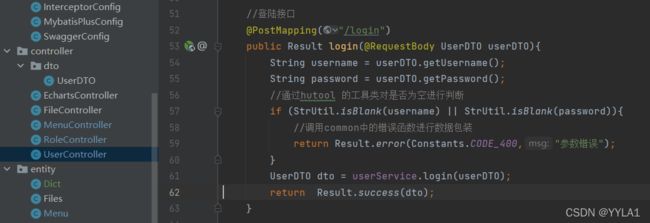
1controlle层
 //登陆接口
    @PostMapping("/login")
    public Result login(@RequestBody UserDTO userDTO){
        String username = userDTO.getUsername();
        String password = userDTO.getPassword();
        //通过hutool 的工具类对是否为空进行判断
        if (StrUtil.isBlank(username) || StrUtil.isBlank(password)){
            //调用common中的错误函数进行数据包装
            return Result.error(Constants.CODE_400,"参数错误");
        }
        UserDTO dto = userService.login(userDTO);
        return  Result.success(dto);
    }
2 service层次(这里的getone函数是mybatis-plus service层函数,因为结合使用了mybatis-plus所以dao层函数不用定义了)
这里的service层进行一番操作 最终返回带有token的userDTO给前端
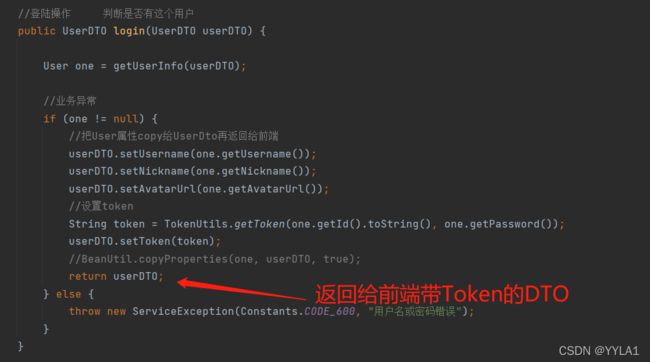
//登陆操作     判断是否有这个用户
    public UserDTO login(UserDTO userDTO) {

        User one = getUserInfo(userDTO);

        //业务异常
        if (one != null) {
            //把User属性copy给UserDto再返回给前端
            userDTO.setUsername(one.getUsername());
            userDTO.setNickname(one.getNickname());
            userDTO.setAvatarUrl(one.getAvatarUrl());
            //设置token
            String token = TokenUtils.getToken(one.getId().toString(), one.getPassword());
            userDTO.setToken(token);

            //返回前端带TOKEN的数据
            return userDTO;
        } else {
            throw new ServiceException(Constants.CODE_600, "用户名或密码错误");
        }
    }

    //根据UserDto获得UserInfo方法
    private User getUserInfo(UserDTO userDTO){

        //使用mybatis-plus进行操作
        QueryWrapper queryWrapper = new QueryWrapper<>();
        queryWrapper.eq("username", userDTO.getUsername());
        queryWrapper.eq("password", userDTO.getPassword());
        User one;  //根据UserDto从数据库查询User
        //sql异常 系统异常
        try {
            one = getOne(queryWrapper); //根据UserDto从数据库查询User
        }catch (Exception e){
            LOG.error(e);
            throw new ServiceException(Constants.CODE_500,"系统错误");
        }

        return one;
    }
2 后端自定义jwt拦截器 并注册拦截器
1 自定义jwt拦截器
代码如下
import cn.hutool.core.util.StrUtil;
import com.auth0.jwt.JWT;
import com.auth0.jwt.JWTVerifier;
import com.auth0.jwt.algorithms.Algorithm;
import com.auth0.jwt.exceptions.JWTDecodeException;
import com.auth0.jwt.exceptions.JWTVerificationException;
import com.example.back.common.Constants;
import com.example.back.entity.User;
import com.example.back.exception.ServiceException;
import com.example.back.service.UserService;
import org.springframework.beans.factory.annotation.Autowired;
import org.springframework.stereotype.Component;
import org.springframework.web.method.HandlerMethod;
import org.springframework.web.servlet.HandlerInterceptor;
import org.springframework.web.servlet.config.annotation.InterceptorRegistry;

import javax.servlet.http.HttpServletRequest;
import javax.servlet.http.HttpServletResponse;

@Component
public class JwtInterceptor extends InterceptorRegistry implements HandlerInterceptor {
    @Autowired
    private UserService userService;


    public boolean preHandle(HttpServletRequest httpServletRequest,
                             HttpServletResponse httpServletResponse, Object object) throws Exception{

        //获取token
       String token = httpServletRequest.getHeader("token");
        // 如果不是映射到方法直接通过
        if(!(object instanceof HandlerMethod)){
            return true;
        }
        // 执行认证
        if (StrUtil.isBlank(token)) {
            throw new ServiceException(Constants.CODE_401,"没有token,重新登陆");
        }

        //获取token的userid
        String userId;
        try {
            //解密获取
            userId = JWT.decode(token).getAudience().get(0); //得到token中的userid载荷
        } catch (JWTDecodeException j) {
            throw new ServiceException(Constants.CODE_401,"token验证失败,重新登陆");
        }

        //根据userid查询数据库
        User user = userService.getById(userId);

        if(user == null){
            throw new ServiceException(Constants.CODE_401,"token验证失败,重新登陆");
        }

        // 用户密码加签验证 token
        JWTVerifier jwtVerifier = JWT.require(Algorithm.HMAC256(user.getPassword())).build();
        try {
            jwtVerifier.verify(token);
        } catch (JWTVerificationException e) {
            throw new ServiceException(Constants.CODE_401,"token验证失败,重新登陆");
        }

        return true;
    }
}
2 注册jwt拦截器(记得放行登陆接口)
代码如下
@Configuration
public class InterceptorConfig implements WebMvcConfigurer {

    @Autowired
    private JwtInterceptor jwtInterceptor;

    @Override
    public void addInterceptors(InterceptorRegistry registry) {
        registry.addInterceptor(jwtInterceptor)
                .addPathPatterns("/**")    //拦截所有请求 通过判断token是否合法来决定是否登陆
                .excludePathPatterns("/user/login","/user/register","/**/export","/**/import", "/file/**","/role/**","/menu/**"); //放行接口
    }

}
一.五 设定统一返回类后后端返给前端的信息数据
成功状态
{
    "code": 200,
    "msg": "SUCCESS",
    "data": {
        "username": "xiaogang",
        "password": "123123123",
        "token": "eyJ0eXAiOiJKV1QqweeiJIUzI1NiJ9.eyJhdWQiOiIqweqwehwIjoxNjUwMDI4OTEzfQ.DdTGv9dguw65SZtmQUwtdWS1uT5_15x4CBVgLApM5uE"
    }
}
失败状态
{
    "code": 401,
    "msg": "fail",
    "data": null
二、前端流程
1.在登陆请求成功后把后端返回数据存储到浏览器
2 定义request.js 统一处理发送的请求为其加上token -------------------------------------------------------------------------统一处理响应 若包含统一返回类code为 token未验证成功code 401 则让用户到登陆页面重新登陆
import axios from 'axios'
import router from "@/router";

const request = axios.create({
    baseURL: 'http://localhost:8081',  // 注意!! 这里是全局统一加上了 '/api' 前缀,也就是说所有接口都会加上'/api'前缀在,页面里面写接口的时候就不要加 '/api'了,否则会出现2个'/api',类似 '/api/api/user'这样的报错,切记!!!
    timeout: 5000
})

// request 拦截器
// 可以自请求发送前对请求做一些处理
// 比如统一加token,对请求参数统一加密
request.interceptors.request.use(config => {
    config.headers['Content-Type'] = 'application/json;charset=utf-8';
    //从前端拿到user对象 登陆时进行了存储
    let user = localStorage.getItem("user") ? JSON.parse(localStorage.getItem("user")) : null
    if (user) {
        config.headers['token'] = user.token;  // 设置请求头
    }
    return config
}, error => {
    return Promise.reject(error)
});

// response 拦截器
// 可以在接口响应后统一处理结果
request.interceptors.response.use(
    response => {
        let res = response.data;
        // 如果是返回的文件
        if (response.config.responseType === 'blob') {
            return res
        }
        // 兼容服务端返回的字符串数据
        if (typeof res === 'string') {
            res = res ? JSON.parse(res) : res
        }

        // 当权限验证不通过的时候给出提示
        if(res.code === '401'){
            router.push("/login")
        }

        return res;
    },
    error => {
        console.log('err' + error) // for debug
        return Promise.reject(error)
    }
)


export default request
三、加餐(基于上述分离流程增加简单的vue隐藏菜单)
1 首先观察我们登录时后端的返回结果
2 在Aside.vue 侧边栏中进行代码编写
总结
前端发送登陆请求 – > 后端登陆接口接受 -->后端数据处理后返给前端token
–> 前端将token存储后 -->每次请求都带着这个token去访问 —>后端设置jwtoken拦截器 -->只放行登陆接口 -->如果前端访问别的接口必须带有token
–> 否则被拦截器拦截 并让前端回复到登陆页面


 后台管理系统