VSCode配置C++环境
VSCode配置C++环境
下载VSCode和MinGW
我的电脑已安装VSCode和CodeBlocks。MinGW可以直接在CodeBlocks目录下面找。如果没有MinGW,请参考:
https://blog.csdn.net/weixin_45743271/article/details/119869412
配置
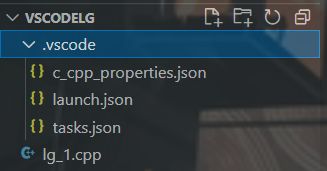
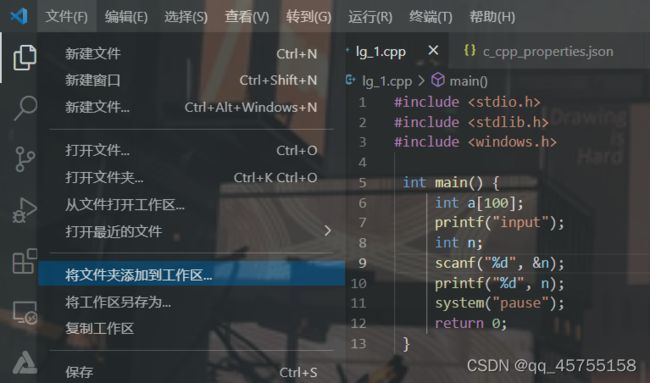
将你存放代码的文件夹添加到工作区。工作区默认有一个.vscode(或手动创建,不得改名)文件夹。在该文件夹下创建(或修改)以下三个文件:

其内容如下:
· c_cpp_properties.json:‘compilerPath’为你的g++路径,注意双斜线。
{
    "configurations": [
        {
          "name": "Win32",
          "includePath": ["${workspaceFolder}/**"],
          "defines": ["_DEBUG", "UNICODE", "_UNICODE"],
          "windowsSdkVersion": "10.0.17763.0",
          "compilerPath": "C:\\CodeBlocks\\MinGW\\bin\\g++.exe",
          "cStandard": "c11",
          "cppStandard": "c++17",
          "intelliSenseMode": "${default}"
        }
      ],
      "version": 4
}
· launch.json:‘miDebuggerPath’为你的gdb路径,由于我CodeBlocks的MinGW没有gdb.exe,故改为gdb32.exe。如果你单独安装MInGW,记得勾选mingw32-gdb.bin(调试编译后文件)。
{
    // 使用 IntelliSense 了解相关属性。
    // 悬停以查看现有属性的描述。
    // 欲了解更多信息,请访问: https://go.microsoft.com/fwlink/?linkid=830387
    "version": "0.2.0",
    "configurations": [
        {
            "name": "g++.exe build and debug active file",
            "type": "cppdbg",
            "request": "launch",
            "program": "${fileDirname}\\${fileBasenameNoExtension}.exe",
            "args": [],
            "stopAtEntry": false,
            "cwd": "${workspaceFolder}",
            "environment": [],
            "externalConsole": true,
            "MIMode": "gdb",
            "miDebuggerPath": "C:\\CodeBlocks\\MinGW\\bin\\gdb32.exe",
            "setupCommands": [
                {
                    "description": "为 gdb 启用整齐打印",
                    "text": "-enable-pretty-printing",
                    "ignoreFailures": true
                }
            ],
            "preLaunchTask": "task g++"
        }
    ]
}
· tasks.json,同样要修改g++路径和bin目录路径。
{
    // See https://go.microsoft.com/fwlink/?LinkId=733558
    // for the documentation about the tasks.json format
    "version": "2.0.0",
    "tasks": [
        {
        "type": "shell",
        "label": "task g++",
        "command": "C:\\CodeBlocks\\MinGW\\bin\\g++.exe",
        "args": [
            "-g",
            "${file}",
            "-o",
            "${fileDirname}\\${fileBasenameNoExtension}.exe",
            "-I",
            "D:\\VSCODELG",
            "-std=c++17"
        ],
        "options": {
            "cwd": "C:\\CodeBlocks\\MinGW\\bin"
        },
        "problemMatcher":[
            "$gcc"
        ],
        "group": "build",
        }
    ]
}
运行
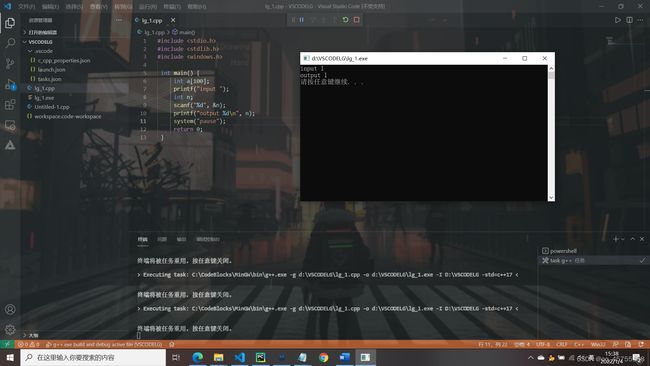
至此,环境配置成功。
一份更详细的参考:
https://blog.csdn.net/weixin_48468423/article/details/118950592
自定义VSCode背景
之后还可以设置自动切换壁纸。
由于pixiv的很多图源格式为.webp,可以在你保存图片的文件夹下加一个bat文件,内容如下:
ren *.webp *.png
保存后双击即可批处理调整图片格式。


