使用SpringBoot依赖jwt实现token加密,附带Postman进行测试
废话:
这段时间涉及到一个项目,老师第一次认真讲token,入坑很浅,花了一天算搞懂了一点点,做个笔记的目的是防止自己下次忘记,肯定有很多不完整的地方,可以通过评论区告诉我哈!
接下来的整个文章都是在讲述token的创建和使用。
前言:
整篇笔记实现了“登录”和“修改”两个方法,当用户没有通过“登录”方式获得token时,在执行“修改”方法时会报错,只有获得了登录方法给的token,并将token加入到“修改”方法请求的头部分,才能完成修改。
整体思维逻辑是写一个token认证方法,再结合mvc写一个过滤器,过滤器实现对所有网页进行过滤,并实现token认证方法。最后写两个注解,当某个方法上面的注解为@PassToken,则代表该方法不需要token令牌认证,直接过,而注解为@UserLoginToken的方法则需要进入到token认证方法中进行认证,如果认证通过则执行,不通过则不执行下面的方法。
0.引入依赖
要实现token令牌加密需要引入jwt依赖,要实现过滤就要引入web依赖,这里面我将我所用到的依赖附上,仅供参考。
在pom.xml文件中添加maven依赖,添加后点击右侧“maven”,刷新下载即可
 <!--引入jwt依赖-->
        <dependency>
            <groupId>com.auth0</groupId>
            <artifactId>java-jwt</artifactId>
            <version>3.4.1</version>
        </dependency>

<!--        引入mybatis-->
        <dependency>
            <groupId>org.mybatis.spring.boot</groupId>
            <artifactId>mybatis-spring-boot-starter</artifactId>
            <version>2.0.1</version>
        </dependency>

        <!--mysql驱动-->
        <dependency>
            <groupId>mysql</groupId>
            <artifactId>mysql-connector-java</artifactId>
            <scope>runtime</scope>
        </dependency>

        <!--lombok-->
        <dependency>
            <groupId>org.projectlombok</groupId>
            <artifactId>lombok</artifactId>
            <version>1.18.16</version>
            <optional>true</optional>
        </dependency>
<!--        web依赖-->
        <dependency>
            <groupId>org.springframework.boot</groupId>
            <artifactId>spring-boot-starter-web</artifactId>
        </dependency>
1.基本结构解释
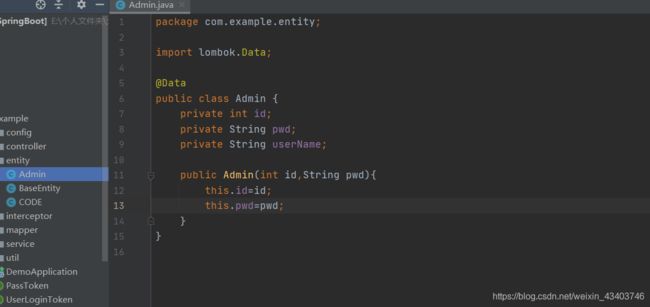
这里我已经写了一个实体类,对应数据库中的数据表“adminfo”,在数据表中有一些测试数据,这些数据包括id、密码、用户名

在“entity”包中,对应创建了它的实体类,取名“Admin”
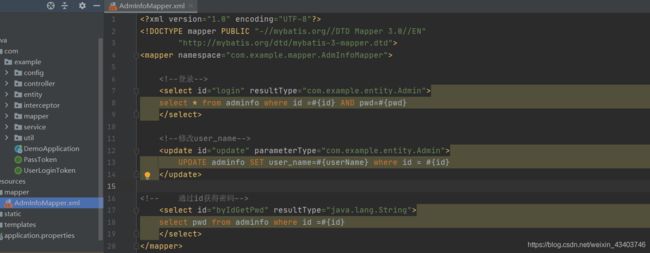
我们使用mybatis连接了数据库,并在“Mapper.xml”文件中编写了三个方法,分别是“通过id和密码登录”、“通过id来修改用户名”、“通过id来得到密码”。
这些都是为了测试使用,自己的具体的业务逻辑已自己的实际需要为准。
<!--登录-->
    <select id="login" resultType="com.example.entity.Admin">
    select * from adminfo where id =#{id} AND pwd=#{pwd}
    </select>
<!--修改user_name-->
    <update id="update" parameterType="com.example.entity.Admin">
        UPDATE adminfo SET user_name=#{userName} where id = #{id}
    </update>
<!--    通过id获得密码-->
    <select id="byIdGetPwd" resultType="java.lang.String">
    select pwd from adminfo where id =#{id}
    </select>
对应“Mapper.xml”文件,我们写了“mapper接口层”、“service业务实现层”、“controller执行层”,这里就不一一贴出代码了。
最后在Postman里面测试,成功实现了三个方法。
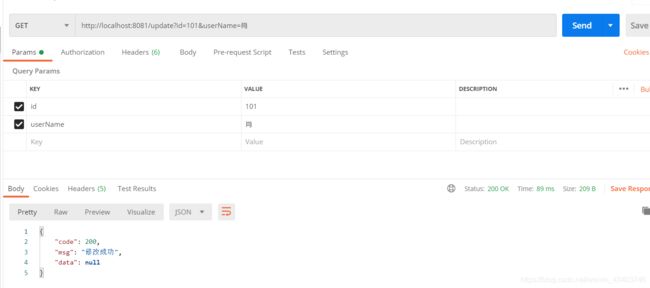
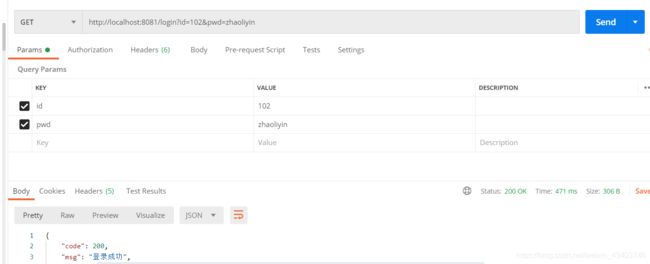
通过测试我们可以看到,即使用户没有先执行登录方法,依然可以执行“通过id修改用户名”的操作。这是不符合逻辑的,一个未登录的用户怎么能够修改自己的用户名呢?此时的token就上线了。
token的作用是根据用户信息生成一串加密码,在用户登录成功后后端将这串加密码发送给前端,前端将加密码存起来,下次请求数据时前端将token放到头部分传给后端,后端验证传来的token,确定了用户无误后才对应给请求做数据传输操作(释放权限)。
我们来想象一个场景,如果我们向后端发送一个请求获取用户我的昵称,那么后端是怎么识别你要获取哪一个呢?当然是通过你传去的token判断你是哪一个用户,最后对应你的数据给你传只属于你的昵称。
2.创建token工具类
既然token是一串根据用户信息加密的乱码,那么怎么生成它呢?这时候我们就需要一个token生成的工具类。它不是固定的,算法不同生成的不同,但它是根据用户给与的信息创建的,不会轻易改变的。
这里我们引入jwt依赖的token生成类,根据用户的id和密码去做生成。
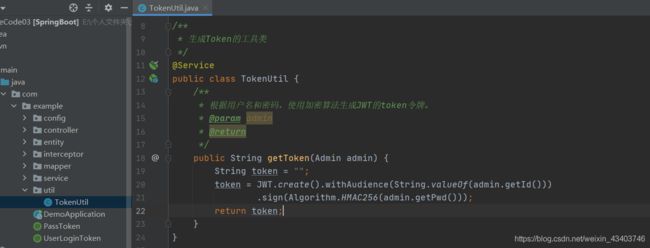
@Service
public class TokenUtil {
    /**
     * 根据用户名和密码,使用加密算法生成JWT的token令牌。
     * @param admin
     * @return
     */
    public String getToken(Admin admin) {
        String token = "";
        token = JWT.create().withAudience(String.valueOf(admin.getId()))
                .sign(Algorithm.HMAC256(admin.getPwd()));
        return token;
    }
}
3.创建注解,做判断甄别
并不是每一个操作都需要判断浏览器头部分中有没有token令牌。我们来想象一下,前端访问一个登陆需求,此时我们后端收到请求后需要验证它是否有传来token吗?如果没有就不为它执行,如果有再执行。这是错误的,因为用户登录之后才会根据登录的信息产生token令牌,又怎么会一开始就有了token令牌呢?所以我们需要准确判断执行哪些方法需要做token验证,而哪些又不用。
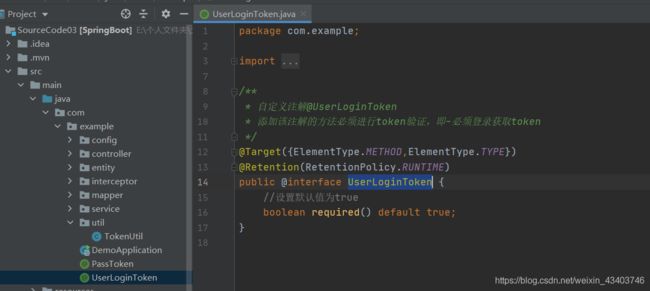
这里给出的方案是给两个@注解。一个注解为需要(UserLoginToken),另一个为不需要(PassToken),我们在controller层中给对应的方法上面进行注解,这样就可以做甄别了。

@Target({ElementType.METHOD,ElementType.TYPE})
@Retention(RetentionPolicy.RUNTIME)
public @interface PassToken {
    //设置默认值为true
    boolean required() default true;
}
/**
 * 自定义注解@UserLoginToken
 * 添加该注解的方法必须进行token验证,即-必须登录获取token
 */
@Target({ElementType.METHOD,ElementType.TYPE})
@Retention(RetentionPolicy.RUNTIME)
public @interface UserLoginToken {
    //设置默认值为true
    boolean required() default true;
}
这里要注意,我们创建的是“注解”,所以java的类型一定要选择正确,选择如下类型。

4.创建token验证类
此时我们就可以编写token验证类了,它的作用是得到前端请求过来的“token”,判断“token”是否合格,合格则放行,不合格则“终止并发布提示”。
自定义的token验证类其实是继承了“HandlerInterceptorAdapter”类,并重写了它里面的“preHandle”方法。
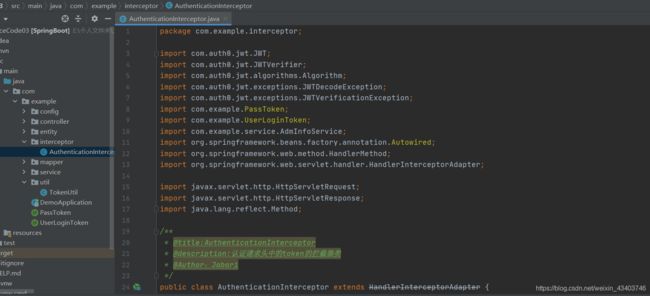
附上整个代码:
package com.example.interceptor;

import com.auth0.jwt.JWT;
import com.auth0.jwt.JWTVerifier;
import com.auth0.jwt.algorithms.Algorithm;
import com.auth0.jwt.exceptions.JWTDecodeException;
import com.auth0.jwt.exceptions.JWTVerificationException;
import com.example.PassToken;
import com.example.UserLoginToken;
import com.example.service.AdmInfoService;
import org.springframework.beans.factory.annotation.Autowired;
import org.springframework.web.method.HandlerMethod;
import org.springframework.web.servlet.handler.HandlerInterceptorAdapter;

import javax.servlet.http.HttpServletRequest;
import javax.servlet.http.HttpServletResponse;
import java.lang.reflect.Method;

/**
 * @title:AuthenticationInterceptor
 * @description:认证请求头中的token的拦截器类
 * @Author:Jabari
 */
public class AuthenticationInterceptor extends HandlerInterceptorAdapter {

    @Autowired
    private AdmInfoService admInfoService;

    /**
     * 执行目标方法之前拦截验证Token
     * @param httpServletRequest
     * @param httpServletResponse
     * @param object
     * @return
     * @throws Exception
     */
//    重写方法,实现拦截
    @Override
    public boolean preHandle(HttpServletRequest httpServletRequest, HttpServletResponse httpServletResponse,Object object)
        throws Exception{
        //从http请求头中取出token
        String token=httpServletRequest.getHeader("token");
        //如果不是映射到方法(即-路径下的方法)直接通过
        if(!(object instanceof HandlerMethod)){
            return true;
        }

        HandlerMethod handlerMethod=(HandlerMethod) object;
        //拿到方法头部的注解
        Method method=handlerMethod.getMethod();
        //检查是否有PassToken注释,有则跳过认证
        if(method.isAnnotationPresent(PassToken.class)){
            //进入到PassToken的注解中,查看里面required的值是否为true(默认true)
            PassToken passToken=method.getAnnotation(PassToken.class);
            if(passToken.required()){
                return true;
            }
        }

        //检查是否有UserLoginToken注释,有则认证
        if(method.isAnnotationPresent(UserLoginToken.class)){
            UserLoginToken userLoginToken=method.getAnnotation(UserLoginToken.class);
            if(userLoginToken.required()){
                //执行认证
                //如果没有token,则代表当前状态为未登录
                if(token==null){
                    throw new RuntimeException("无token,请重新登录");
                }
                //如果有token,则取出token中的id和pwd
                int id;
                String pwd;
                try{
                    //解密token,取出第0个参数(即-存入的id)
                    id= Integer.parseInt(JWT.decode(token).getAudience().get(0));
                    System.out.println("id的值"+id);
                }catch (JWTDecodeException j){
                    //若取出过程出错,则报一个错误
                    throw new RuntimeException("401");
                }
                //成功取出,则调用service层的通过用户名获取id的方法,判断得到的数据账号是否存在
                String userPwd= admInfoService.byIdGetPwd(id);

                if(userPwd.length()==0){
                    throw new RuntimeException("用户不存在,请重新登录");
                }
                //如果账号存在,此时验证密码,查看数据库中的密码是否和token中保存的密码一致
                JWTVerifier jwtVerifier=JWT.require(Algorithm.HMAC256(userPwd)).build();
                try {
                    jwtVerifier.verify(token);
                }catch (JWTVerificationException e){
                    throw new RuntimeException("401");
                }
            }else{
                throw new RuntimeException("无认证方法无法访问");
            }
            return true;
        }
        return true;
    }
}
5.创建过滤类
我们需要创建的token验证方法对所有的路径都进行生效,当用户访问每一个路径方法时都执行该方法,即使该路径方法上面有@PassToken注解,也需要进入该token验证方法中进行验证(但拥有@PassToken注解的方法进入后会很快被返回true,通过验证,具体见代码)。
我们创建的拦截器配置类是继承了MVC中的“WebMvcConfigurer”类,实现重写了它的addInterceptors方法


附上代码:
package com.example.config;

import com.example.interceptor.AuthenticationInterceptor;
import org.springframework.context.annotation.Bean;
import org.springframework.context.annotation.Configuration;
import org.springframework.web.servlet.config.annotation.InterceptorRegistry;
import org.springframework.web.servlet.config.annotation.WebMvcConfigurer;

/**
 * 拦截器配置类
 */
@Configuration
public class interceptorConfig implements WebMvcConfigurer {

    /**
     * 设置拦截哪些路径,不拦截哪些路径
     * @param registry
     */
    @Override
    public void addInterceptors(InterceptorRegistry registry){
        registry.addInterceptor(authenticationInterceptor())
                //添加拦截路径
                .addPathPatterns("/**")
                //添加白名单路径
                .excludePathPatterns("/swagger-resources/**");
    }

    /**
     * 全局注入拦截器配置Bean
     * @return
     */
    @Bean
    public AuthenticationInterceptor authenticationInterceptor(){
        return new AuthenticationInterceptor();
    }
}
此时就会生效。我们回到Service层,在登录方法中调用工具类中“TokenUtil”方法,生成token令牌并传给前端。

附上Service类完整代码:
package com.example.service;

import com.example.entity.Admin;
import com.example.entity.BaseEntity;
import com.example.entity.CODE;
import com.example.mapper.AdmInfoMapper;
import com.example.util.TokenUtil;
import org.springframework.beans.factory.annotation.Autowired;
import org.springframework.stereotype.Service;

@Service
public class AdmInfoService {
    @Autowired
    private AdmInfoMapper admInfoMapper;
    @Autowired
    private TokenUtil tokenUtil;

    /**
     * 登录方法
     */
    public BaseEntity login(Admin admin){
        Admin admin1=admInfoMapper.login(admin);
        if(admin1==null){
            return new BaseEntity(CODE.ERROR,"账号不存在",null);
        }else{
            String token=tokenUtil.getToken(admin);
            return new BaseEntity(CODE.OK,"登录成功",token);
        }
    }

    /**
     * 修改用户名
     */
    public BaseEntity update(Admin admin){
        System.out.println("用户名"+admin.getUserName());
        if(admInfoMapper.update(admin)>0){
            return new BaseEntity(CODE.OK,"修改成功",null);
        }
        return new BaseEntity(CODE.ERROR,"修改失败",null);
    }

    /**
     * 通过id获取密码
     */
    public String byIdGetPwd(int id){
        return admInfoMapper.byIdGetPwd(id);
    }
}
最后来到controller类中,给需要验证token才能访问的方法前面加上(@UserLoginToken)注解,而不需要验证token就能够访问的方法前面也需要加上我们之前创建好的(@PassToken)注解,这样就完成了

6.Postman测试效果
我们先测试登录方法,输入一个正确的id和pwd密码来登录。登录成功,获得生成的token令牌。

我这里是封装了一个返回类“BaseEntity”。这里的data就是返回的token令牌串。
此时我们测试一下“通过id修改用户名”方法

我们看到这里并没有执行成功。返回到idea的控制台,我们就可以找到报错原因“无token,请重新登录”

这是因为我们的修改方法前面添加了“@UserLoginToken”注解,这个注解代表该方法需要在有token令牌且令牌正确的情况下“token验证类-AuthenticationInterceptor”才会放行,而我们在刚刚Postman的头部方法中并没有加上登录账号的token令牌,所以会报错。
我们回到Postman中,在它的请求头方法中放入我们在“登录方法”里面得到的token令牌

此时再做访问测试
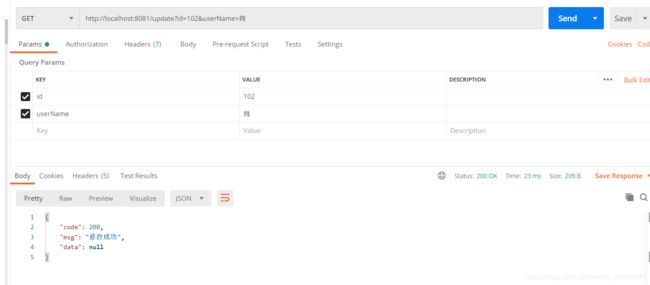
当访问到token验证类中时,它从请求头部分得到了token令牌的值,并对该值进行校验,校验通过,于是对该方法进行放行。这样一来就修改成功了。
后话:
这里主要是实现一下token效果,其实bug非常多,例如登录A账号获得的token可以去修改账号b的用户名,还有token令牌是固定不变了,不安全…
当前能力有限,篇幅有限,就不做过多的解释了,等我哪一天强大了,再来删删改改!再见。
获取该文章所有源码,请移步码云:
https://gitee.com/Saltandlight/csdn-notes.git
