SpringBoot概述
SpringBoot概念
SpringBoot提供了一种快速使用Spring的方式,基于约定优于配置的思想,可以让开发人员不必在配置与逻辑业务之间进行思维的切换,全身心的投入到逻辑业务的代码编写中,从而大大提高了开发的效率,一定程度上缩短了项目周期。2014 年 4 月,Spring Boot 1.0.0 发布。Spring的顶级项目之一(https://spring.io)。
Spring缺点
配置繁琐
虽然Spring的组件代码是轻量级的,但它的配置却是重量级的。一开始Spring用XML配置,而且是很多XML配置。Spring 2.5引入了基于注解的组件扫描,这消除了大量针对应用程序自身组件的显式XML配置。 Spring 3.0引入了基于Java的配置,这是一种类型安全的可重构配置方式,可以代替XML。
所有这些配置都代表了开发时的损耗。因为在思考Spring特性配置和解决业务问题之间需要进行思维切换,所以编写配置挤占了编写应用程序逻辑的时间。和所有框架一样,Spring实用,但它要求的回报也不少。
依赖繁琐
项目的依赖管理也是一件耗时耗力的事情。在环境搭建时,需要分析要导入哪些库的坐标,而且还需要分析导入与之有依赖关系的其他库的坐标,一旦选错了依赖的版本,随之而来的不兼容问题就会严重阻碍项目的开发进度。
SpringBoot功能
自动配置
SpringBoot的自动配置是一个运行时(更准确地说,是应用程序启动时)的过程,考虑了众多因素,才决定Spring配置应该用哪个,不该用哪个。该过程是SpringBoot自动完成的。
起步依赖
起步依赖本质上是一个Maven项目对象模型(Project Object Model,POM),定义了对其他库的传递依赖 ,这些东西加在一起即支持某项功能。 简单的说:起步依赖就是将具备某种功能的坐标打包到一起,并提供一些默认的功能。
辅助功能
提供了一些大型项目中常见的非功能性特性,如嵌入式服务器、安全、指标,健康检测、外部配置等。
小结
SpringBoot提供了一种快速开发Spring项目的方式,而不是对Spring功能上的增强。
Spring的缺点:
- 配置繁琐
- 依赖繁琐
SpringBoot功能
- 自动配置
- 起步依赖
- 辅助功能
SpringBoot快速入门
第一个SpringBoot程序
需求
搭建SpringBoot工程,定义HelloController.hello()方法,返回”Hello SpringBoot!”。
思路
- 创建Maven项目
- 导入SpringBoot起步依赖
- 定义Controller
- 编写引导类
- 启动测试
实现
创建一个普通的Java Maven工程,最终的项目目录结构如图所示:

编写
pom.xml配置文件,添加SpringBoot项目所需依赖org.springframework.boot spring-boot-starter-web 创建
HelloController类,进行简单的业务代码书写package xyz.rtx3090.springboot.controller; import org.springframework.web.bind.annotation.RequestMapping; import org.springframework.web.bind.annotation.RestController; /** * @author BernardoLi * @version 1.0.0 * @ClassName HelloController * @createTime 2021年09月11日 08:22:00 * @Description 第一个springboot程序 */ @RestController//相当于@[email protected] public class HelloController { @RequestMapping(value = "/hello") public String hello() { return "Hello World!"; } }创建
Application启动类,用于启动SpringBoot项目package xyz.rtx3090.springboot; import org.springframework.boot.SpringApplication; import org.springframework.boot.autoconfigure.SpringBootApplication; /** * @author BernardoLi * @version 1.0.0 * @ClassName Application * @createTime 2021年09月11日 08:25:00 * @Description 引导类:springboot项目的入口 */ @SpringBootApplication public class Application { public static void main(String[] args){ SpringApplication.run(Application.class,args); } }运行
Application类的main方法,启动SpringBoot项目,并在浏览器输入http://localhost:8080/hello
这样一个简单的SpringBoot项目已经创建配置完成,比起Spring项目繁琐的配置要快捷不少。
但这还不是最快的,我们还可以借助idea帮我们进一步快速创建SpringBoot项目!
第一个SpringBoot项目(更快版)
需求
使用idea提供的springboot模板创建项目,而不是采用传统的maven项目,并完成和第一个SpringBoot项目案例一样的效果
思路
- 使用idea创建SpringBoot项目
- 创建编写Controller类
- 进入Application类,启动SpringBoot项目
实现
使用idea创建SpringBoot项目


项目最终目录结构,如图所示:

编写
HelloController类,实现业务代码package xyz.rtx3090.springboot.controller; import org.springframework.web.bind.annotation.RequestMapping; import org.springframework.web.bind.annotation.RestController; /** * @author BernardoLi * @version 1.0.0 * @ClassName HelloController * @createTime 2021年09月11日 08:42:00 * @Description 第一个SpringBoot程序(更快版) */ @RestController public class HelloController { @RequestMapping("/hello") public String hello() { return "hello SpringBoot!"; } }进去
Application类,运行其main方法,启动SpringBoot项目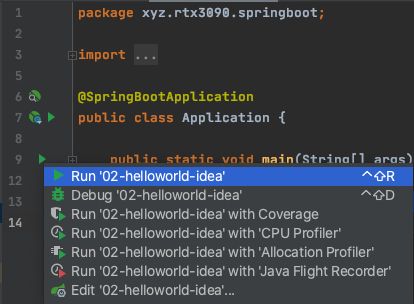
在浏览器输入
http://localhost:8080/hello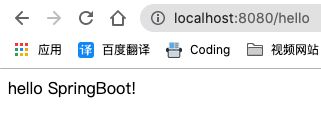
这样一来,我们就用很短的时间完成了SpringBoot项目的部署和运行!
SpringBoot起步依赖分析
在spring-boot-starter-parent中定义了各种技术的版本信息,组合了一套最优搭配的技术版本。
在各种starter中,定义了完成该功能需要的坐标合集,其中大部分版本信息来自于父工程。
我们的工程继承parent,引入starter后,通过依赖传递,就可以简单方便获得需要的jar包,并且不会存在版本冲突等问题。
SpringBoot配置分析
配置文件分类
SpringBoot是基于约定的,所以很多配置都有默认值,但如果想使用自己的配置替换默认配置的话,就可以使用application.properties或者application.yml(application.yaml)进行配置。
properties文件
server.port=8080yaml文件
server:
port: 8080小结
- SpringBoot提供了2种配置文件类型:
properteis和yml/yaml - 默认配置文件名称:
application - 在同一级目录下优先级为:
properties > yml > yaml
YAML配置文件
概述
YAML全称是 YAML Ain't Markup Language 。YAML是一种直观的能够被电脑识别的的数据数据序列化格式,并且容易被人类阅读,容易和脚本语言交互的,可以被支持YAML库的不同的编程语言程序导入,比如: C/C++, Ruby, Python, Java, Perl, C#, PHP 等。YML文件是以数据为核心的,比传统的xml方式更加简洁。
YAML文件的扩展名可以使用.yml或者.yaml。
三种配置文件对比
properties格式server.port=8080 server.address=127.0.0.1xml格式8080 127.0.0.1yaml格式server: port: 8080 address: 127.0.0.1
基本语法
- 大小写敏感
- 数据值前边必须有空格,作为分隔符
- 使用缩进表示层级关系
- 缩进时不允许使用Tab键,只允许使用空格(各个系统 Tab对应的空格数目可能不同,导致层次混乱)
- 缩进的空格数目不重要,只要相同层级的元素左侧对齐即可
- \# 表示注释,从这个字符一直到行尾,都会被解析器忽略
数据格式
纯量(单个的、不可再分的值)
#纯量 name: abc msg1: 'hello \n world' #不会识别转义字符,会原样输出 msg2: "hello \n world" #会识别转义字符对象(键值对的集合)
#对象 person: name: ${name} #参数引用 age: 22 #对象行内写法 human: {name: Bernardo,age: 22}数组(一组按次序排列的值)
#数组 address: - China - America #数组行内写法 dizhi: [China,America]
参数引用
name: abc
person:
name: ${name} #参数引用
age: 22读取配置文件
概述
Controller类读取配置文件中我们自定义的值,总共有三种方式:
- @Value
- Environment
- @ConfigurationProperties
@Value
作用:注解@Value将配置文件中的值单个逐一赋值给类中的被注解的属性
位置:类中的属性值上
缺点:不适合配置文件值过多的情况
语法:@Value("${配置文件值名}")(需要注意:{}中的值名需要与配置文件中的值名一致,而与类中的属性名无关联)
@Value("${配置文件值名}")
private String name;演示
配置文件中的值
name: abc person: name: Jason age: 22 address: - China - AmericaController类读取配置文件的值
@RestController public class HelloController { @Value("${name}") private String name; @Value("${person.name}") private String name2; @Value("${human.age}") private int age; @Value("${address[0]}") private String address1; @RequestMapping("/hello") public String hello() { return name + "; " + name2 + "; " + age + "; " + address1 + "; "; } }
Environment
作用:类中通过引入Environment类型的属性值,然后让其属性值调用getProperty("配置文件值名")来获取配置文件中的值
语法:(注意需要添加@Autowired注解)
@Autowired
private Environment env;
String age = env.getProperty("person.age")//person.age为配置文件值名演示
配置文件
person: name: ${name} #参数引用 age: 22读取配置文件中的值
@RestController public class HelloController { @Autowired private Environment env; @RequestMapping("/hello") public String hello() { return env.getProperty("address[1]") } }
@ConfigurationProperties(prefix = "配置文件值前缀")
用法:通过在实体类上添加@ConfigurationProperties(prefix = "配置文件值前缀")注解,将配置文件的对象值注入的实体类中。然后只需在需要读取配置文件值的类中,引入实体类 类型的属性值,然后通过set、get方法即可读取到配置文件的值
注意:这个只能用于读取配置文件中对象类型的数据
配置文件
person: name: Jason age: 22 address: - China - America实体类
@Component @ConfigurationProperties(prefix = "person") public class Person { private String name; private int age; private String[] address; //setter and getter }读取配置文件的数据
@RestController public class HelloController { @Autowired private Person person; @RequestMapping("/hello") public String hello() { return person.getName() + "; " + person.getAge() + "; " + person.getAddress()[0] + "; " + person.getAddress()[1]; } }
多环境切换配置文件
概述
我们在开发Spring Boot应用时,通常同一套程序会被安装到不同环境,比如:开发、测试、生产等。其中数据库地址、服务器端口等等配置都不同,如果每次打包时,都要修改配置文件,那么非常麻烦。profile功能就是来进行动态配置切换的。
profile配置多环境文件方式
多文件,命名区分的方式「推荐使用」
创建多个配置文件,每个配置文件后用
-关键字的方式来区分。注意:必须是用
-来分隔关键字,关键字可以自定义,但最好见名知意。关键字是后面激活特定配置文件的关键!每个不同关键字的配置文件,我们都可以配置完全不同的配置,用于各种环境切换使用。
这种多环境文件配置的方式,
profile与yaml类型的配置文件都同样适用!最简单的激活方式,就是直接在总配置文件中添加
spring.profiles.active=关键字,即可激活对应的配置文件。
单文件,
---分隔的方式只需要创建一个单一的文件,然后使用
---来进行分隔多种不同环境的配置(详情看下面代码)。只适用于
yaml类的配置文件。--- server: port: 8080 spring: config: activate: on-profile: dev --- server: port: 8081 spring: config: activate: on-profile: test --- server: port: 8082 spring: profiles: active: pro #激活 ---
多环境配置文件的激活方式
在配置文件中激活
直接在配置文件中加入
spring.profiles.active=关键字,即可激活对应的配置文件命令行激活
命令行激活,是在命令行运行对应jar时,采用的一种切换配置文件的方式。
语法:
java -jar 项目jar包 --spring.profiles.active=关键字好处:不需要修改配置文件,直接在jar运行前就可以手动切换jar包,快捷方便
在JVM虚拟机中激活
在项目SpringBoot配置中的
VM options中设置-Dspring.profiles.active=关键字,也可以激活对应的配置文件
内部配置文件加载顺序
优先级从高到低依次为:
- 总项目下的
/config目录下的application.properties配置文件 - 总项目下的
application.properties配置文件 - 当前项目下
/config目录下的application.properties配置文件 - 当前项目下的
application.properties配置文件
高优先级的配置文件生效,并不意味着低优先级的配置文件可完全没用了。高优先级配置文件只是会覆盖掉低优先级配置文件的与其重复的配置内容,除此之外并不会影响低配置文件其他与其不重复的配置内容的生效!
如果把当前项目打成Jar包,本项目如果不是总项目的话,那么总项目里面的配置文件并不会被打入Jar包,也就不会生效!
下面是项目实际多个配置文件,优先级图解:

外部配置文件加载顺序
我们除了可以在项目打包的Jar包中存放配置文件,我们还可以在项目的打包的Jar包存放配置文件。
优先级从高到低依次为:
- Jar包同级目录下的
/config目录下的配置文件 - Jar包同级目录下的配置文件


SpringBoot整合其他框架
SpringBoot整合Spring+SpringMVC
这一节,我们在SpringBoot快速入门中,创建演示的第一个springboot程序就是springboot整合Spring+SpringBoot框架的案例。详细会看上节!
SpringBoot整合Junit
需求
使用SpringBoot整合Junit测试框架,并完成测试操作
思路
- 搭建SpringBoot工程
- 引入starter-test起步依赖(自动的)
- 编写被测试类
- 编写测试类,添加测试注解
@SpringBootTest(classes = 启动类.class)
实现
检查创建的springboot项目pom文件中是否有
spring-boot-starter-test依赖,没有需要自己手动添加org.springframework.boot spring-boot-starter-test test 编写被测试service类
@Service public class UserService { public void add() { System.out.println("add..."); } }编写测试类,注解的参数为正式启动类.class
@SpringBootTest(classes = Application.class)//注意这里 public class UserServiceTest { @Autowired private UserService userService; @Test public void testAdd() { userService.add(); } }
SpringBoot整合Redis
需求
使用SpringBoot整合Redis数据库,并完成Redis数据库操作
思路
- 搭建SpringBoot工程(勾选
NoSQL->Spring Data Redis (Access+Driver) - 引入redis起步依赖(如果上一步勾选了,则不需要手动引入依赖了)
- 在配置文件中,配置redis的ip端口等信息(不配置的话,默认为localhost:6379)
- 注入RedisTemplate模板
- 编写测试方法,测试
实现
- 搭建SpringBoot工程(勾选
NoSQL->Spring Data Redis (Access+Driver) 编写测试类
ApplicationTestspackage xyz.rtx3090.springboot; import org.junit.jupiter.api.Test; import org.springframework.beans.factory.annotation.Autowired; import org.springframework.boot.test.context.SpringBootTest; import org.springframework.data.redis.core.RedisTemplate; @SpringBootTest public class ApplicationTests { @Autowired private RedisTemplate redisTemplate; @Test public void testSet() { //存入数据 redisTemplate.boundValueOps("name").set("Jason"); } @Test public void testGet() { //获取数据 Object age = redisTemplate.boundValueOps("name").get(); System.out.println("age = "+age); } }编写配置文件
#Redis主机ip spring.redis.host=1.117.144.59 #Redis主机端口 spring.redis.port=6379- 启动测试类
SpringBoot整合MyBatis
需求
使用SpringBoot整合mybatis框架,并完成mybatis数据库操作
思路
- 搭建SpringBoot工程(勾选
SQL->MyBatis Framework+MySQL Driver) - 引入mybatis起步依赖,添加mysql驱动(自动已经引入了)
- 编写DataSource和MyBatis相关配置
- 定义表和实体类
- 编写dao和mapper文件/纯注解开发
- 测试
实现1-mapper文件开发
- 搭建SpringBoot工程(勾选
SQL->MyBatis Framework+MySQL Driver) 查看项目
pom文件,发现多了下面两个依赖org.mybatis.spring.boot mybatis-spring-boot-starter 2.2.0 mysql mysql-connector-java 在
application.yaml配置文件中编写DataSource和MyBatis相关配置#mysql datasource spring: datasource: url: jdbc:mysql:///Mybatis?serverTimezone=UTC username: root password: intmain() driver-class-name: com.mysql.cj.jdbc.Driver #mybatis mybatis: mapper-locations: classpath:xyz/rtx3090/springboot/mapper/UserMapper.xml type-aliases-package: xyz/rtx3090/sprigboot/model创建实体类
Userpublic class User { private int id; private String name; private String pwd; //setter and getter //toString }创建
UserMapper接口@Mapper public interface UserMapper2 { public ListfindAll(); } 创建
UserMapper.xml文件在
ApplicationTests类中进行测试@SpringBootTest class ApplicationTests { @Resource private UserMapper2 userMapper2; @Test public void testFindAll2() { ListuserList = userMapper2.findAll(); System.out.println(userList); } }
实现2-注解开发
- 搭建SpringBoot工程(勾选
SQL->MyBatis Framework+MySQL Driver) 查看项目
pom文件,发现多了下面两个依赖org.mybatis.spring.boot mybatis-spring-boot-starter 2.2.0 mysql mysql-connector-java 在
application.yaml配置文件中编写DataSource和MyBatis相关配置#mysql datasource spring: datasource: url: jdbc:mysql:///Mybatis?serverTimezone=UTC username: root password: intmain() driver-class-name: com.mysql.cj.jdbc.Driver #因为是注解开发,所以不需要配置mybatis相关内容创建实体类
Userpublic class User { private int id; private String name; private String pwd; //setter and getter //toString }创建
UserMapper接口,采用注解开发@Mapper public interface UserMapper { @Select("select * from user") public ListfindAll(); } 在
ApplicationTests类中进行测试@SpringBootTest class ApplicationTests { @Resource private UserMapper userMapper; @Test public void testFindAll() { ListuserList = userMapper.findAll(); System.out.println(userList); } }
SpringBoot整合Dubbo
需求
使用SpringBoot整合Dubbo分布式框架,并进行页面访问
思路
创建三个工程项目,分别为:
- 接口工程:存放bean和业务接口
- 服务提供者:业务接口的实现类,调用数据持久层
- 服务消费者:处理浏览器客户端发送的请求,从注册中心调用服务提供者所提供的服务
实现
最终项目目录结构如图所示:

创建普通Java Maven工程
08-springboot-dubbo-public-api-service创建编写service接口
StudentServicepackage xyz.rtx3090.springboot.service; public interface StudentService { Integer queryAllStudentCount(); }
创建SpringBoot工程
09-springboot-dubbo-provider(勾选Web->Spring Web模版)配置pom文件,引入所需依赖(注意修改原有的springboot框架web起步依赖)
org.springframework.boot spring-boot-starter-web org.slf4j slf4j-log4j12 org.springframework.boot spring-boot-starter-test test com.alibaba.spring.boot dubbo-spring-boot-starter 2.0.0 com.101tec zkclient 0.10 org.slf4j slf4j-log4j12 xyz.rtx3090.springboot 08-springboot-dubbo-public-api-service 1.0.0 实现上述的service接口
StudentSerivceImplpackage xyz.rtx3090.springboot.service.impl; import com.alibaba.dubbo.config.annotation.Service; import org.springframework.stereotype.Component; import xyz.rtx3090.springboot.service.StudentService; @Component //暴露服务接口 @Service(interfaceClass = StudentService.class, version = "1.0.0",timeout = 15000) public class StudentServiceImpl implements StudentService { //这里需要注入dao,我们暂时忽略 @Override public Integer queryAllStudentCount() { //模拟dao操作,获取数据 Integer count = 30; return count; } }编写springboot配置文件
application.properties#设置内嵌Tomcat端口号 server.port=8081 #设置上下文根 server.servlet.context-path=/provider #设置dubbo相关配置 spring.application.name=09-springboot-dubbo-provider #声明当前工程是一个服务提供者 spring.dubbo.server=true #设置注册中心 spring.dubbo.registry=zookeeper://localhost:2181
创建SpringBoot工程
10-springboot-dubbo-consumer(勾选Web->Spring Web模版)配置pom文件,引入所需依赖(注意修改原有的springboot框架web起步依赖)
org.springframework.boot spring-boot-starter-web org.slf4j slf4j-log4j12 org.springframework.boot spring-boot-starter-test test com.alibaba.spring.boot dubbo-spring-boot-starter 2.0.0 com.101tec zkclient 0.10 org.slf4j slf4j-log4j12 xyz.rtx3090.springboot 08-springboot-dubbo-public-api-service 1.0.0 编写Controller控制类
StudentControllerpackage xyz.rtx3090.springboot.Controller; import com.alibaba.dubbo.config.annotation.Reference; import org.springframework.stereotype.Controller; import org.springframework.web.bind.annotation.RequestMapping; import org.springframework.web.bind.annotation.ResponseBody; import xyz.rtx3090.springboot.service.StudentService; @Controller @RequestMapping("/student") public class StudentController { @Reference(interfaceClass = StudentService.class,version = "1.0.0",check = false) private StudentService studentService; @RequestMapping("/count") @ResponseBody public String studentCount() { Integer count = studentService.queryAllStudentCount(); return "学生总人数为:" + count; } }编写springboot配置文件
application.properties#设置内嵌Tomcat端口号 server.port=8080 server.servlet.context-path=/consumer #设置dubbo配置 spring.application.name=10-springboot-dubbo-consumer #指定注册中心 spring.dubbo.registry=zookeeper://localhost:2181
依次启动注册中
zookeeper、提供者工程09-springboot-dubbo-provider和消费者工程10-springboot-dubbo-consumer,最后在浏览器输入http://localhost:8080/consumer/student/count,查看页面访问结果:
SpringBoot整合SSM
需求
使用SpringBoot整合SSM框架,并进行页面访问
思路
SpringBoot本身已经帮我们整合并配置好spring+springMVC了,所以我们只需要把更多的精力放到整合和配置Mybatis上就可以了
实现
准备数据库
CREATE DATABASE `springboot`;

USE `springboot`;

DROP TABLE IF EXISTS `t_user`;

CREATE TABLE `t_user` (
  `id` int(11) NOT NULL AUTO_INCREMENT,
  `username` varchar(32) COLLATE utf8mb4_unicode_ci DEFAULT NULL,
  `password` varchar(32) COLLATE utf8mb4_unicode_ci DEFAULT NULL,
  PRIMARY KEY (`id`)
) ENGINE=InnoDB AUTO_INCREMENT=3 DEFAULT CHARSET=utf8mb4 COLLATE=utf8mb4_unicode_ci;

insert  into `t_user`(`id`,`username`,`password`) values (1,'zhangsan','123'),(2,'lisi','234');
最终项目目录结构,如图所示:

- 创建SpringBoot项目,勾选
Web->Spring Web和SQL->MyBatis Framework+MySQL Driver模版 编写配置pom文件,添加覆盖以下依赖
org.springframework.boot spring-boot-starter-web org.mybatis.spring.boot mybatis-spring-boot-starter 2.2.0 mysql mysql-connector-java runtime org.springframework.boot spring-boot-starter-test test model包下创建实体JavaBen类Userpackage xyz.rtx3090.springboot.model; public class User { private int id; private String username; private String password; //setter and getter //toString }mapper包下创建mapper接口UserMapperpackage xyz.rtx3090.springboot.mapper; import org.apache.ibatis.annotations.Mapper; import xyz.rtx3090.springboot.model.User; @Mapper public interface UserMapper { //根据id查询指定用户信息 User queryUserById(int id); }resource目录下创建目录xyz/rtx3090/springboot/mapper,在其目录下创建mapper映射文件UserMapper.xmlservice目录下创建service类UserServicepackage xyz.rtx3090.springboot.service; import xyz.rtx3090.springboot.model.User; public interface UserService { User queryUserById(int id); }service/impl目录下创建service实现类UserServiceImplpackage xyz.rtx3090.springboot.service.impl; import org.springframework.stereotype.Service; import xyz.rtx3090.springboot.mapper.UserMapper; import xyz.rtx3090.springboot.model.User; import xyz.rtx3090.springboot.service.UserService; import javax.annotation.Resource; @Service public class UserServiceImpl implements UserService { @Resource private UserMapper userMapper; @Override public User queryUserById(int id) { User user = userMapper.queryUserById(id); return user; } }controller目录下创建controller控制类UserControllerpackage xyz.rtx3090.springboot.controller; import org.springframework.stereotype.Controller; import org.springframework.web.bind.annotation.RequestMapping; import org.springframework.web.bind.annotation.ResponseBody; import xyz.rtx3090.springboot.model.User; import xyz.rtx3090.springboot.service.UserService; import javax.annotation.Resource; /** * @author BernardoLi * @version 1.0.0 * @ClassName UserController * @createTime 2021年09月12日 03:29:00 * @Description TODO */ @Controller @RequestMapping("/user") public class UserController { @Resource private UserService userService; @RequestMapping("/queryUserById") @ResponseBody public String queryUserById(){ //模拟收到前端数据 int id = 2; User user = userService.queryUserById(id); return user.toString(); } }修改springboot配置文件
Application.properties#mysql datasource spring.datasource.url=jdbc:mysql:///springboot?serverTimezone=UTC spring.datasource.username=root spring.datasource.password=intmain() spring.datasource.driver-class-name=com.mysql.cj.jdbc.Driver #mybatis #指定mapper文件路径 mybatis.mapper-locations=classpath:xyz/rtx3090/springboot/mapper/UserMapper.xml #指定resultType类别名 mybatis.type-aliases-package=xyz/rtx3090/springboot/model进入
Application类执行main方法,启动springboot项目,并在浏览器输入http://localhost:8080/user/queryUserById,查看页面结果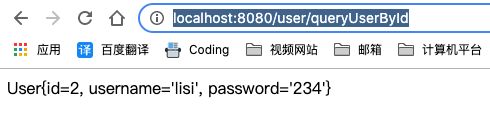
SpringBoot集成SSM+Redis+Dubbo+JSP
暂空