iOS开发之上下文交互菜单(UIContextMenuInteraction)
1. 概述
在iOS13及以后的版本,苹果将用UIContextMenuInteraction取代上文中提到的Peek和Pop的功能,Peek和Pop的功能需要依赖硬件设备,UIContextMenuInteraction则摆脱了对硬件的依赖。
在iOS9以及iPhone6s及以上的设备上,苹果推出了Peek和Pop功能,并在预览时上滑提供可供操作的操作菜单。在iOS13及以后,苹果禁用了UIViewControllerPreviewing协议相关方法,取而代之的则是UIContextMenuInteraction,如果项目最低运行版本是iOS13,且调用了UIViewControllerPreviewing协议相关方法,那么系统将会有黄色的警告,如果UIContextMenuInteraction和UIViewControllerPreviewing协议方法同时使用,系统只会采用UIContextMenuInteraction。
2. 上下文菜单(Context Menu)
在所有运行iOS13(及以上系统)的设备上,苹果都为其提供了上下文菜单功能,用户可以通过长按或者3D Touch(如果硬件支持)方式,弹出一个带可操作菜单的预览界面。
上下文菜单可以创建二级菜单,但是处于自动布局考虑,苹果还是建议所有菜单尽量在同一级别。
下面看一下系统相册列表长按图片的效果:
图中,长按后弹出一个预览视图,底部带有操作选项列表,周边全部虚化,如果点击预览图,则可进入全屏界面查看图片。
2.1 一级菜单
要实现菜单的功能,则需要在控制器内实现UIContextMenuInteractionDelegate的协议方法:
func contextMenuInteraction(_ interaction: UIContextMenuInteraction, configurationForMenuAtLocation location: CGPoint) -> UIContextMenuConfiguration?该方法为协议中必须实现的一个方法,方法要求返回一个UIContextMenuConfiguration对象。这个对象配置了Context menu所需要的预览图以及操作事件等。具体看一下:
| 属性或方法 | 说明 |
|---|---|
var identifier: NSCopying |
configuration对象的唯一标识。 |
init(identifier: NSCopying?, previewProvider: UIContextMenuContentPreviewProvider?, actionProvider: UIContextMenuActionProvider?) |
初始化方法。 |
typealias UIContextMenuContentPreviewProvider |
该block中返回预览视图控制器。 |
typealias UIContextMenuActionProvider |
该block中返回可操作性的菜单。 |
举个例子,在一个界面中,如下图,按住button后弹出对图片的操作选项。
在代理回调中创建一个UIContextMenuConfiguration对象,并添加对应的Action事件,代码如下:
func contextMenuInteraction(_ interaction: UIContextMenuInteraction, configurationForMenuAtLocation location: CGPoint) -> UIContextMenuConfiguration? {
        return UIContextMenuConfiguration(identifier: nil, previewProvider: nil) { (elements) -> UIMenu? in
            let favoriteAction = UIAction(title: "喜欢", image: UIImage(systemName: "heart.fill"), state: .off) { (action) in

            }
            let shareAction = UIAction(title: "分享", image: UIImage(systemName: "square.and.arrow.up.fill"), state: .off) { (action) in

            }
            let deleteAction = UIAction(title: "删除", image: UIImage(systemName: "trash.fill"),
                                        attributes: [.destructive], state: .off) { (action) in

            }
            return UIMenu(title: "菜单", children: [favoriteAction, shareAction, deleteAction])
        }
}
然后还需要向button添加UIContextMenuInteraction对象,方可有长按住事件响应,代码如下:
let interaction = UIContextMenuInteraction(delegate: self)
button.addInteraction(interaction)
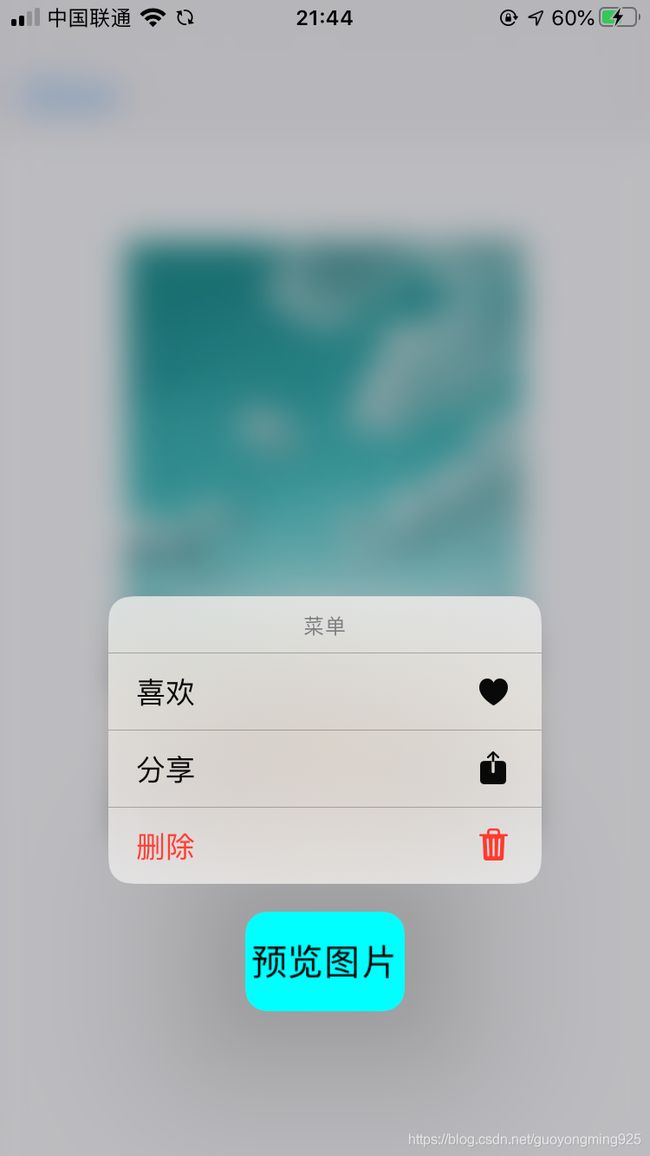
当按住button后,效果如下:
以上则将Context Menu的一级菜单显示出来了。
小结一下:
- UIContextMenuInteraction: 添加一个context menu到指定的view。
- UIContextMenuConfiguration: 配置一个带有action列表的对象给context menu。
- UIContextMenuInteractionDelegate: 管理context menu的整个周期,弹出、展示、销毁。
2.2 二级菜单
二级菜单能够使Context Menu更加简洁、清晰明了。
下面在上面一级菜单的基础上增加一个打分功能二级菜单,代码如下:
func contextMenuInteraction(_ interaction: UIContextMenuInteraction, configurationForMenuAtLocation location: CGPoint) -> UIContextMenuConfiguration? {
        return UIContextMenuConfiguration(identifier: nil, previewProvider: nil) { (elements) -> UIMenu? in

            // 二级action数组
            var ratingActions: Array = []
            // 遍历增加5个action
            for i in 0..<5 {
                let action = UIAction(title: "\(i+1) 分") { (action) in

                }
                ratingActions.append(action)
            }
            // 创建一个打分的菜单
            let ratingMenu = UIMenu(title: "打分", image: UIImage(systemName: "star.circle"), children: ratingActions)

            let favoriteAction = UIAction(title: "喜欢", image: UIImage(systemName: "heart.fill"), state: .off) { (action) in

            }
            let shareAction = UIAction(title: "分享", image: UIImage(systemName: "square.and.arrow.up.fill"), state: .off) { (action) in

            }
            let deleteAction = UIAction(title: "删除", image: UIImage(systemName: "trash.fill"),
                                        attributes: [.destructive], state: .off) { (action) in

            }
            // 将打分的菜单放到一级菜单里面。
            return UIMenu(title: "菜单", children: [ratingMenu, favoriteAction, shareAction, deleteAction])
        }
}
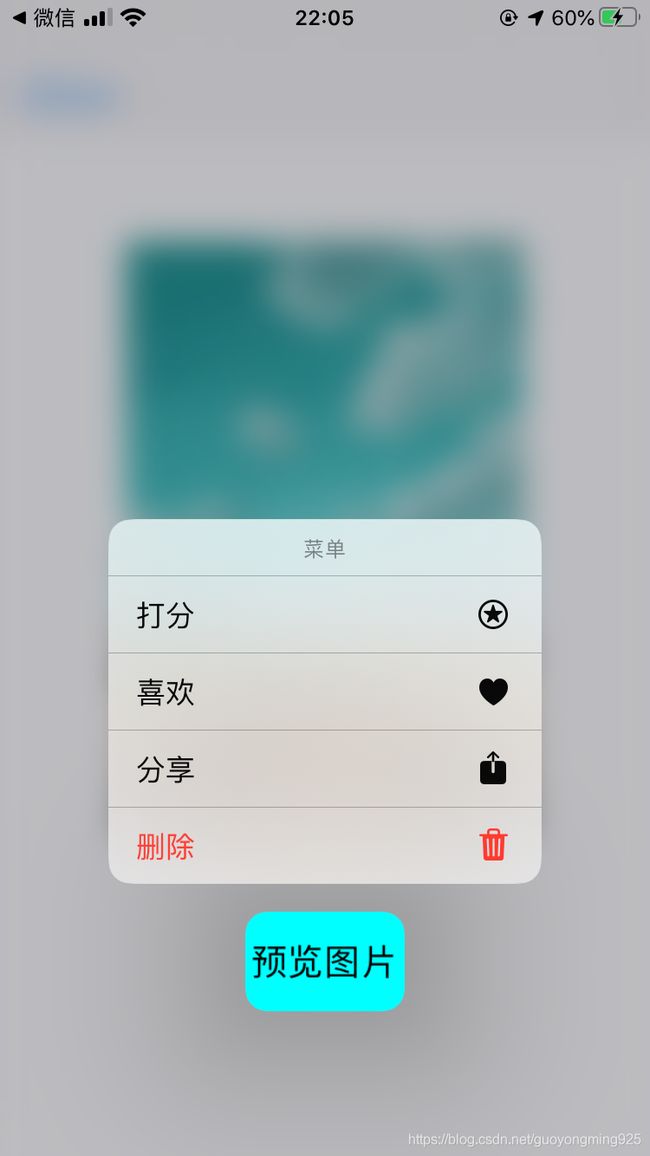
运行效果图如下,当点击“打分”后,转入二级菜单界面。
除了二级菜单,还可以有三级、四级等菜单,写法就是层层嵌套,不过不建议搞这么多层的菜单,影响用户体验。
2.3 分组菜单
分组菜单可以将类似的功能归到一组,比如上面将删除单独归到一组,只需将删除的action包装到UIMenu中,并设置UIMenu的Options属性为displayInline即可,代码如下:
func contextMenuInteraction(_ interaction: UIContextMenuInteraction, configurationForMenuAtLocation location: CGPoint) -> UIContextMenuConfiguration? {
        return UIContextMenuConfiguration(identifier: nil, previewProvider: nil) { (elements) -> UIMenu? in

            // 二级action数组
            var ratingActions: Array = []
            // 遍历增加5个action
            for i in 0..<5 {
                let action = UIAction(title: "\(i+1) 分") { (action) in

                }
                ratingActions.append(action)
            }
            // 创建一个打分的菜单
            let ratingMenu = UIMenu(title: "打分", image: UIImage(systemName: "star.circle"), children: ratingActions)

            let favoriteAction = UIAction(title: "喜欢", image: UIImage(systemName: "heart.fill"), state: .off) { (action) in

            }
            let shareAction = UIAction(title: "分享", image: UIImage(systemName: "square.and.arrow.up.fill"), state: .off) { (action) in

            }

            let deleteAction = UIAction(title: "删除", image: UIImage(systemName: "trash.fill"),
                                        attributes: [.destructive], state: .off) { (action) in

            }
            // 创建一个delete menu,然后设置options属性为displayInline,并将上面的deleteAction添加进来。
            let deleteMenu = UIMenu(title: "删除菜单", options: .displayInline, children: [deleteAction])
            // 将打分的菜单放到一级菜单里面。
            return UIMenu(title: "菜单", children: [ratingMenu, favoriteAction, shareAction, deleteMenu])
        }
}
运行效果图如下:
3. 预览视图及点击处理
预览视图可以快速的给用户提供一些预览信息。
上面的操作菜单是通过UIContextMenuConfiguration对象UIContextMenuActionProvider提供呢,那么预览视图则是通过UIContextMenuConfiguration对象的UIContextMenuContentPreviewProvider提供的,同样是在创建UIContextMenuConfiguration对象的协议方法里面。
func contextMenuInteraction(_ interaction: UIContextMenuInteraction, configurationForMenuAtLocation location: CGPoint) -> UIContextMenuConfiguration? {
        return UIContextMenuConfiguration(identifier: nil) { [weak self] () -> UIViewController? in
            // 创建预览视图,并返回。
            let detailVC = DetailViewController(nibName: "DetailViewController", bundle: nil)
            detailVC.image = self?.imageView.image
            // 预览视图显示大小
            detailVC.preferredContentSize = CGSize(width: 280, height: 360)
            return detailVC
        } actionProvider: { [weak self]  (elements) -> UIMenu? in
            return self?.createContextMenuActions()
        }
}
上面代码中创建了一个DetailViewController对象,并给其传递数据,用于预览内容,然后制定了预览图的大小。运行效果如下:
当点击底部action列表项的时候,自有对应的action block处理点击事件,那么如果点击预览图,如何处理呢?下面看这个协议方法:
/*!
 * 当用户点击预览图的时候调用,相当于3DTouch里面的Pop功能。
 *
 * @param interaction    当前的交互对象
 * @param configuration  当前的配置项
 * @param animator       跳转动画执行者,可以给它添加跳转动画。
 */
func contextMenuInteraction(_ interaction: UIContextMenuInteraction, willPerformPreviewActionForMenuWith configuration: UIContextMenuConfiguration, animator: UIContextMenuInteractionCommitAnimating)
下现在将这个协议方法具体实现以下:
func contextMenuInteraction(_ interaction: UIContextMenuInteraction, willPerformPreviewActionForMenuWith configuration: UIContextMenuConfiguration, animator: UIContextMenuInteractionCommitAnimating) {
        animator.addCompletion { [weak self] in
            if let this = self {
                let detailVC = DetailViewController(nibName: "DetailViewController", bundle: nil)
                detailVC.image = this.button.imageView?.image
                this.show(detailVC, sender: nil)
            }
        }
}
添加了上面的方法后,在运行点击预览图则会进入DetailViewController界面,全屏展示图片。
4. TableView中的Context Menu
TableView中的Context Menu,系统已经进行了封装,我们不需要在创建和添加UIContextMenuInteraction对象了,如果实现了协议方法,那么按住cell的时候就会响应协议方法。
相关协议方法如下:
func tableView(_ tableView: UITableView, contextMenuConfigurationForRowAt indexPath: IndexPath, point: CGPoint) -> UIContextMenuConfiguration?

func tableView(_ tableView: UITableView, willPerformPreviewActionForMenuWith configuration: UIContextMenuConfiguration, animator: UIContextMenuInteractionCommitAnimating)
Demo参考代码如下:
override func tableView(_ tableView: UITableView, contextMenuConfigurationForRowAt indexPath: IndexPath, point: CGPoint) -> UIContextMenuConfiguration? {
        let image = UIImage(named: imageArray[indexPath.row])
        return ImageContextMenuConfiguration.createInstance(indexPath.row, image)
    }

override func tableView(_ tableView: UITableView, willPerformPreviewActionForMenuWith configuration: UIContextMenuConfiguration, animator: UIContextMenuInteractionCommitAnimating) {
        if let index = Int(configuration.identifier as! String) {
            animator.addCompletion {[weak self]in
                let detailVC = DetailViewController(nibName: "DetailViewController", bundle: nil)
                if let imageName = self?.imageArray[index] {
                    detailVC.image = UIImage(named: imageName)
                }
                self?.show(detailVC, sender: nil)
            }
        }
}
5. CollectionView中的Context Menu
CollectionView中的Context Menu,系统已经进行了封装,我们不需要在创建和添加UIContextMenuInteraction对象了,如果实现了协议方法,那么按住cell的时候就会响应协议方法。
相关协议方法如下:
func collectionView(_ collectionView: UICollectionView, contextMenuConfigurationForItemAt indexPath: IndexPath, point: CGPoint) -> UIContextMenuConfiguration?

func collectionView(_ collectionView: UICollectionView, willPerformPreviewActionForMenuWith configuration: UIContextMenuConfiguration, animator: UIContextMenuInteractionCommitAnimating)
Demo参考代码如下:
override func collectionView(_ collectionView: UICollectionView, contextMenuConfigurationForItemAt indexPath: IndexPath, point: CGPoint) -> UIContextMenuConfiguration? {
        let image = UIImage(named: imageArray[indexPath.row])
        return ImageContextMenuConfiguration.createInstance(indexPath.row, image)
    }

override func collectionView(_ collectionView: UICollectionView, willPerformPreviewActionForMenuWith configuration: UIContextMenuConfiguration, animator: UIContextMenuInteractionCommitAnimating) {
        if let index = Int(configuration.identifier as! String) {
            animator.addCompletion {[weak self]in
                let detailVC = DetailViewController(nibName: "DetailViewController", bundle: nil)
                if let imageName = self?.imageArray[index] {
                    detailVC.image = UIImage(named: imageName)
                }
                self?.show(detailVC, sender: nil)
            }
        }
}
6. 总结
干巴巴的讲了一堆,如果不配上Demo,都有点说不过去,需要Demo的点击这里。
Context Menu主要用于预览和快速操作,功能和3D Touch差不多,但是有意取代3D Touch,以减少对硬件的依赖。
本文主要对该功能做了简单的说明,至于如何将该功能用的更好,还待日后具体研究了,文中如果有不对的地方,还请路过的朋友指正。
更多可操作的协议方法,详见UIContextMenuInteractionDelegate。
对了,苹果建议Context Menu采用系统提供的图片符号(SF Symbols),喜欢的小伙伴可以安装看看,链接为:https://developer.apple.com/sf-symbols/,根据自己电脑系统,下载对应的SF Symbols。
本篇文章出自https://blog.csdn.net/guoyongming925的博客,如需转载,请标明出处。


