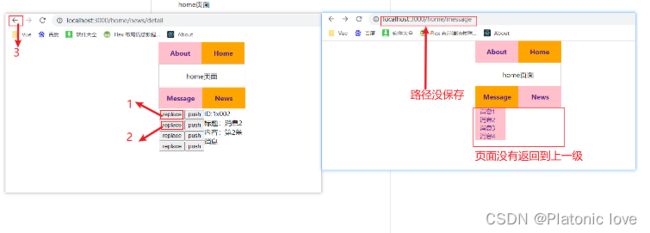
在react脚手架中react router v6 路由表、嵌套路由、编程式路由的使用,react点击按钮跳转页面并传参
一:安装路由并配置路由表
1.首先,我们先安装路由:npm i react-router-dom --save 或者yarn add react-router-dom --save,现在默认安装的式router6.x
//安装路由
npm i react-router-dom --save
yarn add react-router-dom --save
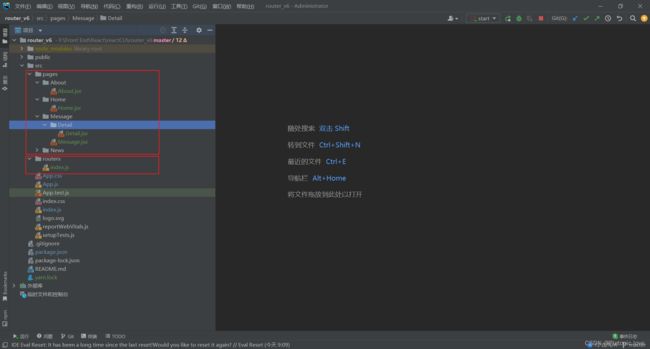
2.创建好目录,见下图:
3.在routers文件夹下的index.js中配置路由
import { Navigate } from 'react-router-dom'
import Message from '../pages/Message/Message'
import News from '../pages/News/News'
import About from '../pages/About/About'
import Home from '../pages/Home/Home'
import Detail from '../pages/Message/Detail/Detail'
//eslint-disable-next-line
export default [
{
path: '/about',
element: '
element: `组件被渲染,就会修改路径,切换视图
}
]
在这里,我们的路由表就配置好了
二:创建一级路由
1.创建路由页面,在App.js里面写一级路由,并写一个简单的样式
import { NavLink, useRoutes } from 'react-router-dom'
import routes from './routers'		//导入路由表

import('./App.css')			//导入APP.js

function App () {
	const element = useRoutes(routes)
	return (


				About
				Home


				{element}


	)
}

export default App
在App.js中,覆盖以下代码
.nav {
  width: 200px;
  height: 50px;
  margin: 0 auto;
  background-color: pink;

}

.main {
  box-sizing: border-box;
  width: 200px;
  border: 1px solid #ccc;
  margin: 0 auto;
}

.navLink {
  text-align: center;
  display: inline-block;
  font-weight: bold;
  text-decoration: none;
  line-height: 50px;
  width: 100px;
}

.link {
  text-decoration: none;
}

.active {
  background-color: orange;
}

ul {
  margin: 0;
  padding: 0;
  display: inline-block;
  width: 70px;
  background-color: pink;
  float: left;
}

li {
  list-style: none;
  font-size: 14px;
  margin-left: 10px;

}

.message {
  float: right;
  width: 128px;
  display: inline-block;
}

.buttonMain {
  margin: 0;
  padding: 0;
  float: left;
}
2.编写一级路由下的页面
Home.jsx页面代码:
import React from 'react'
import { NavLink, Outlet } from 'react-router-dom'
const MyComponent = () => {
return (
home页面
Message
News
About.jsx页面代码:
import React from 'react'

const MyComponent = () => {
	return (

			About

	)
}

export default MyComponent
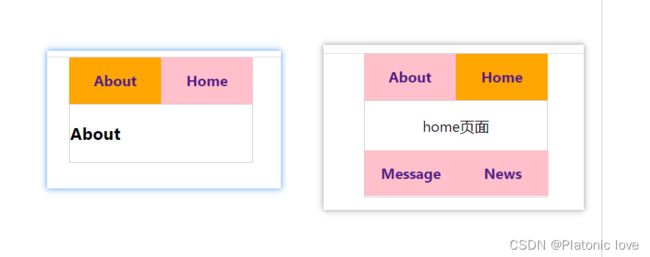
到这里,一级路由就一级写完了,效果如下
三:创建二级(嵌套)路由
1.我们在第一步配置路由的时候,以及将二级路由配置好了,那么,我们开始编写二级路由吧
Message.jsx页面代码:
import React from 'react'
import { Link, Outlet } from 'react-router-dom'
const MyComponent = () => {
const msg = [
{ id: '1x001', title: '消息1', msg: '第1条消息' },
{ id: '1x002', title: '消息2', msg: '第2条消息' },
{ id: '1x003', title: '消息3', msg: '第3条消息' },
{ id: '1x004', title: '消息4', msg: '第4条消息' }
]
return (
{
msg.map(item => {
return (
-
{/*
1.使用params的方式传递参数,需要在路由(表)上声名接受参数,to={`detail/${item.id}/${item.title}/${item.msg}`}
2.使用search的方式传递参数,无需在路由(表)上声名接受参数,to={`detail/?id=${item.id}&title=${item.title}&msg=${item.msg}`}
3.使用state的方式传递参数,无需在路由(表)上声名接受参数,
*/}
{item.title}
)
})
}
2.News.jsx页面代码:
import React from 'react'
import { useNavigate, Outlet } from 'react-router-dom'
const MyComponent = () => {
const msg = [
{ id: '1x001', title: '消息1', msg: '第1条消息' },
{ id: '1x002', title: '消息2', msg: '第2条消息' },
{ id: '1x003', title: '消息3', msg: '第3条消息' },
{ id: '1x004', title: '消息4', msg: '第4条消息' }
]
const navigate = useNavigate()
function replaceShow (id, title, msg) {
//useNavigate的方式进行的传参,使用的都是state传参
// url:需要跳转的路由地址,'/home/news/detail'
// replace:是否在factory中替换路由,如果为true,则替换,否则,将会追加路由到factory中,默认为false
// state:需要传递的参数
navigate(`/home/news/detail`, { replace: true, state: { id, title, msg } })
}
function pushShow (id, title, msg) {
navigate(`/home/news/detail`, { replace: false, state: { id, title, msg } })
}
return (
{
msg.map(item => {
return (
)
})
}
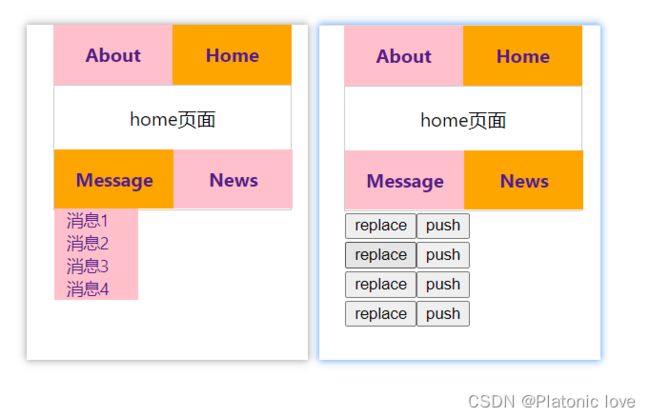
到这里,二级嵌套路由也写完了,效果如下
四、编程式路由创建
在第三大步中,我们已经编写了传参的各种方式,接下来,我们来编写一下如何接收参数
1.Detail.jsx页面代码:
import React from 'react'
import {
	useLocation,
	// useParams,
	// useSearchParams
} from 'react-router-dom'

const MyComponent = () => {
	// params传参,使用useParams来接受参数
	// const params = useParams()
	// const { id, title, msg } = params

	//search传参,使用useSearchParams()来接受参数
	// const [params] = useSearchParams()
	// const id = params.get('id')
	// const title = params.get('title')
	// const msg = params.get('msg')

	//state传参,使用useLocation()来接收参数
	// 值得注意的式,在编程式路由中使用useNavigate的方式进行传参,式用的都是state传参
	const params = useLocation()
	console.log(params)
	const { state: { id, msg, title } } = params

	return (

			ID:{id}

			标题:{title}

			内容:{msg}

	)
}

export default MyComponent
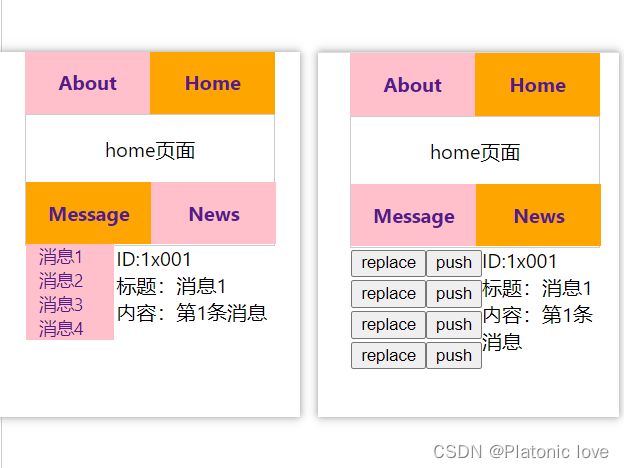
接收参数页面写完了,效果如下:
