uni-app打包安卓app如何接入极光推送JG-JPush
一、我们需要用到的一些插件以及极光平台的官网链接:
极光推送官方SDK
极光JCore官方SDK
极光官网平台
极光官方demo
二、具体实现:
1.上面的前两个链接是极光推送的官方插件,需要我们下载下来用作本地插件使用(或者直接在Dcloud绑定云插件)
如果是本地插件的话:
a.需要在项目下创建一个nativeplugins文件夹,
b.将刚才下载的JG-JPush,JG-JCore文件夹导入nativeplugins文件夹中
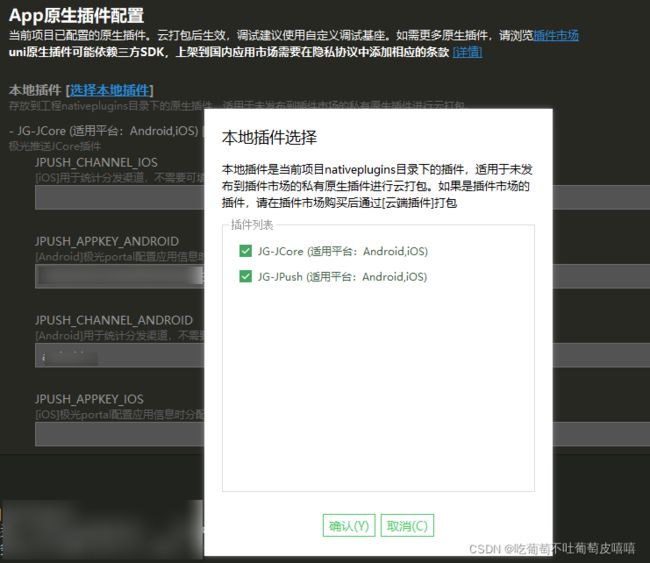
c.在manifest.json文件中点击App原生插件配置:导入本地插件即可
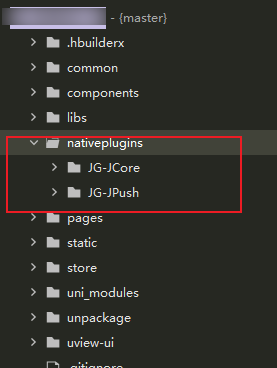
或者直接下载极光官方demo,把nativeplugins文件夹放到自己的项目中

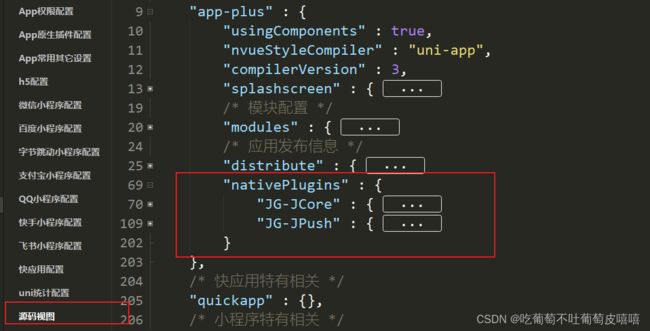
2.将插件成功导入本地之后,mainfest.json里面点击源码视图,会看到多出了一项 "nativePlugins"的配置
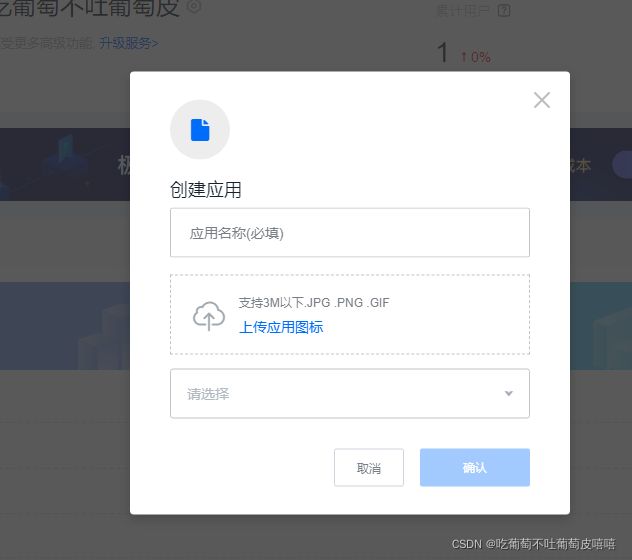
三、完成以上操作后需要去极光官网上面注册账号然后登录之后点击头像选中服务中心,然后找到开发者平台进入,最后点击创建应用,创建好以后点击确认即可。
确认后会自动进入以下页面,点击下一步即可
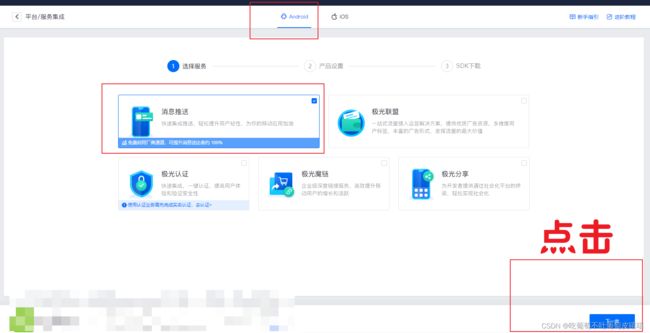
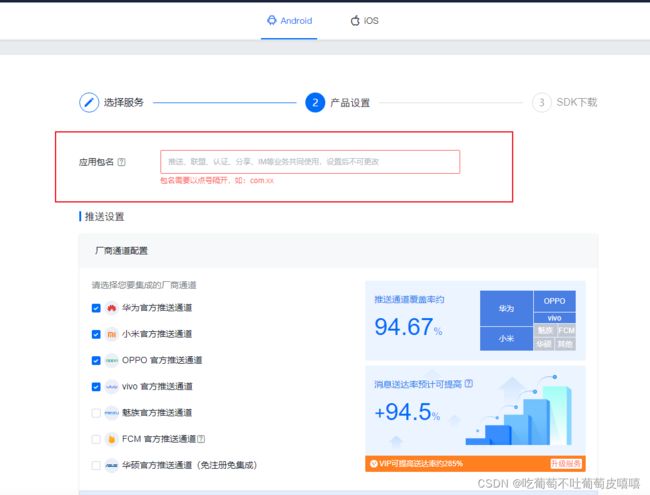
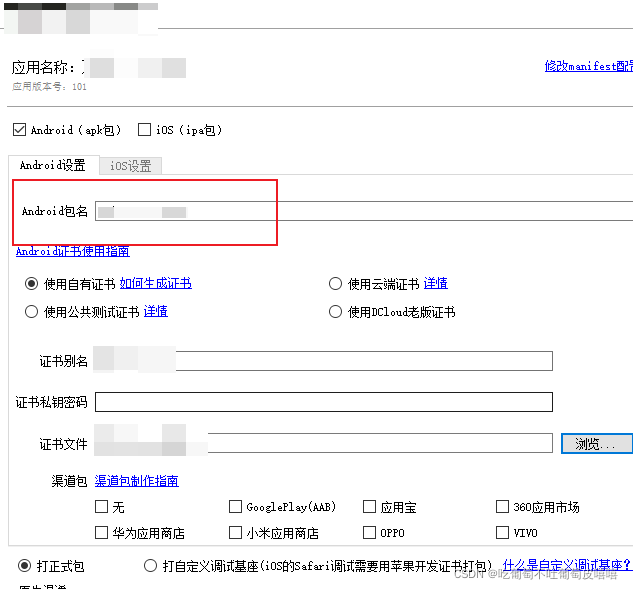
注意:应用包名一旦确定后不可修改,这里的包名需要填写你实际项目的包名,在hbuilder进行自定义基座打包时填写的也是这个对用的包名,填写之后直接回到应用管理:
完成以上操作就可以在极光左侧菜单栏找到设置里面的应用设置即可看到创建的应用信息
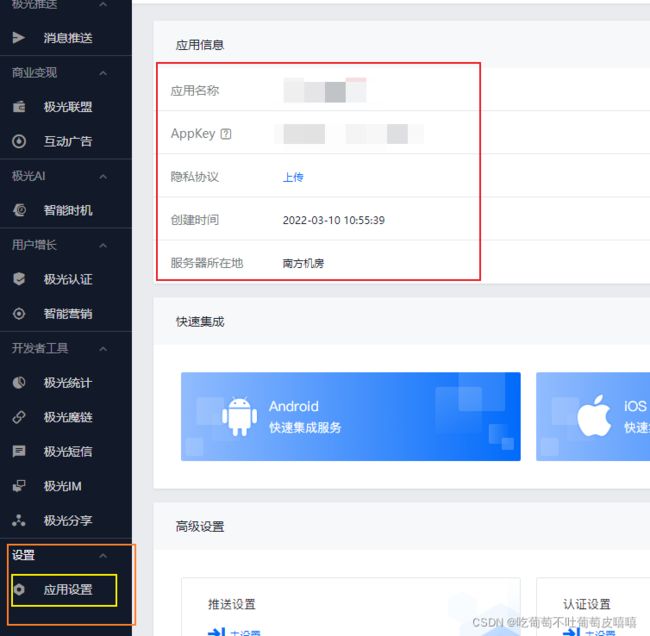
注意:这里的AppKey是应用在极光平台的唯一标识
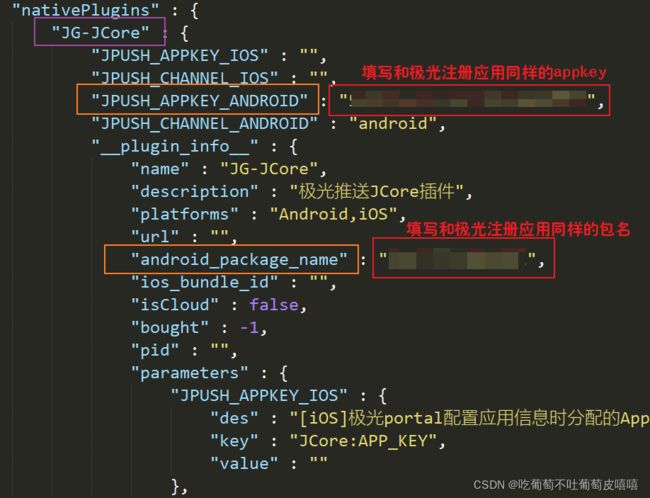
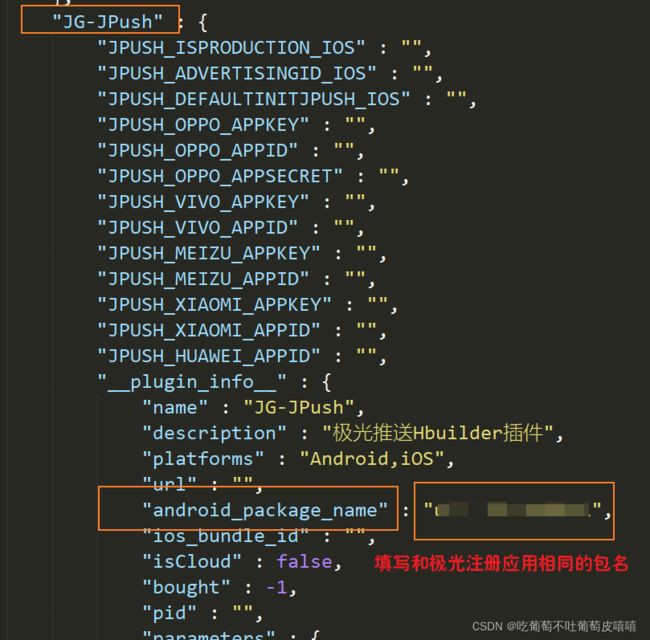
最后又回到项目mainfest.json里面的源码视图,修改nativeplugins里面的几个属性值
JG-JCore里面修改如下:

JG-JPush里面修改如下:
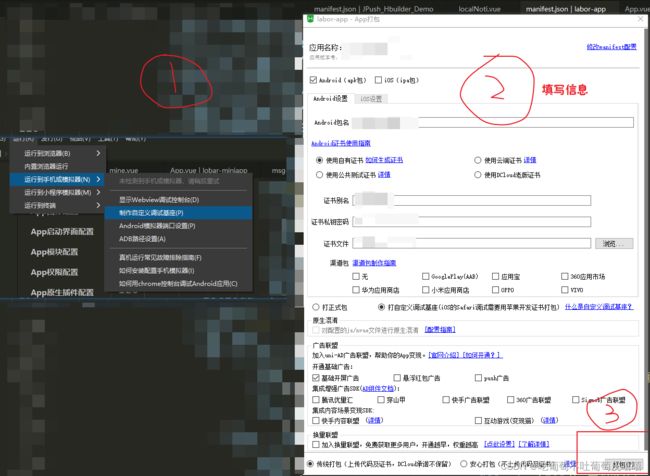
上述配置全部完成之后,就可以进行我们自定义基座的打包了:
hbuilder工具点击:运行---->运行到手机或模拟器---->制作自定义基座。包名一定要和极光注册应用时填写的包名保持一致。
打包可能要等一会儿

打包完成后手机通过usb两个电脑分两步:
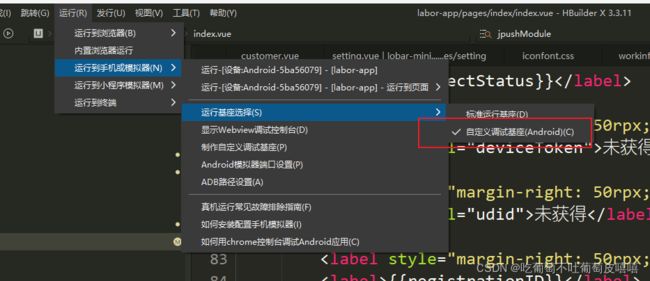
1.点击运行——> 运行到手机和模拟器 ——>自定义调试基座
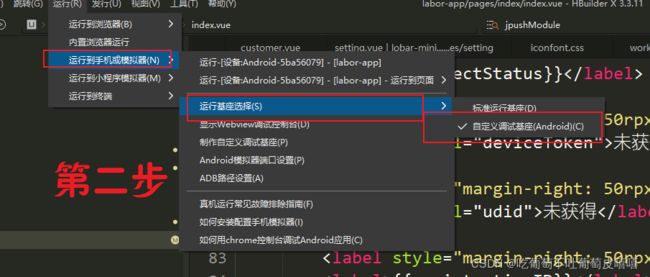
2.再次点击运行——> 运行到手机和模拟器 ——>运行到设备
大无语事件!!!!!
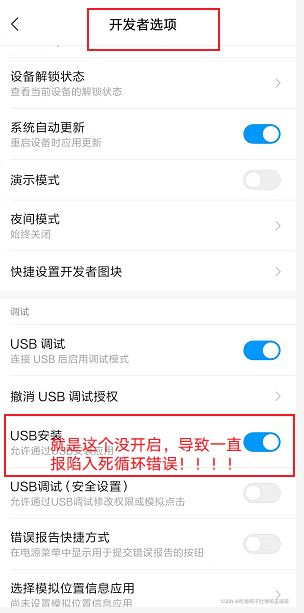
运行到设备的时候一直报如下错误(并且我根据提示进行了操作之后再次运行又陷入相同报错,此刻已经进入死循环了)

![]()
于是网上百度了很多都很多的方法都没有,在看了官方文档还有社区文档的时候,一个人的评论让我顿悟,说要开启usb安装 在手机开发者选项里面开启,我开启之后就运行起来了,真是太不容易了
在页面引入如下代码进行测试==获取registrationID后在极光后台选择我们的应用,然后自建一条推送消息(此处代码来自官网demo)
<template>
    <div>
		</br>
		</br>
		<label style="margin-right: 50rpx;">网络状态:</label>
		<label>{{connectStatus}}</label>
		</br>
		<label style="margin-right: 50rpx;">DeviceToken:</label>
		<label v-model="deviceToken">未获得</label>
		</br>
		<label style="margin-right: 50rpx;">UDID:</label>
		<label v-model="udid">未获得</label>
		</br>
		<label style="margin-right: 50rpx;">RegistrationID:</label>
		<label>{{registrationID}}</label>
		</br>
		<label style="margin-right: 50rpx;">appkey:</label>
		<label v-model="appkey">未获得</label>
		</br>

		<label>---------------------------------</label>
		<button type="primary" @click="openSettingsForNotification">打开通知设置界面</button>
		</br>
		<button type="primary" @click="setLoggerEnable">打开日志</button>
		</br>
		<button type="primary" @click="setLoggerUnEnable">关闭日志</button>
		</br>
		<button type="primary" @click="getRegistrationID">获取注册id</button>

    </div>
</template>

<script>
    // 首先需要通过 uni.requireNativePlugin("ModuleName") 获取 module
    var jpushModule = uni.requireNativePlugin("JG-JPush")
    export default {

		data() {
			return {
				connectStatus: '未链接',
				deviceToken: '',
				udid: '',
				registrationID: '未获得',
				appkey: '',
			}
		},

		onLoad() {
			console.log('开始监听连接状态')
			uni.$on('connectStatusChange',(connectStatus)=>{
				   var connectStr = ''
				   if (connectStatus == true) {
					   connectStr = '已连接'
					   this.getRegistrationID()
				   }else {
					   connectStr = '未连接'
				   }
				   console.log('监听到了连接状态变化 --- ', connectStr)
				   this.connectStatus = connectStr
			    })
		},

		onUnload() {
			// 移除监听事件
		    uni.$off('connectStatusChange')
		},

        methods: {

			openSettingsForNotification() {
				jpushModule.openSettingsForNotification((result)=>{
					this.showToast(result)
				})
			},

			setLoggerEnable() {
				jpushModule.setLoggerEnable(true)
			},

			setLoggerUnEnable() {
				jpushModule.setLoggerEnable(false)
			},

			getRegistrationID() {
				jpushModule.getRegistrationID(result=>{
					let registerID = result.registerID
					console.log(registerID)
					this.showToast(registerID)
					this.registrationID = registerID
				})
			},

			showToast(result){
				uni.showToast({
					icon:'none',
					title: JSON.stringify(result),
					duration: 3000
				})
			}

        }
    }
</script>

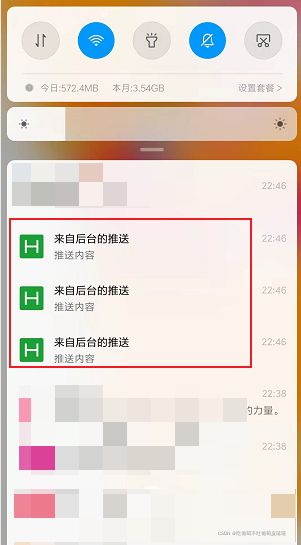
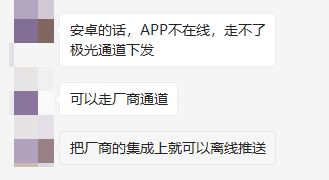
总结:由于是用的集成的skd,所以很不稳定,在app里面的情况下,虽然极光推送成功了,但是手机外收不到消息,手机内可以获取到,遇到这种情况不要慌,问题基本上已经解决一大半了,想要解决这个问题我去咨询了极光客服,走厂商就可以解决这种情况,但是需要去对应的厂商申请appid。
文章若有不对的地方,欢迎指正~~~


