MOSS 2010:Visual Studio 2010开发体验(10)——列表开发之内容类型
上一篇,我讲到了列表的一些基本概念
http://www.cnblogs.com/chenxizhang/archive/2010/04/24/1719467.html
1. 内容类型(Content Type)
里面会包含栏位定义(Field)
2. 列表定义(List Definition)
3. 列表实例(List Instance)
接下来,我们先来看一下内容类型,应该如何在Visual Studio中来定义和实现。
我们的目的是定义这样一个内容类型,它是用来填写订单信息的,它包含了如下三个栏位
1.订购编号(数字)
2.客户编号(文字)
3.订购日期(日期)
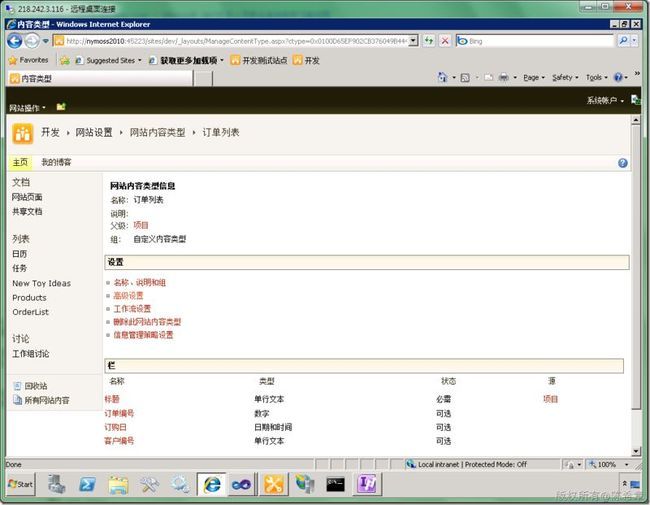
为了易于大家理解和学习,我预先通过在网站中手工添加的方式已经做出来了该内容类型,如下图所示
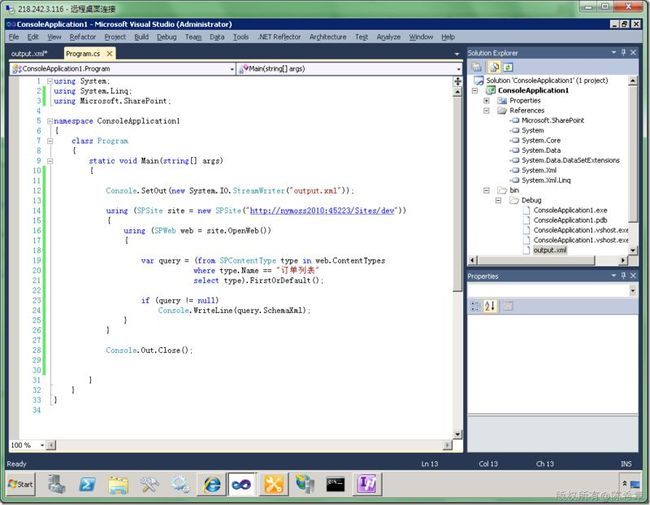
我们接下来,通过编程的方式查看一下这个类型的具体定义是怎么样的
【注意】目前我并没有发现有什么内置工具可以直接导出内容类型的定义。虽然确实有第三方的一个工具(Solution Generator)可以做,但我还是自己写了几句代码
using System;
using System.Linq;
using Microsoft.SharePoint;

namespace ConsoleApplication1
{
    class Program
    {
        static void Main(string[] args)
        {

            Console.SetOut(new System.IO.StreamWriter("output.xml"));

            using (SPSite site = new SPSite("http://nymoss2010:45223/Sites/dev"))
            {
                using (SPWeb web = site.OpenWeb())
                {

                    var query = (from SPContentType type in web.ContentTypes
                                where type.Name == "订单列表"
                                select type).FirstOrDefault();

                    if (query != null)
                        Console.WriteLine(query.SchemaXml);
                }
            }

            Console.Out.Close();


        }
    }
}
这个小程序,可以返回如下一个XML文件
<ContentType ID="0x0100D65EF902CB376049B444A07F18A80074" Name="订单列表" Group="自定义内容类型" Version="3">
  <Folder TargetName="_cts/订单列表" />
  <Fields>
    <Field ID="{c042a256-787d-4a6f-8a8a-cf6ab767f12d}" Name="ContentType" SourceID="http://schemas.microsoft.com/sharepoint/v3" StaticName="ContentType" Group="_Hidden" Type="Computed" DisplayName="内容类型" ReadOnly="TRUE" Sealed="TRUE" Sortable="FALSE" RenderXMLUsingPattern="TRUE" PITarget="MicrosoftWindowsSharePointServices" PIAttribute="ContentTypeID" Customization="">
      <FieldRefs>
        <FieldRef ID="{03e45e84-1992-4d42-9116-26f756012634}" Name="ContentTypeId" />
      </FieldRefs>
      <DisplayPattern>
        <MapToContentType>
          <Column Name="ContentTypeId" />
        </MapToContentType>
      </DisplayPattern>
    </Field>
    <Field ID="{fa564e0f-0c70-4ab9-b863-0177e6ddd247}" Name="Title" SourceID="http://schemas.microsoft.com/sharepoint/v3" StaticName="Title" Group="_Hidden" Type="Text" DisplayName="标题" Required="TRUE" FromBaseType="TRUE" Customization="" ShowInNewForm="TRUE" ShowInEditForm="TRUE" />
    <Field Type="Number" DisplayName="订单编号" Required="FALSE" EnforceUniqueValues="FALSE" Indexed="FALSE" Group="自定义栏" IMEMode="inactive" ID="{6951653a-c02e-4440-a918-54dc6c6b4ad4}" SourceID="{bc8f77ac-9814-448d-9c64-159c9680ecfd}" StaticName="_x008ba2__x005355__x007f16__x0053f7_" Name="_x008ba2__x005355__x007f16__x0053f7_" Customization="" />
    <Field Type="DateTime" DisplayName="订购日" Required="FALSE" EnforceUniqueValues="FALSE" Indexed="FALSE" Format="DateOnly" Group="自定义栏" IMEMode="inactive" ID="{308eac8d-86ca-49e9-a65c-43bac42bb9c4}" SourceID="{bc8f77ac-9814-448d-9c64-159c9680ecfd}" StaticName="_x008ba2__x008d2d__x0065e5_" Name="_x008ba2__x008d2d__x0065e5_" Customization="">
      <Default>[today]</Default>
    </Field>
    <Field Type="Text" DisplayName="客户编号" Required="FALSE" EnforceUniqueValues="FALSE" Indexed="FALSE" MaxLength="255" Group="自定义栏" ID="{442bcf2b-554b-4f53-8877-8612d85cbb8e}" SourceID="{bc8f77ac-9814-448d-9c64-159c9680ecfd}" StaticName="_x005ba2__x006237__x007f16__x0053f7_" Name="_x005ba2__x006237__x007f16__x0053f7_" Customization="" />
  </Fields>
  <XmlDocuments>
    <XmlDocument NamespaceURI="http://schemas.microsoft.com/sharepoint/v3/contenttype/forms">
      <FormTemplates xmlns="http://schemas.microsoft.com/sharepoint/v3/contenttype/forms">
        <Display>ListForm</Display>
        <Edit>ListForm</Edit>
        <New>ListForm</New>
      </FormTemplates>
    </XmlDocument>
  </XmlDocuments>
</ContentType>
【注意】你可能会说,这样做是不是太麻烦了呢?的确不是很方便,我下面会做一个工具来改善这一点。
好了,到这里为止,我们就大致明白了,一个内容类型其实是一个XML定义,那么我们如何来在Visual Studio中来定义它呢
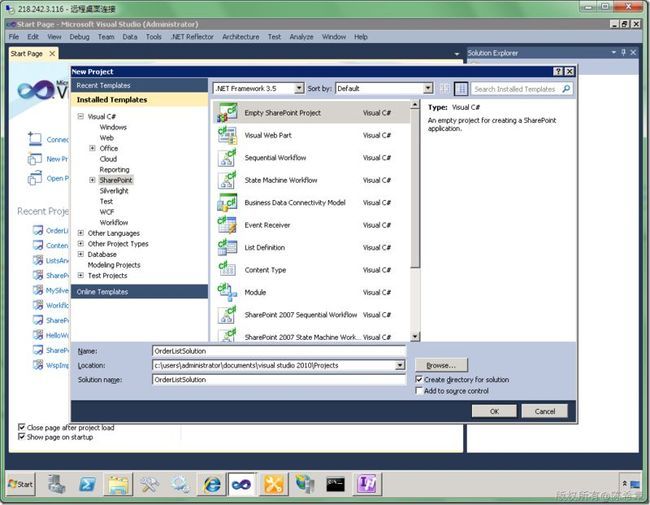
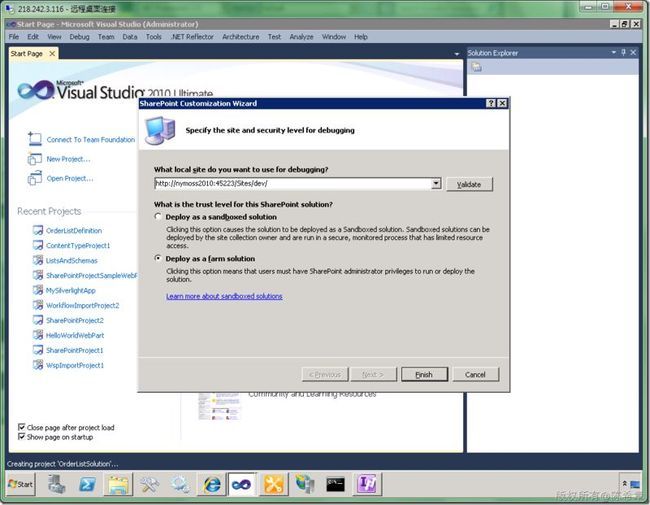
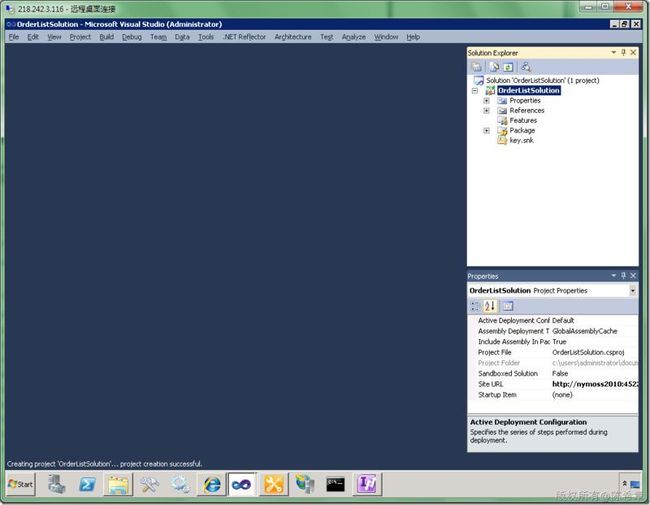
1. 首先创建一个Empty Project
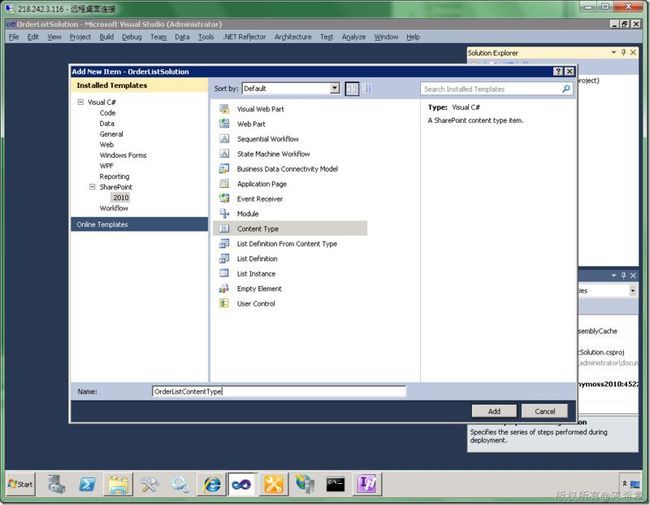
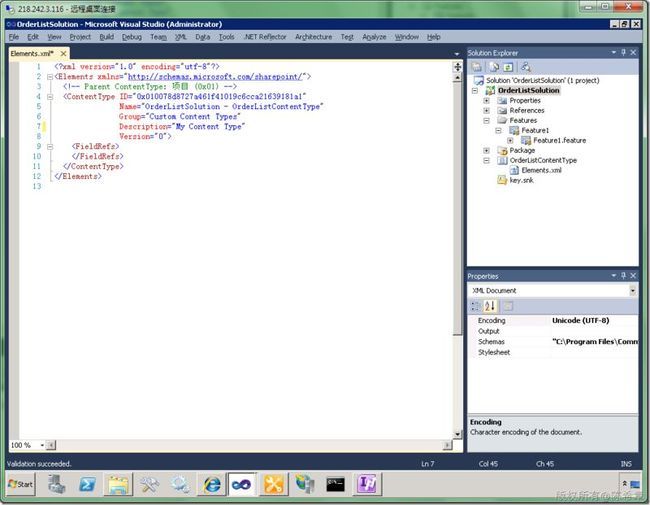
2. 添加一个内容类型
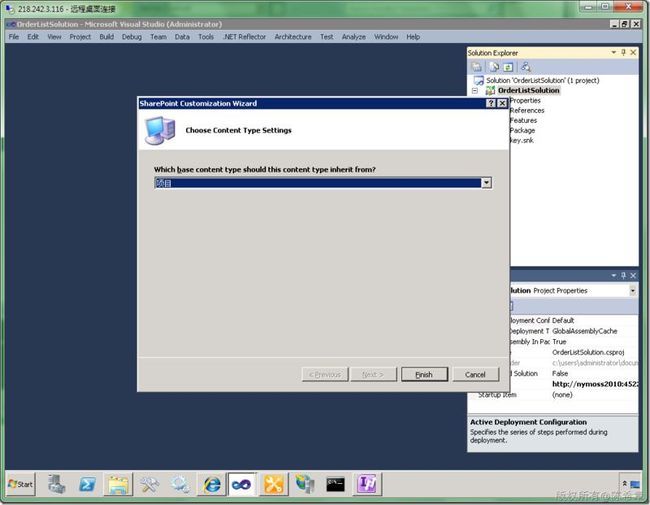
将父内容类型设置为“项目”
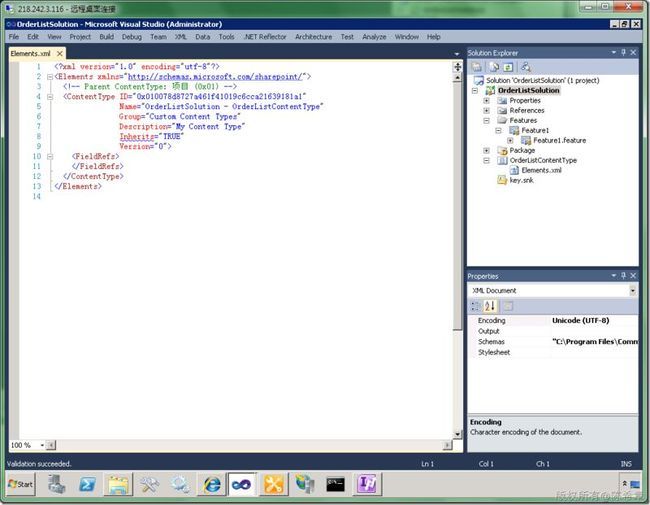
【注意】上面默认生成的XML定义中,inherits确实会出错,我们干脆删除它先
3. 修改内容类型栏位定义
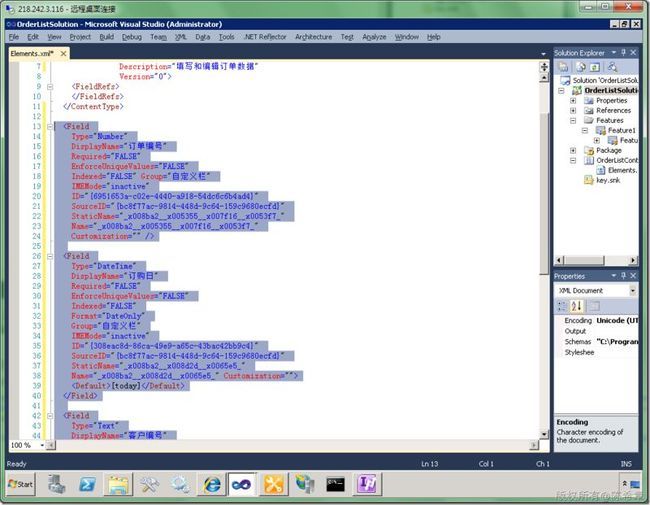
还记得之前那段XML吗?我们需要类似下面的语法定义栏位即可
    <Field Type="Number" DisplayName="订单编号" Required="FALSE" EnforceUniqueValues="FALSE" Indexed="FALSE" Group="自定义栏" IMEMode="inactive" ID="{6951653a-c02e-4440-a918-54dc6c6b4ad4}" SourceID="{bc8f77ac-9814-448d-9c64-159c9680ecfd}" StaticName="_x008ba2__x005355__x007f16__x0053f7_" Name="_x008ba2__x005355__x007f16__x0053f7_" Customization="" />
    <Field Type="DateTime" DisplayName="订购日" Required="FALSE" EnforceUniqueValues="FALSE" Indexed="FALSE" Format="DateOnly" Group="自定义栏" IMEMode="inactive" ID="{308eac8d-86ca-49e9-a65c-43bac42bb9c4}" SourceID="{bc8f77ac-9814-448d-9c64-159c9680ecfd}" StaticName="_x008ba2__x008d2d__x0065e5_" Name="_x008ba2__x008d2d__x0065e5_" Customization="">
      <Default>[today]</Default>
    </Field>
    <Field Type="Text" DisplayName="客户编号" Required="FALSE" EnforceUniqueValues="FALSE" Indexed="FALSE" MaxLength="255" Group="自定义栏" ID="{442bcf2b-554b-4f53-8877-8612d85cbb8e}" SourceID="{bc8f77ac-9814-448d-9c64-159c9680ecfd}" StaticName="_x005ba2__x006237__x007f16__x0053f7_" Name="_x005ba2__x006237__x007f16__x0053f7_" Customization="" />
我们如法炮制,添加到Elements文件中去
【注意】要添加在ContentType元素的外面,而不是里面
【注意】你可能需要修改一下有关的ID,这个可以通过Tools==>Create GUID这个工具来做到
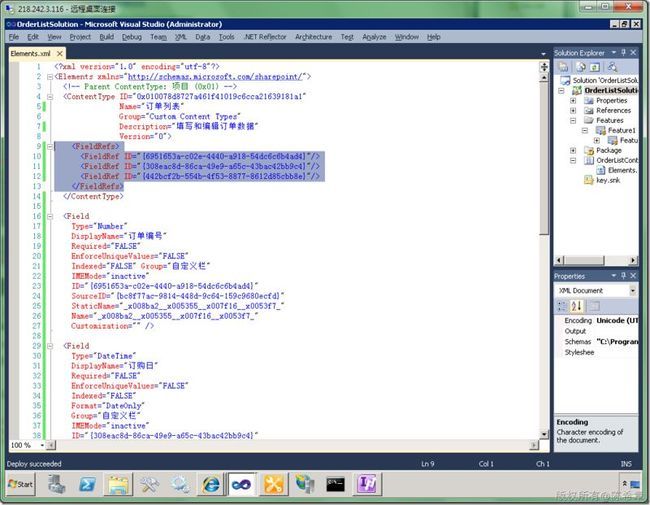
接下来,我们建立内容类型与栏位的关系(称为所有的引用)
    <FieldRefs>
      <FieldRef ID="{6951653a-c02e-4440-a918-54dc6c6b4ad4}"/>
      <FieldRef ID="{308eac8d-86ca-49e9-a65c-43bac42bb9c4}"/>
      <FieldRef ID="{442bcf2b-554b-4f53-8877-8612d85cbb8e}"/>
    </FieldRefs>
4. 部署内容类型
完成上面的操作之后,就可以来部署看看效果了。请按下CTRL+F5键,部署将产生如下的一些输出
------ Build started: Project: OrderListSolution, Configuration: Debug Any CPU ------
OrderListSolution -> c:\users\administrator\documents\visual studio 2010\Projects\OrderListSolution\OrderListSolution\bin\Debug\OrderListSolution.dll
Successfully created package at: c:\users\administrator\documents\visual studio 2010\Projects\OrderListSolution\OrderListSolution\bin\Debug\OrderListSolution.wsp
------ Deploy started: Project: OrderListSolution, Configuration: Debug Any CPU ------
Active Deployment Configuration: Default
Run Pre-Deployment Command:
Skipping deployment step because a pre-deployment command is not specified.
Recycle IIS Application Pool:
Skipping application pool recycle because no matching package on the server was found.
Retract Solution:
Skipping package retraction because no matching package on the server was found.
Add Solution:
Adding solution 'OrderListSolution.wsp'...
Deploying solution 'OrderListSolution.wsp'...
Activate Features:
Activating feature 'Feature1' ...
Run Post-Deployment Command:
Skipping deployment step because a post-deployment command is not specified.
========== Build: 1 succeeded or up-to-date, 0 failed, 0 skipped ==========
========== Deploy: 1 succeeded, 0 failed, 0 skipped ==========
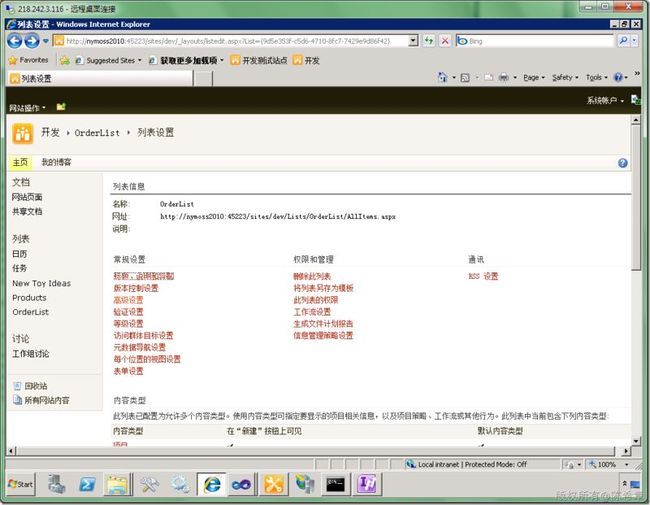
部署如果成功的话,会自动打开我们的网站。为了作为测试,我单独创建了一个OrderList的列表(此步骤略过)
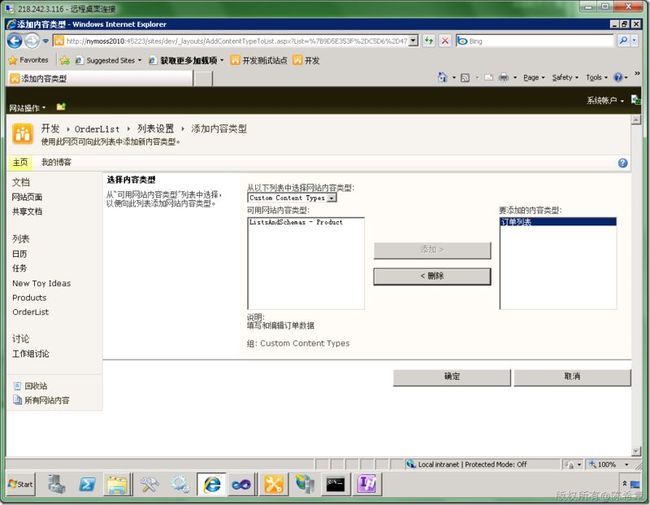
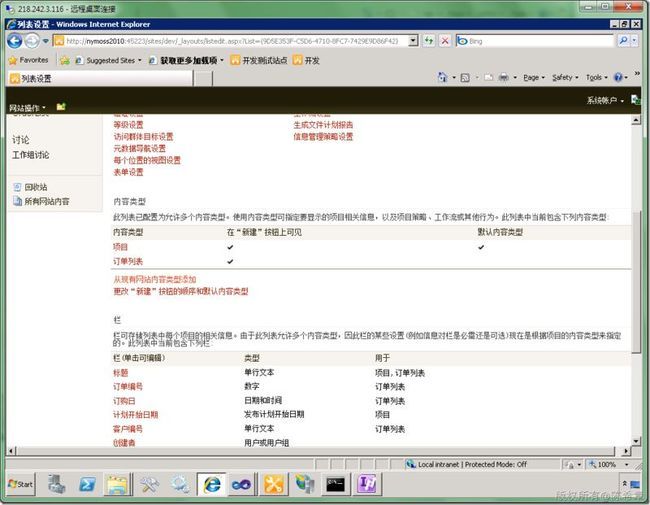
添加内容类型
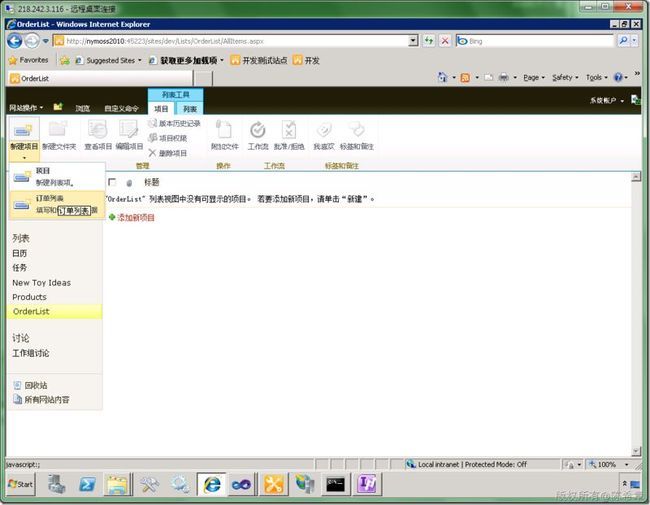
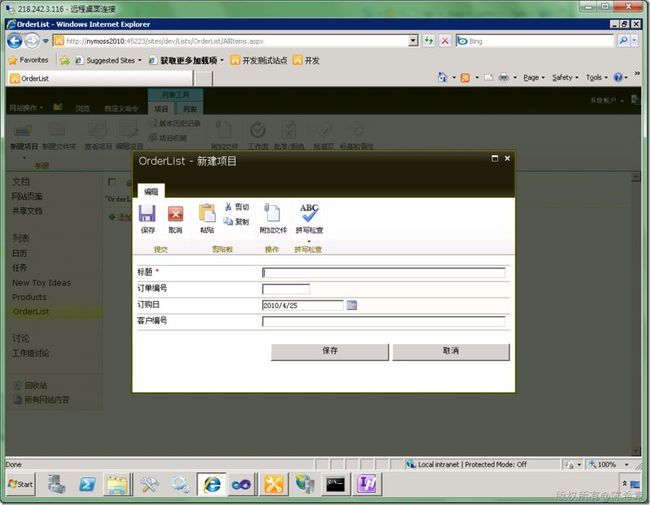
下面我们来看看如何使用该内容类型
好,到这里为止,我们就在Visual Studio中实现了一个自定义内容类型,而且将它部署到了网站,然后在一个列表中使用了它。
但是,问题是,如果每次都需要我们手工来建立列表与内容类型的联系,其实还是比较繁琐的。有没有办法让一个列表自动地就关联到某个内容类型呢?
当然可以的,我们下面就会介绍列表定义和列表实例的实现。
