GateWay简单的使用、集群搭建和数据库动态配置
GateWay简单的使用、集群搭建和数据库动态配置
- GateWay简单的使用、集群搭建和数据库动态配置
-
- 什么是微服务网关?
- 过滤器和网关的区别
- Zuul 与 GateWay 有哪些区别
- GateWay环境搭建
-
- 新建一个Maven空项目gateway
-
- pom.xml
- application.yml
- 主启动类:
- GateWay整合Nacos实现服务转发
-
- 修改application.yml
- GateWay实现全局过滤方法
-
- TokenGlobalFilter
- 基于Nginx部署GateWay集群
- 数据库实现动态服务网关
-
- 添加依赖
- 数据库脚本
- pojo类:GateWay
- GateWayMapper
- application.yml添加
- GateWayService
- GateWayController
- GateWay常用谓语词汇表
-
- 1、时间之后
- 2、时间之前
- 3、时间之间
- 4、Cookie
- 5、主机路由
- 6、方法
- 7、Path(最常用)
- 8、权重
- GateWay实现解决跨域问题
- 网关GateWay源码分析
-
- SpringBoot项目源码的入口
GateWay简单的使用、集群搭建和数据库动态配置
什么是微服务网关?
-
微服务网关是整个微服务API请求的入口,可以实现过滤Api接口。
-
作用:可以实现用户的验证登录、解决跨域、日志拦截、权限控制、限流、熔断、负载均衡、黑名单与白名单机制等。
-
微服务中的架构模式采用前后端分离,前端调用接口地址都能够被抓包分析到。

在微服务中,我们所有的企业入口必须先经过API网关,经过API网关转发到真实的服务器中。
如何添加验证信息:
- 传统的方式我们可以使用过滤器拦截用户会话信息,这个过程所有的服务器都必须写入该验证会话登录的代码。
- 使用了网关只需要在网关中配置即可
过滤器和网关的区别
-
过滤器适合于单个服务实现过滤请求;
-
网关拦截整个的微服务实现过滤请求,能够解决整个微服务中冗余代码。
-
过滤器是局部拦截,网关实现全局拦截。
Zuul 与 GateWay 有哪些区别
Zuul网关属于netfix公司开源的产品,属于第一代微服务网关。
Gateway属于SpringCloud自研发的网关框架,属于第二代微服务网关。
GateWay环境搭建
Nacos全程是启动的
新建一个Maven空项目gateway
pom.xml
<parent>
    <groupId>org.springframework.bootgroupId>
    <artifactId>spring-boot-starter-parentartifactId>
    <version>2.0.2.RELEASEversion>
parent>
<dependencies>
    <dependency>
        <groupId>org.springframework.cloudgroupId>
        <artifactId>spring-cloud-starter-gatewayartifactId>
        <version>2.0.0.RELEASEversion>
    dependency>


dependencies>
application.yml
server:
  port: 80

####服务网关名称
spring:
  application:
    name: gateway
  cloud:
    gateway:
      ###路由策略
      routes:
        ###路由id
        - id: provider
          ## 根据我们的服务名称查找地址是实现调用
          uri: https://www.baidu.com/
          ###匹配规则
          predicates:
            - Path=/provider/**
### 127.0.0.1/provider  帮助我们转发到 https://www.baidu.com/

## 留个心眼:配置不会写死
主启动类:
@SpringBootApplication
public class AppGateWay {
    public static void main(String[] args) {
        SpringApplication.run(AppGateWay.class, args);
    }
}
启动项目访问 http://localhost/provider 即可跳到百度页面
GateWay整合Nacos实现服务转发
先添加依赖下先
<dependency>
    <groupId>com.alibaba.cloudgroupId>
    <artifactId>spring-cloud-starter-alibaba-nacos-discoveryartifactId>
    <version>2.0.0.RELEASEversion>
dependency>
我演示的时候还有一个项目也启动了:服务提供者,里面有这样一个接口,方便观察:
@RequestMapping("/")
public String provider(HttpServletRequest request) {
    String serverPort = request.getHeader("serverPort");
    return "提供者端口号:" + this.serverPort + "网关端口号:" + serverPort;
}
修改application.yml
server:
  port: 80

#服务网关名称
spring:
  application:
    name: gateway
  cloud:
    ### 服务注册地址
    nacos:
      discovery:
        server-addr: 127.0.0.1:8848
    gateway:
      discovery:
        locator:
          #开启以服务id去注册中心上获取转发地址
          enabled: true
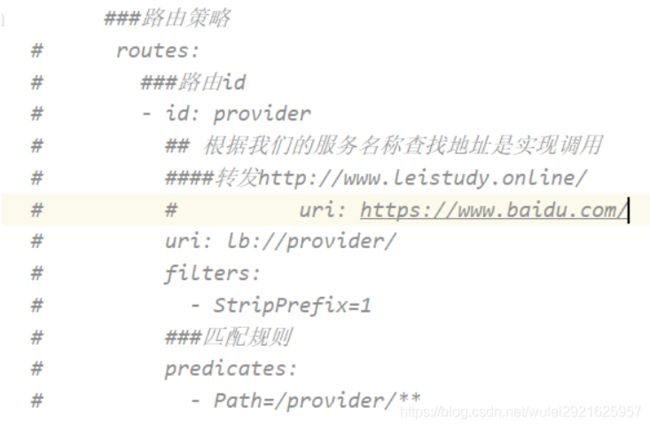
        ###路由策略
      routes:
        ###路由id
        - id: provider
          ## 根据我们的服务名称查找地址是实现调用
          #          uri: https://www.baidu.com/
          # 修改uri 由于我们是从服务注册中心拿的服务名,所以可能是一个集群,所以用lb
          uri: lb://provider/
          # 配置以下过滤,不然报错
          filters:
            - StripPrefix=1
          ###匹配规则
          predicates:
            - Path=/provider/**

  ### 127.0.0.1/provider  帮助我们转发到 http://127.0.0.1:8080/  (8080是我服务提供者的端口号,暂时只启动了一个)
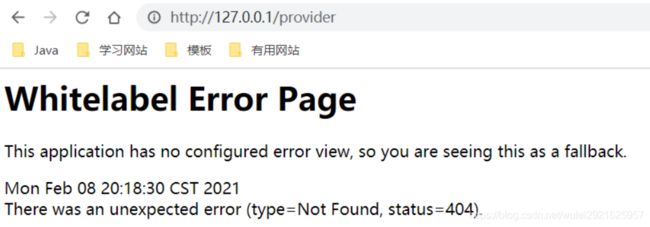
启动项目即可: http://localhost/provider

GateWay实现全局过滤方法
其实也很简单,实现一个接口即可GlobalFilter,下面写一个全局过滤器:必须传token才能访问
TokenGlobalFilter
@Component
public class TokenGlobalFilter implements GlobalFilter {

    @Value("${server.port}")
    private String serverPort;

    @Override
    public Mono<Void> filter(ServerWebExchange exchange, GatewayFilterChain chain) {
        //如何去获取参数
        String token = exchange.getRequest().getQueryParams().getFirst("token");
        if (StringUtils.isEmpty(token)) {
            ServerHttpResponse response = exchange.getResponse();
            response.setStatusCode(HttpStatus.INTERNAL_SERVER_ERROR);
            String msg = "token not is null ";
            DataBuffer buffer = response.bufferFactory().wrap(msg.getBytes());
            return response.writeWith(Mono.just(buffer));
        }
        // 在请求头中存放serverPort serverPort
        ServerHttpRequest request = exchange.getRequest().mutate().header("serverPort", serverPort).build();
        //说明你的token不为空,直接转发到我们的真实服务
        return chain.filter(exchange.mutate().request(request).build());
    }
}
基于Nginx部署GateWay集群
首先在Nginx的配置文件中修改配置
worker_processes  1;

events {
    worker_connections  1024;
}

http{
	include        mime.types;
	default_type   application/octet-stream;

	# 监听的网关地址,默认为轮询算法
	upstream mygatewayaddress {
		server 127.0.0.1:81;
		server 127.0.0.1:82;
	}

	server {
		listen 80;
		# 我的www.wu.com是本地的域名映射
		server_name  www.wu.com;
		location / {
			proxy_pass http://mygatewayaddress/;
		}
    }
}
把上面的那个全局过滤的方法给注释了,免得访问还要带参数
然后启动网关分别为 81、82,测试即可 http://127.0.0.1/provider
数据库实现动态服务网关
既然实现动态配置,那么可以把aplication.yml里面的路由注释掉
添加依赖
<dependency>
    <groupId>org.projectlombokgroupId>
    <artifactId>lombokartifactId>
dependency>
<dependency>
    <groupId>org.mybatis.spring.bootgroupId>
    <artifactId>mybatis-spring-boot-starterartifactId>
    <version>2.1.4version>
dependency>
<dependency>
    <groupId>org.springframework.bootgroupId>
    <artifactId>spring-boot-starter-jdbcartifactId>
dependency>

<dependency>
    <groupId>mysqlgroupId>
    <artifactId>mysql-connector-javaartifactId>
    <version>8.0.21version>
dependency>

<dependency>
    <groupId>com.alibabagroupId>
    <artifactId>druidartifactId>
    <version>1.1.23version>
dependency>
数据库脚本
create database gateway;

use gateway;

CREATE TABLE `gateway`
(
    `id`            int(11) NOT NULL AUTO_INCREMENT primary key,
    `route_id`      varchar(11)  DEFAULT NULL,
    `route_name`    varchar(255) DEFAULT NULL,
    `route_pattern` varchar(255) DEFAULT NULL,
    `route_type`    varchar(255) DEFAULT NULL,
    `route_url`     varchar(255) DEFAULT NULL
) ENGINE = InnoDB
  AUTO_INCREMENT = 2;

select *
from gateway;
pojo类:GateWay
@Repository
@Data
@AllArgsConstructor
@NoArgsConstructor
public class GateWay {
    private int id;
    private String routeId;
    private String routeName;
    private String routePattern;
    private String routeType;
    private String routeUrl;
}
GateWayMapper
@Mapper
@Component
public interface GateWayMapper {
    @Select("select * from gateway")
    List<GateWay> getAll();
}
application.yml添加
  datasource:
    username: root
    password: Wl123456
    url: jdbc:mysql://127.0.0.1:3306/gateway?useUnicode=true&characterEncoding=UTF-8&useSSL=true&serverTimezone=UTC
    driver-class-name: com.mysql.cj.jdbc.Driver

#整合mybatis
mybatis:
  type-aliases-package: com.wu.pojo
  configuration:
    map-underscore-to-camel-case: true
GateWayService
//可以说是写死的
@Service
public class GateWayService implements ApplicationEventPublisherAware {

    private ApplicationEventPublisher publisher;

    @Autowired
    private GateWayMapper gateWayMapper;

    @Autowired
    private RouteDefinitionWriter routeDefinitionWriter;

    @Autowired
    @Override
    public void setApplicationEventPublisher(ApplicationEventPublisher applicationEventPublisher) {
        this.publisher = applicationEventPublisher;
    }


    public String initAllRoute() {
        // 从数据库查询配置的网关配置
        List<GateWay> gateWays = gateWayMapper.getAll();
        for (GateWay gw : gateWays) {
            System.out.println(gw);
            loadRoute(gw);
        }
        return "success";
    }

    //设置路由
    public String loadRoute(GateWay gateWay) {
        RouteDefinition definition = new RouteDefinition();
        Map<String, String> predicateParams = new HashMap<>(8);
        PredicateDefinition predicate = new PredicateDefinition();
        FilterDefinition filterDefinition = new FilterDefinition();
        Map<String, String> filterParams = new HashMap<>(8);

        // 如果配置路由type为0的话 则从注册中心获取服务
        URI uri = null;
        if ("0".equals(gateWay.getRouteType())) {
            uri = UriComponentsBuilder.fromUriString("lb://" + gateWay.getRouteUrl() + "/").build().toUri();
        } else {
            uri = UriComponentsBuilder.fromHttpUrl(gateWay.getRouteUrl()).build().toUri();
        }

        // 定义的路由唯一的id
        definition.setId(gateWay.getRouteId());
        predicate.setName("Path");
        //路由转发地址
        predicateParams.put("pattern", gateWay.getRoutePattern());
        predicate.setArgs(predicateParams);

        // 名称是固定的, 路径去前缀
        filterDefinition.setName("StripPrefix");
        filterParams.put("_genkey_0", "1");
        filterDefinition.setArgs(filterParams);
        definition.setPredicates(Arrays.asList(predicate));
        definition.setFilters(Arrays.asList(filterDefinition));
        definition.setUri(uri);
        routeDefinitionWriter.save(Mono.just(definition)).subscribe();
        this.publisher.publishEvent(new RefreshRoutesEvent(this));
        return "success";
    }
}
GateWayController
@RestController
public class GateWayController {
    @Autowired
    private GateWayService gateWayService;

    /**
     * 同步网关配置
     *
     * @return
     */
    @RequestMapping("/synGateWayConfig")
    public String synGateWayConfig() {
        return gateWayService.initAllRoute();
    }
}
启动项目访问: http://127.0.0.1/provider

好的,现在我们调用自己的接口来动态配置http://127.0.0.1/synGateWayConfig
调用完后再次访问http://127.0.0.1/provider
- 如果你实现的是项目启动就加载配置,那么万一数据库数据有变化怎么办?你又没有暴露接口,还是只能重启项
- 所以自己完全可以写一个可视化界面来管理数据库和配置网关,这样岂不是更好?因为公司数据库是不会让你去接触的
GateWay常用谓语词汇表
路由:是网关基本的模块,分别为id(唯一)、目标uri(真实服务地址)、一组谓词+过滤器一起组合而成,如果谓词匹配成功,则路由匹配成功。
谓词: 匹配Http请求参数
过滤器:对下游的服务器之前和之后实现处理。
1、时间之后
- id: provider
uri: http://www.baidu.com/
###匹配规则
predicates:
  - After=2017-01-20T17:42:47.789-07:00[America/Denver]
# 此路由与 2017 年 1 月 20 日 17:42 MountainTime(Denver)之后的所有请求相匹配。
2、时间之前
- id: provider
uri: http://www.baidu.com/
###匹配规则
predicates:
  - Before=2017-01-20T17:42:47.789-07:00[America/Denver]
# 此路由与 2017 年 1 月 20 日 17:42 MountainTime(Denver)之前的所有请求相匹配。
3、时间之间
- id: provider
uri: http://www.baidu.com/
###匹配规则
predicates:
  - Between=2017-01-20T17:42:47.789-07:00[America/Denver], 2018-01-21T17:42:47.789-07:00[America/Denver]
# 此路由与 2017年--2018年之间的所有请求相匹配。
4、Cookie
- id: provider
uri: http://www.baidu.com/
###匹配规则
predicates:
  - Cookie=chocolate, ch.p
# 此路由匹配具有名称为chocolate与ch.p匹配的cookie的请求。
5、主机路由
- id: provider
uri: http://www.baidu.com/
###匹配规则
predicates:
  - Host=**.somehost.org,**.anotherhost.org
# www.**.somehost.org ...
6、方法
- id: provider
uri: http://www.baidu.com/
###匹配规则
predicates:
  - Method=GET,POST
# get post请求的都行
7、Path(最常用)
- id: provider
uri: http://www.baidu.com/
###匹配规则
predicates:
  - Path=/red/{segment},/blue/{segment}
# /red/1 , /red/1/ ...
8、权重
spring:
  cloud:
    gateway:
      routes:
      - id: weight_high
        uri: https://www.baidu.com
        predicates:
        # 分组要相同才有效果
        - Weight=group1, 8
      - id: weight_low
        uri: https://www.taobao.com
        predicates:
        - Weight=group1, 2
# 这里的 8  2 不是没访问10次会出现 8 次或 2 次,而是没访问一次出现的概率!
GateWay实现解决跨域问题
解决跨域的问题
-
HttpClient转发
-
使用过滤器允许接口可以跨域 响应头设置
-
Jsonp 不支持我们的post 属于前端解决
-
Nginx解决跨域的问题保持我们域名和端口号一致性
-
Nginx也是通过配置文件解决跨域的问题
-
基于微服务网关解决跨域问题,需要保持域名和端口一致性
-
使用网关代码允许所有的服务可以跨域的问题
-
使用SpringBoot注解形式@CrossOrigin
/**
 * 解决跨域问题
 */
@Component
public class CrossOriginFilter implements GlobalFilter {
    @Override
    public Mono<Void> filter(ServerWebExchange exchange, GatewayFilterChain chain) {
        ServerHttpRequest request = exchange.getRequest();
        ServerHttpResponse response = exchange.getResponse();
        HttpHeaders headers = response.getHeaders();
        headers.add(HttpHeaders.ACCESS_CONTROL_ALLOW_ORIGIN, "*");
        headers.add(HttpHeaders.ACCESS_CONTROL_ALLOW_METHODS, "POST, GET, PUT, OPTIONS, DELETE, PATCH");
        headers.add(HttpHeaders.ACCESS_CONTROL_ALLOW_CREDENTIALS, "true");
        headers.add(HttpHeaders.ACCESS_CONTROL_ALLOW_HEADERS, "*");
        headers.add(HttpHeaders.ACCESS_CONTROL_EXPOSE_HEADERS, "*");
        return chain.filter(exchange);
    }
}
网关GateWay源码分析
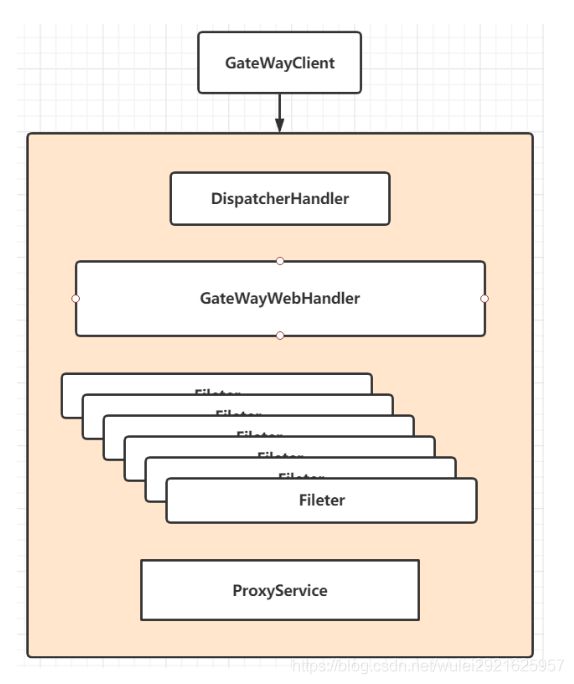
1、客户端向网关发送Http请求,会到达DispatcherHandler接受请求,匹配到
RoutePredicateHandlerMapping。
2、根据RoutePredicateHandlerMapping匹配到具体的路由策略。
3、FilteringWebHandler获取的路由的GatewayFilter数组,创建 GatewayFilterChain 处理过滤请求
SpringBoot项目源码的入口
-
GatewayClassPathWarningAutoConfiguration--------->作用检查是否配置我们webfux依赖。
-
GatewayAutoConfiguration--------->加载了我们Gateway需要的注入的类。
-
GatewayLoadBalancerClientAutoConfiguration --------->网关需要使用的负载均衡
-
GatewayRedisAutoConfiguration --------->网关整合Redis整合Lua实现限流
-
GatewayDiscoveryClientAutoConfiguration --------->服务注册与发现功能


