微信导航小程序开发
提示:文章写完后,目录可以自动生成,如何生成可参考右边的帮助文档
文章目录
- 前言
- 一、注册申请一个小程序
- 二、下载打开微信开发者工具
-
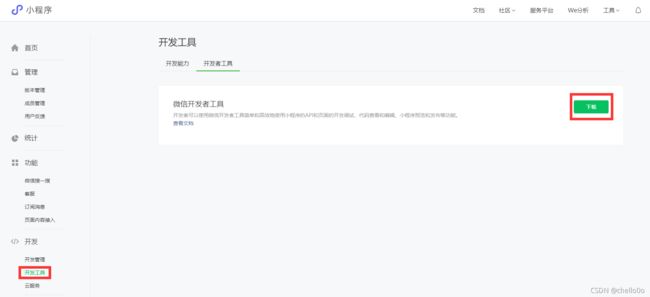
- 1.下载
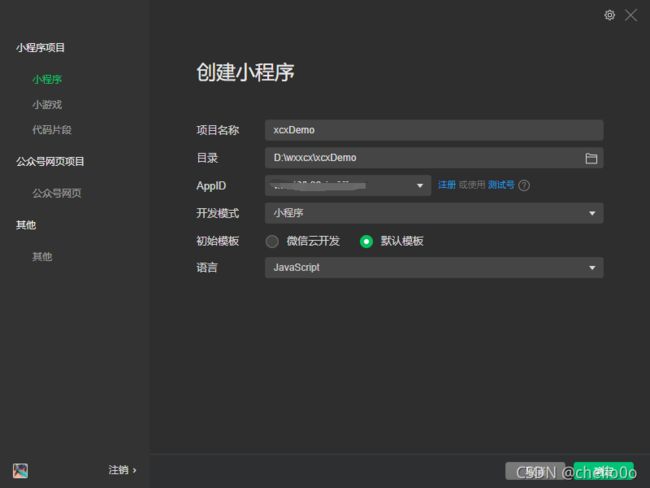
- 2.创建一个小程序项目,填上申请好的小程序AppID,其他选项如图
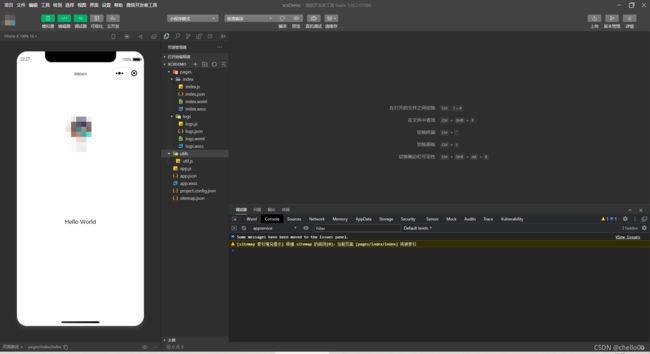
- 3.刚创建好的项目界面如图
- 三、开发
-
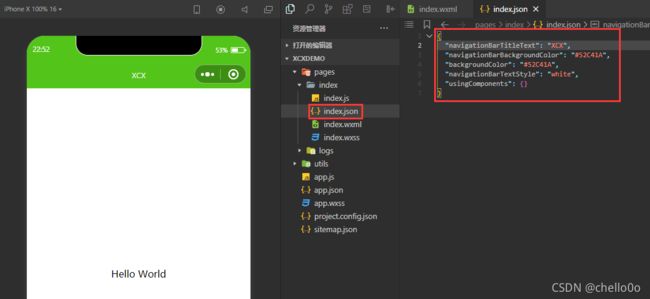
- 1.先把顶部换成我们喜欢的样子,比如这样
- 2.画一下界面
- 3.让界面全屏展示
- 4.在地图上标记点位
-
- 然后我们给点位换一个喜欢的图标吧
- 5.添加路线导航
-
- 5.1使用路线导航需要添加插件
- 5.2配置插件
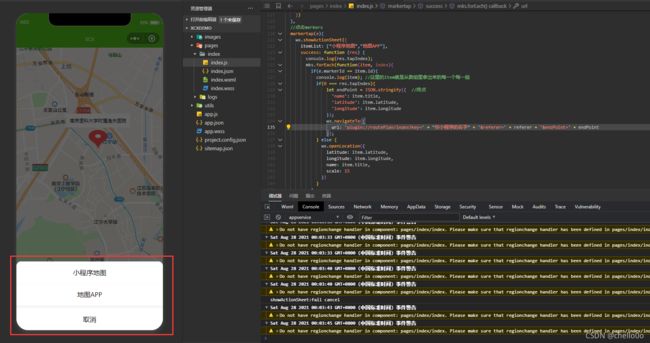
- 5.3使用插件,点击弹出导航选项
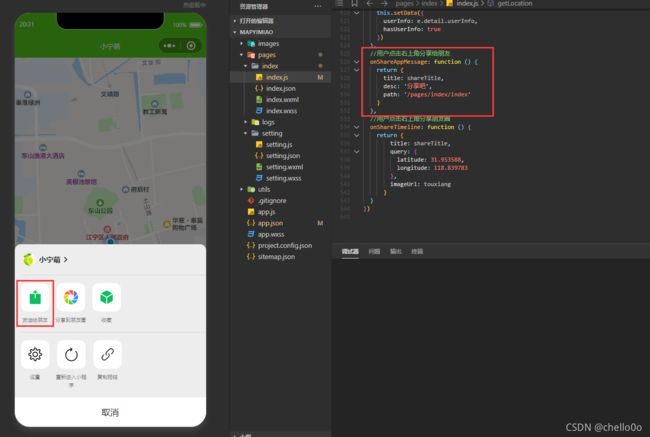
- 6.发送给朋友
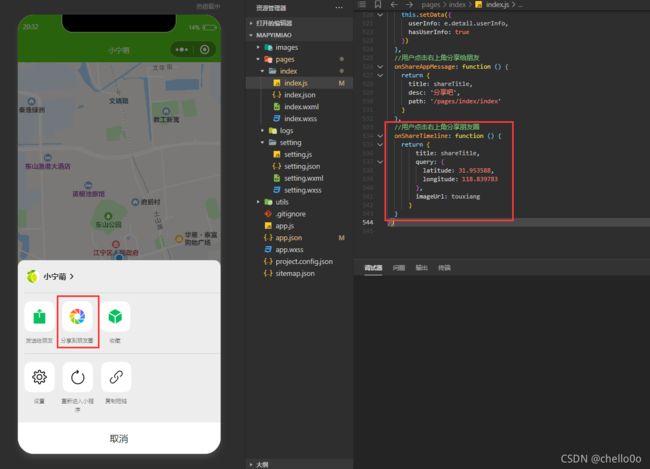
- 7.分享到朋友圈
- 四、发布
-
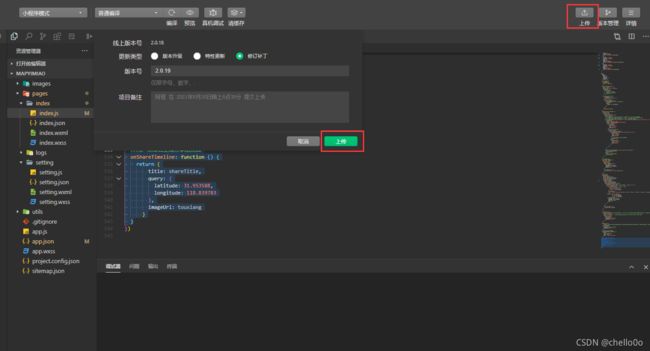
- 1.上传代码
- 2.提交审核
-
- 小技巧来了!
- 还有!!!
- 总结
- 后续更新预告:
前言
记录一个定位及导航小程序。
提示:以下是本篇文章正文内容,下面案例可供参考
一、注册申请一个小程序
我之前已经申请过了,这里不再赘述了哈
二、下载打开微信开发者工具
1.下载
2.创建一个小程序项目,填上申请好的小程序AppID,其他选项如图
3.刚创建好的项目界面如图
三、开发
1.先把顶部换成我们喜欢的样子,比如这样
{
  "navigationBarTitleText": "XCX",
  "navigationBarTextStyle": "white",
  "backgroundColor": "#52C41A",
  "navigationBarBackgroundColor": "#52C41A",
  "usingComponents": {}
}
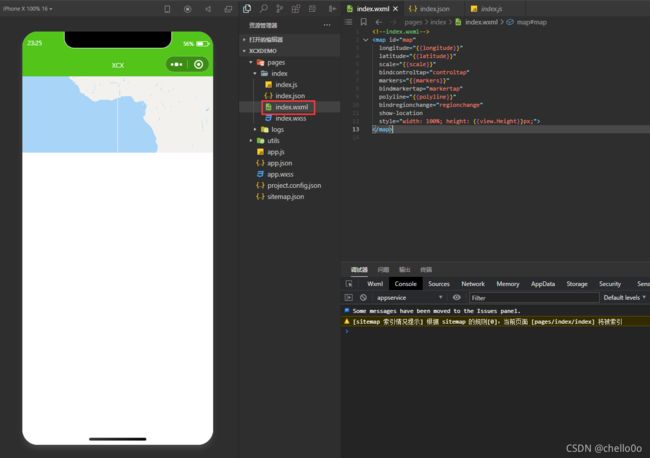
2.画一下界面
<!--index.wxml-->
<map id="map"
  longitude="{{longitude}}"
  latitude="{{latitude}}"
  scale="{{scale}}"
  bindcontroltap="controltap"
  markers="{{markers}}"
  bindmarkertap="markertap"
  polyline="{{polyline}}"
  bindregionchange="regionchange"
  show-location
  style="width: 100%; height: {{view.Height}}px;">
</map>
3.让界面全屏展示
let vm = this;
wx.getSystemInfo({
  success: function (res) {
    //设置map高度,根据当前设备宽高满屏显示
    vm.setData({
      view: {
        Height: res.windowHeight
      }
    })
  }
});
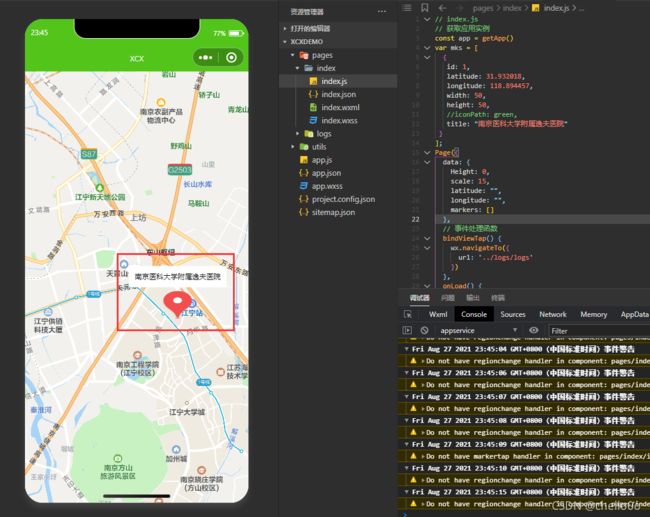
4.在地图上标记点位
onLoad() {
    let vm = this;
    if (wx.getUserProfile) {
      this.setData({
        canIUseGetUserProfile: true
      });
      wx.getSystemInfo({
        success: function (res) {
          //设置map高度,根据当前设备宽高满屏显示
          vm.setData({
            view: {
              Height: res.windowHeight
            }
          })
        }
      });
      vm.getUserLocation();
    }
  },
getUserLocation: function () {
    let vm = this;
    wx.getSetting({
      success: (res) => {
        console.log("getSetting");
        console.log(res)
        // res.authSetting['scope.userLocation'] == undefined    表示 初始化进入该页面
        // res.authSetting['scope.userLocation'] == false    表示 非初始化进入该页面,且未授权
        // res.authSetting['scope.userLocation'] == true    表示 地理位置授权
        if (res.authSetting['scope.userLocation'] != undefined && res.authSetting['scope.userLocation'] != true) {
          wx.showModal({
            title: '请求授权当前位置',
            content: '需要获取您的地理位置,请确认授权',
            success: function (res) {
              if (res.cancel) {
                wx.showToast({
                  title: '拒绝授权',
                  icon: 'none',
                  duration: 1000
                })
              } else if (res.confirm) {
                wx.openSetting({
                  success: function (dataAu) {
                    if (dataAu.authSetting["scope.userLocation"] == true) {
                      wx.showToast({
                        title: '授权成功',
                        icon: 'success',
                        duration: 1000
                      })
                      //再次授权,调用wx.getLocation的API
                      vm.getLocation();
                    } else {
                      wx.showToast({
                        title: '授权失败',
                        icon: 'none',
                        duration: 1000
                      })
                    }
                  }
                })
              }
            }
          })
        } else if (res.authSetting['scope.userLocation'] == undefined) {
          //调用wx.getLocation的API
          vm.getLocation();
        } else {
          //调用wx.getLocation的API
          vm.getLocation();
        }
      }
    })
  },
  // 微信获得经纬度
  getLocation: function () {
    let vm = this;
    wx.getLocation({
      type: 'wgs84',
      success: function (res) {
        vm.setData({
          latitude: res.latitude,
          longitude: res.longitude,
          markers: mks
        })
      },
      fail: function (res) {
        console.log('fail' + JSON.stringify(res))
      }
    })
  },
然后我们给点位换一个喜欢的图标吧
这里我是去https://www.iconfont.cn/上下载的,然后创建一个和pages同级的文件夹,把下载的图标放进去,用相对路径引用

代码如下:
var green = "../../images/green.png";
var mks = [
  {
   id: 1,
   latitude: 31.932018,
   longitude: 118.894457,
   width: 50,
   height: 50,
   iconPath: green,
   title: "南京医科大学附属逸夫医院"
 }
];
5.添加路线导航
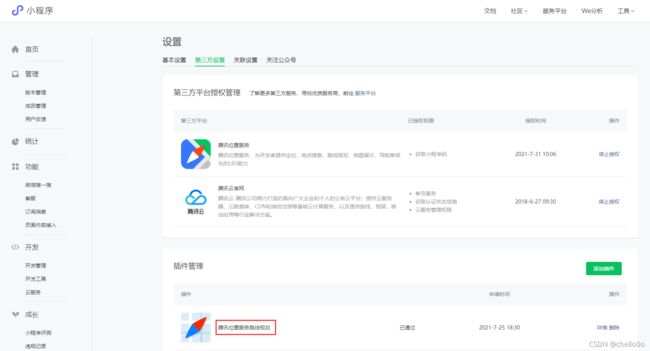
5.1使用路线导航需要添加插件
5.2配置插件
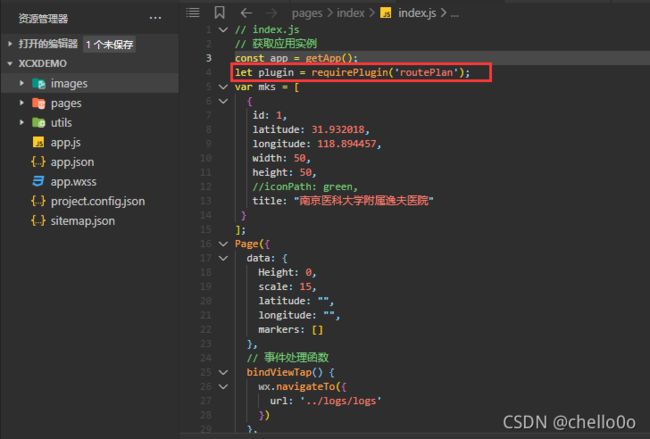
"plugins": {
    "routePlan": {
    "version": "1.0.13",
    "provider": "wx50b5593e81dd937a"
    }
}
let plugin = requirePlugin('routePlan');
5.3使用插件,点击弹出导航选项
//点击merkers
  markertap(e){
    wx.showActionSheet({
      itemList: ["小程序地图","地图APP"],
      success: function (res) {
        console.log(res.tapIndex);
        mks.forEach(function(item, index){
          if(e.markerId == item.id){
            console.log(item); //这里的item就是从数组里拿出来的每一个每一组
            if(0 === res.tapIndex){
                let endPoint = JSON.stringify({  //终点
                  'name': item.title,
                  'latitude': item.latitude,
                  'longitude': item.longitude
                });
                wx.navigateTo({
                  url: 'plugin://routePlan/index?key=' + "小程序名称" + '&referer=' + referer + '&endPoint=' + endPoint
                });
            } else {
              wx.openLocation({
                latitude: item.latitude,
                longitude: item.longitude,
                name: item.title,
                scale: 15
              })
            }
          }
        })
      },
      fail: function (res) {
        console.log(res.errMsg)
      }
    })
  },
6.发送给朋友
//用户点击右上角分享给朋友
  onShareAppMessage: function () {
    return {
      title: '导航小程序',
      desc: '分享吧',
      path: '/pages/index/index'
    }
  },
7.分享到朋友圈
//用户点击右上角分享朋友圈
	onShareTimeline: function () {
		return {
	      title: '导航小程序',
	      query: {
	        latitude: 31.953588,
          longitude: 118.839783
	      },
	      imageUrl: "../../images/touxiang.png"
	    }
	}
四、发布
发布流程及快速发布小技巧等
1.上传代码
2.提交审核
小技巧来了!
这里一定要提交图片预览和视频预览,把你手机上打开的样子截个图和录个屏,会帮你省去很多审核时间,
还有!!!
根据我的经验发现每天21点前提交审核一般会在两小时内审核通过,之后就要等第二天早上审核了,所以有紧急发布的就不要熬夜啦,赶快提交哈
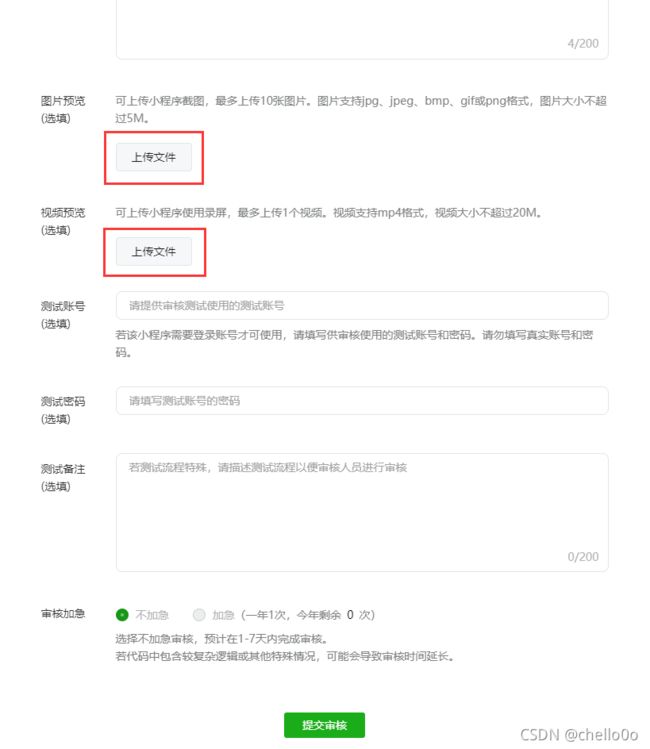
然后等审核通过,可以在管理界面里发布代码,也可以在微信里搜索’小程序助手‘在审核管理里发布,发布完成就可以访问你的正式版本小程序啦~~~~
总结
来都来了,点个赞再走吧
后续更新预告:
1、 小程序配合云托管实现后台数据运维,免去部分发布
2、 小程序版本管理等
