如何将 Django 服务器单独部署到 heroku 上
文章目录
- Django server 单独部署 heroku
-
- 视频资源
- 部署步骤的 checklist
- 准备工作
-
- 创建账号
- 使用 pipenv / anaconda 创建python 和 Django 运行环境
- 安装 git
- 安装 heroku cli
- 安装 gunicorn
- 生成 requirements.txt 文件
- 手动创建 Procfile 文件
- 安装 django-heroku
- 手动创建 runtime.txt 文件规定 python 的部署版本
- 正式部署
-
- 在终端登录 heroku
- 终端创建 heroku 仓库
- init 本地项目文件夹并与远端创建的 heroku 关联
- 将本地项目 push 到 heroku 完成部署
Django server 单独部署 heroku
视频资源
- 参考视频:https://www.bilibili.com/video/BV1ta4y1i7aL/?spm_id_from=333.337.search-card.all.click&vd_source=e162db2199c43956dc501bc6c0725612
- 视频是个印度人讲的,没有中文字幕,但是有英文字母,大家可以去看原视频
部署步骤的 checklist
- 他进行的步骤我从视频中找到了他的 github 并把步骤清单列在这里:
- Copy the project seperately
- Go to 'Getting Started on Heroku with Python'
- Create an Heroku account
- install pipenv
- Install git ( check git --version)
- Install Heroku CLI
- Login heroku
- Create a virtual enviroment
- Run manage.py not gonna run - pip freeze nothing installing
- Check which version django,requests you have and install it
- Run manage.py and then stop it
- Go to django heroku
- Create a Procfile and
- Install django-heroku
- Add stuff to settings.py file
- Install guincorn
- pip freeze > requirements.txt
- heroku create attreyaweb (to create an app on heroku)
- git status git commands (git push heroku master)
- Open up the website
- Admin panel not working. heroku run bash. Migrations
准备工作
创建账号
- 要创建一个 heroku 账号,点此处 这是一个平台,类似于 github,也是通过 git 进行管理,所以要注册一个账号,最终也是通过 git 命令将服务器部署到 heroku 上
使用 pipenv / anaconda 创建python 和 Django 运行环境
- 他这里提到的
install pipenv的原因是想通过pipenv创建一个虚拟环境,这个虚拟环境也可以通过anaconda来创建;虚拟环境的作用主要是保护你本地 python 环境,虚拟环境可以在不影响你本地所有东西的情况下创建一个隔离的环境,在这里面你可以创建任意的 Python 运行环境,也可以随时将这个虚拟环境删除
安装 git
- 安装 git,这个主要是保证你的本地有 git 能够将代码 push 到远端仓库,这个只要是用过 github 或者 gitlab 的小伙伴应该都是ok 的
安装 heroku cli
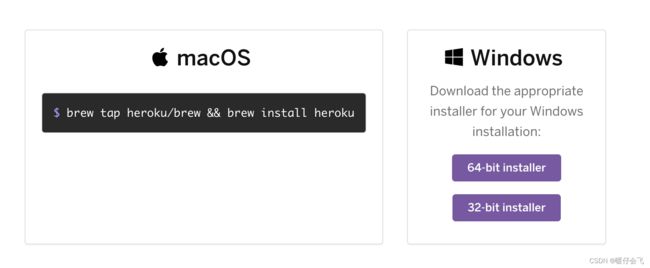
- 创建一个 heroku 的脚手架 heroku cli,这个安装的方法 官网 也给了
- 登录 heroku 这个步骤我们后面在进行,这里先不急
- 创建虚拟环境我们也已经做完了,就是用 anaconda 创建的;这一步其实应该是写代码之前的配环境环节,但如果你到了这里,很显然你已经代码写完,如果你不是用 heroku 支持的 python 版本开发的程序,你最好用 conda 重新配一个环境,然后把代码复制粘贴到新环境里调试一下看看能不能正常运行。
安装 gunicorn
- 注意: 一定在自己的环境中
pip install gunicorn这个虽然在你本地的环境中用不到,你本地运行服务器也没有用,但是当你上传代码到 heroku,他会使用 gunicorn 来帮你部署,所以 gunicorn 必须要出现在你的环境中,这样才能随着下一步 freeze 操作生成的 requirements.txt 一起 push 到远端 heroku 仓库
生成 requirements.txt 文件
- 下一步的
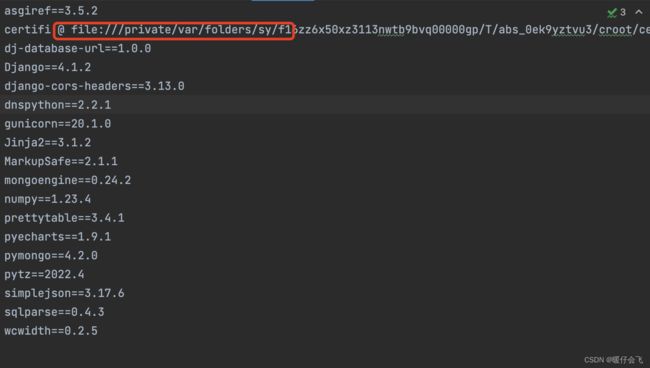
pip freeze > requirements.txt的作用主要是将你所有的 python 环境输出到 requirements.txt 这个文件里面,这个文件记录了你所有运行代码需要的 library 的列表,部署的时候会从这里面读取然后在远程给你配置部署环境,所以非常重要。这一步还有一点非常重要:如果你的 requirements.txt 中出现了这种问题,一定要注意,将后面的内容删掉,手动换成版本号,和其他的那些写法一样,你可以用
pip list来检查当前环境下所有 library 的版本,唯一正确的写法就是package名称==版本号
手动创建 Procfile 文件
- 接下来需要创建一个
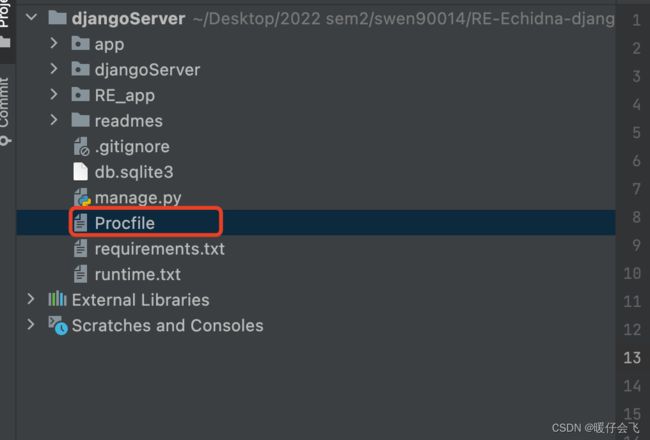
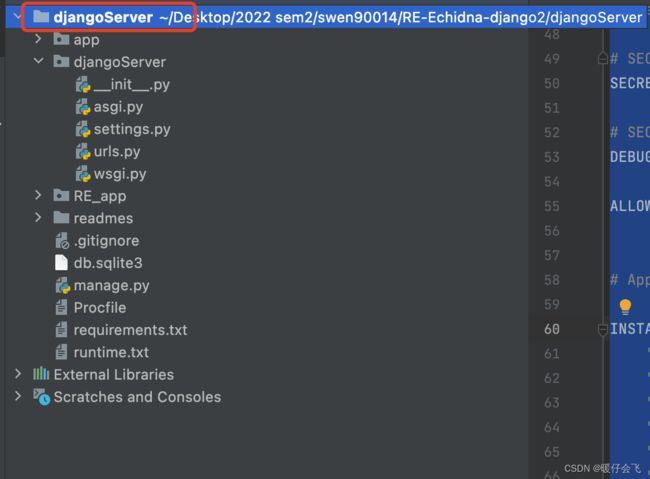
Procfile文件,这个文件 没有后缀!没有后缀!没有后缀!(mac 容易将无后缀的文件默认是 txt 格式,一定要注意这个问题,这个文件是真正的无后缀的) Procfile文件中写的内容是web: gunicorn myproject.wsgi这里的myproject替换成你的文件的名称,比如我这个服务器中,就应该写成web: gunicorn djangoServer.wsgi这个文件对于heroku的部署非常重要,否则部署一定会失败- 这个文件的位置如下:
安装 django-heroku
- 再接着就是安装
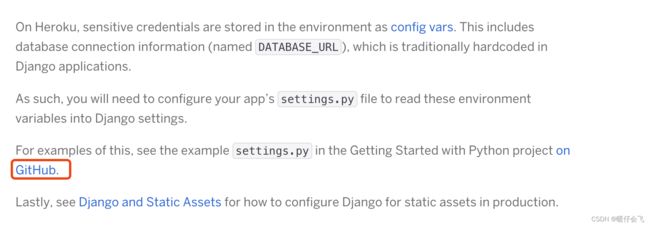
django-heroku,安装命令pip install django-heroku - 按照官网的指示对 setting.py 的内容进行设置,官网推荐你怎么写你就怎么写
- 根据官网推荐的这个文件去修改你 Django 中原本的
settings.py文件, - 我把自己的
settings.py也贴在这里,大家可以参考,尤其注意的是ALLOWED_HOSTS = ["*"]这句话一定不要漏:
""" Django settings for djangoServer project. Generated by 'django-admin startproject' using Django 3.2. For more information on this file, see https://docs.djangoproject.com/en/3.2/topics/settings/ For the full list of settings and their values, see https://docs.djangoproject.com/en/3.2/ref/settings/ """ import datetime from pathlib import Path import dj_database_url import os from django.test.runner import DiscoverRunner from pathlib import Path # Build paths inside the project like this: BASE_DIR / 'subdir'. BASE_DIR = Path(__file__).resolve().parent.parent """ Heroku """ IS_HEROKU = "DYNO" in os.environ SECRET_KEY = "CHANGE_ME!!!! (P.S. the SECRET_KEY environment variable will be used, if set, instead)." if 'SECRET_KEY' in os.environ: SECRET_KEY = os.environ["SECRET_KEY"] # Generally avoid wildcards(*). However since Heroku router provides hostname validation it is ok if IS_HEROKU: ALLOWED_HOSTS = ["*", 're-echidna-django.herokuapp.com'] else: ALLOWED_HOSTS = ['*','re-echidna-django.herokuapp.com'] # SECURITY WARNING: don't run with debug turned on in production! if not IS_HEROKU: DEBUG = True # Application definition # Quick-start development settings - unsuitable for production # See https://docs.djangoproject.com/en/3.2/howto/deployment/checklist/ # SECURITY WARNING: keep the secret key used in production secret! SECRET_KEY = 'django-insecure-pm42jjw)=bp1*8m3+vd=#kfnbe99213px8yb9*_7^%r6d$wlii' # SECURITY WARNING: don't run with debug turned on in production! DEBUG = True ALLOWED_HOSTS = ["*"] # Application definition INSTALLED_APPS = [ 'django.contrib.admin', 'django.contrib.auth', 'django.contrib.contenttypes', 'django.contrib.sessions', 'django.contrib.messages', 'django.contrib.staticfiles', 'RE_app.apps.AppConfig', 'corsheaders' ] MIDDLEWARE = [ 'django.middleware.security.SecurityMiddleware', 'django.contrib.sessions.middleware.SessionMiddleware', 'django.middleware.common.CommonMiddleware', # 'django.middleware.csrf.CsrfViewMiddleware', 'django.contrib.auth.middleware.AuthenticationMiddleware', 'django.contrib.messages.middleware.MessageMiddleware', 'django.middleware.clickjacking.XFrameOptionsMiddleware', 'corsheaders.middleware.CorsMiddleware', 'django.middleware.common.CommonMiddleware' ] CORS_ORIGIN_ALLOW_ALL = True CORS_ALLOW_CREDENTIALS = True ROOT_URLCONF = 'djangoServer.urls' TEMPLATES = [ { 'BACKEND': 'django.template.backends.django.DjangoTemplates', 'DIRS': [os.path.join(BASE_DIR, 'RE_app', 'templates')] , 'APP_DIRS': True, 'OPTIONS': { 'context_processors': [ 'django.template.context_processors.debug', 'django.template.context_processors.request', 'django.contrib.auth.context_processors.auth', 'django.contrib.messages.context_processors.messages', ], }, }, ] WSGI_APPLICATION = 'djangoServer.wsgi.application' # Database # https://docs.djangoproject.com/en/3.2/ref/settings/#databases DATABASES = { 'default': { # 'ENGINE': 'django.db.backends.sqlite3', # 'ENGINE': None, # 'ENGINE': 'djongo', # 'NAME': BASE_DIR / 'db.sqlite3', # 'NAME': 'RE_ECHIDNA', # 'ENFORCE_SCHEMA': False, # 'CLIENT': { # 'host': 'mongodb+srv://: # 'host': 'mongodb+srv://ZIYUQ:@ / ?retryWrites=true&w=majority'} @cluster0.366apt7.mongodb.net/?retryWrites=true&w=majority'} } } # Password validation # https://docs.djangoproject.com/en/3.2/ref/settings/#auth-password-validators AUTH_PASSWORD_VALIDATORS = [ { 'NAME': 'django.contrib.auth.password_validation.UserAttributeSimilarityValidator', }, { 'NAME': 'django.contrib.auth.password_validation.MinimumLengthValidator', }, { 'NAME': 'django.contrib.auth.password_validation.CommonPasswordValidator', }, { 'NAME': 'django.contrib.auth.password_validation.NumericPasswordValidator', }, ] # Internationalization # https://docs.djangoproject.com/en/3.2/topics/i18n/ LANGUAGE_CODE = 'en-us' TIME_ZONE = 'UTC' USE_I18N = True USE_L10N = True USE_TZ = True # Static files (CSS, JavaScript, Images) # https://docs.djangoproject.com/en/3.2/howto/static-files/ STATIC_URL = '/static/' # Default primary key field type # https://docs.djangoproject.com/en/3.2/ref/settings/#default-auto-field DEFAULT_AUTO_FIELD = 'django.db.models.BigAutoField' """ Heroku """ # Test Runner Config class HerokuDiscoverRunner(DiscoverRunner): """Test Runner for Heroku CI, which provides a database for you. This requires you to set the TEST database (done for you by settings().)""" def setup_databases(self, **kwargs): self.keepdb = True return super(HerokuDiscoverRunner, self).setup_databases(**kwargs) # Use HerokuDiscoverRunner on Heroku CI if "CI" in os.environ: TEST_RUNNER = "djangoServer.settings.HerokuDiscoverRunner" # Default primary key field type # https://docs.djangoproject.com/en/4.0/ref/settings/#default-auto-field DEFAULT_AUTO_FIELD = 'django.db.models.BigAutoField' # print(os.path.join(BASE_DIR, 'RE_app', 'templates')) - 根据官网推荐的这个文件去修改你 Django 中原本的
手动创建 runtime.txt 文件规定 python 的部署版本
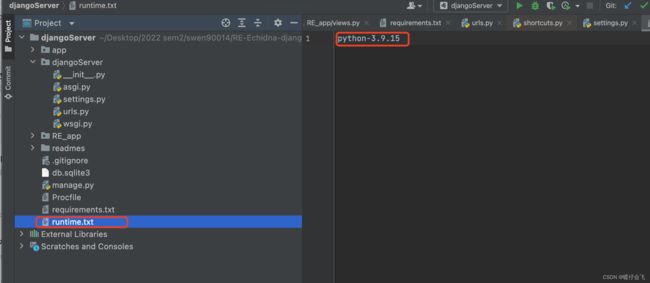
- 部署前的最后一步,是在文件夹中创建一个 runtime.txt 的文本文件,里面写上你希望远端使用的 python 的版本:
- 说明一下,这里我本地其实 python 是 3.9.0 但是我大胆判断,远端的 3.9.15 应该和 3.9.0 是兼容的,而且远端只支持那么几种 python 版本,我只能选择 3.9.15 因此我这里可以告诉你,本地 3.9 的系列的 python 应该都不影响部署。
正式部署
在终端登录 heroku
heroku login登录到你自己的 heroku 账号,他会弹出一个界面,登录即可。(如果你使用了 ,执行这一步的时候尽量断掉,否则有可能说你 ip 地址不一致)
终端创建 heroku 仓库
- 这时候创建一个 heroku 仓库
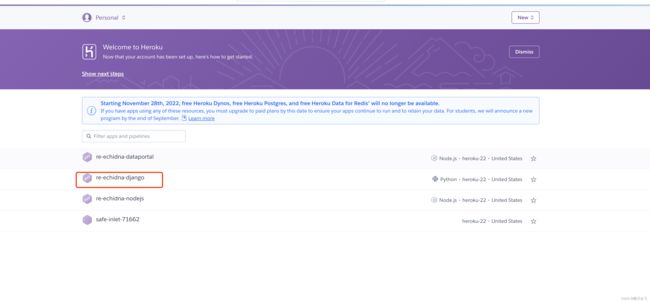
heroku create xxxxx任意名字,比如我heroku create re-echidna-dataportal他就会在 heroku 你的账号下面创建一个库。
init 本地项目文件夹并与远端创建的 heroku 关联
git initheroku git:remote -a xxxxxxx 是刚才 create 的名称- 到这里,我们已经将本地的文件和远端的仓库建立联系了
将本地项目 push 到 heroku 完成部署
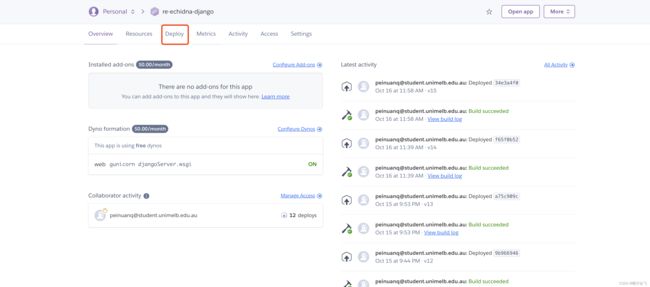
git add .将本地所有的文件提交到本地仓库git commit -am "随便说一句话"git push heroku master这句话一执行,远端会根据你的 requirements 准备运行环境,并通过 runtime 选择 python 版本并检查是否支持,最后通过 procfile 来部署

