Arduino定时器&中断的使用和快速上手
Catalogue
-
- 1. Intro
- 2. 什么是中断?
- 3. 中断快速上手
- 4. 什么是定时器?
- 5. 定时器快速上手
-
- 5.1 MsTimer2
- 5.2 TimerOne
- 6. 注意事项
- 7. 总结
- 8. References
1. Intro
定时器和中断都是单片机中的重要的功能,使用中断功能可以完成很多更加复杂的控制,而定时器和中断常常搭配在一起使用,本文将通过几个示例程序简单快速的上手定时器和中断。
本文节选自笔者的仓库https://github.com/Undertone0809/arduino-uno-dev,欢迎star。
2. 什么是中断?
CPU执行时原本是按程序指令一条一条向下顺序执行的。 但如果此时发生了某一事件B请求CPU迅速去处理(中断发生),CPU暂时中断当前的工作,转去处理事件B(中断响应和中断服务). 待CPU将事件B处理完毕后, 再回到原来被中断的地方继续执行程序(中断返回),这一过程称为中断 。
arduino官方对中断的解释:
Interrupts are useful for making things happen automatically in microcontroller programs and can help solve timing problems. Good tasks for using an interrupt may include reading a rotary encoder, or monitoring user input.
If you wanted to ensure that a program always caught the pulses from a rotary encoder, so that it never misses a pulse, it would make it very tricky to write a program to do anything else, because the program would need to constantly poll the sensor lines for the encoder, in order to catch pulses when they occurred. Other sensors have a similar interface dynamic too, such as trying to read a sound sensor that is trying to catch a click, or an infrared slot sensor (photo-interrupter) trying to catch a coin drop. In all of these situations, using an interrupt can free the microcontroller to get some other work done while not missing the input.
中断对于使事情在微控制器程序中自动发生很有用,并且可以帮助解决定时问题。使用中断的好任务可能包括读取旋转编码器,或者监视用户输入。
如果你想确保一个程序总是捕获来自旋转编码器的脉冲,使它永远不会错过一个脉冲,那么写一个程序做任何其他事情都会变得非常棘手,因为程序需要不断地轮询编码器的传感器线,以便在脉冲发生时捕获脉冲。其他传感器也有类似的接口动态,比如试图读取一个声音传感器,它试图捕获一个点击,或者一个红外插槽传感器(照片中断)试图捕获一个硬币。在所有这些情况下,使用中断可以使微控制器在不丢失输入的情况下完成一些其他工作。
在你工作摸鱼的时候有电话来了,于是你停下手头正在摸的鱼,转头去接电话,等到电话打完了之后,回来继续摸刚才没摸玩的鱼,这就是中断。
电话来了就是中断的触发信号,接电话就是中断要执行的事情(函数),打完电话回来继续摸鱼就是中断函数执行完之后继续执行未执行完的主程序。
3. 中断快速上手
下面我们通过一个简单的demo来快速上手如何使用中断。
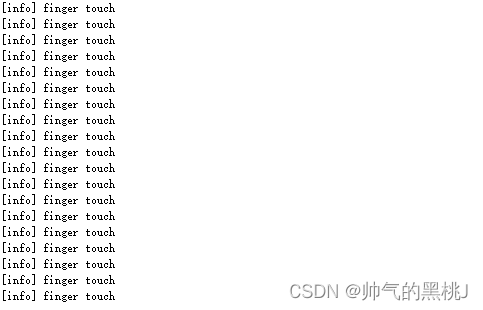
demo: 死循环执行+1串口打印程序,当手指触摸2号引脚时,打印一次finger touch,手指离开2号引脚的时候,打印一次finger leave
/**
 * @brief The purpose of this demo is to show how to use interrupt.
 * @author https://github.com/Undertone0809/arduino-uno-dev by zeeland
 * @createTime 2022/11/11 23:24:24
 * @File InterruptDemo.ino
 */

int pinInterrupt = 2; // 接中断信号的引脚

void onTouch()
{
  Serial.println("[info] finger touch");
}

void onLeave()
{
  Serial.println("[info] finger leave");
}

void setup()
{
  Serial.begin(9600);
  Serial.println("[info] begin to work");

  pinMode( pinInterrupt, INPUT);// 设置管脚为输入

  // Enable中断管脚, 中断服务程序为onTouch(), 监视引脚变化
  attachInterrupt(digitalPinToInterrupt(pinInterrupt), onLeave, FALLING);
  attachInterrupt(digitalPinToInterrupt(pinInterrupt), onTouch, RISING);
}

void loop()
{
  while(1);
}
事实上,如果你跑过该示例,你会发现实际上2号引脚的触发并不怎么灵敏,以至于它没有办法很好地触发onLeave中断,如果你想要更准确的中断触发效果,那么你不应该拿手测试(狗头)。
对于attachInterrupt()这个函数,arduino提供了以下五种中断触发方案,使用者可以根据自己的需求去更换不同的中断触发方案。
4. 什么是定时器?
定时器(Timer)就是定时器,定时器用于设定特定时间触发中断。
Arduino UNO有三个定时器,
- timer0:一个被Arduino的delay(), millis()和micros()使用的8位定时器
- timer1:一个被Arduino的Servo()库使用的16位定时器
- timer2:一个被Arduino的Tone()库使用的8位定时器
Actually,定时器的使用也有多种方式,常见的定时器使用方式有自定义触发、MsTimer2库、TimeOne库三种方式,但事实上,我们不推荐自定义编写定时器触发方式,如果你想使用操作寄存器这种复杂的方式,你就没必要使用arduino,所以下面只会MsTimer2和TimeOne两种方式。
5. 定时器快速上手
5.1 MsTimer2
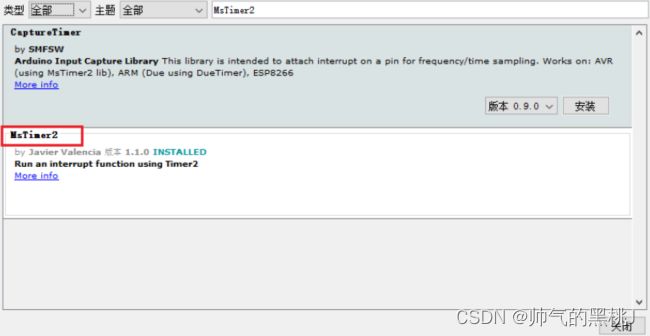
MsTimer2封装了Timer2的定时器,因为为第三方库,所以需要先安装MsTimer2库。
demo: 每500ms让13引脚的LED灯亮一下。
/**
* @brief The purpose of this demo is to show how to toggle LED on pin 13 each second.
* @author https://github.com/Undertone0809/arduino-uno-dev by zeeland
* @createTime 2022/11/11 23:24:24
* @File TimerInterruptDemo.ino
*/
#include 5.2 TimerOne
该库使用 timer1 产生自定义载波频率下不同 pwm 占空比输出 和 定时器中断。同样,使用TimerOne时也需要先安装第三方库才能导入。
demo: 在引脚9上设置占空比为50%的PWM输出,并附加一个中断,使LED灯频闪,代码如下:
/**
* @brief The purpose of this demo is to show Sets up PWM output on pin 9
* with a 50% duty cycle, and attaches an interrupt that toggles digital
* pin 10 every half second.
* @author https://github.com/Undertone0809/arduino-uno-dev by zeeland
* @createTime 2022/11/11 23:24:24
* @File TimerInterruptDemo2.ino
*/
#include 6. 注意事项
- 如果你使用了 MsTimer2 库, 则 pin11 和 pin3 就不能再用做 PWM 输出了! 因为该 pin3 和 pin11 的 PWM 是靠 timer2 帮忙的! (tone()也是)
- 注意 Servo.h 库与 TimerOne 都是使用内部定时器 timer1 会影响pin 9, pin 10 的 PWM
- tone() 使用 timer2 定时器; 若使用 Tone 库的 Tone 对象(Tone 变量)也是优先使用 timer2 定时器,若用两个 Tone 变量则 timer1 也会被用掉, 用三个 Tone 则连控制 millis( )的 timer0 也会被用掉。
- 别忘了, timer0 负责帮忙控制 pin 5 和 pin 6 的 PWM 输出。只要不去改变 timer 的 Prescaler 就不会影响其控制的 PWM pin, 但MsTimer2 库与 tone( )都会改变 Prescaler。
7. 总结
可以看出TimerOne不仅可以完成定时器的功能,也封装了PWM的功能,功能上更加丰富。不过在代码可读性上来说,MsTimer2更具优势,所以可以根据自己的需求选择。更多详细的讲解可以查看源代码或查看References中的official tutorial.
8. References
-
Arduino official tutorial about attachinterrupt()
-
Arduino Uno 定时器中断 timer 0,1, 2 (自定义配置、MsTimer2、TimerOne库)
-
Arduino official tutorial about MsTimer2
-
https://github.com/PaulStoffregen/MsTimer2
-
Arduino official tutorial about TimerOne


