【无标题】
1.深度相机使用的基本代码
D415深度相机的基本功能可以靠Intel提供的
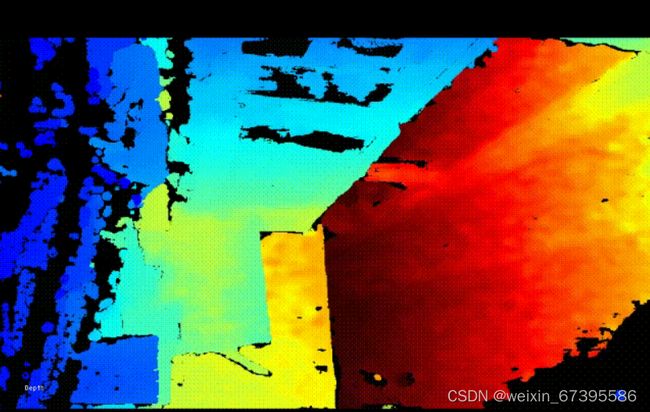
(1)相机视野中心物体到相机的距离:
#include
rs2::pipeline p;//创建管道,用于传输流和每一帧的数据
p.start();
rs2::frameset frames = p.wait_for_frames();//(深度相机通常提供多个视频流),等待用于接受每一个源流的帧
rs2::depth_frame depth = frames.get_depth_frame();//获得总帧数
float width = depth.get_width();
float height = depth.get_height();
float dist_to_center = depth.get_distance(width / 2, height / 2);//获取距离
(2)对齐
作用:将图像从一种视图转变为另一种视图(例如从深度—颜色转变为颜色—深度)
代码:
#include
#include "../example.hpp"
#include "imgui.h"
#include "imgui_impl_glfw.h"
rs2::pipeline pipe;
rs2::config cfg;
cfg.enable_stream(RS2_STREAM_DEPTH);
cfg.enable_stream(RS2_STREAM_COLOR);//创建深度流和颜色流
pipe.start(cfg);//配置
rs2::align align_to_depth(RS2_STREAM_DEPTH);
rs2::align align_to_color(RS2_STREAM_COLOR);
frameset = align_to_depth.process(frameset);
glEnable(GL_BLEND);//使用OpenGL 混合功能渲染两个重叠的流
// 使用 Alpha 通道进行混合
glBlendFunc(GL_SRC_ALPHA, GL_ONE_MINUS_SRC_ALPHA);
if (dir == direction::to_depth)
{
// 对齐深度,首先渲染深度,然后用底片在上面覆盖颜色
depth_image.render(colorized_depth, { 0, 0, app.width(), app.height() });
color_image.render(color, { 0, 0, app.width(), app.height() }, alpha);
}
else
{
// 同上
color_image.render(color, { 0, 0, app.width(), app.height() });
depth_image.render(colorized_depth, { 0, 0, app.width(), app.height() }, 1 - alpha);
}
glColor4f(1.f, 1.f, 1.f, 1.f);
glDisable(GL_BLEND);
//Imgui用于设置UI
ImGui_ImplGlfw_NewFrame(1);
render_slider({ 15.f, app.height() - 60, app.width() - 30, app.height() }, &alpha, &dir);
ImGui::Render();
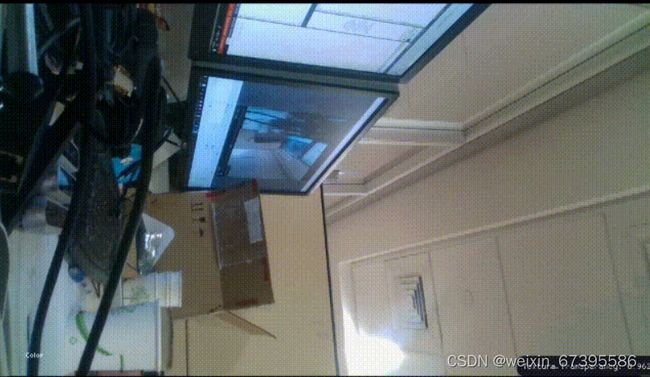
(3)将深度和 RGB 数据流传输到屏幕
#include
#include "example.hpp"
window app(1280, 720, "RealSense Capture Example");// 创建一个简单的 窗口进行渲染
Int main{
texture depth_image, color_image;
rs2::colorizer color_map;//增强可视化效果
rs2::pipeline pipe;
pipe.start();
rs2::frameset data = pipe.wait_for_frames();
rs2::frame depth = color_map(data.get_depth_frame());
rs2::frame color = data.get_color_frame();
depth_image.render(depth, { 0, 0, app.width() / 2, app.height() });
color_image.render(color, { app.width() / 2, 0, app.width() / 2, app.height() });
}
(4)点云
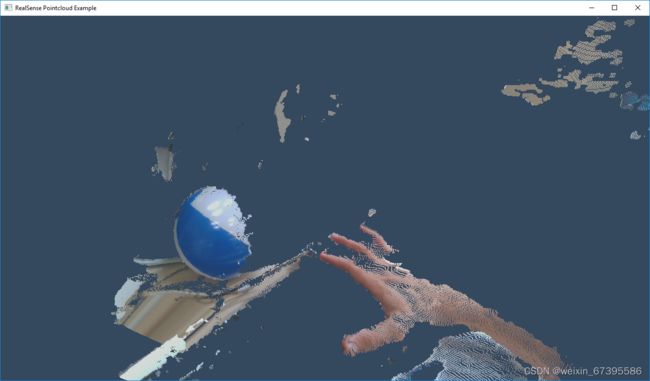
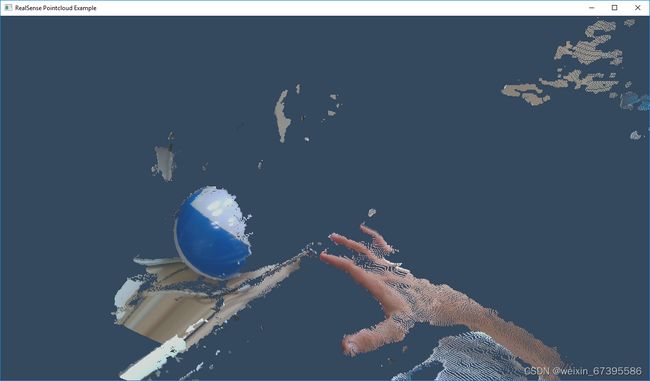
生成和可视化带纹理的 3D 点云
示例:
#include
#include "example.hpp"
struct state { double yaw, pitch, last_x, last_y; bool ml; float offset_x, offset_y; texture tex; };//管理点云视图旋转
void register_glfw_callbacks(window& app, state& app_state);
void draw_pointcloud(window& app, state& app_state, rs2::points& points);
window app(1280, 720, "RealSense Pointcloud Example");
state app_state = { 0, 0, 0, 0, false, 0, 0, 0 };
register_glfw_callbacks(app, app_state);//操作点云
using namespace rs2;
pointcloud pc = rs2::context().create_pointcloud();//声明点云对象,用于计算点云和纹理映射
rs2::points points;//持续
pipeline pipe
pipe.start();
auto data = pipe.wait_for_frames()
auto frames = pipe.wait_for_frames();
auto depth = frames.get_depth_frame();
points = pc.calculate(depth);
auto color = frames.get_color_frame();
pc.map_to(color);
app_state.tex.upload(color);
draw_pointcloud(app, app_state, points);
auto vertices = points.get_vertices();
auto tex_coords = points.get_texture_coordinates();
for (int i = 0; i < points.size(); i++)
{
if (vertices[i].z)
{
glVertex3fv(vertices[i]);
glTexCoord2fv(tex_coords[i]);//上传深度数据点和纹理坐标
}
}
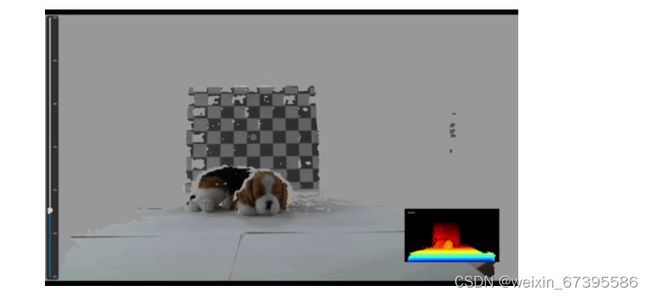
(5)深度视频
例:
代码:
#include
#include "../example.hpp"
#include
#include "imgui_impl_glfw.h"
void remove_background(rs2::video_frame& color, const rs2::depth_frame& depth_frame, float depth_scale, float clipping_dist)
{
constuint16_t*p_depth_frame=reinterpret_cast
uint8_t*p_other_frame=reinterpret_cast
}//获取深度和彩色图像、深度比例单位和用户希望显示的最大距离,并更新颜色帧,使其背景可以随高度删除
float get_depth_scale(rs2::device dev);
rs2_stream find_stream_to_align(const std::vector
bool profile_changed(const std::vector
Int main(){
window app(1280, 720, "CPP - Align Example");
ImGui_ImplGlfw_Init(app, false);
rs2::colorizer c;
texture renderer;
}
rs2::pipeline pipe;
rs2::pipeline_profile profile = pipe.start();
float depth_scale = get_depth_scale(profile.get_device());
rs2_stream align_to = find_stream_to_align(profile.get_streams());
rs2_stream align_to = find_stream_to_align(profile.get_streams());
while (app) // Application still alive? {
rs2::frameset frameset = pipe.wait_for_frames();
if (profile_changed(pipe.get_active_profile().get_streams(), profile.get_streams())) {
profile = pipe.get_active_profile();
align_to = find_stream_to_align(profile.get_streams());
align = rs2::align(align_to);
depth_scale = get_depth_scale(profile.get_device());
}
auto processed = align.process(frameset);
rs2::video_frame other_frame = processed.first_or_default(align_to);
rs2::depth_frame aligned_depth_frame = processed.get_depth_frame();
if (!aligned_depth_frame || !other_frame)
{
continue;
}
remove_background(color_frame, aligned_depth_frame, depth_scale, depth_clipping_distance);
for (int y = 0; y < height; y++) {
auto depth_pixel_index = y * width;
for (int x = 0; x < width; x++, ++depth_pixel_index) {
auto pixels_distance = depth_scale * p_depth_frame[depth_pixel_index];
if (pixels_distance <= 0.f || pixels_distance > clipping_dist) {
auto offset = depth_pixel_index * other_bpp;
std::memset(&p_other_frame[offset], 0x99, other_bpp);
}
}
}
RCNN
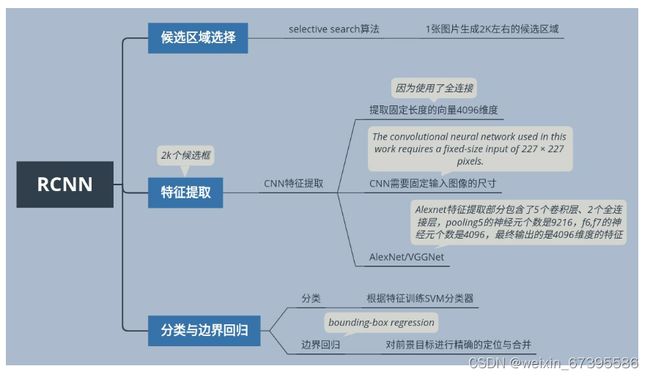
(1)基本思想:
RCNN 主要由三部分构成
候选区域的选择
特征提取
分类与边界回归
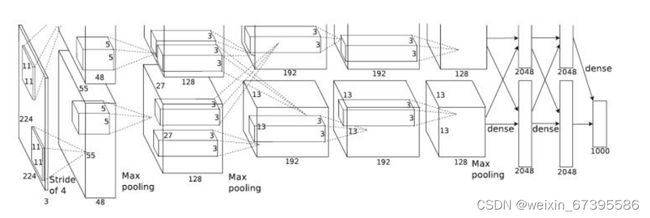
Alexnet 网络结构
(2)Relu
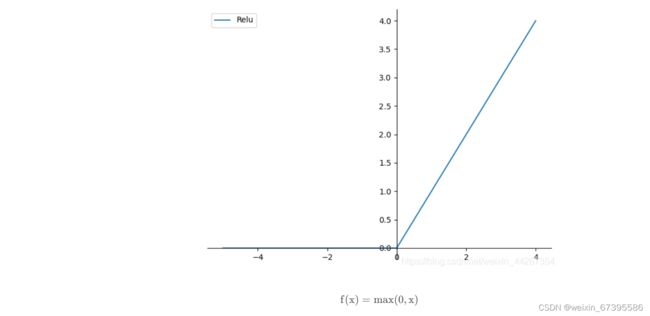
饱和与非饱和函数:当 x 趋向于正无穷与负无穷时,函数的导数都趋近于 0,此函数即为饱和函数如 Sigmoid 和 tanh,否则为非饱和函数如 ReLU。
非饱和函数优点:1. 解决梯度消失。 2. 加快收敛速度。
AlexNet 使用非饱和函数 ReLU 作为激活函数,函数图像如下:
2.LRN 与 BN
归一化(Normalization):将一列数据变化到某个固定区间,在神经网络中可以使网络更快收敛并且避免数值问题。
LRN(Local Response Normalization):指的是被激活的神经元会抑制它周围的神经元。
LRN 的作用是:对局部神经元的活动创建竞争机制,使得其中响应比较大的值变得相对更大,并抑制其他反馈较小的神经元,增强了模型的泛化能力。论文公式如下:
i 表示第 i 个通道,n 是自定义的邻近通道的个数 (前 n/2 个,后 n/2 个),N 是通道的总数。k,α,β,n 都是自定义的超参数,x,y 表示在通道上的位置。可以理解为对应位置的输出值是根据指定的前后各 n/2 个位于相近通道的相同位置的值进行归一化得到的。
原论文提到 LRN 在 Imagenet 上获得了 1.4% 的提升,但在后来实验中有研究者发现 LRN 影响不大,却会大幅增加计算量,所以它的实际使用较少,大多都是直接使用 BN(Batch Normalization)。
ICS(Internal Covariate Shift):在深层网络训练的过程中,由于网络中参数变化而引起内部结点数据分布发生变化的这一过程被称作 Internal Covariate Shift。
ICS 主要会导致两个问题:
上层网络需要不停调整来适应输入数据分布的变化,导致网络学习速度的降低。
网络的训练过程容易陷入梯度饱和区,减缓网络收敛速度
为了解决上述问题,提出了白化(Whitening):使得输入特征分布具有相同的均值与方差,并去除了特征之间的相关性。但白化存在计算成本高与信息丢失两个不足之处,于是又提出了 BN。
BN(Batch Normalization):针对每一批数据,在网络的每一层输入之前增加归一化处理。BN 是针对通道进行规范化,并引入两个可学习参数 λ 与 β 以保有数据原有的表达能力,减少信息丢失。
BN 的作用可以总结为以下几点:
规范化数据分布,加快学习速度
抑制整体向非线性函数的取值区间上下限靠近,可以避免梯度消失
具有一定的正则化效果,可以防止过拟合
3.Dropout
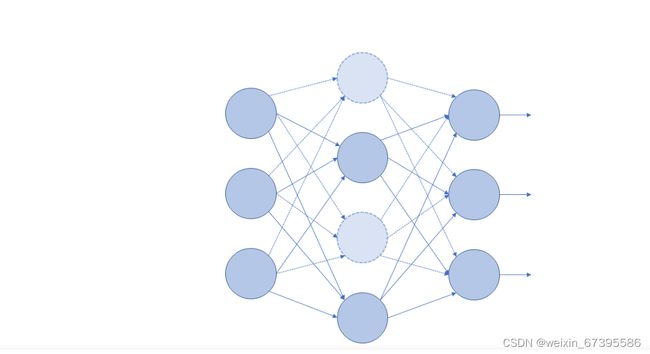
Dropout 是指在训练网络时,按照一定概率将神经元暂时丢弃,即其权重不参与计算与更新。这样每次的网络结构都存在一定的不确定性,那么对于单个神经元来说,它对整个网络的输出所产生的影响相对减弱,而丢弃了它所形成的新的网络结构被迫学习更加具有适应性的特征。而对于多个神经元来说,相互之间的联系由于被迫断开,它们的共同作用减弱,之间的依赖关系减少,但每个新的网络结构所具有的信息表达的学习能力都相对与之前的网络更大了。
对于其中抑制过拟合一方面也可以类比为,在训练一个团体的能力时,可能会存在几个具有较强能力的人,每次训练他们时随机选取一些人停止训练,而原本他们所承担的任务分配给了仍旧参与训练的人,那么参与训练的人能力被迫得到提升。多次如此,团体中的个体也就学习到了比原本特征更加鲁棒的特征,那么也就起到了抑制过拟合的作用。
Dropout 一般设置失活概率 p=0.5,因为此时所有神经元的排列组合数取得最大。
3.网络架构:
卷积:96 个 11*11 卷积核,stride=4,padding=2;ReLU;maxpool (3*3,2);BatchNorm
卷积:256 个 5*5 卷积核,stride=1,padding=2;ReLU;maxpool (3*3,2);BatchNorm
卷积:384 个 3*3 卷积核,stride=1,padding=1;ReLU
卷积:384 个 3*3 卷积核,stride=1,padding=1;ReLU
卷积:256 个 3*3 卷积核,stride=1,padding=1;ReLU;maxpool (3*3,2)
FC:256*5*5->4096;ReLU;Dropout
FC:4096->4096;ReLU;Dropout
FC:4096->1000
4.代码实现
pytouch:
class AlexNet(nn.Module):
def __init__(self, num_classes=1000):
super(AlexNet, self).__init__()
self.conv = nn.Sequential(
nn.Conv2d(3, 96, 11, 4, 2), # 3*224*224->2*48*55*55
nn.ReLU(),
nn.MaxPool2d(3, 2), # 2*48*27*27
nn.BatchNorm2d(96),
nn.Conv2d(96, 256, 5, padding=2), # 2*128*27*27
nn.ReLU(),
nn.MaxPool2d(3, 2), # 2*128*13*13
nn.BatchNorm2d(256),
nn.Conv2d(256, 384, 3, padding=1), # 2*192*13*13
nn.ReLU(),
nn.Conv2d(384, 384, 3, padding=1), # 2*192*13*13
nn.ReLU(),
nn.Conv2d(384, 256, 3, padding=1), # 2*128*13*13
nn.MaxPool2d(3, 2), # 2*128*6*6
nn.Flatten()
)
self.fc = nn.Sequential(
nn.Linear(256*6*6, 4096),
nn.ReLU(),
nn.Dropout(0.5),
nn.Linear(4096, 4096),
nn.ReLU(),
nn.Dropout(0.5),
nn.Linear(4096, num_classes),
)
def forward(self, input):
output = self.conv(input)
output = self.fc(output)
return output
