计算机视觉数据增强系列1
目录
- 前言
- 1.ColorJitter
- 2.图像的标准化
- 3.多边形class
- 4.垂直翻转
- 5.水平翻转
- 6.resize
- 6.Pad
- 7.结果展示
前言
突然想总结一下数据增强,这篇博客主要针对于场景文字检测的数据增强,主要是多边形。当然目标检测也是同理,毕竟同样都是点集。
1.ColorJitter
随机调整图像的亮度、对比度、饱和度和色调。这里笔者对torchvision的接口包装了一下:
class ColorJitter(object):

    def __int__(self, brightness=0, contrast=0, saturation=0, hue=0):
        '''
        随机增强brightness, contrast, saturation, hue
        :param brightness:
        :param contrast:
        :param saturation:
        :param hue:
        :return:
        '''
        self.transform = transforms.ColorJitter(brightness, contrast, saturation, hue)

    def __call__(self, data: dict):
        '''
        随机增强brightness, contrast, saturation, hue
        :param img:rgb图像
        :return:numpy.array
        '''
        img = data.get('img', None)
        img = Image.fromarray(img)
        img = self.transform(img)
        img = np.asarray(img)
        data['img'] = img
        return data
2.图像的标准化
class Normalize:
    def __init__(self, mean, std=None):
        '''
        标准化
        :param mean: list or np.ndarray
        :param std:
        '''
        if not isinstance(mean, np.ndarray):
            mean = np.array(mean)
            std = np.array(std)
        self.mean = mean
        self.std = std

    def __call__(self, data):
        '''

        :param img: 输入rgb图片
        :return:
        '''
        img = data.get('img', None)
        img -= self.mean
        if self.std is None:
            return img / 255
        img /= self.std
        data['img'] = img
        return data
3.多边形class
下面的的代码比上面复杂一点,因为接下来这些数据增强涉及到了点集的变换,这里笔者设计了一个多边形class,里面实现了我们需要的点集变换。具体的成员函数会在相应的数据增强代码中给出。
class Polygons_tf(object):
    '''
    对多边形转换
    '''
    def __init__(self,polygons:np.ndarray,h,w):
        '''

        :param polygons: 要处理的多边形,shape:(n,14,2)
        :param h:
        :param w:
        '''
        self.polygons=polygons
        self.h=h
        self.w=w

        if len(self.polygons)==0:
            raise RuntimeError("No polygons")

    def __eq__(self, other):
        if isinstance(other,np.ndarray):
            self.polygons=other
        elif isinstance(other,Polygons_tf):
            self.polygons=other.polygons
            self.w=other.w
            self.h=other.h
        else:
            raise RuntimeError("can transform "+other)

    def value(self):
        return self.polygons
4.垂直翻转
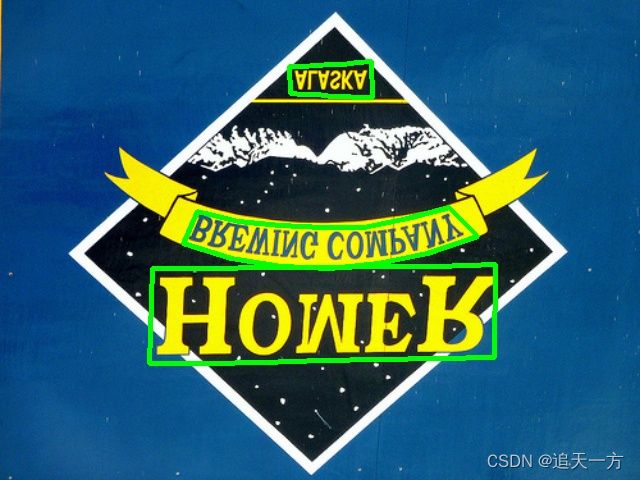
垂直翻转即上下翻转了,x坐标不变,然后用图像的高减去原来的y值就是翻转后的了
class RandomVerticalFlip:
    '''
    垂直翻转
    '''
    def __init__(self,p):
        self.p=p
        self.do = False
        if np.random.random(1) < self.p:
            self.do = True

    def __call__(self,data:dict):

        if self.do:
            img = data.get('img', None)
            polys = data.get('polys', None)
            # v_img = img[::-1, :, :]
            v_img=cv2.flip(img,0)
            polys.VerticalFlip()
            data['img']=v_img
            data['polys']=polys
        return data

    def __repr__(self):
        repr_str=self.__class__.__name__
        return repr_str
def VerticalFlip(self):
        '''
        垂直翻转
        :return:
        '''
        self.polygons[...,1]=self.h-self.polygons[...,1]
5.水平翻转
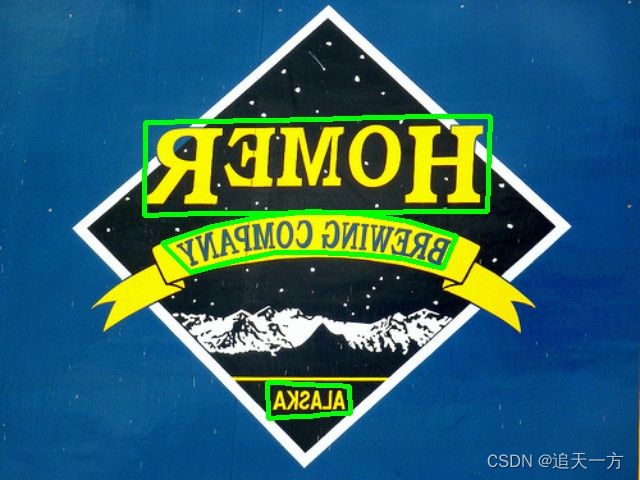
水平翻转就和垂直翻转相反了,y坐标不变,用图像的宽减去原来的x值即可
class RandomHorizontalFlip:
    '''
    水平翻转
    '''
    def __init__(self,p):
        self.p=p
        self.do=False
        if np.random.random(1)<self.p:
            self.do=True

    def __call__(self, data:dict):
        if self.do:
            img = data.get('img', None)
            polys = data.get('polys', None)
            #cv2要快上很多
            # h_img = img[:, ::-1, :]
            h_img=cv2.flip(img,1)
            polys.HorizontalFlip()
            data['img']=h_img
            data['polys']=polys
        return data

    def __repr__(self):
        repr_str=self.__class__.__name__+'shui'
        return repr_str
    def HorizontalFlip(self):
        '''
        水平翻转
        :return:
        '''
        self.polygons[...,0]=self.w-self.polygons[...,0]
6.resize
这里笔者实现的resize注意的是,最后resize的大小不一定是target_shape,因为要达到自适应缩放的效果,笔者在计算resize的wh时用的是两个里面的小的放缩系数,所以会导致长边达不到target_shape的预期,处理的话也很简单,使用后面的pad就行了,其实也就是把自适应缩放分开成了两步。
class resize(object):
    def __init__(self, target_shape):
        self.target_shape = target_shape

    def _resize(self, img):
        h, w = img.shape[:2]
        th, tw = self.target_shape[:2]
        scale = min(th / h, tw / w)
        new_shape = (int(w * scale), int(h * scale))
        new_img = cv2.resize(img, new_shape, interpolation=cv2.INTER_LINEAR).astype(np.uint8)
        return new_img,scale,new_shape

    def __call__(self, data: dict):
        img = data.get('img', None)
        polys = data.get('polys', None)
        new_img ,scale,new_shape= self._resize(img)
        polys.resize(scale,new_shape)
        data['img']=new_img
        data['polys']=polys
        return data

    def __repr__(self):
        repr_str=self.__class__.__name__
        return repr_str
    def resize(self,scale,new_shape):
        self.polygons=self.polygons*scale
        self.w=new_shape[0]
        self.h=new_shape[1]
6.Pad
class Pad(object):
    def __init__(self, target_shape, pad_val=(0,)):
        self.target_shape = target_shape
        self.pad_val = pad_val

    def pad_img(self, img):
        try:
            c = img.shape[2]
            assert len(self.pad_val) == img.shape[2]
        except:
            assert len(self.pad_val) == 1
            self.pad_val=np.ones((img.shape[2]))*self.pad_val
        h, w = img.shape[:2]
        th, tw = self.target_shape[:2]
        self.top = int((th - h) / 2)
        self.left = int((tw - w) / 2)
        self.bottom=th-self.top-h
        self.right=tw-self.left-w
        pad_img=cv2.copyMakeBorder(img,self.top,self.bottom,self.left,self.right,cv2.BORDER_CONSTANT,self.pad_val)
        return pad_img

    def process_polys(self,polys):
        polygons=polys.polygons
        polygons[...,0]=polygons[...,0]+self.left
        polygons[...,1]=polygons[...,1]+self.top
        polygons[...,0]=np.clip(polygons[...,0],self.left,self.target_shape[1]-self.right)
        polygons[...,1]=np.clip(polygons[...,1],self.top,self.target_shape[0]-self.bottom)
        polys.polygons=polygons
        polys.w=self.target_shape[1]
        polys.h=self.target_shape[0]
        return polys

    def __call__(self, data: dict):
        img = data['img']
        polys = data.get('polys', None)
        pad_img = self.pad_img(img)
        new_polys=self.process_polys(polys)
        data['img']=pad_img
        data['polys'] = new_polys
        return data

    def __repr__(self):
        repr_str=self.__class__.__name__
        return repr_str
    def pad(self,pad_shape,new_shape):
        '''

        :param pad_shape: (pad_w,pad_h)
        :return:
        '''
        self.polygons[...,0]+=pad_shape[0]
        self.polygons[...,1]+=pad_shape[1]
        self.h=new_shape[1]
        self.w=new_shape[0]


