跟着炮哥运行yolov5
(4条消息) 目标检测---教你利用yolov5训练自己的目标检测模型_炮哥带你学的博客-CSDN博客_model.yaml path
下载了yolov5.5的数据集
复制粘贴修改data中voc.yaml,_命名为hat.yaml
复制粘贴修改models中yolov5s.yaml,命名为yolov5s-hat.yaml
utils路径下找到datasets.py这个文件,将里面的第81行里面的参数nw改完0
train中改数据weights、cfg、data、epoch.
epochs别搞太多了,两天运算了40轮。
11月12日19:14——11月15日10:14
问题的解决
出现的问题1:
OMP: Error #15: Initializing libiomp5md.dll, but found libiomp5md.dll already initialized.
OMP: Hint This means that multiple copies of the OpenMP runtime have been linked into the program. That is dangerous, since it can degrade performance or cause incorrect results. The best thing to do is to ensure that only a single OpenMP runtime is linked into the process, e.g. by avoiding static linking of the OpenMP runtime in any library. As an unsafe, unsupported, undocumented workaround you can set the environment variable KMP_DUPLICATE_LIB_OK=TRUE to allow the program to continue to execute, but that may cause crashes or silently produce incorrect results. For more information, please see http://www.intel.com/software/products/support/.原因:site-packages目录下,有两个以上的libiomp5md.dll文件
解决方式:添加两行代码:
import os
os.environ["KMP_DUPLICATE_LIB_OK"]="TRUE"注:这两行代码一定要放在import torch之前
(4条消息) 报错:“Initializing libiomp5md.dll, but found libiomp5md.dll already initialized“_非知之难的博客-CSDN博客_libiomp5md.dll
出现的问题2:
general.py中出现Unresolved reference 'utils'
fitness下面划红线
原因:找不到目录
解决方式:设置里面改:file–>setting–>project:server–>project structure,之后再改回来(4条消息) Pycharm中无法导入包问题:Unresolved reference 解决方法_Charles_yy的博客-CSDN博客_@unresolvedimport
出现的问题3:
AssertionError: Image Not Found D:\PycharmProjects\yolov5-hat\VOCdevkit\images\train\000000.jpg
原因:找不到文件
解决方式:新建了一个文件包(4条消息) 深度机器学习:报错AssertionError: Image Not Found D:\PycharmProjects\yolov5-hat\VOCdevkit\images\train\000000_学习中.....臭丫头的博客-CSDN博客
出现的问题4:
RuntimeError: CUDA out of memory. Tried to allocate 20.00 MiB (GPU 0; 2.00 GiB total capacity; 1.10 GiB already allocated; 0 bytes free; 1.11 GiB reserved in total by PyTorch) If reserved memory is >> allocated memory try setting max_split_size_mb to avoid fragmentation. See documentation for Memory Management and PYTORCH_CUDA_ALLOC_CONF
原因:显存不足
解决方式:我的电脑通过修改batchsize=4解决了(4条消息) 解决:RuntimeError: CUDA out of memory. Tried to allocate 2.00 MiB_无尽的沉默的博客-CSDN博客
出现的问题5:
NotImplementedError: Could not run 'torchvision::nms' with arguments from the 'CUDA' backend. This could be because the operator doesn't exist for this backend, or was omitted during the selective/custom build process (if using custom build). If you are a Facebook employee using PyTorch on mobile, please visit https://fburl.com/ptmfixes for possible resolutions. 'torchvision::nms' is only available for these backends: [CPU, QuantizedCPU, BackendSelect, Python, Named, Conjugate, Negative, ADInplaceOrView, AutogradOther, AutogradCPU, AutogradCUDA, AutogradXLA, AutogradLazy, AutogradXPU, AutogradMLC, Tracer, UNKNOWN_TENSOR_TYPE_ID, Autocast, Batched, VmapMode].
原因:电脑上有GPU,但是安装的torch和torchvision没有加cu113
解决方式:下载torch-cuda版和torchvision-cuda版
至此运行成功.
启用tensorbord查看参数
输入:tensorboard --logdir=runs/train(复制网址查看)
训练过程查看:tensorboard --logdir=runs
启用tensorbord查看参数
输入:tensorboard --logdir=runs/train(复制网址查看)
训练过程查看:tensorboard --logdir=runs
出现错误:tensorboard : The term 'tensorboard' is not recognized as the name of a cmdlet, function, script file, or operable program. Check the spelling of the name, or if a path was included, verify that the path is correct and try again.
打开detect.py文件修改参数:
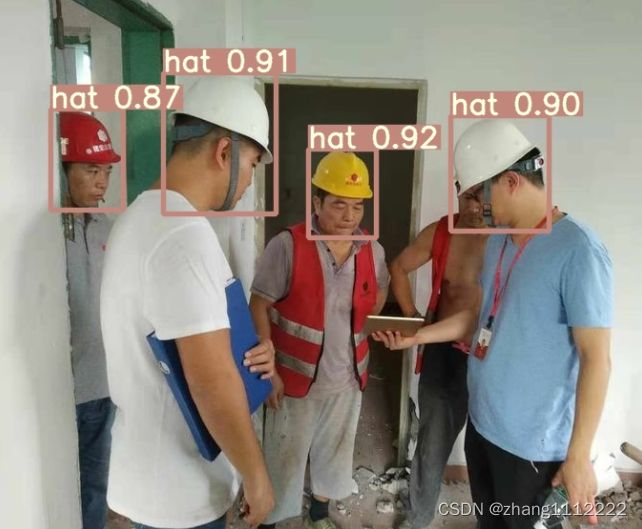
得到结果:
台式电脑没有装摄像头的我就没试了。
用自己数据集运算
出现错误1:AttributeError: Can't get attribute 'SPPF' on
解决方法:在models/commen.py中加个SPPF类
(5条消息) AttributeError: Can‘t get attribute ‘SPPF‘ on <module ‘models.common‘ from ‘H:\\yolov5-5.0\\models\\_啥也不是的py人的博客-CSDN博客
import warnings
class SPPF(nn.Module):
    # Spatial Pyramid Pooling - Fast (SPPF) layer for YOLOv5 by Glenn Jocher
    def __init__(self, c1, c2, k=5):  # equivalent to SPP(k=(5, 9, 13))
        super().__init__()
        c_ = c1 // 2  # hidden channels
        self.cv1 = Conv(c1, c_, 1, 1)
        self.cv2 = Conv(c_ * 4, c2, 1, 1)
        self.m = nn.MaxPool2d(kernel_size=k, stride=1, padding=k // 2)

    def forward(self, x):
        x = self.cv1(x)
        with warnings.catch_warnings():
            warnings.simplefilter('ignore')  # suppress torch 1.9.0 max_pool2d() warning
            y1 = self.m(x)
            y2 = self.m(y1)
            return self.cv2(torch.cat([x, y1, y2, self.m(y2)], 1))


