mmdetection 使用 之 训练/测试 自己的数据集
目录
-
- 一、修改配置文件
- 二、训练/测试命令以及常用命令参数
-
- 2.1 测试
- 2.2 训练
mmdetection的官方使用教程:
https://github.com/open-mmlab/mmdetection/blob/master/README_zh-CN.md
本文以coco格式数据集为例,其他的标准格式如VOC等过程也大体相同,至于非标准格式的数据集建议先转换格式。
一、修改配置文件
使用训练/检测自己的coco格式数据集时,配置文件的修改方式有两种:
1、修改各个原始配置文件的对应位置(比较麻烦);
2、【推荐】新建一个对应模型的配置文件,在其中重新设定类别,数据路径等
这里介绍第二种方法:
例如,要使用mask_rcnn_r50_fpn网络时,其对应的配置文件是:mmdetection/configs/mask_rcnn/mask_rcnn_r50_caffe_fpn_mstrain-poly_1x_coco.py,
这也是在训练、测试coco数据集时命令中要调用的。当要训练自己的数据集时,可以在这个配置文件的基础上新建一个配置文件,然后直接添改要改的项就行了,没必要一个一个地找原始文件去改。
首先新建一个配置文件,名字随意,例如为:mask_rcnn_r50_caffe_fpn_mstrain-poly_1x_balloon.py,添加内容:
# The new config inherits a base config to highlight the necessary modification
_base_ = 'mask_rcnn/mask_rcnn_r50_caffe_fpn_mstrain-poly_1x_coco.py'

# We also need to change the num_classes in head to match the dataset's annotation
model = dict(
    roi_head=dict(
        bbox_head=dict(num_classes=1),
        mask_head=dict(num_classes=1)))

# Modify dataset related settings
dataset_type = 'COCODataset'
classes = ('balloon',)
data = dict(
    train=dict(
        img_prefix='balloon/train/',
        classes=classes,
        ann_file='balloon/train/annotation_coco.json'),
    val=dict(
        img_prefix='balloon/val/',
        classes=classes,
        ann_file='balloon/val/annotation_coco.json'),
    test=dict(
        img_prefix='balloon/val/',
        classes=classes,
        ann_file='balloon/val/annotation_coco.json'))

# We can use the pre-trained Mask RCNN model to obtain higher performance
load_from = 'checkpoints/mask_rcnn_r50_caffe_fpn_mstrain-poly_3x_coco_bbox_mAP-0.408__segm_mAP-0.37_20200504_163245-42aa3d00.pth'
根据自己数据集需要修改的项:
① 网络结构中的num_classes,这需要自己去根据__base__/models/目录下对应的网络结构中去改,(直接把包含有num_classes的部分直接沾到你自己的新配置文件中的model=dict(...)里,可以参考下面),把num_classes修改为你的数据集的类别就行,不用增加背景类
② 类似的,修改data=dict(...)中的内容(这一部分的源文件是__base__/datasets/下对应的文件),修改图片路径、标签路径为你数据集的路径,
另外!一定要添加classes=('name1','name2',....)这一行,里面是你的数据集的各类的名称,然后在train,val,test要相应的添加classes = classes这一行,否则会报错说类别不等于默认的类别数
二、训练/测试命令以及常用命令参数
2.1 测试
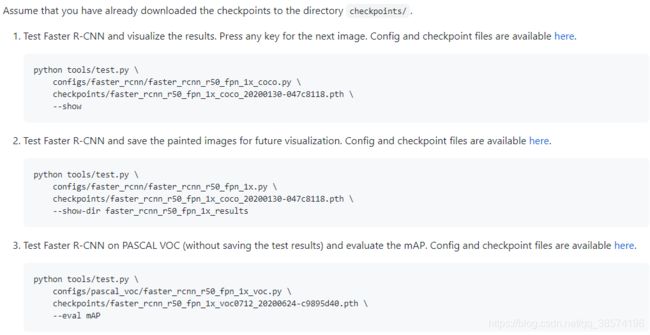
使用现有模型进行测试,mmdetection提供单GPU测试以及多GPU测试:
单GPU:
## single-gpu testing
python tools/test.py \
    ${CONFIG_FILE} \
    ${CHECKPOINT_FILE} \
    [--out ${RESULT_FILE}] \
    [--eval ${EVAL_METRICS}] \
    [--show]
多GPU:
## multi-gpu testing
bash tools/dist_test.sh \
    ${CONFIG_FILE} \
    ${CHECKPOINT_FILE} \
    ${GPU_NUM} \
    [--out ${RESULT_FILE}] \
    [--eval ${EVAL_METRICS}]
其中参数说明:
CONFIG_FILE:	configs配置文件
CHECKPOINT_FILE:	训练的权重文件
RESULT_FILE : 	检测结果的保存文件夹名称,如果不设定的话将不会保存检测结果  保存格式为pickle格式
EVAL_METRICS : 	要评估的指标,对于COCO数据集可以设定为:proposal_fast,proposal,bbox,segm;PASCAL VOC可设定为:mAP,recall
--show :		设定的话会绘制检测结果并创建窗口显示结果
--show-dir : 	后面需要接保存路径,设定的话会将绘制了检测结果的图片保存到该路径下
--show-score-thr :	后接置信度阈值,设定了的话低于该阈值的检测框会被移除
--cfg-options : 	用于修改配置文件的参数
--eval-options :	仅用于eval,后接的参数会被传入 dataset.evaluate()函数

在测试时也可以指定检测结果存为json文件,添加命令:
--format-only --options "jsonfile_prefix=your result save name"
2.2 训练
单GPU:
python tools/train.py \
    ${CONFIG_FILE} \
    [optional arguments]
参数说明:
--no-validate (not suggested): 在训练期间禁用验证(因为默认是会开启验证的,当没有验证集或其他情况时可以添加此选项)
--work-dir ${WORK_DIR}: Override the working directory.重新设定当前工作目录
--resume-from ${CHECKPOINT_FILE}: Resume from a previous checkpoint file.重新训练的权重路径
--options 'Key=value': Overrides other settings in the used config.与测试中类似,后接的'Key=value'可以修改配置文件的参数
多GPU:
bash ./tools/dist_train.sh \
    ${CONFIG_FILE} \
    ${GPU_NUM} \
    [optional arguments]
当需要在一个多卡单机上同时运行两个或以上的任务时,需要设定任务的port不同,默认是29500,例如:
CUDA_VISIBLE_DEVICES=0,1,2,3 PORT=29500 ./tools/dist_train.sh ${CONFIG_FILE} 4
CUDA_VISIBLE_DEVICES=4,5,6,7 PORT=29501 ./tools/dist_train.sh ${CONFIG_FILE} 4
参数与上面的都类似,不再一一说明

