SpringBoot中Spring Security 的使用
1.Spring Security 的介绍
Spring Security是一个能够为基于Spring的企业应用系统提供声明式的安全访问控制解决方案的安全框架。
Spring Security对Web安全性的支持大量地依赖于Servlet过滤器。这些过滤器拦截进入请求,并且在应用程序处理该请求之前进行某些安全处理。 Spring Security提供有若干个过滤器,它们能够拦截Servlet请求,并将这些请求转给认证和访问决策管理器处理,从而增强安全性。根据自己的需要,可以使用适当的过滤器来保护自己的应用程序。
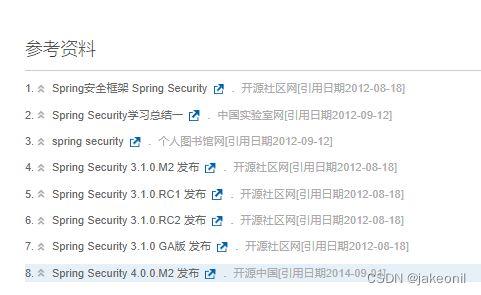
它的更新日志:
2.在SpringBoot中的使用
(1)首先是环境的配置,版本的使用
springboot的版本:
然后添加的是Spring Security的maven的配置
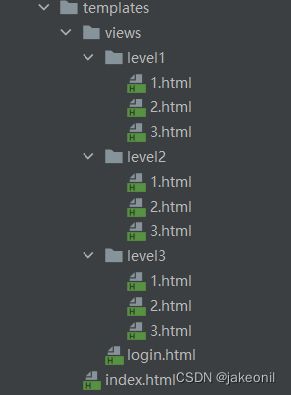
(2)前端网页资源
其中各个level中的页面是要带有某种权力才可以去访问到的,比如说是vip1只能访问到level1中的1,2,3界面,后面会进行相关的配置(相关的页面资源在文末有相关baiduyun链接)
(3)视图控制器来进行页面的跳转
package com.csg.springbootsecurity.controller;


import org.springframework.stereotype.Controller;
import org.springframework.web.bind.annotation.PathVariable;
import org.springframework.web.bind.annotation.RequestMapping;

@Controller
public class ViewController {


    @RequestMapping({"/","/index"})
    public String index()
    {
        return "index";
    }

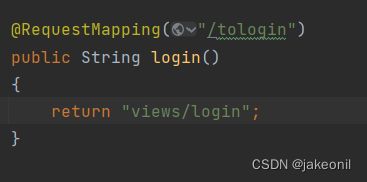
    @RequestMapping("/tologin")
    public String login()
    {
        return "views/login";
    }


    @RequestMapping("/level1/{id}")
    public String level1(@PathVariable("id") int id)
    {
        return "views/level1/"+id;
    }

    @RequestMapping("/level2/{id}")
    public String level2(@PathVariable("id") int id)
    {
        return "views/level2/"+id;
    }

    @RequestMapping("/level3/{id}")
    public String level3(@PathVariable("id") int id)
    {
        return "views/level3/"+id;
    }
}
(4)再来到的是Spring Security在springboot中的配置类
package com.csg.springbootsecurity.config;


import org.springframework.context.annotation.Configuration;
import org.springframework.security.config.annotation.authentication.builders.AuthenticationManagerBuilder;
import org.springframework.security.config.annotation.web.builders.HttpSecurity;
import org.springframework.security.config.annotation.web.configuration.EnableWebSecurity;
import org.springframework.security.config.annotation.web.configuration.WebSecurityConfiguration;
import org.springframework.security.config.annotation.web.configuration.WebSecurityConfigurerAdapter;
import org.springframework.security.crypto.bcrypt.BCryptPasswordEncoder;

@EnableWebSecurity
public class SecurityConfig extends WebSecurityConfigurerAdapter {
    @Override
    protected void configure(HttpSecurity http) throws Exception {
        http.authorizeRequests().antMatchers("/").permitAll()
                .antMatchers("/level1/**").hasRole("vip1")
                .antMatchers("/level2/**").hasRole("vip2")
                .antMatchers("/level3/**").hasRole("vip3");

        http.formLogin().loginPage("/tologin");//开启登录功能跳转的是自带的界面,发送的是/tologin请求来到的是login的界面,那么登录的表单和这里都是登录界面的请求
        http.logout().logoutSuccessUrl("/");//注销的功能
        http.csrf().disable();
        http.rememberMe().rememberMeParameter("remember");
    }

    @Override
    protected void configure(AuthenticationManagerBuilder auth) throws Exception {
       auth.inMemoryAuthentication().passwordEncoder(new BCryptPasswordEncoder())
               .withUser("csh").password(new BCryptPasswordEncoder().encode("123456")).roles("vip2","vip3")
               .and()
               .withUser("root").password(new BCryptPasswordEncoder().encode("123456")).roles("vip1","vip2","vip3")
               .and()
               .withUser("guest").password(new BCryptPasswordEncoder().encode("123456")).roles("vip1");

    }
}
@EnableWebSecurity:开启安全配置,同时标记类为配置类
WebSecurityConfigurerAdapte:同时配置类要继承的是web安全配置适配器,重写当中的方法,进行自己的安全配置。
重写方法的介绍:
(1)
WebSecurityConfigurerAdapter中的原码:
protected void configure(HttpSecurity http) throws Exception {
        this.logger.debug("Using default configure(HttpSecurity). If subclassed this will potentially override subclass configure(HttpSecurity).");
        http.authorizeRequests((requests) -> {
            ((AuthorizedUrl)requests.anyRequest()).authenticated();
        });
        http.formLogin();
        http.httpBasic();
    }
在我们重写的时候
http.authorizeRequests().antMatchers("/").permitAll()
        .antMatchers("/level1/**").hasRole("vip1")
anMatchers(这里要写的是我们访问的url)而后面是permitAll的话是允许全部的访问,而后接hasRole是要带某种权力才能访问得到
登录功能的实现:
http.formLogin().loginPage("/tologin");//开启登录功能跳转的是自带的界面,如果加上loginPage的话发送一个请求,这里发送的是/tologin请求来到的是login的界面
http.formLogin()
是来默认开启登录的功能,没有配置接loginPage("/tologin")的话是默认跳转的是自带的登录界面
我这里是跳转到了自己的登录界面
记住我功能的实现:
http.rememberMe().rememberMeParameter("remember");
在前端页面中是:
功能是保存好用户的一个cookie
(2)
重写的方法:
 protected void configure(AuthenticationManagerBuilder auth) throws Exception {
        this.disableLocalConfigureAuthenticationBldr = true;
    }
auth.inMemoryAuthentication().passwordEncoder(new BCryptPasswordEncoder())
.withUser("csh").password(new BCryptPasswordEncoder().encode("123456")).roles("vip2","vip3")
withUser(账户名) 这里注意的是password要进行的是加密的密码,这里我采用的是BCryptPasswordEncoder().encode("123456"),同时后面的roles是代表的权限
(5)前端视图的过滤(不同权限不同视图)
首页
加上两个命名空间:
xmlns:th="http://www.thymeleaf.org"
      xmlns:sec="http://www.thymeleaf.org/thymeleaf-extras-springsecurity5">
(3)成果界面展示
初始界面:
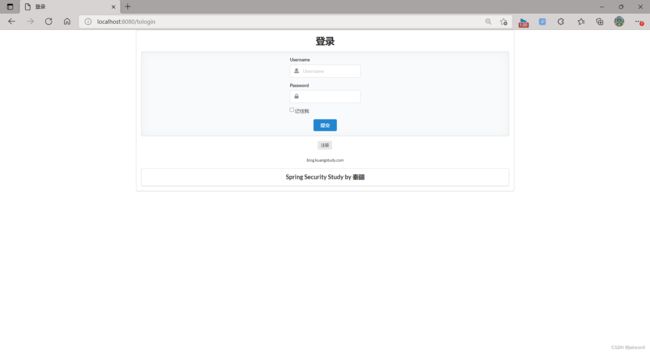
登录界面:
登录csh账户:


