基于python的验证码生成与识别1—生成简单的验证码
最近爬虫的时候经常遇到验证码,想着干脆就花点时间去学习一下如何识别验证码,顺便在这里记录一下过程,方便以后翻阅。
识别验证码的主要过程为:
1. 图像预处理 二值化,去噪等
2. 图像分割 把验证码分割单个字符
3. 图像识别 输出图像对应的字符
目前接触到图像识别方法是Tesseract,KNN分类算法,AI 与向量空间图像识别算法(http://www.jb51.net/article/99408.htm)。
在识别中最麻烦的一步就是获取标注的素材。
所以第一更,我们先使用PIL来生成简单的验证码(无干扰扭曲等),用于试验以上几种方法。
部分方法借鉴自 http://www.cnblogs.com/yangdianfeng007/p/5438193.html
上代码:
使用方法:调用
create_pic(num, dirname='./', mode, random_font=False)num 生成图片的数量。
dirname 生成图片的路径
mode 三种模式获得一个随机的指定位数的字符串: number-纯数字, word-纯字母, mix-数字和字母混合
random_font 是否使用随机字体
'''
	用于创建简单的验证码
	get_text(mode='number',count=4)
		获得随机的 字母/数字 任意长度的字符串
	get_random_font()
		返回一个随机的字体
	get_captcha(dirname='./', mode='mix', count=4, random_font=False)
		在指定文件夹生成验证码图片,并且返回文件名称
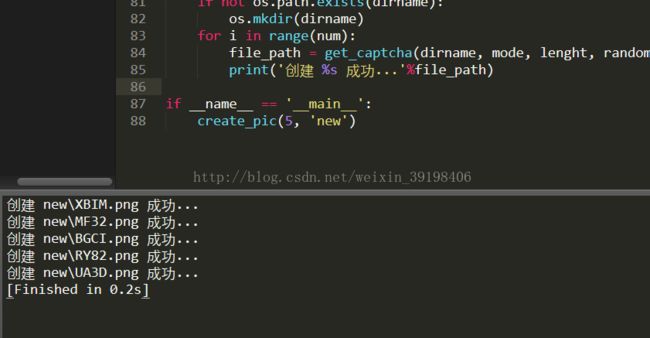
	create_pic(num, dirname='./')
		在指定文件夹、生成指定数量的图片
'''
import random
from PIL import Image,ImageDraw,ImageFont
import os

# 三种模式获得一个随机的指定位数的字符串: number-纯数字, word-纯字母, mix-数字和字母混合
def get_text(mode='number',count=4):
	number_list = ['0','1','2','3','4','5','6','7','8','9']
	word_list = [ 'A', 'B', 'C', 'D', 'E', 'F', 'G', 'H','I','J', 'K','L', 'M', 'N','O','P','Q','R','S', 'T', 'U', 'V', 'W', 'Z','X', 'Y']
	if mode == 'number':
		return ''.join(random.sample(number_list, count))
	elif mode == 'word':
		return ''.join(random.sample(word_list, count))
	else:
		return ''.join(random.sample(number_list + word_list, count))


# 获得一个随机的字体文件路径
def get_random_font():
	# 获取字体目录下所有文件
	font_path = 'C:/Windows/Fonts/'
	font_list = os.listdir(font_path)

	# 遍历所有文件,保留ttf文件,返回这个列表
	ttf_list = []
	for font_file in font_list:
		if font_file.endswith('.ttf'):
			ttf_list.append(font_file)

	my_font = random.choice(ttf_list)
	return font_path + my_font


#字符串写入图片,生成验证码图片
def get_captcha(dirname='./', mode='mix', count=4, random_font=False):
	#导入字体
	if random_font == False:
		font_path = 'C:/Windows/Fonts/ARIALN.TTF'
	else:
		font_path = get_random_font()
	font = ImageFont.truetype(font_path,40)

	# 生成字符串
	text = get_text(mode, count)

	# 根据指定字体字符串的尺寸,计算出字符串放在图片中间时的坐标
	font_width, font_height = font.getsize(text)
	#size=(宽度,高度) 图片大小会根据字数调整,同时字符串总数会在图片的中间位置
	width = font_width + 20 + count
	height = font_height + 20 + count//5
	size = width, height
	start_point = ((width - font_width) / 2, (height - font_height) / 2)

	#背景颜色/字体颜色/字体路径
	bgcolor = (255,255,255)
	fontcolor = (0,0,0)

	#创建图片画布
	image = Image.new('RGBA',size,bgcolor)

	# 创建画笔并使用字符串填充图片
	draw = ImageDraw.Draw(image)
	draw.text((start_point), text, font= font, fill=fontcolor)

	# 保存图片到当前文件夹
	file_path = os.path.join(dirname, text + '.png')
	image.save(file_path)
	return file_path

def create_pic(num, dirname='./', mode='mix', random_font=False):
	if not os.path.exists(dirname):
		os.mkdir(dirname)
	for i in range(num):
		file_path = get_captcha(dirname, mode, num, random_font)
		print('创建 %s 成功...'%file_path)

if __name__ == '__main__':
	create_pic(5, 'new', 'mix')
