Win10下 anaconda3 + cuda11.3 + TensorFlow_GPU2.6.0 + Pytorch_GPU1.10.1
Win10 + CUDA11.3 + tf_GPU2.6.0 + pytorch_GPU1.10.1
- 软件版本
-
- TensorFlow_GPU
- Pytorch_GPU
- 第一步:安装N卡驱动
- 第二步:安装Anaconda
- 第三步:CUDA、cuDNN的安装
-
- CUDA11.3的安装
- cuDNN8.2.1的安装
- 验正安装结果
- 第四步:安装TensorFlow_GPU
- 第五步:安装Pytorch_GPU
- 相关参考
软件版本
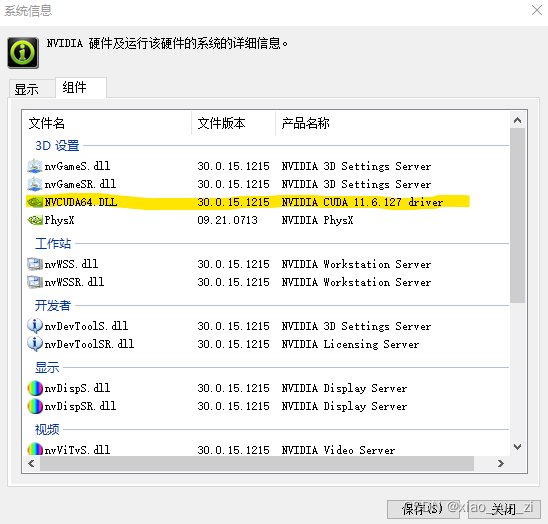
个人N卡2070 super,驱动512.15,支持最新的CUDA11.6(方法:英伟达控制面板—>帮助—>系统信息—>组件)。但TensorFlow_GPU 2.6.0、Pytorch_GPU 1.11.0目前并未适配到CUDA11.6。
TensorFlow_GPU
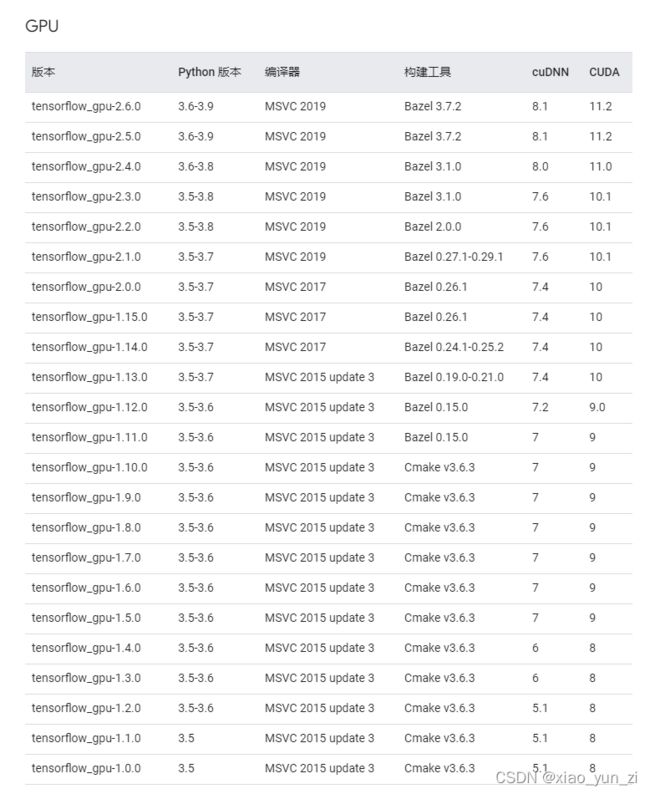
tf_ GPU 2.6.0 需搭配 CUDA11.2,cuDNN8.1,python3.6~3.9
Pytorch_GPU
pytorch_GPU 1.11.0 支持 CUDA10.2、CUDA11.3
点击查看torch、torchvision、torchaudio版本对应关系
| CUDA | CUDAToolkit | Pytorch |
|---|---|---|
| 11.3 | 11.3 | 1.11.0,1.10.1,1.10.0,1.9.1,1.9.0,1.8.1 |
| 11.1 | 11.1 | 1.8.0 |
| 11.0 | 11.0 | 1.7.1,1.7.0 |
| 10.2 | 10.2 | 1.11.0,1.10.1,1.10.0,1.9.1,1.9.0,1.8.1,1.8.0,1.7.1,1.7.0,1.6.0,1.5.1,1.5.0 |
| 10.1 | 10.1 | 1.7.1,1.7.0,1.6.0,1.5.1,1.5.0,1.4.0 |
| 10.0 | 10.0 | 1.2.0,1.1.0,1.0.1,1.0.0 |
| 9.2 | 9.2 | 1.7.1,1.7.0,1.6.0,1.5.1,1.5.0,1.4.0,1.2.0 |
| 9.0 | 9.0 | 1.1.0,1.0.1,1.0.0 |
| 8.0 | 8.0 | 1.0.0 |
尝试了 tf_GPU=2.6.0、CUDA=11.2、cuDNN=8.2.0、pytorch_GPU=1.8.0 or 1.10.1,结果 tf 没问题,pytorch总失败。最后安装 tf_GPU=2.6.0、CUDA=11.3、cuDNN=8.2.1、pytorch_GPU=1.10.1 两个都成功。
第一步:安装N卡驱动
官网下载对应显卡型号的驱动,注意带notebooks针对的是笔记本电脑。安装位置可自定义,也可默认。
第二步:安装Anaconda
(1)官网下载
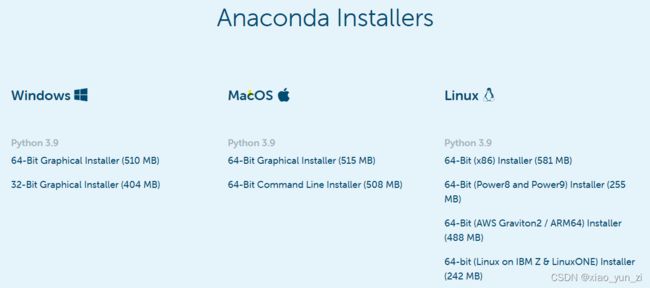
Windows 64bit(对应操作系统位数)
(2)以管理员运行
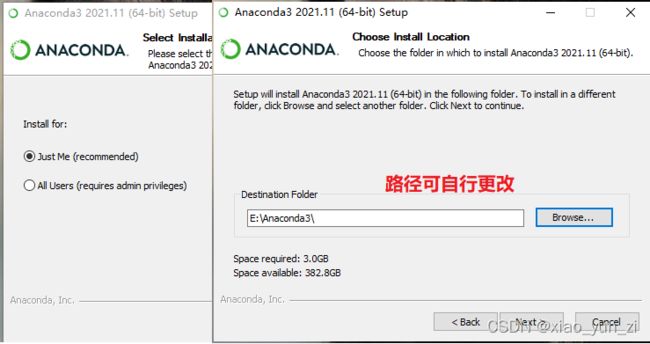

第三步:CUDA、cuDNN的安装
CUDA11.3的安装
(1)官网下载CUDA11.3
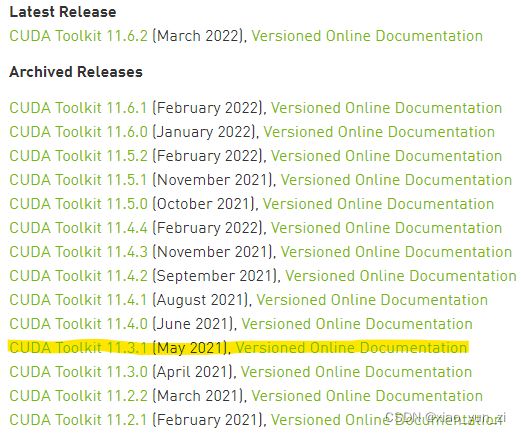
(2)exe文件以管理员身份运行
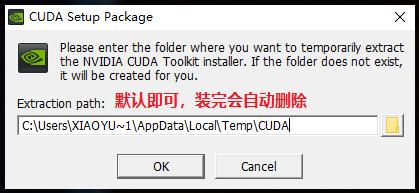
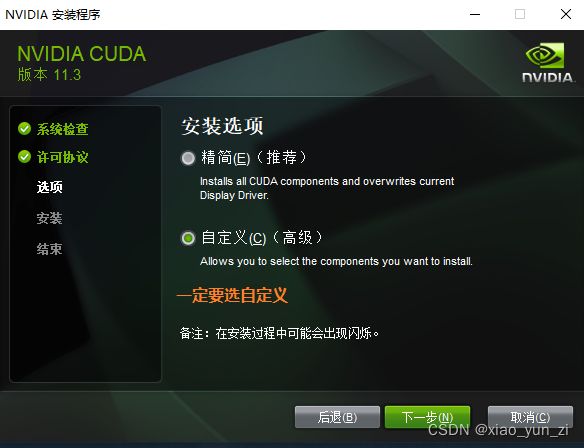
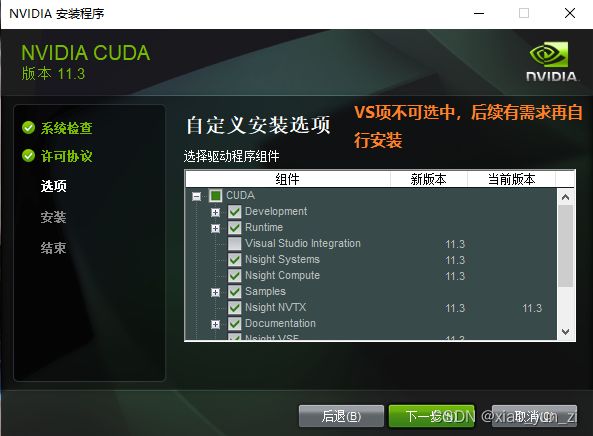

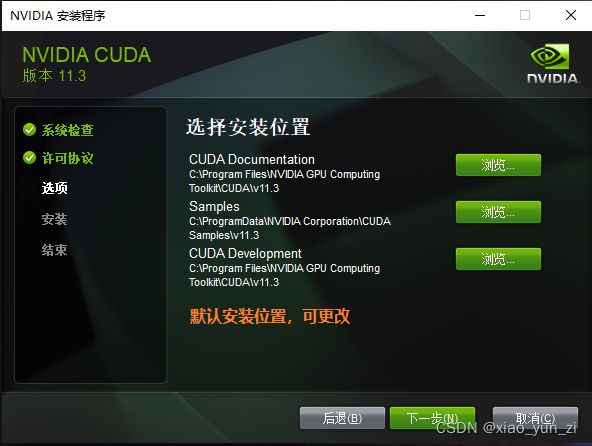
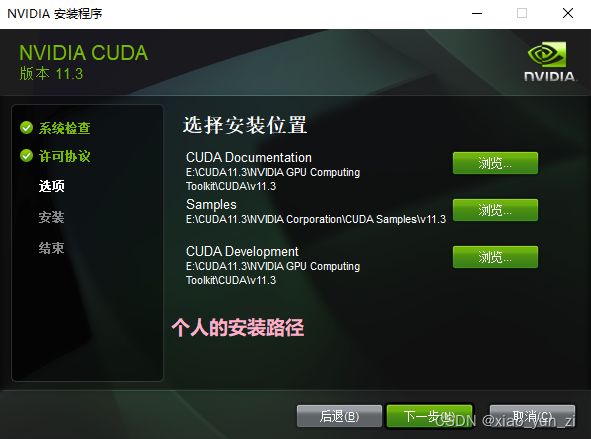
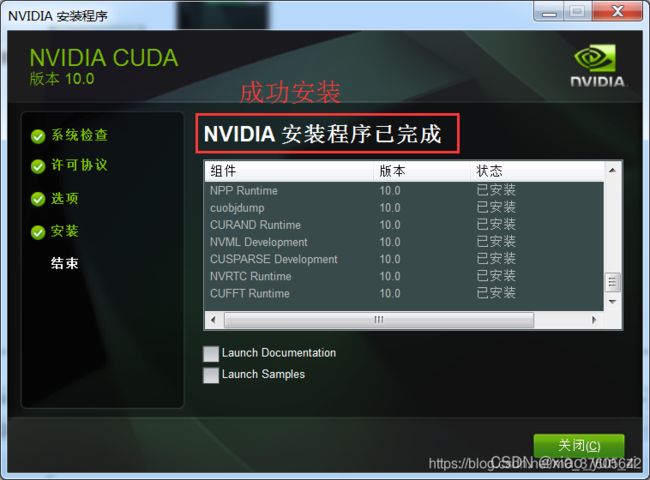
安装程序显示NVIDIA程序已完成时,下边的 launch xxxx不要选中,随后点击关闭。因已装好,不想卸载重装,所以下图来自
此链接。
cuDNN8.2.1的安装
(1)官网下载cuDNN8.2.1
注:需登陆英伟达账号后才能下cuDNN

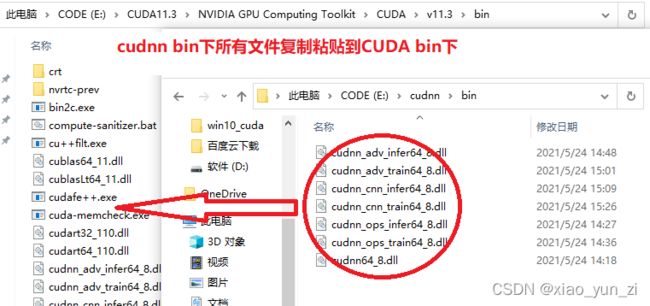
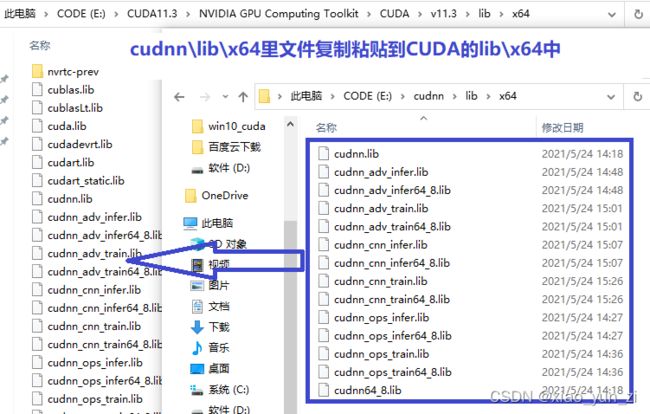
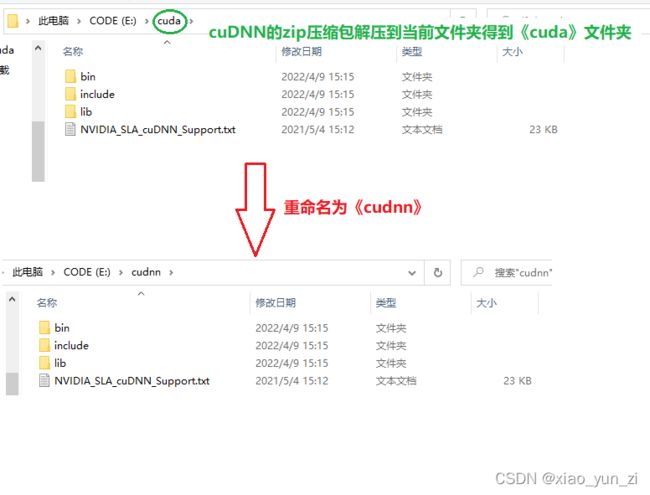
(2)解压cuDNN8.2.1,并重新命名
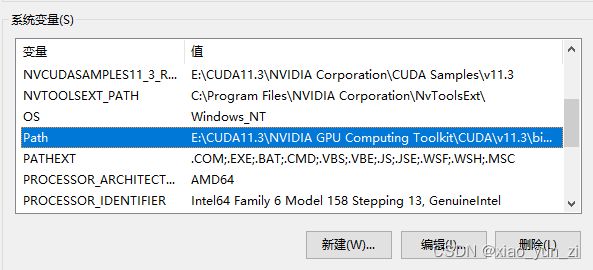
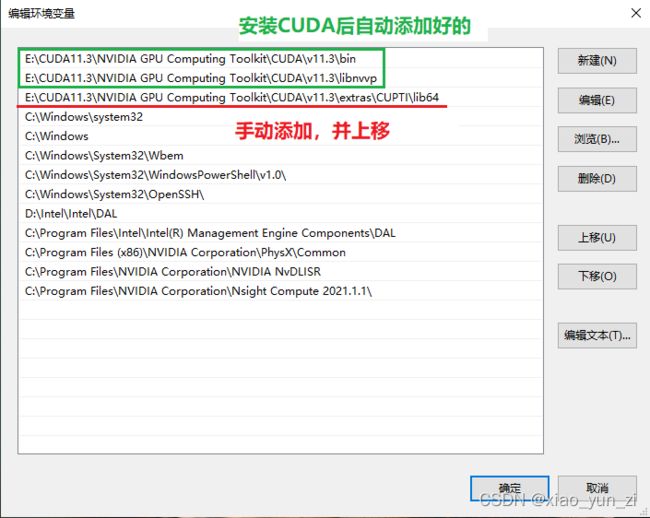
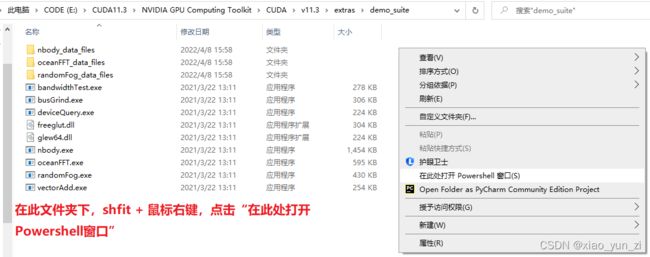
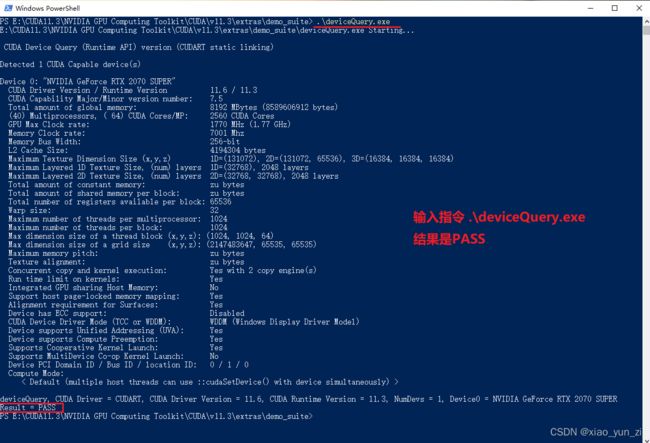
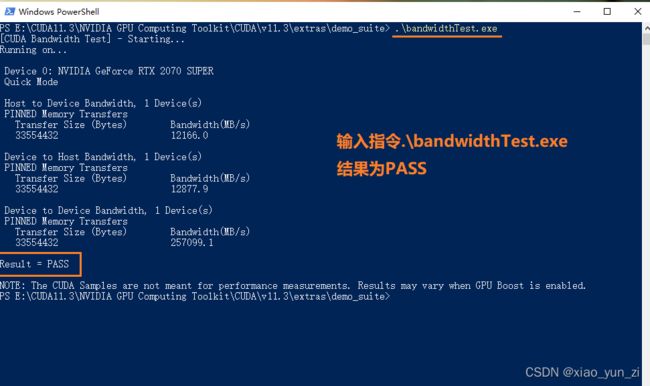
验正安装结果
第四步:安装TensorFlow_GPU
(1)打开cmd,激活conda,切换成国内清华镜像源
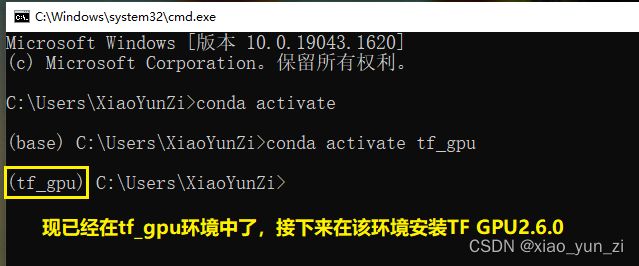
(2)创建tf_gpu环境并激活(Anaconda常用指令)
conda activate  #激活conda
conda create -n tf_gpu python=3.9  #为TensorFlow GPU版单独创建环境,该环境的python为3.9版本
#创建好环境后,先激活
conda activate tf_gpu  #激活环境 tf_gpu
#激活 tf_gpu 环境后,输入以下命令
conda install tensorflow-gpu=2.6.0
#安装结束后
import tensorflow as tf
tf.__version__
tf.test.is_gpu_available()  #返回 True,则安装成功

(4)测试
参考链接,注意只有run time第二个数据远小于第一个数据,才表明GPU发挥了作用
(5)卸载Tensorflow
如果有卸载的需求,在tf_gpu环境中输入以下代码即可
conda uninstall tensorflow
第五步:安装Pytorch_GPU
安装torch的过程是最艰难的,个人先装的torch,然后装的tf。torch试过原地址装1.11.0(CUDA11.3时);1.10.1和1.8.0(CUDA11.2时),也试过换成清华源安装,但都False。有两个问题:1.原地址装,速度过慢,经常失败;2.无论是原地址或清华源装,总装成CPU版本的。多次尝试后,清华源装1.10.1没问题。
(1)打开cmd,激活conda,切换成国内清华镜像源
装TensorFlow_GPU已经换过源的,直接下一步
(2)创建pytorch_gpu环境并激活(想同时用 tf 和 pytorch,直接装在tf_gpu环境中,两个都能用的)
conda activate
conda create -n pytorch_gpu python=3.9
conda activate pytorch_gpu
(3)安装Pytorch GPU 1.10.1
官网给出的指令如下:
conda install pytorch==1.10.1 torchvision==0.11.2 torchaudio==0.10.1 cudatoolkit=11.3 -c pytorch -c conda-forge
#其中 -c pytorch -c conda-forge 会在原地址下载,不是在配置好的清华源下载
其中 -c pytorch -c conda-forge 会在原地址下载,不是在配置好的清华源下载。因此,在安装时,pytorch_gpu环境中输入的指令为:
conda install pytorch==1.10.1 torchvision==0.11.2 torchaudio==0.10.1 cudatoolkit=11.3
#将在清华源下载安装torch
#安装结束后
import torch
torch.__version__
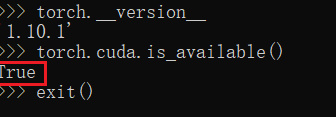
torch.cuda.is_available()  #返回 True,安装成功
conda uninstall pytorch
(5)TensorFlow GPU和Pytorch GPU装在同一个环境下的验证

相关参考
1. https://www.bilibili.com/video/BV1ov41137Z8?p=1
2. https://blog.csdn.net/shiwanghualuo/article/details/122860521
3. https://blog.csdn.net/m0_37605642/article/details/99100924
4. https://blog.csdn.net/scl52tg/article/details/120959893
5. https://blog.csdn.net/qq_32390983/article/details/122257576
6. https://blog.csdn.net/wq3095435422/article/details/123534237?spm=1001.2101.3001.6650.4&utm_medium=distribute.pc_relevant.none-task-blog-2defaultCTRLISTRate-4.pc_relevant_antiscanv2&depth_1-utm_source=distribute.pc_relevant.none-task-blog-2defaultCTRLISTRate-4.pc_relevant_antiscanv2&utm_relevant_index=8
7. https://blog.csdn.net/Williamcsj/article/details/123915652
8. https://blog.csdn.net/zxm_jimin/article/details/120966625
9. https://blog.csdn.net/zxm_jimin/article/details/120980192
