Springboot异步多线程编程
文章目录
- 一、基础知识
- 二、什么时候用同步&异步
- 三、什么时候需要使用多线程
- 四、springboot异步多线程编程实现
一、基础知识
同步:同步就是指一个进程在执行某个请求的时候,若该请求需要一段时间才能返回信息,那么这个进程将会一直等待下去,直到收到返回信息才继续执行下去;
异步:异步是指进程不需要一直等下去,而是继续执行下面的操作。当有消息返回时系统会通知进程进行处理,这样可以提高执行的效率。
进程:进程是独立的应用程序,占用cpu资源和物理内存。一个进程包括由操作系统分配的内存空间,包含一个或多个线程;
线程:线程是进程中虚拟的时间片,一个线程不能独立的存在,它必须是进程的一部分。
多线程:实际上就是时间片的轮转或者抢占。多线程能满足编写高效率的程序来达到充分利用CPU的目的;
二、什么时候用同步&异步
什么时候用同步:如果数据在线程间共享,例如正在写的数据可能被另外一个线程读到,而正在读的数据可能被另外一个线程写到,这些数据是共享的数据。这时就必须进行同步存取操作,否者前后读取的数据就有可能不一致;
什么时候用异步:调用一个需要花费很长时间来执行的方法的时候,并且不需要让程序等待对方返回,这时就应该使用异步编程;
必须使用同步的场景举例:
有一个共享的银行账号,原来里面有余额1000元,现在有两个用户A,B都要进行取钱;
首先A查询账号剩余1000元,A想要取出200元,A点击取款,系统正在处理取款事项…
紧接着在A取款的过程中B查询同一个账号还有1000元,B也想要取走200元;
A取完款后剩余800元,正常。而B取完款后理论上应该剩余600元,但是实际上还是剩余800元。这种场景就必须使用同步,而不能使用异步;
三、什么时候需要使用多线程
举个例子:
假设有个请求,服务端的处理需要执行3个比较耗时的操作:
1、操作1(200ms)
2、操作2(200ms)
3、操作3(200ms)
单线程总共就需要600ms,但如果把操作1、操作2、操作3分别分给3个线程去做,就只需要200ms了。
但是假设另外一个请求,服务端的处理也需要执行3个操作:
1、操作1(10ms)
2、操作2(10ms)
3、操作3(400ms)
单线程总共就需要420ms,这种情况下,即使把操作1、操作2、操作3分别分给3个线程去做,也需要400ms(耗时取决于最慢的那个线程的执行速度)。比起不用单线程,只节省了20ms。但是有可能线程调度切换也要花费个1、2ms。因此,这个方案显得优势就不明显了,还带来程序复杂度提升,不太值得,此时更好的方案是去优化降低操作3的耗时。
四、springboot异步多线程编程实现
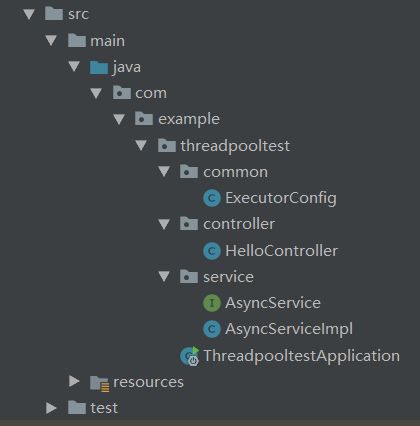
4.1 使用idea创建springboot web项目,工程最终目录结构如下:
4.2 首先创建springboot的线程池配置:
common包下面创建ExecutorConfig类,用于自定义线程池的相关配置。使用@Configuration和@EnableAsync这两个注解,表示这是线程池的配置类。
@Configuration
@EnableAsync
@Slf4j
public class ExecutorConfig {

    /** 核心线程数(默认线程数) */
    private int corePoolSize = 10;
    /** 最大线程数 */
    private int maxPoolSize = 20;
    /** 允许线程空闲时间(单位:默认为秒) */
    private static final int keepAliveTime = 60;
    /** 缓冲队列大小 */
    private int queueCapacity = 10;

    @Bean
    public Executor asyncServiceExecutor(){
        log.info("start asyncServiceExecutor");
        ThreadPoolTaskExecutor executor=new ThreadPoolTaskExecutor();
        //配置核心线程数
        executor.setCorePoolSize(corePoolSize);
        //配置最大线程数
        executor.setMaxPoolSize(maxPoolSize);
        //配置空闲时间
        executor.setKeepAliveSeconds(keepAliveTime);
        //配置队列大小
        executor.setQueueCapacity(queueCapacity);
        //配置线程前缀名
        executor.setThreadNamePrefix("async-service-");

        // rejection-policy:当pool已经达到max size的时候,如何处理新任务
        // CALLER_RUNS:不在新线程中执行任务,而是有调用者所在的线程来执行
        executor.setRejectedExecutionHandler(new ThreadPoolExecutor.CallerRunsPolicy());

        //执行初始化
        executor.initialize();
        return executor;
    }
}
4.3 service层接口和实现:
service包下新增server层的接口AsyncService类和对应的实现类AsyncServiceImpl。AsyncService内容如下:
public interface AsyncService {
    /**
     * 执行异步任务
     **/
    void executeAsync();
}
AsyncServiceImpl类内容如下,注意:
1.在executeAsync方法上增加注解@Async(“asyncServiceExecutor”) ;
2.@Async表示使用异步实现方式
3.括号里的asyncServiceExecutor是前面ExecutorConfig.java中的方法名,表明executeAsync方法使用asyncServiceExecutor方法创建的线程池多线程执行:
@Slf4j
@Service
public class AsyncServiceImpl implements AsyncService {

    //异步多线程调用
    @Async("asyncServiceExecutor")
    public void executeAsync() {
        log.info("start executeAsync");
        try{
            Thread.sleep(2000);
        }catch (Exception e){
            e.printStackTrace();
        }
        log.info("end executeAsync");
    }
}
4.4 controller层实现:
创建HelloController类,新增/test http接口,调用server层的executeAsync服务。
@Slf4j
@RestController
public class HelloController {
    @Autowired
    private AsyncService asyncService;

    //异步多线程调用方法,不用等方法返回结果
    @RequestMapping("/test")
    public String test(){
        log.info("start submit");

        //调用service层的任务
        asyncService.executeAsync();

        log.info("end submit");
        return "success";
    }
}
4.5 验证效果:
验证异步效果:
1.先将ExecutorConfig类下corePoolSize设置为1,表示只用1个线程。然后运行springboot;
2.springboot启动成功后,在浏览器输入:http://localhost:8080/test 。 可以看到虽然我们前面AsyncServiceImpl代码中sleep了2秒,但由于使用的是异步实现,所以接口马上直接先返回了success,而不需要等待2秒后再返回。

后台日志也能看到,异步接口controller层很快就执行结束,然后service方法继续按代码执行了2秒:
![]()
验证多线程效果:
1.corePoolSize设置为1时,使用Jmeter同时调用接口:http://localhost:8080/test 4次;
2.在springboot的控制台看见日志如下:

可以看出是1个线程每隔2秒执行完一次start&end executeAsync, 执行4次总共花费了8秒时间;
3.将corePoolSize设置为10,重启sprintboot;
4.再次使用Jmeter同时调用接口:http://localhost:8080/test 4次;
5.在springboot的控制台看见日志如下:

可以看出是4个线程同时在执行,执行完4次start&end executeAsync, 总共花费了2秒时间,这就是多线程可以提高程序运行效率的体现。
4.6 获取多线程的返回值:
Java自jdk1.5以后,提供了java.util.concurrent.Future来获取异步线程返回的结果。 主线程会创建一个 Future 接口的对象,然后启动并发线程,并告诉并发线程,一旦你执行完毕,就把结果存储在这个 Future 对象里。
一般情况下,我们会把长时间运行的逻辑放在异步线程中进行处理,这是使用 Future 接口最理想的场景。主线程只要简单的将异步任务封装在 Future 里,然后开始等待 Future 的完成,在这段等待的时间内,可以处理一些其它逻辑,一旦 Future 执行完毕,就可以从中获取执行的结果并进一步处理。
AsyncServiceImpl类中增加两个方法:
    //多线程调用并获取回调结果
    @Async("asyncServiceExecutor")
    public Future<String> sendMessageAsync1(){
        log.info("异步发送消息1---执行开始");
        try {
            Thread.sleep(2000);
        } catch (InterruptedException e) {
            e.printStackTrace();
        }
        log.info("异步发送消息1---执行结束");
        return new AsyncResult<>("异步发送消息1");
    }

    @Async("asyncServiceExecutor")
    public Future<String> sendMessageAsync2(){
        log.info("异步发送消息2---执行开始");
        try {
            Thread.sleep(2000);
        } catch (InterruptedException e) {
            e.printStackTrace();
        }
        log.info("异步发送消息2---执行结束");
        return new AsyncResult<>("异步发送消息2");
    }
AsyncService类中增加接口:
    Future<String> sendMessageAsync1();
    Future<String> sendMessageAsync2();
Controller中增加http接口调用:
    //异步多线程调用,但是要等方法回调结果。用多线程,所以只需要2秒
    @RequestMapping("/sendMessageAsync")
    public String sendMessageAsync() throws ExecutionException, InterruptedException {
        System.out.println("开始时间:"+new Date());
        Future<String> sendMessageAsync1 = asyncService.sendMessageAsync1();
        Future<String> sendMessageAsync2 = asyncService.sendMessageAsync2();

        String result="";
        String result1="";
        String result2="";

        while(!(sendMessageAsync1.isDone() && sendMessageAsync2.isDone())){
//            System.out.println(
//                    String.format(
//                            "future1 is %s and future2 is %s",
//                            sendMessageAsync1.isDone() ? "done" : "not done",
//                            sendMessageAsync2.isDone() ? "done" : "not done"
//                    )
//            );
//            Thread.sleep(300);
        }

        result +=sendMessageAsync1.get();
        result +=sendMessageAsync2.get();

        System.out.println("结束时间:"+new Date());
        return result;
上面使用的是先调用 Future.isDone() 判断任务是否完成,再调用 Future.get() 从完成的任务中获取任务执行的结果。
也可以直接用Future.get()并设置一个超时时间:
    @RequestMapping("/sendMessageAsync")
    public String sendMessageAsync() throws ExecutionException, InterruptedException {
        System.out.println("开始时间:"+new Date());
        Future<String> sendMessageAsync1 = asyncService.sendMessageAsync1();
        Future<String> sendMessageAsync2 = asyncService.sendMessageAsync2();

        String result="";
        String result1="";
        String result2="";

        //通过future.get()方法阻塞性获取执行结果,设置超时时间为3秒,3秒还没获取到值,就超时报错
        try {
            result1=sendMessageAsync1.get(3000, TimeUnit.MILLISECONDS);
        } catch (TimeoutException e) {
            sendMessageAsync1.cancel(true);
            log.error("sendMessageAsync1方法超时未返回结果");
            e.printStackTrace();
        }

        try {
            result2=sendMessageAsync2.get(3000, TimeUnit.MILLISECONDS);
        } catch (TimeoutException e) {
            sendMessageAsync2.cancel(true);
            log.error("sendMessageAsync2方法超时未返回结果");
            e.printStackTrace();
        }
        result=result1+result2;

        System.out.println("结束时间:"+new Date());
        return result;
    }
Future.get() 方法是一个阻塞方法。如果任务还没执行完毕,那么会一直阻塞直到直到任务完成
为了防止调用 Future.get() 方法阻塞当前线程,推荐的做法是先调用 Future.isDone() 判断任务是否完成,然后再调用 Future.get() 从完成的任务中获取任务执行的结果。
因为 Future.isDone() 和 Future.get() 的存在,我们就可以在等待任务完成时运行其它一些代码。使用 isDone() 和 get() 方法来获取结果,这应该是消费 Future 最常见的方式。
针对上面的代码, 如果不用isDone(),直接用get(), 那么get()阻塞的这2秒内就不能做任何其他事情。而用了while isDone(), 这2秒内则可以做一些其他的事情,比如上面代码中的输出打印一段话。
运行结果如下:


虽然sendMessageAsync1和sendMessageAsync2都要2秒时间,由于是多线程并行处理,所以总共只花费了2秒。
正常的单线程处理:
    //正常的单线程处理,要花4秒
    @RequestMapping("/sendmessage")
    public String sendMessage() throws ExecutionException, InterruptedException {
        System.out.println(new Date());

        //调用service层的任务
        String sendMessage1=asyncService.sendMessage1();
        String sendMessage2=asyncService.sendMessage2();

        String result="";
        result=sendMessage1+sendMessage2;

        System.out.println(new Date());
        return result;
    }


单线程顺序执行sendMessage1和sendMessage2,每一个方法执行需要2秒,总共就需要4秒才能执行完。
项目代码已上传至GitHub,需要的朋友可以自行下载: threadpooldemoserver
============================================================================
以上就是本篇文章的全部内容,如果对你有帮助,
欢迎扫码关注程序员杨叔的微信公众号,获取更多全栈测试干货内容资料:
