sobel算子、池化、cifar数据集
7_2_sobel算子
sobel算子用于提取图像边长
代码:
# -*- coding: utf-8 -*-
"""
Created on Mon Nov 28 21:20:25 2022

@author: 玉想琼思
"""

import matplotlib.pyplot as plt#画图用的包
import matplotlib.image as mpimg#读取图片用的包
import numpy as np#图片是一个二维图像,二维就是一个数组,做数组用的
import tensorflow.compat.v1 as tf
tf.disable_v2_behavior()

myimg=mpimg.imread('D:\course\人工智能\张晨光老师上课的代码\img.jpg')#读取图像
plt.imshow(myimg)#将图像画出来
plt.axis('on')#画坐标轴
plt.show()
print(myimg.shape)#打印图的形状   输出结果(2448, 3264, 3)表示2448行,3264列,3个通道

full=np.reshape(myimg, [1, 3264, 2448, 3]) #重新做此图的形状
inputfull=tf.Variable(tf.constant(1.0, shape=[1, 3264, 2448, 3]))#模拟此处的形状画出一个全1矩阵,作为模拟数据

#卷积这个图像,因为是3通道,所以sobel算子也是3通道三通道:-1   0   1
            										   -2   0   2
           											   -1   0   1
filter=tf.Variable(tf.constant([[-1.0, -1.0, -1.0], [0, 0, 0], [1.0, 1.0, 1.0],
                                [-2.0, -2.0, -2.0], [0, 0, 0], [2.0, 2.0, 2.0],
                                [-1.0, -1.0, -1.0], [0, 0, 0], [1.0, 1.0, 1.0]],
                                shape=[3, 3, 3, 1]))#进来的时候是3通道(第一个数字),出去的时候是1通道(最后一个数字),像把它过滤成黑白图像

"""
卷积公式:
VALID:out=(in-filter+1)/stride 上取整
SAME:out=in/stride+filter-in
P=(out-1)*stride+filter-in
P_L=P_U=P/2
P_R=P_D=P-P_L
"""
#开始卷积
#P=(3264-1)*1+3-3264=2,所以在原来图像的左上和右下都各添1个0,这样卷积出来就是SAME
op=tf.nn.conv2d(inputfull, filter, strides=[1, 1, 1, 1], padding='SAME')#把占位符inputfull放进来,步长strides为1*1,SAME卷积
#把卷积结果做归一化,(现在的值-最小的)/(最大的-最小的)之后转化成255,归一化是0——1,*255是因为图像是0——255,cast把实型转换成整型
o=tf.cast(((op-tf.reduce_min(op))/(tf.reduce_max(op)-tf.reduce_min(op)))*255, tf.uint8)

with tf.Session() as sess:
    sess.run(tf.global_variables_initializer())
    t, _=sess.run([o, filter], feed_dict={inputfull:full})#full数据,给了占位符inputfull,数据有值,占位符无值。求卷积核filter和输出,只保留输出t。
    t=np.reshape(t, [3264, 2448])#把b(批次)和c(通道)都去掉,只留宽(3264)和高(2448)
    plt.imshow(t, cmap='Greys_r')#灰色系
    plt.axis('off')#坐标关闭
    plt.show()
代码运行结果:
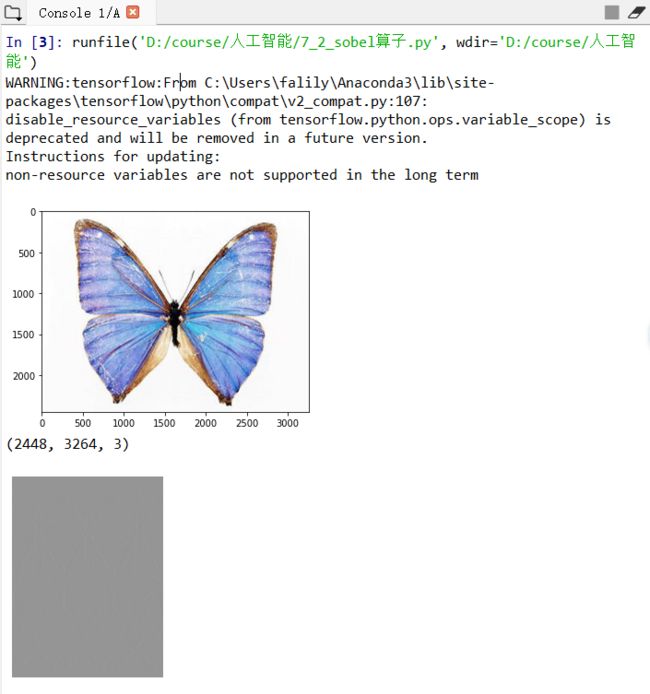
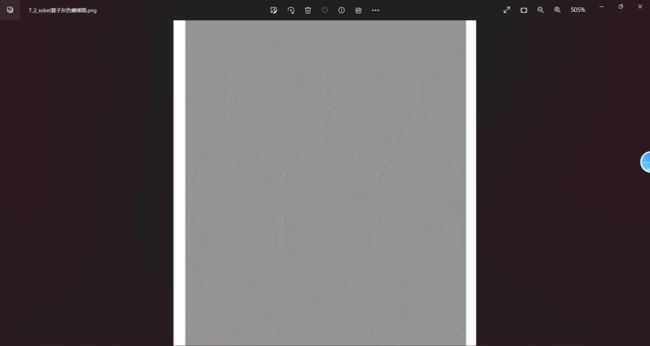
将这个灰色的图保留一下,放大看,会有蝴蝶的纹路:(这个图是原图的转置)
如果将上述代码中的所有宽(3264)和高(2448)互换:
# -*- coding: utf-8 -*-
"""
Created on Mon Nov 28 21:20:25 2022

@author: 玉想琼思
"""

import matplotlib.pyplot as plt
import matplotlib.image as mpimg
import numpy as np
import tensorflow.compat.v1 as tf
tf.disable_v2_behavior()

myimg=mpimg.imread('D:\course\人工智能\张晨光老师上课的代码\img.jpg')
plt.imshow(myimg)
plt.axis('on')
plt.show()
print(myimg.shape)

full=np.reshape(myimg, [1, 2448, 3264, 3])
inputfull=tf.Variable(tf.constant(1.0, shape=[1, 2448, 3264, 3]))

filter=tf.Variable(tf.constant([[-1.0, -1.0, -1.0], [0, 0, 0], [1.0, 1.0, 1.0],
                                [-2.0, -2.0, -2.0], [0, 0, 0], [2.0, 2.0, 2.0],
                                [-1.0, -1.0, -1.0], [0, 0, 0], [1.0, 1.0, 1.0]],
                                shape=[3, 3, 3, 1]))
op=tf.nn.conv2d(inputfull, filter, strides=[1, 1, 1, 1], padding='SAME')
o=tf.cast(((op-tf.reduce_min(op))/(tf.reduce_max(op)-tf.reduce_min(op)))*255, tf.uint8)

with tf.Session() as sess:
    sess.run(tf.global_variables_initializer())
    t, _=sess.run([o, filter], feed_dict={inputfull:full})
    t=np.reshape(t, [2448, 3264])
    plt.imshow(t, cmap='Greys_r')
    plt.axis('off')
    plt.show()
FileNotFoundError: [Errno 2] No such file or directory: 'img.jpg'
尝试把文件路径写全,将myimg=mpimg.imread('img.jpg')改成myimg=mpimg.imread('D:\course\人工智能\张晨光老师上课的代码\img.jpg')问题解决。
问题2.
AttributeError: module 'tensorflow' has no attribute 'Session'
原因:tensorflow2.0与1.0版本不兼容
将import tensorflow as tf替换成
import tensorflow.compat.v1 as tf
tf.disable_v2_behavior()
即可解决问题
7_3_池化:
代码:
# -*- coding: utf-8 -*-
"""
Created on Mon Nov 28 22:14:52 2022

@author: 玉想琼思
"""

import tensorflow.compat.v1 as tf
tf.disable_v2_behavior()

#先做一个原始的数据,并不是用真实的图像,而是用自定义的整型
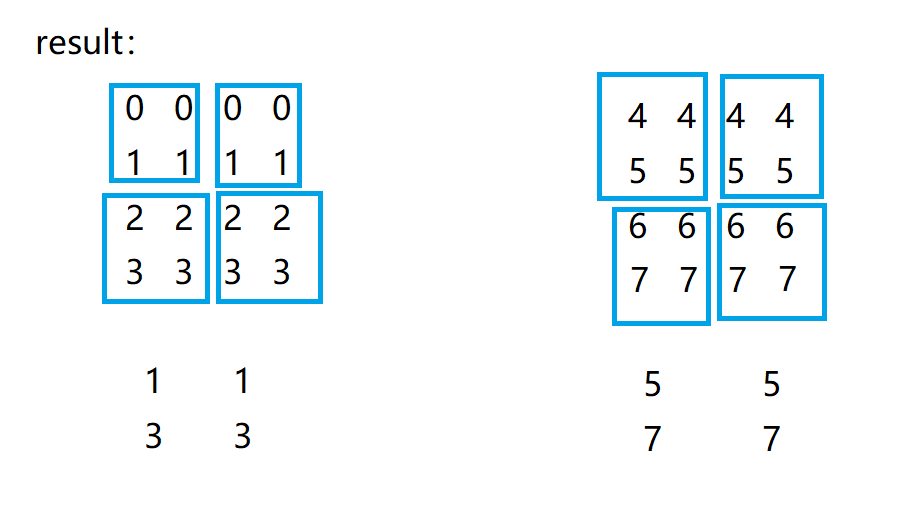
img=tf.constant([[#数据是双通道的,其中一个通道是4*4的:0  0  0  0, 另一个通道也是4*4的:4  4  4  4
											   	#    1  1  1  1					    5  5  5  5
												#    2  2  2  2					    6  6  6  6
												#	 3  3  3  3				  	    7  7  7  7
        [[0.0, 4.0], [0.0, 4.0], [0.0, 4.0], [0.0, 4.0]],
        [[1.0, 5.0], [1.0, 5.0], [1.0, 5.0], [1.0, 5.0]],
        [[2.0, 6.0], [2.0, 6.0], [2.0, 6.0], [2.0, 6.0]],
        [[3.0, 7.0], [3.0, 7.0], [3.0, 7.0], [3.0, 7.0]]
        ]])
img=tf.reshape(img, [1, 4, 4, 2])#reshape重置,处理的时候是1个,4*4的边长,2个通道

#四种池化方式:
#两边都留1是因为不想让两边的位置参与运算,所以留1,没有变换
#max_pool最大池化
pooling=tf.nn.max_pool(img, [1, 2, 2, 1], [1, 2, 2, 1], padding='VALID')#做最大池化前边的2*2是池化核的大小,后面的2*2是步长,VALID不填充,最大池化
pooling1=tf.nn.max_pool(img, [1, 2, 2, 1], [1, 1, 1, 1], padding='VALID')#1*1表示一步一池化,全部信息都保留
#avg_pool均值池化
#P=(out-1)*strides+filters-in=3, P_L=3/2=1, P_R=3-1=2
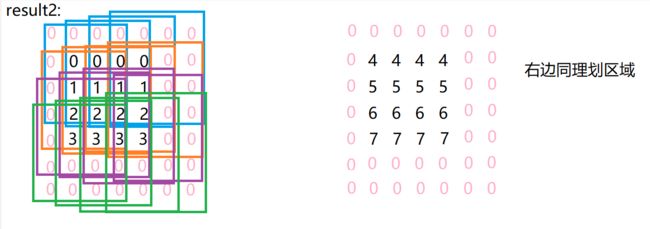
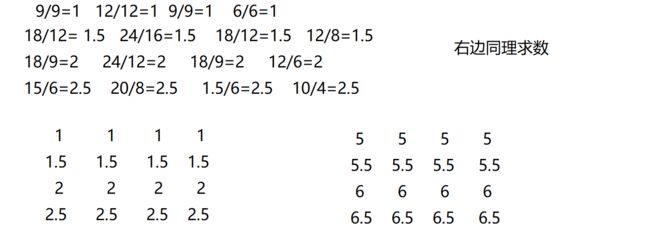
#对于SAME池化,和卷积一样,输出尺寸=输入尺寸/步长,输入尺寸是4*4,步长是1,out=insides=4/1=4,所以输出应为4。填充:P=(4-1)*1+4-4=3, P_L=3/2=1, P_R=3-1=2, 所以左边补1个0,右边补两个0
pooling2=tf.nn.avg_pool(img, [1, 4, 4, 1], [1, 1, 1, 1], padding='SAME')
#out=insides=4/4+4-4=1,所以输出应为1,填充:P=(1-1)*4+4-4=0,所以不用填充。
pooling3=tf.nn.avg_pool(img, [1, 4, 4, 1], [1, 4, 4, 1], padding='SAME')
nt_hpool2_flat=tf.reshape(tf.transpose(img), [-1, 16])#转置img,变成:0  1  2  3 ,   然后再变成n行16列,4*4=16,n行16列就是1行16列
													  #             0  1  2  3
													  #             0  1  2  3
pooling4=tf.reduce_mean(nt_hpool2_flat, 1)#求均值,1是按行求均值,0是按列求均值

with tf.Session() as sess:
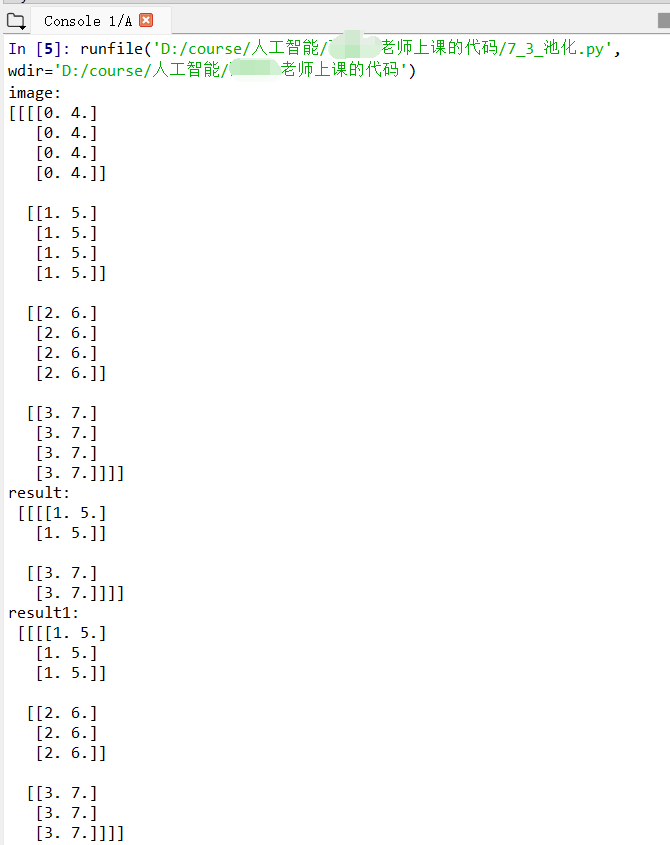
    print('image:')
    image=sess.run(img)
    print(image)

    result=sess.run(pooling)
    print('result:\n', result)

    result1=sess.run(pooling1)
    print('result1:\n', result1)

    result2=sess.run(pooling2)
    print('result2:\n', result2)

    result3=sess.run(pooling3)
    print('result3:\n', result3)

    flat, result4=sess.run([nt_hpool2_flat, pooling4])
    print('flat:\n', flat)#转置的img,一个通道是1行16列,两个通道就是2行16列,输出结果就是2行16列
    print('result4:\n', result4)#flat按行求均值
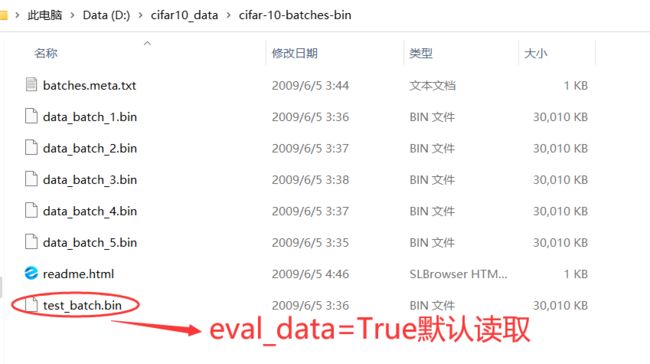
7_4_cifar
cifar数据集
import cifar10_input
import tensorflow as tf
import pylab
import numpy as np

batch_size=12#每次训练12张
data_dir='/tmp/cifar10_data/cifar-10-batches-bin'
#eval_data=True默认读取test_batch.bin数据集,从data_dir=data_dir路径下读取12张
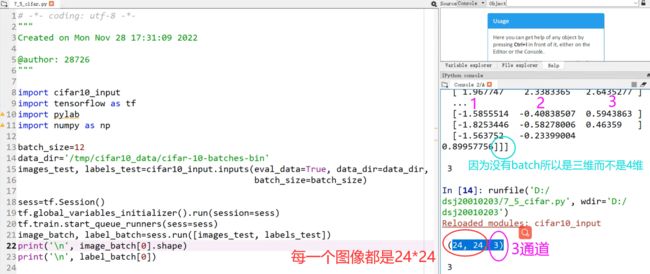
images_test, labels_test=cifar10_input.inputs(eval_data=True, data_dir=data_dir,
                                              batch_size=batch_size)

sess=tf.Session()
tf.global_variables_initializer().run(session=sess)
tf.train.start_queue_runners(sess=sess)#开启队列模式:会以队列的形式加载,提高训练的速度
image_batch, label_batch=sess.run([images_test, labels_test])#要获取运行images_test和labels_test,分别用image_batch和label_batch表示
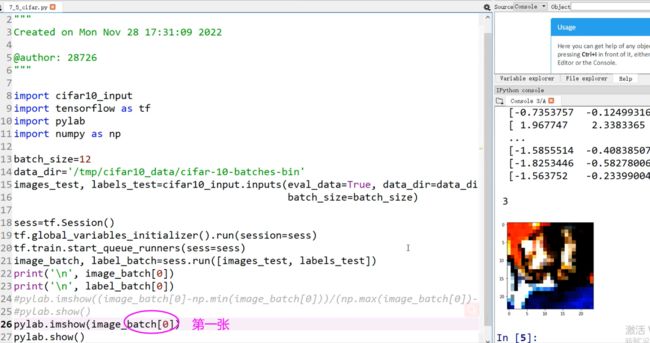
print('\n', image_batch[0])#取第0张的图像
print('\n', label_batch[0])#取第0张的标签
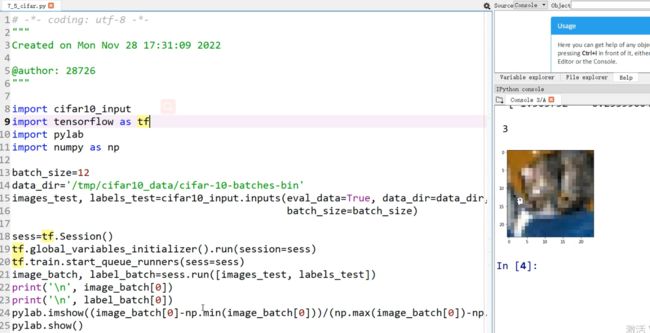
pylab.imshow((image_batch[0]-np.min(image_batch[0]))/(np.max(image_batch[0])-np.min(image_batch[0])))#归一化,(用图像中每一个像素减去所有像素中最小的像素)/(最大的像素减去最小的像素)
pylab.show()
AttributeError: module 'tensorflow' has no attribute 'gfile'
原因:在当前的版本中,gfile已经定义在io包的file_io.py中。

