神经网络实战案例(含思路和全代码)- 在 Fashion-MNIST 数据集上实现完整的神经网络
背景:
数据集中有十种物品的图片
目标:
构建一个完整的神经网络,能识别这些图片
实现流程:
导入数据集:
import torchvision
import torchvision.transforms as transforms
import torch
import torch.nn as nn
import torch.optim as optim
from torch.nn import  functional as F
from torch.utils.data import DataLoader,TensorDataset


mnist = torchvision.datasets.FashionMNIST(root="Home/Downloads/MINST-FASHION/FashionMNIST", # A directory on your computer
                                          download=True,
                                          train=True,# Train or test ?
                                          transform=transforms.ToTensor() # Turn my data into tensor.
                                          )

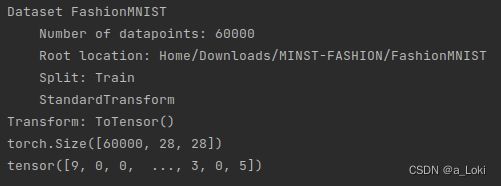
print(mnist) # Dscription of data
print(mnist.data.shape)
print(mnist.targets)
这里处理数据的模块transforms可以对数据集的数据本身进行修改,
而DataLoader,TensorDataset是对数据结构,归纳方式进行变换
结果:
这里图像通道为1,被省略了
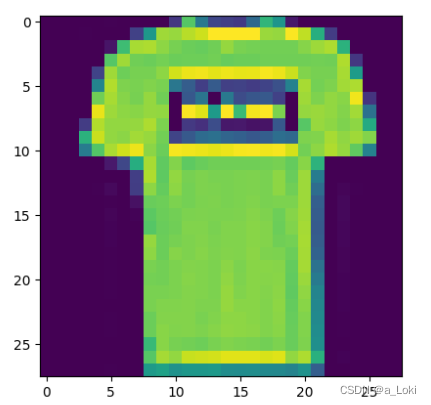
样本查看:
import numpy
import matplotlib.pyplot as plt


plt.imshow(mnist[1][0].view(28,28).numpy())
plt.show()
确定超参数:
lr = 0.15
gamma = 0.8
epochs = 5
bs = 128
数据处理
这里数据本身已经被划分好了,所以不需要TensorDataset来划分数据了
batch_data = DataLoader(mnist,batch_size=bs,shuffle=True,drop_last=False)
for x,y in batch_data:
    print(x.shape)
    print(y.shape)
    break
这里对于x,128为图片的张数,通道为1,高28,宽28.除了128,其余都为x的特征,可以将128后面的数进行乘积运算。以此确定神经网络输入的神经元
构建神经网络:
input_count = mnist.data[0].numel()
output_count = len(mnist.targets.unique())

class Modle(nn.Module):
    def __init__(self,in_feature=10,out_feature=2):
        super(Modle, self).__init__()
        self.liear1 = nn.Linear(in_feature,128,bias=False)
        self.output = nn.Linear(128,out_feature,bias=False)

    def forward(self,x):
        x = x.view(-1,28*28)
        sigma1 = torch.relu(self.liear1(x))
        sigma2 = torch.log_softmax(self.output(sigma1),dim=1)
        return sigma2
和之前我们实现的神经网络不同的是,因为使用的数据不是规定好的,所以要用 x = x.view(-1,28*28) 来保证后面那个维度一定为784,-1为占位符,让pytorch自动计算该维度的 值。
然后,要得到多分类的准确率,最后一层的输出函数选择log_softmax
定义损失函数和优化算法:
CrossEntropyLoss()=log_softmax() + NLLLoss()
定义好用于训练的函数(就是之前文章讲的内容
def fit_train(net,lr=0.15,gamma=0.8,epochs=5):
    criterion = nn.NLLLoss() # CrossEntropyLoss()=log_softmax() + NLLLoss()  loss function
    opt = optim.SGD(net.parameters(),lr=lr,momentum=gamma) # Define optimization algorithm
    correct = 0
    count = 0 #
    for epoch in range(epochs):
        for batch_index,(x,y) in enumerate(batch_data):
            y = y.view(x.shape[0]) # Lower dimension
            sigma = net.forward(x)
            loss = criterion(sigma,y)
            loss.backward()
            opt.step()
            opt.zero_grad()
            count += x.shape[0]
            # Solution accuracy
            yhat = torch.max(sigma,1)[1] # estimate
            correct += torch.sum(yhat == y)# accuracy
            # print("The current accuracy is:{}".format(correct/count))
            # Monitor progress
            if (batch_index+1) % 168 == 0 or batch_index == (len(batch_data) - 1) :
                print("epoch:{}---{}/{}---({:.0f}%),loss:{:.6f},Accuracy:{:.3f}".format(
                    epoch+1,
                    count,
                    epochs*len(batch_data.dataset),
                    100*count/(epochs*len(batch_data.dataset)),
                    loss.data.item(),
                    float(100*correct/count)))
            """
            epochs*len(batch_data.dataset) : all times
            count : now times
            correct : Correct number each time
            """
训练与评估
if __name__ == '__main__':
    torch.random.manual_seed(929)
    net = Modle(in_feature=mnist.data[0].numel(),out_feature=len(mnist.targets.unique()))
    fit_train(net,lr=lr,gamma=gamma,epochs=epochs)
结果:
一个简单的深度学校训练过程就完成了
当然这里可以看到,损失值并不是一路下降的状态,这说明我们的参数可能需要有所调整。
我试的最好的参数是
lr = 0.15
gamma = 0
epochs = 10
后续要提高就需要调整架构和优化神经网络了


