寻找凸四边形的四个顶点
利用Opencv 寻找凸四边形的四个顶点
对于一个含有凸四边形的图像,要想定位出凸四边形的四个顶点的坐标。
首先,得先对图像进行边缘检测,而边缘检测的前提是二值化图像【未进行二值化的图像进行边缘检测得到的结果往往非常不理想】,根据实际图像的特点,我对图像进行二值化处理以及闭运算【主要去除目标物内的孤立点】的过程如下:
#图像灰度处理   最大值灰度
import cv2
import numpy as np
import matplotlib.pyplot as plt
plt.rcParams['font.sans-serif'] = ['SimHei'] #显示中文
#读取第一张图像
img=cv2.imread(r"C:\Users\li1223\Desktop\DSC_0059.jpg")
gray_1 = cv2.cvtColor(img,cv2.COLOR_BGR2GRAY)#BGR转换为灰度
#获取图像尺寸
h,w=img.shape[0:2]
#自定义空白单通道图像,用于存放灰度图
gray=np.zeros((h,w),dtype=img.dtype)
#对原图像进行遍历,然后分别对B\G\R按比例灰度化
for i in range(h):
    for j in range(w):
        gray[i,j]=max(img[i,j,0],img[i,j,1],img[i,j,2])#求3通道中最大的值
#gray1= cv2.cvtColor(gray,cv2.COLOR_BGR2RGB)#BGR转换为RGB显示格式,方便通过matplotlib进行图像显示
gray_avarage = np.sum(gray)/(h*w)
pp = np.where(gray>gray_avarage)
gray1 = np.zeros((h,w),dtype=img.dtype)
gray1[pp]=1
kernel = np.ones((5,5), np.uint8)
#调用opencv库膨胀函数
#img1=cv2.dilate(gray1,kernel,1)#5x5卷积核,膨胀1次
#img1=cv2.erode(gray1,kernel,1)#5x5卷积核,腐蚀1次
#opening = cv2.morphologyEx(gray1, cv2.MORPH_OPEN, kernel)#先腐蚀后膨胀
closing = cv2.morphologyEx(gray1,cv2.MORPH_CLOSE,kernel)#先膨胀后腐蚀
cv2.imshow('二值化图像',closing)
cv2.waitKey(0)
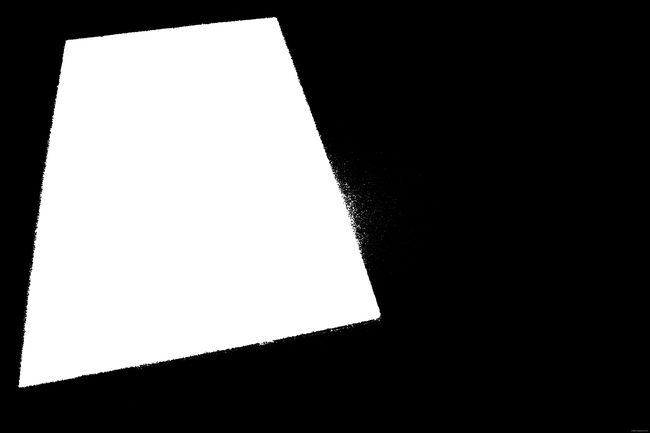
对得到的二值化图像可知,在凸四边形目标物的外围依旧有不规则孔洞和孤立小点,我们根据实际情况,如果只是有很多孤立的小点可以采用图像形态学开运算进行处理,如果有较大的不规则孔洞,可以采用联通区域的面积进行判别筛选处理。
代码如下:
import cv2
import numpy as np

img = cv2.imread(r'C:\Users\li1223\Desktop\222.png', cv2.IMREAD_COLOR)
h, w, _ = img.shape
GrayImage=cv2.cvtColor(img,cv2.COLOR_BGR2GRAY) #图片灰度化处理
ret,binary = cv2.threshold(GrayImage,40,255,cv2.THRESH_BINARY) #图片二值化,灰度值大于40赋值255,反之0
threshold = h/20 * w/20   #设定面积阈值

#cv2.fingContours寻找图片轮廓信息
"""提取二值化后图片中的轮廓信息 ,返回值contours存储的即是图片中的轮廓信息,是一个向量,内每个元素保存了一组由连续的Point点构成的点的集合的向量,每一组Point点集就是一个轮廓,有多少轮廓,向量contours就有
多少元素"""
contours,hierarch=cv2.findContours(binary,cv2.RETR_EXTERNAL,cv2.CHAIN_APPROX_NONE)
for i in range(len(contours)):
    area = cv2.contourArea(contours[i]) #计算轮廓所占面积
    if area < threshold:                #将area小于阈值区域填充背景色,由于OpenCV读出的是BGR值
        cv2.drawContours(img,[contours[i]],-1, (0,0,0), thickness=-1)     #原始图片背景BGR值(84,1,68)
        continue
cv2.namedWindow("clahe image", 0)
cv2.resizeWindow("clahe image", 640, 480)
cv2.imshow("clahe image111", img)
cv2.waitKey(0)
cv2.imwrite(r'C:\Users\li1223\Desktop\2222.png',img)

去除目标物外孔洞的二值化图
其次,将凸四边形的轮廓凸显出来(此时的轮廓含有各种毛刺边),所以再利用凸显出来的轮廓寻找凸区域勾画出轮廓的整体(去除了毛刺边)【此时,可以得到勾画轮廓的系列点,顶点也在其中】。对系列点进行椭圆拟合【通常使用最小二乘法】,可以得到椭圆质点、长短轴半径以及旋转角度【根据最小二乘法的原理得,此椭圆是不会将顶点包含在内】。最后,利用拟合所得的椭圆参数构建椭圆方程,将系列点带入计算。包含在椭圆内的点,计算值为负,在椭圆上的点,计算值为零,在椭圆外的点,计算为正。
将计算值为正的点提取出来【顶点就在其中】构建点集,第一步挑选出计算值最大的点作为第一个顶点,然后去除第一个顶点附近的点和它本身,利用剩下的点构建一个新的点集【此时新的点集包含剩余的三个顶点以及这三个顶点附近的点】;第二步在新的点集中,挑选出计算值最大的点作为第二个顶点,然后去除第二个顶点附近的点和它本身,利用剩下的点构建一个新的点集【此时新的点集包含剩余的二个顶点以及这二个顶点附近的点】;依次类推,得到全部四个点。
假设得到椭圆质点【也称中心点】 ( x 0 , y 0 ) (x_{0},y_{0}) (x0,y0),长半轴 a a a,短半轴 b b b以及旋转角度 θ \theta θ 。
一般椭圆方程为: A x 2 + B x y + C y 2 + D x + E y + F = 0 Ax^{2}+Bxy+Cy^{2}+Dx+Ey+F=0 Ax2+Bxy+Cy2+Dx+Ey+F=0
此时方程可以变形为: A ( x − x 0 ) + B ( x − x 0 ) ( y − y 0 ) + C ( y − y 0 ) + f = 0 A(x-x_{0})+B(x-x_{0})(y-y_{0})+C(y-y_{0})+f=0 A(x−x0)+B(x−x0)(y−y0)+C(y−y0)+f=0
令 x ′ = x − x 0 x^{'}=x-x_{0} x′=x−x0 , y ′ = y − y 0 y^{'}=y-y_{0} y′=y−y0
则有: A x ′ 2 + B x ′ y ′ + C y ′ 2 + f = 0 Ax^{'2}+Bx^{'}y^{'}+Cy^{'2}+f=0 Ax′2+Bx′y′+Cy′2+f=0
另有,椭圆标准方程式:
x 2 b 2 + y 2 a 2 = 1 \tfrac{x^{2}}{b^{2}}+\tfrac{y^{2}}{a^{2}}=1 b2x2+a2y2=1
【此式与Opencv默认width为 x x x轴,且规定对应于椭圆的短半轴】
对于斜椭圆,其旋转角度为 θ \theta θ,则有 (逆时针旋转为正,顺时针旋转为负)
x = x ′ c o s θ − y ′ s i n θ x=x^{'}cos\theta-y^{'}sin\theta x=x′cosθ−y′sinθ
y = x ′ s i n θ + y ′ c o s θ y=x^{'}sin\theta+y^{'}cos\theta y=x′sinθ+y′cosθ
故,其标准方程为:
( x ′ c o s θ − y ′ s i n θ ) 2 b 2 + ( x ′ s i n θ + y ′ c o s θ ) 2 a 2 = 1 \tfrac{(x^{'}cos\theta-y^{'}sin\theta)^{2}}{b^{2}}+\tfrac{(x^{'}sin\theta+y^{'}cos\theta)^{2}}{a^{2}}=1 b2(x′cosθ−y′sinθ)2+a2(x′sinθ+y′cosθ)2=1
化解,得到
( a 2 c o s 2 θ + b 2 s i n 2 θ ) x ′ 2 + ( a 2 s i n 2 θ + b 2 c o s 2 θ ) y ′ 2 + 2 c o s θ s i n θ ( b 2 − a 2 ) x ′ y ′ − a 2 b 2 = 0 (a^{2}cos^{2}\theta+b^{2}sin^{2}\theta)x^{'2}+(a^{2}sin^{2}\theta+b^{2}cos^{2}\theta)y^{'2}+2cos\theta sin\theta(b^{2}-a^{2})x^{'}y^{'}-a^{2}b^{2}=0 (a2cos2θ+b2sin2θ)x′2+(a2sin2θ+b2cos2θ)y′2+2cosθsinθ(b2−a2)x′y′−a2b2=0
则有:
A = a 2 c o s 2 θ + b 2 s i n 2 θ A=a^{2}cos^{2}\theta+b^{2}sin^{2}\theta A=a2cos2θ+b2sin2θ
B = 2 c o s θ s i n θ ( b 2 − a 2 ) B=2cos\theta sin\theta(b^{2}-a^{2}) B=2cosθsinθ(b2−a2)
C = a 2 s i n 2 θ + b 2 c o s 2 θ C=a^{2}sin^{2}\theta+b^{2}cos^{2}\theta C=a2sin2θ+b2cos2θ
f = − a 2 b 2 f=-a^{2}b^{2} f=−a2b2
代码如下:
import cv2
import numpy as np
import matplotlib.pyplot as plt
import math

Img = cv2.imread(r'C:\Users\li1223\Desktop\2222.png')
imgray = cv2.cvtColor(Img, cv2.COLOR_BGR2GRAY)
B = imgray.copy()
ret, thresh = cv2.threshold(imgray, 150, 255, 0)
# th2 = cv2.adaptiveThreshold(imgray,255,cv2.ADAPTIVE_THRESH_MEAN_C,cv2.THRESH_BINARY,11,2)

contours, hierarchy = cv2.findContours(thresh,cv2.RETR_EXTERNAL,cv2.CHAIN_APPROX_SIMPLE) #寻找边缘
hull = cv2.convexHull(contours[len(contours)-1]) #寻找边缘的凸区域;
#print(hull)
cv2.polylines(Img, [hull], True, (0, 255, 0), 2) #绘制边缘

#cv2.drawContours(A,contours[0],-1,(0,0,255),3)
#cv2.imshow("Perfectly11 fitted ellipses", A)
#cv2.waitKey(0)
elps = cv2.fitEllipseAMS(hull) #根据边缘凸区域进行椭圆拟合
cv2.ellipse(Img, elps, (0,0,255)) #绘制拟合的椭圆

center ,a_b ,angle = elps #求取拟合椭圆的中心、长短轴、旋转角度
#print(center)
center_x ,center_y = center
b ,a = a_b
angle = angle/180*np.pi
#print('elps',center_x,center_y,b,a,angle)

#构建拟合椭圆的标准方程
C = math.pow(a/2*math.sin(angle),2)+math.pow(b/2*math.cos(angle),2)
B = 2*(-math.pow(a/2,2)+math.pow(b/2,2))*math.sin(angle)*math.cos(angle)
A = math.pow(a/2*math.cos(angle),2)+math.pow(b/2*math.sin(angle),2)
f = -math.pow(a/2*b/2,2)

center_array = np.array([center_x,center_y])
point_set = hull.reshape(hull.shape[0],-1)

hh = point_set-center_array
distance = A*np.power(hh[:,0],2)+B*hh[:,0]*hh[:,1]+C*np.power(hh[:,1],2)+f #计算边缘区域在椭圆上的值;

gg = np.where(distance>0)
dd = hull.reshape(hull.shape[0], -1)[gg[0],:]
dd_1 = np.copy(dd)


radius=8
color=(255,0,0)
thickness=4
#寻找凸四边形的四个顶点
first_point = hull.reshape(hull.shape[0], -1)[np.argsort(distance)[-1:]].reshape(2, ) #第一个顶点
cv2.circle(Img, tuple(first_point), radius, color, thickness)

#排除第一个顶点附近的点
a_1 = np.sqrt(np.power((first_point-dd)[:,0],2)+np.power((first_point-dd)[:,1],2))
b_1 = np.sqrt(np.power((first_point-center_array)[0],2)+np.power((first_point-center_array)[1],2))
c_1 = np.sqrt(np.power((dd-center_array)[:,0],2)+np.power((dd-center_array)[:,1],2))
cos = (np.power(b_1,2)+np.power(c_1,2)-np.power(a_1,2))/(2*b_1*c_1) - math.cos(20/180*np.pi)
cos_ad = np.where(cos < 0)
dd_1 = dd_1[cos_ad]

dd_2 = np.copy(dd_1)
hh = dd_2-center_array
distance_1 = A*np.power(hh[:,0],2)+B*hh[:,0]*hh[:,1]+C*np.power(hh[:,1],2)+f #计算边缘区域在椭圆上的值;

scend_point = dd_2[np.argsort(distance_1)[-1:]].reshape(2, ) #第二个顶点
cv2.circle(Img, tuple(scend_point), radius, color, thickness)
#排除第二个顶点附近的点
a_2 = np.sqrt(np.power((scend_point-dd_2)[:,0],2)+np.power((scend_point-dd_2)[:,1],2))
b_2 = np.sqrt(np.power((scend_point-center_array)[0],2)+np.power((scend_point-center_array)[1],2))
c_2 = np.sqrt(np.power((dd_2-center_array)[:,0],2)+np.power((dd_2-center_array)[:,1],2))
cos_2 = (np.power(b_2,2)+np.power(c_2,2)-np.power(a_2,2))/(2*b_2*c_2) - math.cos(20/180*np.pi)
cos_ad = np.where(cos_2 < 0)
dd_2 = dd_2[cos_ad]

dd_3 = np.copy(dd_2)
hh = dd_3-center_array
distance_2 = A*np.power(hh[:,0],2)+B*hh[:,0]*hh[:,1]+C*np.power(hh[:,1],2)+f #计算边缘区域在椭圆上的值;

third_point = dd_3[np.argsort(distance_2)[-1:]].reshape(2, ) #第三个顶点
cv2.circle(Img, tuple(third_point), radius, color, thickness)
#排除第三个顶点附近的点
a_3 = np.sqrt(np.power((third_point-dd_3)[:,0],2)+np.power((third_point-dd_3)[:,1],2))
b_3 = np.sqrt(np.power((third_point-center_array)[0],2)+np.power((third_point-center_array)[1],2))
c_3 = np.sqrt(np.power((dd_3-center_array)[:,0],2)+np.power((dd_3-center_array)[:,1],2))
cos_3 = (np.power(b_3,2)+np.power(c_3,2)-np.power(a_3,2))/(2*b_3*c_3) - math.cos(20/180*np.pi)
cos_ad = np.where(cos_3 < 0)
dd_3 = dd_3[cos_ad]

dd_4 = np.copy(dd_3)
hh = dd_4-center_array
distance_3 = A*np.power(hh[:,0],2)+B*hh[:,0]*hh[:,1]+C*np.power(hh[:,1],2)+f #计算边缘区域在椭圆上的值;

fourth_point = dd_4[np.argsort(distance_3)[-1:]].reshape(2, ) #第四个顶点
cv2.circle(Img, tuple(fourth_point), radius, color, thickness)
cv2.circle(Img, tuple([int(center_x),int(center_y)]), radius, color=(0,0,255), thickness=10)#绘制椭圆质点

cv2.imwrite(r'C:\Users\li1223\Desktop\22222.png',Img)
cv2.imshow("Perfectly fitted ellipses", Img)
cv2.waitKey(0)


