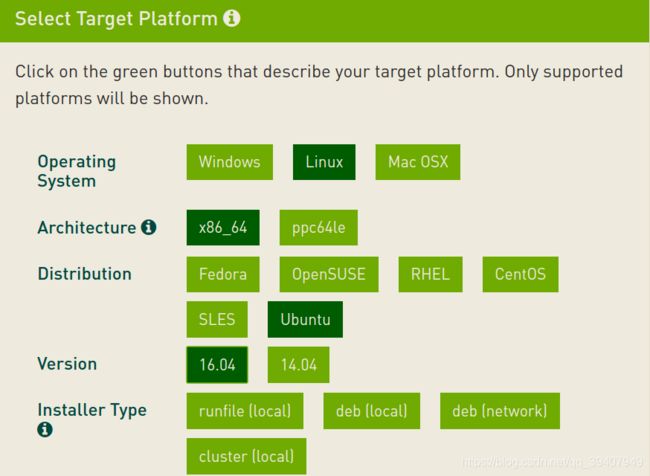
Ubuntu16.04 安装NVIDIA和CUDA注意事项(所踩的坑)
因为要搞机器学习相关领域,所以装了Ubuntu系统,还要加装Nvidia和cuda两个软件(其实他们都是同一家的)。反复重装了一个多星期,细数之前踩过的坑,总结一下提醒自己也为后来之人提供前车之鉴。
NVIDIA和CUDA安装教程
- NVIDIA安装F
-
- 常规安装教程
- 安装出现问题及解决方案
-
- 一、禁用nouveau驱动
- 二、关闭图形界面
- 三、禁用Secure boot
- 四、NVIDIA-SMI has failed because ……
- 五、An NVIDIA kernel module 'nvidia-drm' appears to ……
- 六、nvidia_drm is in use……
- 七、NVIDIA-SMI has failed because it couldn‘t communicate……
- 特别提醒:出现以下情况可能为正常
-
- 一、NVIDIA-SMI couldn't find libnvidia-ml.so library in your system……
- 二、ERROR: Unable to load info from any available system……
- 三、Info: the current GL alternatives in use are……
- 四、The owner of /home/name/.config/ibus/bus is not root!……
- 五、TypeError: a bytes-like object is required, not 'str'……
- CUDA安装
-
- 常规安装教程
-
- 注意事项
- 一、下载合适版本安装包
- 二、run安装方式安装
- 三、配置环境变量
- 四、检查是否安装成功
- 五、测试CUDA的Samples例子
NVIDIA安装F
常规安装教程
我这里__推荐的是安装系统推荐版本__,我之前一直尝试最新版本,结果导致出现各种问题,循环登录,闪屏,启动不了桌面等等。
0.如果之前有装过Nvidia,需要先卸载之前安装
sudo apt-get remove --purge nvidia*
1.打开终端,加入官方ppa源
sudo add-apt-repository ppa:graphics-drivers/ppa
2.刷新软件库
sudo apt-get update
3.查看推荐显卡驱动
ubuntu-drivers devices
建议选择驱动后边有_ 推荐(recommended)_字符的
4.安装推荐的显卡驱动
sudo apt-get install nvidia-384 nvidia-settings nvidia-prime
nvidia-384是我电脑系统推荐版本,当然这里也可以选择一键自动安装。
sudo ubuntu-drivers autoinstall
安装完成后,重启电脑,一定重启电脑
5.查看安装版本及是否正常
执行下面命令
nvidia-smi
显示以下界面即正常(网上盗图,侵删)

6.集显与独显的切换
独显特别费电,一般在外出时切换到集显,节省电量,增长待机时间。
(1)图形化界面切换
nvidia-setting

(2)命令行切换
NVIDIA提供了一个切换显卡的命令:
sudo prime-select query  # 查看当前使用显卡
sudo prime-select nvidia # 切换nvidia显卡
sudo prime-select intel  # 切换intel显卡
注: 每一次切换显卡都需要重新启动电脑才能生效
安装出现问题及解决方案
一般安装安装不成功需要注意以下事项;
一、禁用nouveau驱动
1.打开编辑配置文件
sudo gedit /etc/modprobe.d/blacklist.conf
2.在最后一行添加以下命令
blacklist nouveau
这一条的含义是禁用nouveau第三方驱动,之后也不需要改回来。
3.使命令生效
由于nouveau是构建在内核中的,所以要执行下面命令生效:
sudo update-initramfs -u
4.重启后再次尝试
先验证nouveau是否已禁用
lsmod | grep nouveau
没有信息显示,说明nouveau已被禁用,接下来可以安装nvidia的显卡驱动。
二、关闭图形界面
1.一般安装驱动都是在tty界面,在ubuntu下按ctrl+alt+f1进入字符界面
在命令行界面下输入
sudo service lightdm stop
2.安装完成后打开图形界面
sudo service lightdm start
3.然后重启
三、禁用Secure boot
bios禁用secure boot,也就是设置为disable
如果没有禁用secure boot,会导致NVIDIA驱动安装失败,或者不正常。
四、NVIDIA-SMI has failed because ……
1.挂载Nvidia驱动
sudo modprobe nvidia //报错
2.检查驱动是否安装成功
nvidia-smi
如果输出为:NVIDIA-SMI has failed because it couldn‘t communicate with NVIDIA driver. Make sure that the latest driver is installed and running.
3.解决方案
sudo apt-get install dkms
sudo dkms install -m nvidia -v 418.56   //后面版本编号以自己实际安装为准
418.56之前安装 nvidia 驱动的版本号,可通过下面方法查到:
ls /usr/src | grep nvidia
然后重启,再进行检测
五、An NVIDIA kernel module ‘nvidia-drm’ appears to ……
1.在tty2中安装Nvidia出现如下问题:
An NVIDIA kernel module ‘nvidia-drm’ appears to already be loaded in your kernel. This may be because it is in use (for example, by an X server, a CUDA program, or the NVIDIA Persistence Daemon), but this may also happen if your kernel was configured without support for module unloading. Please be sure to exit any programs that may be using the GPU(s) before attempting to upgrade your driver. If no GPU-based programs are running, you know that your kernel supports module unloading, and you still receive this message, then an error may have occured that has corrupted an NVIDIA kernel module’s usage count, for which the simplest remedy is to reboot your computer.
2.解决方案:关闭所有装置,并停止载入NVIDIA驱动程序
sudo systemctl isolate multi-user.target
sudo modprobe -r nvidia-drm
注:这个解决方法在非tty,linux图形界面的情况下一样适用,只不过第一个命令会直接从图形界面进入到tty界面
六、nvidia_drm is in use……
出现此问题可输入如下代码:
sudo systemctl stop systemd-logind
重新登录后再进行后续操作。
七、NVIDIA-SMI has failed because it couldn‘t communicate……
声明:此问题是在驱动、cuda和cudnn全部安装成功,后续使用中出现的问题。
出现这种错误的原因经常是使用sudo apt-get update、sudo apt-get upgrade命令更新软件列表信息及软件时,造成了内核版本的升级,导致以前下载的nvidia显卡驱动不再适配,解决方法是重新安装nvidia显卡驱动或者是降低linux内核版本。
NVIDIA-SMI has failed because it couldn‘t communicate with the NVIDIA driver.
2.解决方案:重新安装nvidia显卡驱动。
(1)利用命令 ll /usr/src/ 可查看下面有一个nvidia-440.44/文件夹,版本号因电脑而异
(2)进入到之前下载的run驱动文件下,执行以下代码即可;
(3)安装过程中不出意外一路默认即可。
sudo chmod a+x NVIDIA-Linux-x86_64-418.56.run #文件具体名依据实际情况
sudo ./NVIDIA-Linux-x86_64-418.56.run
特别提醒:出现以下情况可能为正常
一、NVIDIA-SMI couldn’t find libnvidia-ml.so library in your system……
1.在安装完后,在==intel(集显)==下输入:
nvidia-smi
然后出现:NVIDIA-SMI couldn’t find libnvidia-ml.so library in your system. Please make sure that the NVIDIA Display Driver is properly installed and present in your system.
Please also try adding directory that contains libnvidia-ml.so to your system PATH.
2.此时查询电脑使用显卡
sudo prime-select query
若为intel,则输入:
sudo prime-select nvidia
重启后重试
二、ERROR: Unable to load info from any available system……
1.在安装完后,在==intel(集显)==下输入:
nvidia-settings
出现下面错误,ERROR: Unable to load info from any available system
2.建议切换到Nvidia下:
sudo prime-select nvidia
重启后重试
三、Info: the current GL alternatives in use are……
1.在安装完后,在==intel(集显)==下切换独显:
sudo prime-select nvidia
出现如下错误:
Info: the current GL alternatives in use are: [‘nvidia-430-prime’, ‘nvidia-430-prime’]
Info: the current EGL alternatives in use are: [‘nvidia-430-prime’, ‘nvidia-430-prime’]
Info: selecting nvidia-430 for the nvidia profile
update-alternatives: 使用 /usr/lib/nvidia-430/ld.so.conf 来在手动模式中提供 /etc/ld.so.conf.d/x86_64-linux-gnu_GL.conf (x86_64-linux-gnu_gl_conf)
update-alternatives: 使用 /usr/lib/nvidia-430/ld.so.conf 来在手动模式中提供 /etc/ld.so.conf.d/x86_64-linux-gnu_EGL.conf (x86_64-linux-gnu_egl_conf)
update-alternatives: 使用 /usr/lib/nvidia-430/alt-ld.so.conf 来在手动模式中提供 /etc/ld.so.conf.d/i386-linux-gnu_GL.conf (i386-linux-gnu_gl_conf)
update-alternatives: 使用 /usr/lib/nvidia-430/alt-ld.so.conf 来在手动模式中提供 /etc/ld.so.conf.d/i386-linux-gnu_EGL.conf (i386-linux-gnu_egl_conf)
直接重启检查是否切换成功即可
四、The owner of /home/name/.config/ibus/bus is not root!……
1.在使用Nvidia图形化界面是输入:
sudo nvidia-settings
出现下面错误也可能是警告:The owner of /home/name/.config/ibus/bus is not root!
2.解决方案:找到所在文件直接删掉ibus就好
这里我出现这样问题是因为我使用了搜狗输入法,切换掉了系统自带的ibus框架,用的是Fcitx框架,所以直接删除ibus即可
五、TypeError: a bytes-like object is required, not ‘str’……
1.查询电脑使用显卡命令:
sudo prime-select query
2.出现以下错误:
Traceback (most recent call last):
File “/usr/bin/prime-select”, line 401, in
if not switcher.print_current_alternative():
File “/usr/bin/prime-select”, line 259, in print_current_alternative
gl_alternatives = self._get_current_gl_alternative()
File “/usr/bin/prime-select”, line 216, in _get_current_gl_alternative
return self._get_current_alternative(self._gl_switcher, self._gl_switcher_other)
File “/usr/bin/prime-select”, line 203, in _get_current_alternative
raw_alternative = switcher.get_current_alternative()
File “/usr/bin/prime-select”, line 83, in get_current_alternative
c = p.split(‘\n’)
TypeError: a bytes-like object is required, not ‘str’
解决方案:可能是电脑里选择python版本的问题
选择编译语言 Python2 or python3
sudo update-alternatives --config python
选择python2,继续进行
CUDA安装
常规安装教程
注意事项
注意安装CUDA版本,要和Nvidia驱动版本一致或者要适配
| CUDA Toolkit | Linux x86_64 Driver Version | Windows x86_64 Driver Version |
|---|---|---|
| CUDA 10.2.89 | >= 440.33 | >= 441.22 |
| CUDA 10.1 (10.1.105 general release, and updates) | >= 418.39 | >= 418.96 |
| CUDA 10.0.130 | >= 410.48 | >= 411.31 |
| CUDA 9.2 (9.2.148 Update 1) | >= 396.37 | >= 398.26 |
| CUDA 9.2 (9.2.88) | >= 396.26 | >= 397.44 |
| CUDA 9.1 (9.1.85) | >= 390.46 | >= 391.29 |
| CUDA 9.0 (9.0.76) | >= 384.81 | >= 385.54 |
| CUDA 8.0 (8.0.61 GA2) | >= 375.26 | >= 376.51 |
| CUDA 8.0 (8.0.44) | >= 367.48 | >= 369.30 |
| CUDA 7.5 (7.5.16) | >= 352.31 | >= 353.66 |
| CUDA 7.0 (7.0.28) | >= 346.46 | >= 347.62 |
| 更详细的请参照官网发布, |
https://docs.nvidia.com/cuda/cuda-toolkit-release-notes/index.html
一、下载合适版本安装包
二、run安装方式安装
下载完CUDA 8.0之后执行如下语句,运行.run文件
sudo sh cuda_9.0.176_384.81_linux.run //后面为你安装包文件
单击回车,一路往下运行,直到提示“是否为NVIDIA安装驱动nvidia-xxx?”,选择否,因为已经安装好驱动程序了,其他的全都是默认,不过要记住安装位置,默认是安装在/usr/local/cuda文件夹下.
三、配置环境变量
配置环境变量,运行如下命令打开profile文件
sudo gedit /etc/profile
打开文件后在文件末尾添加路径,也就是安装目录,命令如下:
export  PATH=/usr/local/cuda-8.0/bin:$PATH   //你安装哪个版本就是cuda-x.x
export  LD_LIBRARY_PATH=/usr/local/cuda-8.0/lib64$LD_LIBRARY_PATH    //你安装哪个版本就是cuda-x.x
保存,然后重启电脑
四、检查是否安装成功
1.验证驱动版本
cat /proc/driver/nvidia/version
结果显示类似如下:
NVRM version: NVIDIA UNIX x86_64 Kernel Module 384.81 Sat Sep 2 02:43:11 PDT 2017
GCC version: gcc version 5.4.0 20160609 (Ubuntu 5.4.0-6ubuntu1~16.04.5)
2.验证CUDA Toolkit
nvcc -V
会输出CUDA的版本信息
如果是这样的:
The program ‘nvcc’ is currently not installed. You can install it by typing:
sudo apt-get install nvidia-cuda-toolkit
可能是环境配置没有成功,重新配置环境。
五、测试CUDA的Samples例子
cd /usr/local/cuda/samples
sudo make -j //-j 可以最大限度的使用cpu编译,加快编译的速度
需要编译通过,且过程中没有 Error ,警告可忽略
cd ./bin/x86_64/linux/release
./deviceQuery
deviceQuery 是你的显卡的相关信息,执行结果为PASS则通过
恭喜你完成NVIDIA和CUDA的安装,可以进行下一关了(#.#)
参考博文
参考博文1 Linux安装NVIDIA显卡驱动的正确姿势
https://blog.csdn.net/wf19930209/article/details/81877822
参考博文2 Ubuntu 16.04 Nvidia驱动安装(run方式)
https://blog.csdn.net/lihe4151021/article/details/90083431
参考博文3 Ubuntu无法检测外接显示器,无法打开nvidia-settings或者打开nvidia-settings时有报错,ubuntu-drivers devices命令后无显示
https://blog.csdn.net/m0_38007695/article/details/103456043
参考博文4 nvidia-smi 报错:无法与 nvidia driver 通信
https://zhuanlan.zhihu.com/p/89714824
参考博文5 安装NVIDIA驱动出现: An NVIDIA kernel module ‘nvidia-drm’
https://zhuanlan.zhihu.com/p/135875408
参考博文6 nvidia_drm remains in use for no apparent reason after Xorg shutdown
https://forums.developer.nvidia.com/t/nvidia-drm-remains-in-use-for-no-apparent-reason-after-xorg-shutdown/53689
参考博文7 Ubuntu16.04+CUDA9.0 安装(全网最简便快速安装,测试成功)
https://blog.csdn.net/qq_25241325/article/details/90753830
参考博文8 Ubuntu 16.04+1080Ti机器学习基本环境配置
https://blog.csdn.net/MahoneSun/article/details/80808930
参考博文9 显卡驱动报错:NVIDIA-SMI has failed because it couldn’t communicate with the NVIDIA driver.
https://blog.csdn.net/u012114438/article/details/104425573
参考博文10 Ubuntu:NVIDIA-SMI has failed because it couldn‘t communicate with the NVIDIA driver. 解决方法总结
https://blog.csdn.net/qq_38327353/article/details/108219702