利用opencv-python 进行图像的不规则裁剪
利用opencv-python 进行图像的不规则裁剪
利用凸包进行裁剪
首先我们进行凸包裁剪,先利用 cv2.convexHull(xy) 函数得到点集xy的凸包顶点。然后利用mask进行提取,并利用截取数组行列的方法得到图像。代码:
def hull_cut(filter_xy,img):
    hull=cv2.convexHull(filter_xy)
    col0 =hull[:,:,0]
    col1 =hull[:,:,1]
    x1=np.min(col0)
    y1=np.min(col1)
    x2=np.max(col0)
    y2 = np.max(col1)
    if x1 < 0:
       x1 = 0
    if x2 > img.shape[1]:
       x2 = img.shape[1]
    if y1 < 0:
        y1 = 0
    if y2 > img.shape[0]:
        y2 = img.shape[0]
    mask=np.zeros(img.shape,dtype=np.uint8)#创建与原图大小的掩码,这里掩码全为0.
    mask2 = cv2.fillPoly(mask,[hull],(255,255,255))
    ROI = cv2.bitwise_and(mask2, img)
    img_end=ROI[y1:y2,x1:x2]
    return img_end
进行最小矩形截取,但不对图片进行旋转
首先利用求最小矩形的方法来求矩形框。在以框为mask进行裁剪。其中求最小矩形框采用的是cv2.minAreaRect(xy) 值得细讲。
minAreaRect() 返回了所需区域的最小斜矩形的参数,与包围框直接返回四个顶点的坐标不同,最小外接矩形返回的是矩形的 ((x, y), (w, h), angle),对应了矩形的中心,宽度,高度和旋转角度。
旋转角度angle是水平轴(x轴)逆时针旋转,与碰到的矩形的 第一条边的夹角。并且这个边的边长是width,另一条边边长是height。也就是说,width与height不是按照长短来定义的。
在OpenCV中,坐标系原点在左上角,相对于x轴,逆时针旋转角度为负,顺时针旋转角度为正,所以函数minAreaRect()返回的角度范围时[-90~0)。一个平放的长矩形,调用minAreaRect() 返回的角度为-90度。如果旋转图像,矩形树立起来,这时调用minAreaRect()得到的角度依然是-90度。

参考链接OpenCV Python实现旋转矩形的裁剪
代码如下:
def rect_cut_U(filter_xy,img):#按照最小矩形进行裁剪,但不进行旋转,保留黑色填补
    rect = cv2.minAreaRect(filter_xy)#得到最小矩形
    size=tuple(map(int, rect[1]))
    if size[0] < size[1]:
        w = size[1]
        h = size[0]
    else:
        w = size[0]
        h = size[1]
    if w>1500 or h<224:
        img_end=None
    else:
        box = cv2.boxPoints(rect)#得到矩形的坐标
        box=np.int0(box)
        boxed=box.reshape((-1,1,2))
        col0 =box[:,0]
        col1 =box[:,1]
        x1=np.min(col0)
        y1=np.min(col1)
        x2=np.max(col0)
        y2 = np.max(col1)
        if x1 < 0:
            x1 = 0
        if x2 > img.shape[1]:
            x2 = img.shape[1]
        if y1 < 0:
            y1 = 0
        if y2 > img.shape[0]:
            y2 = img.shape[0]
        mask=np.zeros(img.shape,dtype=np.uint8)#创建与原图大小的掩码,这里掩码全为0.
        mask2 = cv2.fillPoly(mask,[boxed],(255,255,255))
        ROI = cv2.bitwise_and(mask2, img)
        img_end=ROI[y1:y2,x1:x2]
    return img_end
利用仿射变换将图像旋转到水平。
这里其实是将整个图像按照求出的矩形偏转角进行旋转,然后利用 cv2.minAreaRect得到的w,h尺寸来截取,代码如下:
def rect_cut_A(filter_xy,img):#基于仿射变换进行
    horizon = True #是否将截取的图片放平
    rect = cv2.minAreaRect(filter_xy)#得到最小矩形的中心点(x,y),宽度和高度(w,h),旋转角度angle。
    center, size, angle = rect[0], rect[1], rect[2]
    center, size = tuple(map(int, center)), tuple(map(int, size))
    if horizon:#保证长边为宽,且在水平线上
        if size[0] < size[1]:
            angle -= 270
            w = size[1]
            h = size[0]
        else:
            w = size[0]
            h = size[1]
        size = (w, h)
    if w>1500 or h<224:
        img_crop=None
    else:
        height, width = img.shape[0], img.shape[1]
        M = cv2.getRotationMatrix2D(center, angle, 1)
        img_rot = cv2.warpAffine(img, M, (width, height))
        img_crop = cv2.getRectSubPix(img_rot, size, center)
    return img_crop
采用透视变换进行图像转正(不推荐,因为有时会产生扭曲)
这方法实际是直接将得到的最小矩形顶点进行透视变换,由不水平的面,投影到水平面。涉及到投影,所以计算实际更多,而且有时会出现扭曲变形,因为像素点的位置完全改变了。
代码:
def rect_cut(filter_xy,img):#基于透视变换截取图片
    rect = cv2.minAreaRect(filter_xy)#得到最小矩形
    box = cv2.boxPoints(rect)#得到矩形的坐标
    box=np.int0(box)#标准化坐标到整数
    #box2= box.reshape((-1, 1, 2))
    width=int(rect[1][0])
    height=int(rect[1][1])
    if width > height:
        w = width
        h = height
    else:
        w = height
        h = width
    if w>1500 or h<224:
        warped=None
    else:
        src_pts = box.astype("float32")
        dst_pts = np.array([[w - 1, h - 1],[0, h - 1],[0, 0],[w - 1, 0]], dtype="float32")
        M = cv2.getPerspectiveTransform(src_pts, dst_pts)
        warped = cv2.warpPerspective(img, M, (w, h))
    return warped
截取结果

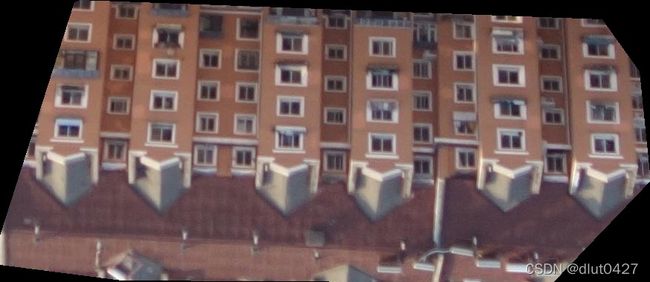
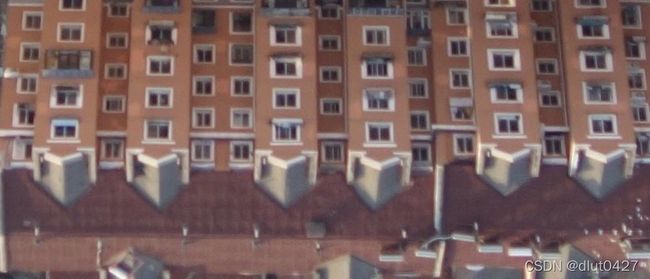
这个图是截取的正好,没有发生扭曲。加入截取原图中绿色的点就会出现扭曲,如图

所以不推荐使用
参考链接
[1]:https://www.jianshu.com/p/90572b07e48f
[2]:https://blog.csdn.net/qq_32593713/article/details/102653870


