win10 OpenPCDet 训练KITTI以及自己的数据集
文章目录
-
- 1.OpenPCDet
- 2.OpenPCDet 训练KITTI数据集
-
- 2.1KITTI数据集的摆放
- 2.2数据集的预处理
- 2.3OpenPCDet训练KITTI报错: KeyError: 'road_plane'
- 3.OpenPCDet 训练自己的数据集
-
- 3.1 不使用KITTI格式
- 3.2 使用KITTI格式标注
- 4. point-cloud-annotation-tool标注格式转KITTI格式
1.OpenPCDet
- OpenPCDet官方github
- 框架作者的知乎介绍
- 点云3D目标检测代码库
- 数据-模型分离 标准化坐标系
- 3D bounding box: (cx, cy, cz, dx, dy, dz, heading)
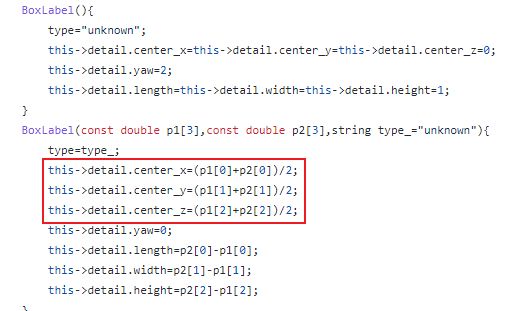
- (cx, cy, cz) 为物体3D框的几何中心位置
- (dx, dy, dz)分别为物体3D框在heading角度为0时沿着x-y-z三个方向的长度
- heading为物体在俯视图下的朝向角 (沿着x轴方向为0度角,逆时针x到y角度增加)
- 3D bounding box: (cx, cy, cz, dx, dy, dz, heading)
- 模型模块化设计,config文件写明模块,PCDet自动拓扑组合框架
- 代码简洁 重构基于numpy+PyTorch的数据增强模块与数据预处理模块
- PCDet中开源的多个高性能3D目标检测算法
- 训练自己的数据集
- self.getitem() 中加载自己的数据 点云与3D标注框均转至前述统一坐标定义,入数据基类提供的 self.prepare_data()
- 在 self.generate_prediction_dicts()中接收模型预测的在统一坐标系下表示的3D检测框,并转回自己所需格式
- 组合改进模型
- 更改对应模块替换原有模块
2.OpenPCDet 训练KITTI数据集
- 环境的安装根据官方文档来即可 编译python setup.py install
2.1KITTI数据集的摆放
- KITTI数据集分享与简析
- 将下载好的数据集按照以下顺序放到mmdetection项目路径下(其中新建ImageSets文件夹用来存放数据集划分文本)
OpenPCDet
├── pcdet
├── tools
├── checkpoints
├── data
│   ├── kitti
│   │   ├── ImageSets
│   │   ├── testing
│   │   │   ├── calib
│   │   │   ├── image_2
│   │   │   ├── velodyne
│   │   ├── training
│   │   │   ├── calib
│   │   │   ├── image_2
│   │   │   ├── label_2
│   │   │   ├── velodyne
2.2数据集的预处理
# 这一步后会生成下方所示的gt_database(里面是根据label分割好的点云)及.pkl文件
python -m pcdet.datasets.kitti.kitti_dataset create_kitti_infos tools/cfgs/dataset_configs/kitti_dataset.yaml
kitti
├── ImageSets
│   ├── test.txt
│   ├── train.txt
├── testing
│   ├── calib
│   ├── image_2
│   ├── velodyne
├── training
│   ├── calib
│   ├── image_2
│   ├── label_2
│   ├── velodyne
├── gt_database
│   ├── xxxxx.bin
├── kitti_infos_train.pkl
├── kitti_infos_val.pkl
├── kitti_dbinfos_train.pkl
├── kitti_infos_trainval.pkl
- 生成对对应文件后就可以开始训练了
cd tools
python train.py --cfg_file cfgs/kitti_models/pointpillar.yaml --batch_size=1 --epochs=10 --workers=1
- 测试生成模型的性能 test.py
# 测试生成模型的性能 test.py
python test.py --cfg_file cfgs/kitti_models/pointpillar.yaml --batch_size 1  --ckpt ../output/kitti_models/pointpillar/default/ckpt/checkpoint_epoch_9.pth
# 可视化模型预测效果 demo.py
python demo.py --cfg_file cfgs/kitti_models/pointpillar.yaml  --data_path ../data/kitti/testing/velodyne/000001.bin --ckpt ../output/kitti_models/pointpillar/default/ckpt/checkpoint_epoch_9.pth
2.3OpenPCDet训练KITTI报错: KeyError: ‘road_plane’
- 修改以下代码,可能行数会有所区别,主要是plane相关代码
  - tools/cfgs/dataset_configs/kitti_dataset.yaml
      - 23行 USE_ROAD_PLANE: true 将true改为False
  - pcdet/datasets/augmentor/data_augmentor.py
      - 225-228行 注释掉
      if 'road_plane' in data_dict:
      data_dict.pop('road_plane')
  - pcdet/datasets/augmentor/database_sampler.py
      - 161-167行 注释掉
      if self.sampler_cfg.get('USE_ROAD_PLANE', False):
          sampled_gt_boxes, mv_height = self.put_boxes_on_road_planes(
              sampled_gt_boxes, data_dict['road_plane'], data_dict['calib']
          )
          data_dict.pop('calib')
          data_dict.pop('road_plane')
      - 186-189行 注释掉
      if self.sampler_cfg.get('USE_ROAD_PLANE', False):
          # mv height
          obj_points[:, 2] -= mv_height[idx]
3.OpenPCDet 训练自己的数据集
- 自己的数据集只有点云以及标注信息,没有图片和参数标定信息。
- 利用point-cloud-annotation-tool对点云数据进行标注,由于point-cloud-annotation-tool只能够标注PCD和bin格式的点云,而我的点云格式是PLY格式的,所以一开始先用脚本将点云PLY->PCD(轮子1)(其实直接转成bin会更好,我就先记录下自己不太灵光的操作过程)。
- 标注后由于软件标签类别有限大多为交通相关类别,所以就利用轮子将保存后目录的所有文本内的类别进行修改(轮子2),由于我只设置了一种类别也只标记了一种类别所以修改还算方便。至此我得到的标签信息就是(class,x,y,z,l,w,h,θ)(类别,x,y,z,长,宽,高,与y轴夹角)
- 天真的以为我的数据集准备好了,在网上找了几种方法准备来训练自己的数据集,由于实在太菜,大佬的方法我一个也没能实现,这里给出一些大佬的训练教程链接,也许会对训练有些启发。
- 训练后预测没有出现标注框,不是很成功时间紧张的就不要看了,有空的话可以看看处理的思路,理解可能存在偏差欢迎指正。
- 3D目标检测(4):OpenPCDet训练篇–自定义数据集
- openPCdet 实现自定义点云数据集训练
- Openpcdet-(2)自数据集训练数据集训练
3.1 不使用KITTI格式
- 在GitHub的issuesTraining using our own dataset 下有位大佬155cannon发出的教程和代码较为详细并且是中文耶,且处理思路也不需要将数据集标签格式转换为KITTI格式(真心觉得KITTI标签里参数过多,观察视角呀与y轴的夹角呀什么的,并且中心点坐标选的是底面中心点不是框的中心点,顺序还是是hwlxyz(高宽长xyz)),便准备跟着他的思路来训练,下面简述一下他的处理流程也可以去issues下看看大佬的代码,但是我没有成功,着急训练的可以直接跳过看3.2使用KITTI格式标注
- 数据集 点云文件转txt格式只存xyz 标签文件 只存x, y, z, dx, dy, dz,heading, heading统一设为1.57,也就是90°
- 在openPCDet下增加三个文件, 分别是
- pcdet/datasets/kitti/dataset.py 对数据集进行预处理时会用到,主要是生成训练时需要的.pkl文件以及gt_database
- tools/cfgs/dataset_configs/coils_dataset.yaml 数据集预处理时和上一文件一起用到,主要修改点云范围POINT_CLOUD_RANGE,标签类别信息的一些设置
- tools/cfgs/coils_models/pointpillar.yaml 训练时用到的网络信息,主要修改类别信息以及用到的dataset配置文件路径
- 所以我就开始在网上找轮子将我刚从PLY->PCD的点云转成PCD->TXT(轮子1)(都是遍历整个文件夹修改,等后面有时间把这些点云格式转化的轮子整合一下)
- 再利用1.1中修改类别名称的轮子将标签中的类别信息直接去掉,这样我的数据集格式就和他的差不多了。
- 然而可能我的操作有误嗯太菜了报的错百度后改不成功,嗯那就换一种方法进行处理,将自己的数据集转换为KITTI模式来处理。
3.2 使用KITTI格式标注
- KITTI数据集分享与简析
- 还是在GitHub的issuesTraining using our own dataset 下最新的一条看到大佬分享了自己将标注标签转为KITTI格式进行训练的教程,跟着他的方法我的数据集预处理和训练是成功跑通了也生成了对应的.pth文件,但是测试时发现没有生成标注框,可能还需要改改。以下是处理流程
- 输入点云格式需为bin格式的,所以将之前已经转成PCD格式的点云(还好之前没有覆盖或者删除)批量转换为bin格式(轮子1),转换时提醒没有intensity强度信息,但是还是转换成功了,也可以可视化,训练似乎也没什么问题,不知道这是不是导致测试没有生成框的原因。
- 因为之前是用point-cloud-annotation-tool标注的,有xyz长宽高与y轴的夹角信息,于是便在标签的类别信息后面增加7个0(轮子2)(这些参数对于没有图像和相机参数而言意义不大,可以直接设为0),数据集的准备也就差不多了。
- 接下来主要是新建以下三个文件,建议直接去大佬的GitHub保存。
- pcdet/datasets/custom/custom_dataset.py
- tools/cfgs/dataset_configs/custom_dataset.yaml
- tools/cfgs/custom_models/pointrcnn.yaml
- 对以上文件中的类别信息,数据集路径,点云范围POINT_CLOUD_RANGE进行更改,其他的不用怎么大改
- 更改 pcdet/datasets/init.py文件,增加以下代码
from .custom.custom_dataset import CustomDataset # 在__all__ = 中增加 'CustomDataset': CustomDataset- 完成以上就可以开始对数据集进行预处理和训练了
custom
├── ImageSets
│   ├── test.txt
│   ├── train.txt
├── testing
│   ├── velodyne
├── training
│   ├── label_2
│   ├── velodyne
├── gt_database
│   ├── xxxxx.bin
├── custom_infos_train.pkl
├── custom_infos_val.pkl
├── custom_dbinfos_train.pkl
python -m pcdet.datasets.custom.custom_dataset create_custom_infos tools/cfgs/dataset_configs/custom_dataset.yaml
python tools/train.py --cfg_file tools/cfgs/custom_models/pointrcnn.yaml --batch_size=1 --epochs=10 --workers=1
-
下面说一下我训练时遇到的错误避免大家踩坑
-
一开始测试没有后我检查我的标签数据发现我中间几位的数据是
而KITTI中间几位是<高宽长xyz>,所以一开始我的gt_database里生成的.bin文件都是0kb里面没有点的数据啥也没有(也不知道为啥这样也能训练),标签数据位置不对没能从点云中裁剪出点。 -
修正标签数据后重新对数据集进行预处理和训练,gt_database文件夹下生成的.bin文件是对的,也可以进行训练(训练时报错什么difficulty把该行注释后就可以跑了)并且生成对应pth文件,但是测试的时候依旧没有框。
-
由于一开始我的标签是在3.1中利用PCD文件标注生成的,思考会不会因为这个原因导致测试没有框,于是又重新对所有的.bin点云进行重新标注,结果训练的时候报错ValueError: Caught ValueError in DataLoader worker process 0.把worker值改为0 后就没报这个错了,但还是报错ValueError: Cannot take a larger sample than population when 'replace=False’跟着几个博客改了改还是没能改成功。
-
更新一下报错ValueError: Cannot take a larger sample than population when 'replace=False’找到解决办法了
- 在网上看到教程是由于numpy.random.choice(a, size=None, replace=True, p=None)里的size大于a的样本长度需要改小一些,但当时就直接去修改size的值不太成功
- 今天看到GitHub下有相同的
可以解决,方法如下
# 将pcdet/datasets/processor/data_processor.py大概第161行的 extra_choice = np.random.choice(choice, num_points - len(points), replace=False) # 修改为以下代码 try: extra_choice = np.random.choice(choice, num_points - len(points), replace=False) except ValueError: extra_choice = np.random.choice(choice, num_points - len(points), replace=True) -
- 但是Evaluation时出现了一个新的报错ZeroDivisionError: float division by zero
- 感谢网友wangwhan的debug经验分享,这是他的解决方法【“评估的时候没有正确读取数据集,导致dataloader是空的,实际上生成pkl文件的名称和数据集配置文件里的info路径不一致导致的,改动数据集配置文件(yaml)就解决了”】
- 下面贴一些比较详细的代码注释教程方便查看
- jjw-DL/OpenPCDet-Noted
- OpenPCDet:数据处理kitti_dataset.py的理解
- jjw-DL/OpenPCDet-Noted
4. point-cloud-annotation-tool标注格式转KITTI格式
- 遍历文件夹对每个标注文件进行修改(先拷贝备份一份防止出错)
- 我在进行这个脚本转换前已经在类别后面加了7个0 (轮子2)
- 这个脚本主要就是将
修改为<高宽长xyz> - 其次通过point-cloud-annotation-tool源码可知它的xyz是标注框几何中心坐标,而KITTI是标注框底面坐标,所以利用z-0.5高将z轴坐标修改为KITTI形式

# -*- coding:utf-8 -*-
import os
def process(path):
    files = os.listdir(path)
    file_names = set([file.split('.')[0] for file in files])
    file_names = list(file_names)
    # 替换字符
    print(file_names)
    for filename in file_names:
        file_data = ''

        dir_path = os.path.join(path, filename + ".txt")  # TXT文件
        # f = open('E:/DataSet/label_2/cloudnorm_00001.txt')  # 打开txt文件
        print(type(dir_path))
        print(dir_path)
        f = open(dir_path)  # 打开txt文件
        line = f.readline()  # 以行的形式进行读取文件
        list1 = []
        while line:
            a = line.split()
            b = a[0:15]  # 这是选取需要读取/修改的列
            list1.append(b)  # 将其添加在列表之中
            line = f.readline()
        f.close()

        # path_out = dir_path  # 新的txt文件
        with open(dir_path, 'w+', encoding='utf-8') as f_out:
            for i in list1:
                # print(len(i))
                l0 = i[0]
                l1 = i[1]
                l2 = i[2]
                l3 = i[3]
                l4 = i[4]
                l5 = i[5]
                l6 = i[6]
                l7 = i[7]
                l8 = i[8]
                l9 = i[9]
                l10 = i[10]
                l11 = i[11]
                l12 = i[12]
                l13 = i[13]
                l14 = i[14]

                a=round( (float(i[10])-0.5*float(i[13])),6)
                # print(fir)
                # print(str(sec))
                f_out.write(
                    l0 + ' ' + l1 + ' ' + l2 + ' ' + l3 + ' ' + l4 + ' ' + l5 + ' ' + l6 + ' ' + l7 + ' ' + l13 + ' ' + l12 + ' ' + l11 + ' '+ l8 + ' ' + l9 +' ' + str(a) + ' '  + l14 + '\n')
                print('trans has done!!!')

if __name__ == '__main__':
    # 这里路径修改为你自己point-cloud-annotation-tool标注文件路径
    path = 'E:/DataSet/text2/'
    process(path)
- 如果按照上述操作将标签修改后需对pcdet/datasets/custom/custom_dataset.py文件127行左右函数进行修改
# 将原本的
loc_lidar = np.concatenate([np.array((float(loc_obj[2]), float(-loc_obj[0]), float(loc_obj[1]-2.3)), dtype=np.float32).reshape(1,3) for loc_obj in loc])
        return loc_lidar
# 修改为
loc_lidar = np.concatenate(
            [np.array((float(loc_obj[0]), float(loc_obj[1]), float(loc_obj[2])), dtype=np.float32).reshape(1, 3) for loc_obj in loc])
        return loc_lidar