springboot整合web启动配置
作为一位菜鸡,只能不断学习学习学习!!!
文章目录
-
- 一、学习前的知识充能
- 二、springboot启动配置
- 三、springboot与web的结合
一、学习前的知识充能
- properties和yml的区别
作为一名使用传统ssh框架开发的小程序员,我们一般都是在properties进行类似key-value形式存储参数,而第一次接触到yml俺觉得这个配置相对于properties显得更轻便清晰,因为不用写重复的分级代码。下面就主要来讲讲这两种文件的区别。
1)代码逻辑
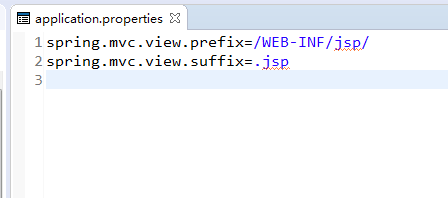
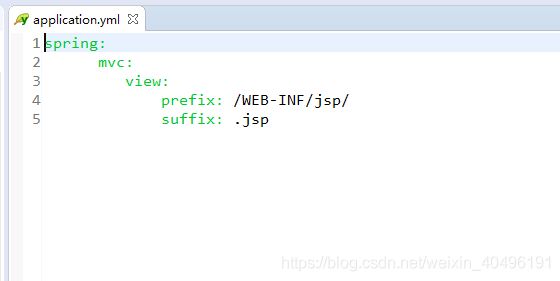
在properties中,我们编写参数一般都是通过“.”来进行分级,而在yml中,则是通过空格进行分级,形成类似树结构的形状,以下properties和yml的配置效果是一样的。
2)优先级
在加载的过程中,系统一般是现在先yml加载文件,再加载properties文件。这意味着什么?意味着properties有可能覆盖yml的部分参数,从这里我们也可以看出properties的优先级要高于yml文件。
3)代码简洁性
从上面我们可以看出来,在properties中,我们如果要传几个
spring.mvc.view级底下的参数,需要重复编写“spring.mvc.view”级,但是在yml中只需类似树结构状的分级展开,减少了代码的重复率。
4)注意点
对于propertie文件,我们的参数配置写法可能稍微比较宽松,但是在yml中,代码语句就相对比较严格。这里就说说我之前踩过的两个坑。首先是我们前面说了,yml中控制优先级需要通过空格来缩进,因为我直接从网上copy了代码,所以不知道出现了什么看起来像空格的东西,直接报错了,改过来即可,当然这里的空格打多少个都没关系,只要阶梯状便可。另一个坑是对于yml语句,在冒号后面一定要加上一个空格,再写代码,否则也会直接报错!!! - ftl和jsp的区别
作为一位传统框架开发的小渣渣,接触的前端页面不是html就是jsp,那ftl又是啥玩意儿?俺也不懂,度娘告诉我这玩意儿是替代jsp的存在,看来看去区别比较能理解的区别有以下两种:
1)ftl不能编写java语言,能够更严格的实现前后端分离
2)ftl不需要像jsp那样子编译文件,提高了速度
网上介绍了很多其他区别,但是从概念上来看比较大的区别是以上举得两点,其他不多说,只能在后面的尝试中学习更多的相关内容。
二、springboot启动配置
- 创建项目
new->other->maven project
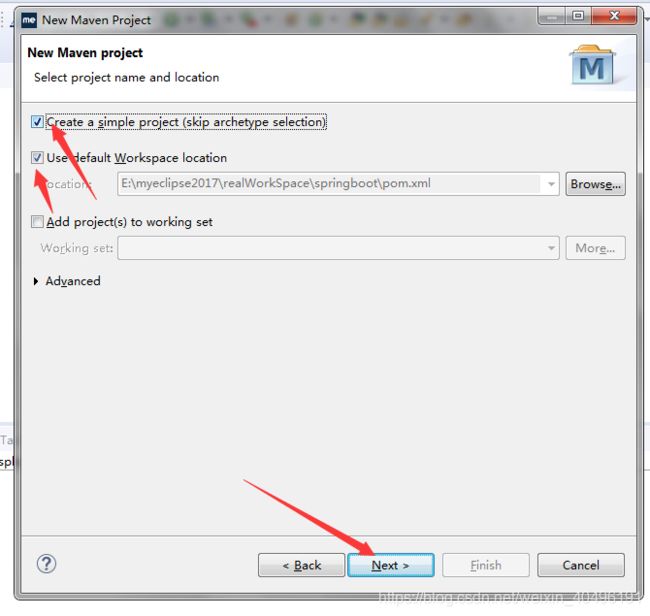
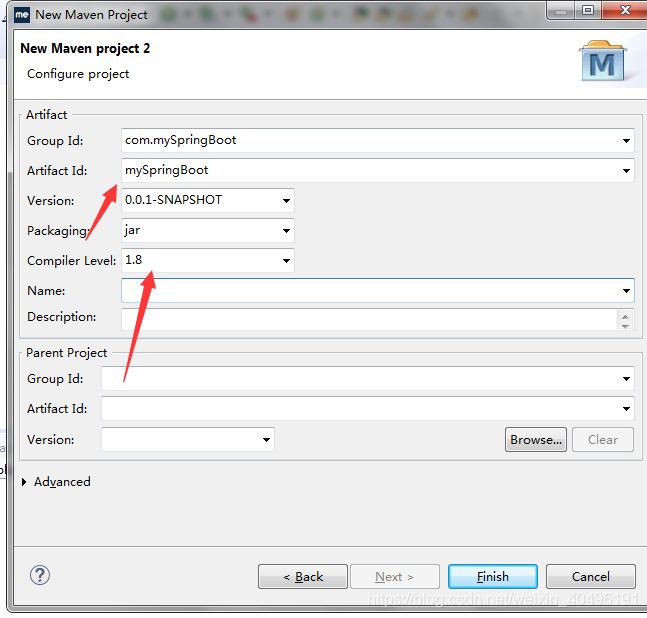
然后点击finish即可!这里需要注意的是最好使用较新版本的myeclipse,因为如果编译环境跟不上,jdk8以上的一些功能将无法使用。 - 配置项目
因为springboot依赖maven进行jar包的加载,所以这里需要先对pom.xml进行相关的配置
	4.0.0
	com.springboot
	springboot
	0.0.1-SNAPSHOT


		org.springframework.boot
		spring-boot-starter-parent
		2.1.8.RELEASE


			org.springframework.boot
			spring-boot-starter-web


			org.springframework.boot
			spring-boot-starter


			org.springframework.boot
			spring-boot-starter-test


			org.springframework.boot
			spring-boot-devtools


				maven-compiler-plugin

					1.8
					1.8


				org.springframework.boot
				spring-boot-maven-plugin
配置完xml,右键->maven-> update project,等待jar包下载完成即可!
3. 启动项目
在src/main/java底下创建相关java包,用于编写java代码。创建完包,就开始启动项目。由于springboot内置tomcat服务器,只需在main方法启动即可。这里分享两种启动方法。
1)组合注解
package ffcs.cn.mayi.service;

import java.util.HashMap;
import java.util.Map;

import org.springframework.boot.SpringApplication;
import org.springframework.boot.autoconfigure.EnableAutoConfiguration;
import org.springframework.context.annotation.ComponentScan;
import org.springframework.stereotype.Controller;
import org.springframework.web.bind.annotation.RequestMapping;
import org.springframework.web.bind.annotation.ResponseBody;
import org.springframework.web.bind.annotation.RestController;


@Controller
@EnableAutoConfiguration//理解为启动springboot
@ComponentScan("ffcs.cn.mayi.service")//扫包范围
public class Mayi2Service {

	@RequestMapping("/hello")
	@ResponseBody
	public Map hello() {
		Map map=new HashMap();
		map.put("resMessage", "成功");
		map.put("resCode", "200");
		return map;
	}

	public static void main(String[] args) {
		SpringApplication.run(Mayi2Service.class, args);
	}
}
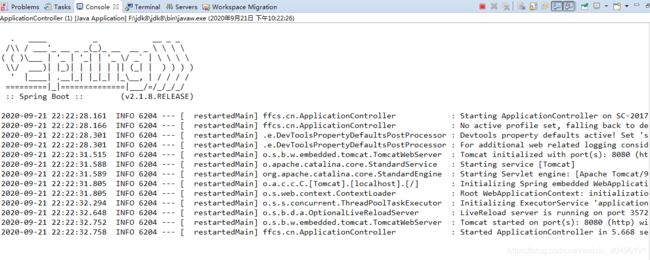
由于springboot默认端口为8080,启动完可以通过localhost:8080/hello访问
2)单注解
第一种方法可以看出我们需要写多个注解,为了方法,这里使用另一个注解,即@SpringBootApplication,这个注解我们可以通过追踪源码发现它是由@Configuration,@EnableAutoConfiguration和 @ComponentScan三个注解及其他一些注解组合而成,类似一个封装体。
package ffcs.cn;

import org.apache.catalina.core.ApplicationContext;
import org.springframework.boot.SpringApplication;
import org.springframework.boot.SpringBootConfiguration;
import org.springframework.boot.autoconfigure.SpringBootApplication;
import org.springframework.stereotype.Controller;
import org.springframework.web.bind.annotation.RequestMapping;
import org.springframework.web.bind.annotation.ResponseBody;
//Spring Boot项目的核心注解,主要目的是开启自动配置 。
//等于@Configuration,@EnableAutoConfiguration和 @ComponentScan(默认扫描当前所在包)
@SpringBootApplication
@Controller // 标明这是一个SpringMVC的Controller控制器
public class ApplicationController {

	@RequestMapping("/hello3")
	@ResponseBody
	public String hello() {
		return "hello3 world";
	}

	public static void main(String[] args) {
		SpringApplication.run(ApplicationController.class, args);
	}
}
启动完可以通过localhost:8080/hello3访问
对于这种方式,需要注意的一个地方是该注解的扫包是默认扫当前启动类所在的目录以及该目录底下的所有文件,也就是说,位于该目录以外的controller类将不会被访问。所以可以将启动类放在src/main/java的根目录底下以便于可以访问其他的controller类!
三、springboot与web的结合
- springboot和ftl的整合
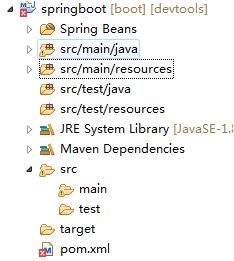
在整合前,这里需要先了解springboot项目的配置文件存在位置。在之前创建的项目中,我们的java文件存放地址为src.main.java底下,而配置文件及其他的项目文件则是放在src.main.resource底下。举个例子,如果我们要存放静态文件,可以在src.main.resource创建static文件夹(固定文件夹名),然后存在照片,这时候我们可以直接通过项目+文件名即可访问到,如http://localhost:8080/1.png
1)配置文件
在src.main.resource底下创建applicaition.yml文件,配置关于ftl的相关信息,指定ftl文件路径
spring:
  http:
    encoding:
      force:true
      charset:UTF-8
  freemarker:
    allow-request-override:false
    cache:false
    check-template-location:true
    charset:UTF-8
    content-type:text/html;charset=utf-8
    expose-request-attributes:false
    expose-session-attributes:false
    expose-spring-macro-helpers:false
    suffix:.ftl
    template-loader-path:classpath:/templates
2)创建ftl文件
根据配置文件信息在src.main.resource底下创建templates文件夹,然后新建ftl文件,可以看出这里主要展示了姓名和年龄两个字段,接下来要做的就是从后端传数据过来
我的ftl


	name:${name}

	age:${age}
3)传参到前端
在springboot扫包范围内的class创建一个方法
	@RequestMapping("/freemarker")
	public  String freemarker(Map resultMap) {
		resultMap.put("name","小米");
		resultMap.put("age","18");
		List myList=new ArrayList();
		myList.add("小白");
		myList.add("小红");
		//freemarker.ftl
		return "freemarker";
	}
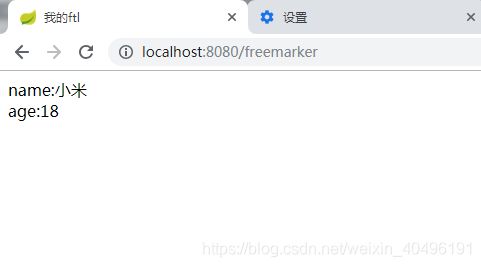
然后启动项目,访问路径http://localhost:8080/freemarker
2. springboot和jsp的整合
1)配置文件
在src.main.resource底下创建applicaition.yml文件,指定jsp文件路径
spring:
      mvc:
         view:
             prefix: /WEB-INF/jsp/
             suffix: .jsp
2)创建jsp文件
在WEB-INF/jsp/底下创建jsp文件,随便输出数据
<%@ page language="java" import="java.util.*" pageEncoding="UTF-8"%>
<%
String path = request.getContextPath();
String basePath = request.getScheme()+"://"+request.getServerName()+":"+request.getServerPort()+path+"/";
%>


    My JSP 'index.jsp' starting page


 	   姓名:${name}

 	   年龄:${age}
3)传参到前端
在springboot扫包范围内的class创建一个方法
	@RequestMapping("/index")
	public ModelAndView index(){
		ModelMap map=new ModelMap();
		map.put("name","小明");
		map.put("age","18");
		return new ModelAndView("index",map);
	}
然后启动项目,访问路径http://localhost:8080/index

继续学习…未待完续…
