Pytorch目标检测模型Android移植-超超超轻量人脸检测和关键点识别算法(2)
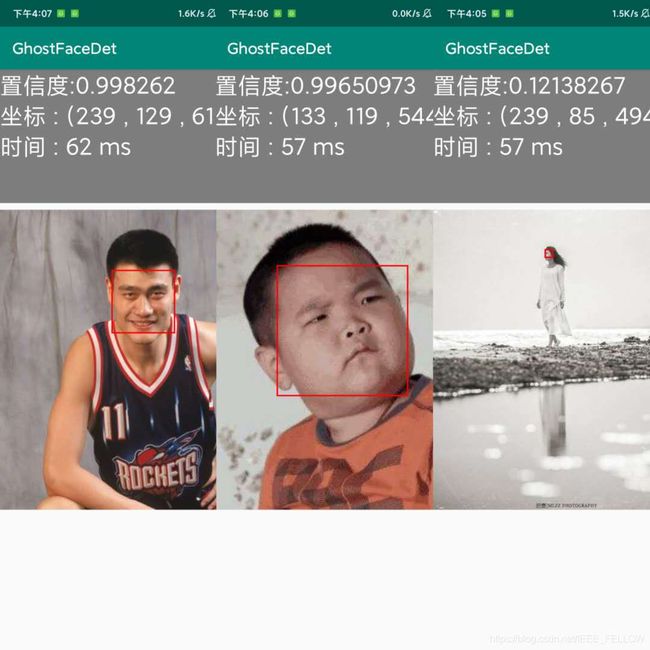
书接上文,我们实现了一个大小仅仅813 k的人脸检测模型。
如何移植到android呢?
Pytorch1.3之后就提供了android移植的开发示例:Android | PyTorch
基本流程是Pytorch模型->TorchScrip序列化,然后android调用模型即可.
1.序列化你的模型
import torch
import torchvision

model = 你的模型
model.eval()
example = torch.rand(1, 3, w, h)
traced_script_module = torch.jit.trace(model, example)
traced_script_module.save("model.pt")
2 . 预处理
读取图片,并且将bitmap转化为Pytorch的Tensor,Pytorch的TensorImageUtils.bitmapToFloat32Tensor可以实现bitmap转化为你需要的Tensor,使用方式是:
final Tensor inputTensor = TensorImageUtils.bitmapToFloat32Tensor(bitmap,
        TensorImageUtils.TORCHVISION_NORM_MEAN_RGB, TensorImageUtils.TORCHVISION_NORM_STD_RGB);
TensorImageUtils.bitmapToFloat32Tensor会将你的图片先除以255然后用提供的均值方差归一化。
很多时候我们使用的均值和方差以及预处理方式会不同,那么可以参考 TensorImageUtils中的实现重写预处理函数:
bitmap = BitmapFactory.decodeStream(getAssets().open("face.jpg"));
float[] face_mean = new float[]{104.0f, 117.0f, 123.0f};
float[] face_std = new float[]{1.0f, 1.0f, 1.0f};
final Tensor inputTensor = bitmapToFloat32Tensor(bitmap,
            face_mean, face_std);
这样就实现了输入Tensor的转化。
3.模型加载
module = Module.load(assetFilePath(this, "model.pt"));加载刚刚序列化的模型。
4. 模型推理
final IValue[] outputTensor = module.forward(IValue.from(inputTensor)).toTuple();5. 后处理
主要是根据上面预测的offset和anchor解码出bbox,之后进行nms即可。
6 . 性能对比
测试了骁龙710和855+推理对比,速度差异挺大的,855大约50~60ms,710大约110ms。
Donate
无偿开源,希望能对大家的学习和工作有帮助,也可以请我喝咖啡.
源码:https://github.com/midasklr/facedetection_android.pytorch

