zabbix基础环境部署
目录
一、环境准备
二、部署LNMP
1、安装Nginx及其依赖包
2、修改nginx配置
3、测试页面
三、部署zabbix服务端
1、下载zabbix
2、安装源码zabbix
3、为zabbix创建数据库与数据库账户
4、搭建Zabbix页面
4.1、第1步 Check of pre-requisites
4.2、第2步 Configure DB connection
4.3、第3步 Zabbix server details
4.4、第4步 Pre-installation summary
4.5、第5步 install
4.6、zabbix页面登录和配置
4.7、启动服务
四、搭建zabbix被监控客户端
1、配置web1主机
一、环境准备
准备三台centos服务器
| 服务器 | 主机名 | IP | 备注 |
| 监控服务器 | zabbixserver | 192.168.2.10 | 关闭selinux和firewalld |
| 监控客户端 | web1 | 192.168.2.20 | 关闭selinux和firewalld |
| 监控客户端 | web2 | 192.168.2.30 | 关闭selinux和firewalld |
二、部署LNMP
(以下LNMP环境部署在zabbixserver端)
1、安装Nginx及其依赖包
yum install gcc pcre-devel openssl-devel -y   #安装基础编译环境
useradd nginx                                 #创建nginx用户
tar -xvf nginx-1.22.1.tar.gz                  #解压
cd nginx-1.22.1

#--prefix为指定安装目录,--user为指定账户名称,--group为指定组名称,--with-http_ssl_module为支持加密功能
#--with-stream为TCP/UDP代理功能的模块,使用Nginx四层代理的时候会用到,--with-http_stub_status_module为开启status状态功能,可以查看nginx连接数等信息
./configure --prefix=/usr/local/nginx --user=nginx --group=nginx --with-http_ssl_module --with-stream --with-http_stub_status_module

make && make install                          #编译安装
#安装数据库和PHP环境
yum install php php-mysql php-fpm mariadb mariadb-devel mariadb-server -y2、修改nginx配置
vim /usr/local/nginx/conf/nginx.conf #新增修改如下标红内容http {
include mime.types;
default_type application/octet-stream;#zabbix的web页面使用PHP写,需要大量的缓存,所以需要将nginx开启一定的缓存容量
fastcgi_buffers 8 16k; #缓存php生成的页面内容,8个16k
fastcgi_buffer_size 32k; #缓存php生产的头部信息
fastcgi_connect_timeout 300; #连接PHP的超时时间
fastcgi_send_timeout 300; #发送请求的超时时间
fastcgi_read_timeout 300; #读取请求的超时时间#log_format main '$remote_addr - $remote_user [$time_local] "$request" '
# '$status $body_bytes_sent "$http_referer" '
# '"$http_user_agent" "$http_x_forwarded_for"';#access_log logs/access.log main;
sendfile on;
#tcp_nopush on;... ...
#打开php,动静分离,是nginx可以识别动态脚本
location ~ \.php$ {
root html;
fastcgi_pass 127.0.0.1:9000; #9000端口是php-fpm
fastcgi_index index.php;
#fastcgi_param SCRIPT_FILENAME /scripts$fastcgi_script_name;
include fastcgi.conf;
}... ...
}
修改完后开启服务:
systemctl enable --now mariadb

systemctl enable --now php-fpm

/usr/local/nginx/sbin/nginx
如要将nginx加入systemctl管理并实现开机自启,可以参照:将Nginx加入systemctl管理_桂安俊@kylinOS的博客-CSDN博客_nginx 加入systemctl
注:如果使用systemctl启动nginx,需要将前面/usr/local/nginx/sbin/nginx方式启动的nginx进程关闭,不然会报错。
3、测试页面
vim /usr/local/nginx/html/test.php浏览器访问http://192.168.2.10/test.php
三、部署zabbix服务端
(以下均在zabbixserver主机安装)
1、下载zabbix
官网下载源码包地址:Download Zabbix sources
本文使用的是3.4.4版本,下载地址如下:
链接:https://pan.baidu.com/s/1T_h7OhFf5wHAR8Bo0WvsEQ?pwd=1234
提取码:1234
2、安装源码zabbix
#先安装依赖包
yum install net-snmp-devel curl-devel libevent-devel -y

tar -xvf zabbix-3.4.4.tar.gz

cd zabbix-3.4.4

#--enable-server安装服务端,--enable-proxy安装监控代理,--enable-agent安装客户端,自己也要监控自己
#--with-mysql=/usr/bin/mysql_config指定mysql配置,具体路径可以用which mysql_config命令查
# --with-net-snmp是通过snmp协议开启对网络设备的监控,--with-libcurl是zabbix可以调用curl指令
./configure --enable-server --enable-proxy --enable-agent --with-mysql=/usr/bin/mysql_config --with-net-snmp --with-libcurl

make install
查看安装结果:
ls /usr/local/etc/
ls /usr/local/bin/
ls /usr/local/sbin/
3、为zabbix创建数据库与数据库账户
#进入数据库
mysql
执行sql语句:
#创建一个zabbix空数据库
create database zabbix character set utf8;

#赋予权限,可以用用户:zabbix、密码:zabbix 本机localhost登录
grant all on zabbix.* to zabbix@'localhost' identified by 'zabbix';

#退出
exit
将zabbix提供的数据库文件,导入到zabbix数据库:
mysql -uzabbix -pzabbix zabbix < /root/zabbix-3.4.4/database/mysql/schema.sql

mysql -uzabbix -pzabbix zabbix < /root/zabbix-3.4.4/database/mysql/images.sql

mysql -uzabbix -pzabbix zabbix < /root/zabbix-3.4.4/database/mysql/data.sql
4、搭建Zabbix页面
#将zabbix自带的html文件,拷贝到nginx下
cp -a /root/zabbix-3.4.4/frontends/php/*  /usr/local/nginx/html/

chmod -R 777 /usr/local/nginx/html/*
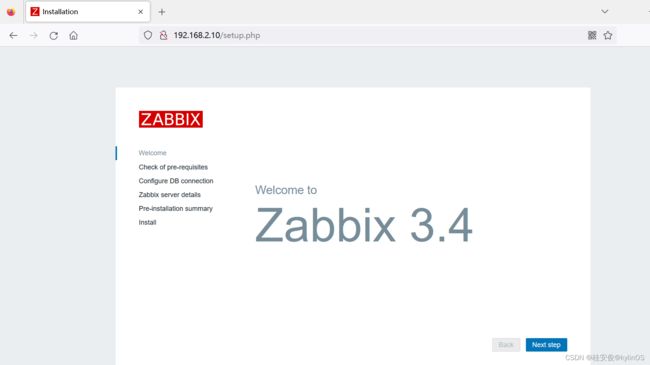
浏览器访问:http://192.168.2.10/index.php
如上会自动进入到zabbix配置页面,点击Next step进行一步步配置。
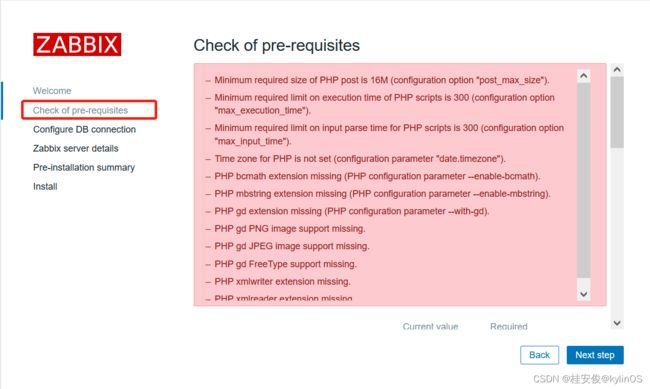
4.1、第1步 Check of pre-requisites
如上需要修改php配置
a、安装依赖软件:
yum install php-gd php-xml php-ldap -yb、修改PHP配置文件
vim /etc/php.ini按照zabbix页面报错提示,搜索配置项并修改如下内容:
date.timezone = Asia/Shanghai     #设置时区
max_execution_time = 300          #最大执行时间,单位秒
post_max_size = 32M               #POST数据最大容量
max_input_time = 300              #服务器接收数据的时间限制
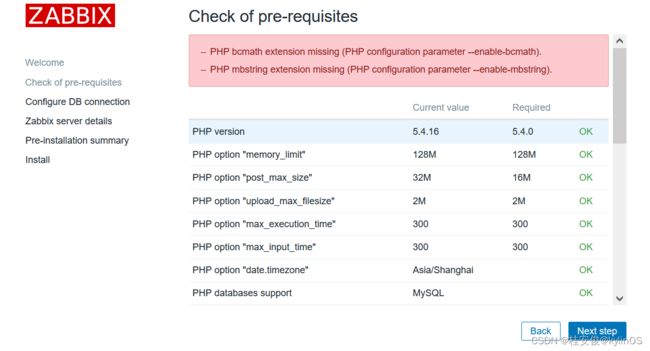
systemctl restart php-fpm再重新回到zabbix页面,点Back,上一步,然后再Next step,会发现少了很多报错:
如上提示是缺少bcmath和mbstring依赖包,安装提示依赖包:
yum install php-bcmath php-mbstring -y

systemctl restart php-fpm  #重启生效
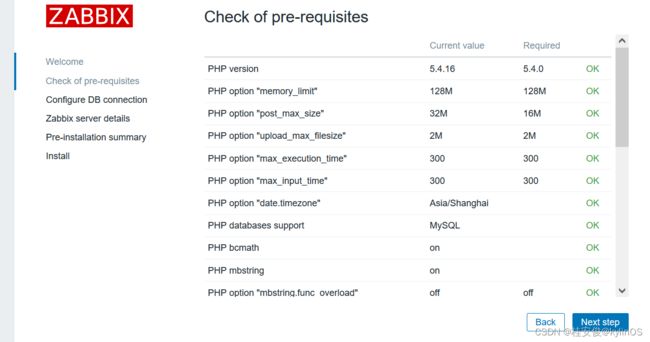
再重新Back、然后Next step,发现这一步已经没有报错:
再点Next step进入下一步配置。
4.2、第2步 Configure DB connection
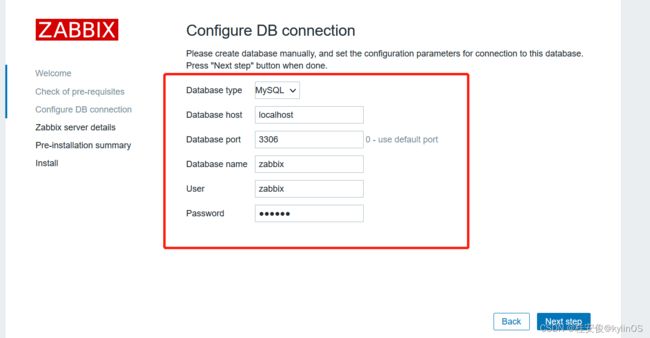
给zabbix配置数据库,如下图,关于mysql的用户名和密码与上文数据库设置保持一致即可:
点击下一步Next step,如果能连接成功,则不会报错,直接进入下一步配置。
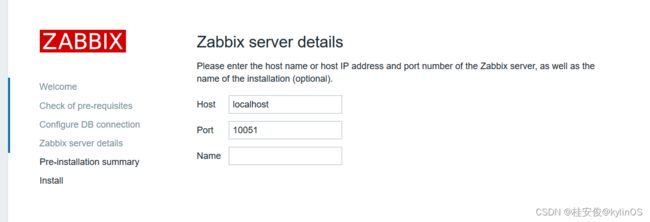
4.3、第3步 Zabbix server details
使用默认配置即可,直接点下一步。
4.4、第4步 Pre-installation summary
这里是检查上述所有配置列表,检查无误后直接下一步即可
4.5、第5步 install
安装成功,点finish完成:
4.6、zabbix页面登录和配置
默认登录用户是admin,密码是zabbix
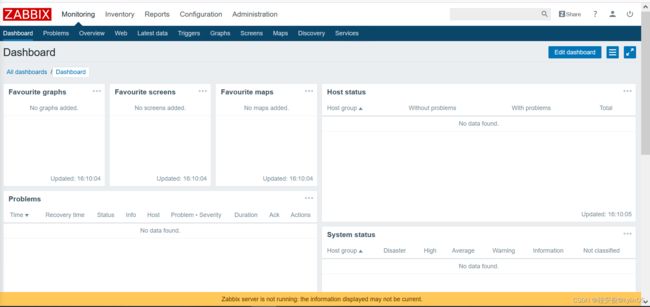
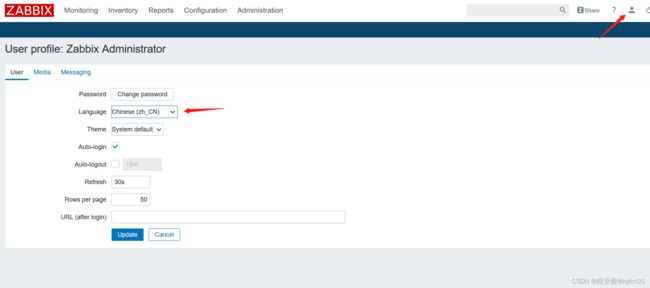
可修改页面为中文,注意切换中文的时候,在业务使用过程中查或者获取一些数据可能会乱码,可以再切回英文显示:
上图最下面的黄色部分提示:zabbix server is not running,是因为zabbix_server服务没启,下面将启动zabbix_server监控服务。
4.7、启动服务
将zabbix_server监控服务器软件打开:
vim /usr/local/etc/zabbix_server.conf搜索修改如下配置:
DBHost=localhost        #数据库主机
DBName=zabbix           #设置数据库名称
DBUser=zabbix           #设置数据库账户
DBPassword=zabbix       #设置数据库密码
LogFile=/tmp/zabbix_server.log      #设置日志
启动服务:
useradd zabbix    #不创建用户无法启动服务

zabbix_server     #启动服务

netstat -utnlp | grep :10051   #查看端口
设置zabbix_server监控服务和zabbix_agentd代理服务开机自启:
echo zabbix_server >> /etc/rc.local
echo zabbix_agentd >> /etc/rc.local
chmod +x /etc/rc.local
四、搭建zabbix被监控客户端
1、配置web1主机
被zabbix监控端也要安装zabbix服务:
yum install gcc pcre-devel autoconf -y

tar -xvf zabbix-3.4.4.tar.gz  #上传zabbix源码包并解压

cd zabbix-3.4.4/

./configure --enable-agent    #作为被监控端只需要开启agent服务即可

make install
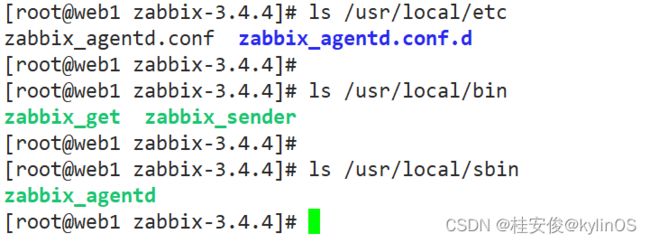
查看安装结果:
ls /usr/local/etc
ls /usr/local/bin
ls /usr/local/sbin
修改配置文件:
vim /usr/local/etc/zabbix_agentd.conf搜索修改如下配置:
Server=127.0.0.1,192.168.2.10    #允许访问服务地址列表,指允许谁来监控我,这里指本机和192.168.2.10(zabbix服务端)可以监控本台主机

ServerActive=192.168.2.10:10051  #zabbix服务端IP地址和端口

LogFile=/tmp/zabbix_agentd.log   #r日志文件
启动zabbix agent客户端服务:
useradd zabbix

zabbix_agentd

netstat -utnlp | grep :10050
如上,zabbix_server服务端监控端口是10051,zabbix_agentd被监控客户端监控端口是10050。
同样,需要将zabbix_agentd设置为开机自启:
echo zabbix_agentd >> /etc/rc.local

chmod +x /etc/rc.local

