Labelme标注数据,使用Mask RCNN训练自己的数据集
代码:https://github.com/matterport/Mask_RCNN
训练环境:Ubuntu系统
一、数据准备
准备好数据图像,使用labelme进行多边形标注
1. 安装labelme
必须要有深度学习环境(安装annaconda)
打开cmd激活base环境(activate base)
使用命令 pip install labelme安装labelme工具
2. 安装完成后在命令行输入labelme回车即可打开labelme工具
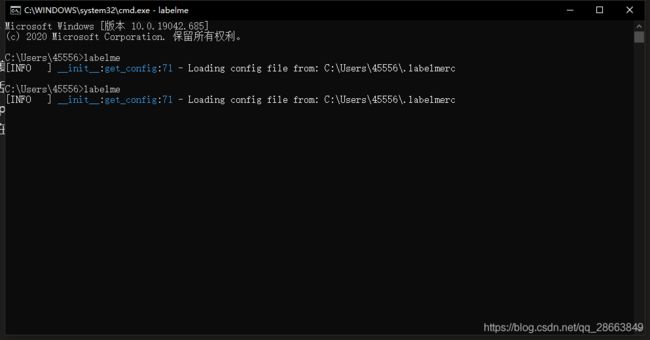

点击opendir打开需要标注图片所在目录,点击create polygons即可开始标注多边形
标注完成后一张图像会生成一个json文件
3. 将json文件生成文件夹,文件夹里面包含以下几个文件
![]()
此时需要使用labelme的版本为3.16.5(pip install labelme==3.16.5),建立以下代码文件:
json2img.py,否则会报错:module ‘labelme.utils’ has no attribute 'draw_label’
import argparse
import base64
import json
import os
import os.path as osp
import warnings

import PIL.Image
import yaml

from labelme import utils
###############################################增加的语句,改下路径即可##############################
import glob
json_list = glob.glob(os.path.join(r'./00/','*.json'))
###############################################   end    ##################################


def main():
    # warnings.warn("This script is aimed to demonstrate how to convert the\n"
    #               "JSON file to a single image dataset, and not to handle\n"
    #               "multiple JSON files to generate a real-use dataset.")

    parser = argparse.ArgumentParser()
    ###############################################  删除的语句  ##################################
    # parser.add_argument('json_file')
    # json_file = args.json_file
    ###############################################    end       ##################################
    parser.add_argument('-o', '--out', default=None)
    args = parser.parse_args()

    ###############################################增加的语句##################################
    for json_file in json_list:
    ###############################################    end       ##################################

        if args.out is None:
            out_dir = osp.basename(json_file).replace('.', '_')
            out_dir = osp.join(osp.dirname(json_file), out_dir)
        else:
            out_dir = args.out
        if not osp.exists(out_dir):
            os.mkdir(out_dir)

        data = json.load(open(json_file))

        if data['imageData']:
            imageData = data['imageData']
        else:
            imagePath = os.path.join(os.path.dirname(json_file), data['imagePath'])
            with open(imagePath, 'rb') as f:
                imageData = f.read()
                imageData = base64.b64encode(imageData).decode('utf-8')
        img = utils.img_b64_to_arr(imageData)

        label_name_to_value = {'_background_': 0}
        for shape in sorted(data['shapes'], key=lambda x: x['label']):
            label_name = shape['label']
            if label_name in label_name_to_value:
                label_value = label_name_to_value[label_name]
            else:
                label_value = len(label_name_to_value)
                label_name_to_value[label_name] = label_value
        lbl = utils.shapes_to_label(img.shape, data['shapes'], label_name_to_value)

        label_names = [None] * (max(label_name_to_value.values()) + 1)
        for name, value in label_name_to_value.items():
            label_names[value] = name
        lbl_viz = utils.draw_label(lbl, img, label_names)

        PIL.Image.fromarray(img).save(osp.join(out_dir, 'img.png'))
        utils.lblsave(osp.join(out_dir, 'label.png'), lbl)
        PIL.Image.fromarray(lbl_viz).save(osp.join(out_dir, 'label_viz.png'))

        with open(osp.join(out_dir, 'label_names.txt'), 'w') as f:
            for lbl_name in label_names:
                f.write(lbl_name + '\n')

        warnings.warn('info.yaml is being replaced by label_names.txt')
        info = dict(label_names=label_names)
        with open(osp.join(out_dir, 'info.yaml'), 'w') as f:
            yaml.safe_dump(info, f, default_flow_style=False)

        print('Saved to: %s' % out_dir)


if __name__ == '__main__':
    main()
修改:json_list = glob.glob(os.path.join(r’./00/’,’*.json’))为标注生成json的文件夹
打开cmd,激活labelme为3.16.5的环境,cd到json2img.py文件夹下,运行python json2img.py即可生成对应名称的文件夹,里面包含上述五个文件。

在上面的文件夹内新建文件夹命名为:labelme_json再把这些文件夹全部放进labelme_json文件夹内。此时需要在labelme_json同级目录下再新建三个文件夹如下:

4. 移动文件
将.json文件全部移动到json文件夹内,将图像全部移动到pic文件夹内,剩下cv_mask需要使用脚本代码完成移动和重命名操作(请自行网上查找)可参考以下代码修改,label.png需为8位图,可属性查看。如果为16位需要转为8位。
# -*- coding: utf-8 -*-
"""
Created on Mon Jul 27 13:47:29 2020

@author: 45556
"""

import os
import shutil
import sys
import re
spath=r'./train/labelme_json/'
tpath=r'./train/cv_mask/'
sfolder=os.listdir(spath)
i=1
for tempfolder in sfolder:
    temppath=os.path.join(spath,tempfolder)
    flist=os.listdir(temppath)
    if not 'label.png' in flist:
        print('not find label.png in {}'.format(temppath))
        continue
    # 开始复制文件,注意这里不改变名字
    # step 1 创建新的文件夹
    shutil.copy(os.path.join(temppath,'label.png'),os.path.join(tpath,'{}.png'.format(tempfolder.replace("_json",""))))
到这里所有的数据都准备好了,按照同样的步骤可以准备好测试集。
二、训练
1. train.py
打开代码项目,在主目录下新建train.py文件,如下:
# -*- coding: utf-8 -*-

import os
import sys
import random
import math
import re
import time
import numpy as np
import cv2
import matplotlib
import matplotlib.pyplot as plt
import tensorflow as tf
from mrcnn.config import Config
from mrcnn import utils
from mrcnn import model as modellib, utils
from mrcnn import visualize
import yaml
from mrcnn.model import log
from PIL import Image

# os.environ["CUDA_VISIBLE_DEVICES"] = "0"
# Root directory of the project
# ROOT_DIR = os.getcwd()

ROOT_DIR = os.path.abspath(r"E:\Github\Mask_RCNN-master")
# Directory to save logs and trained model
MODEL_DIR = os.path.join(ROOT_DIR, "logs")

iter_num = 0

# Local path to trained weights file
COCO_MODEL_PATH = os.path.join(ROOT_DIR, "mask_rcnn_coco.h5")
# Download COCO trained weights from Releases if needed
if not os.path.exists(COCO_MODEL_PATH):
    utils.download_trained_weights(COCO_MODEL_PATH)


class ShapesConfig(Config):
    """Configuration for training on the toy shapes dataset.
    Derives from the base Config class and overrides values specific
    to the toy shapes dataset.
    """
    # Give the configuration a recognizable name
    NAME = "shapes"

    # Train on 1 GPU and 8 images per GPU. We can put multiple images on each
    # GPU because the images are small. Batch size is 8 (GPUs * images/GPU).
    GPU_COUNT = 1
    IMAGES_PER_GPU = 1

    # Number of classes (including background)
    NUM_CLASSES = 1 + 2  # background + 1 shapes

    # Use small images for faster training. Set the limits of the small side
    # the large side, and that determines the image shape.
    IMAGE_MIN_DIM = 320
    IMAGE_MAX_DIM = 384

    # Use smaller anchors because our image and objects are small
    RPN_ANCHOR_SCALES = (8 * 6, 16 * 6, 32 * 6, 64 * 6, 128 * 6)  # anchor side in pixels

    # Reduce training ROIs per image because the images are small and have
    # few objects. Aim to allow ROI sampling to pick 33% positive ROIs.
    TRAIN_ROIS_PER_IMAGE = 100

    # Use a small epoch since the data is simple
    STEPS_PER_EPOCH = 100

    # use small validation steps since the epoch is small
    VALIDATION_STEPS = 50


config = ShapesConfig()
config.display()


class DrugDataset(utils.Dataset):
    # 得到该图中有多少个实例(物体)
    def get_obj_index(self, image):
        n = np.max(image)
        return n

    # 解析labelme中得到的yaml文件,从而得到mask每一层对应的实例标签
    def from_yaml_get_class(self, image_id):
        info = self.image_info[image_id]
        with open(info['yaml_path']) as f:
            temp = yaml.load(f.read())
            labels = temp['label_names']
            del labels[0]
        return labels

    # 重新写draw_mask
    def draw_mask(self, num_obj, mask, image, image_id):
        # print("draw_mask-->",image_id)
        # print("self.image_info",self.image_info)
        info = self.image_info[image_id]
        # print("info-->",info)
        # print("info[width]----->",info['width'],"-info[height]--->",info['height'])
        for index in range(num_obj):
            for i in range(info['width']):
                for j in range(info['height']):
                    # print("image_id-->",image_id,"-i--->",i,"-j--->",j)
                    # print("info[width]----->",info['width'],"-info[height]--->",info['height'])
                    at_pixel = image.getpixel((i, j))
                    if at_pixel == index + 1:
                        mask[j, i, index] = 1
        return mask

    # 重新写load_shapes,里面包含自己的自己的类别
    # 并在self.image_info信息中添加了path、mask_path 、yaml_path
    # yaml_pathdataset_root_path = "/tongue_dateset/"
    # img_floder = dataset_root_path + "rgb"
    # mask_floder = dataset_root_path + "mask"
    # dataset_root_path = "/tongue_dateset/"
    def load_shapes(self, count, img_floder, mask_floder, imglist, dataset_root_path):
        """Generate the requested number of synthetic images.
        count: number of images to generate.
        height, width: the size of the generated images.
        """
        # Add classes
        self.add_class("shapes", 1, "b_sidewalk")
        self.add_class("shapes", 2, "z_crossing")

        for i in range(count):
            # 获取图片宽和高
            print(i)
            filestr = imglist[i].split(".")[0]
            # print(imglist[i],"-->",cv_img.shape[1],"--->",cv_img.shape[0])
            # print("id-->", i, " imglist[", i, "]-->", imglist[i],"filestr-->",filestr)
            # filestr = filestr.split("_")[1]
            mask_path = mask_floder + "/" + filestr + ".png"
            yaml_path = dataset_root_path + "labelme_json/" + filestr + "_json/info.yaml"
            print(dataset_root_path + "labelme_json/" + filestr + "_json/img.png")
            cv_img = cv2.imread(dataset_root_path + "labelme_json/" + filestr + "_json/img.png")

            self.add_image("shapes", image_id=i, path=img_floder + "/" + imglist[i],
                           width=cv_img.shape[1], height=cv_img.shape[0], mask_path=mask_path, yaml_path=yaml_path)

    # 重写load_mask
    def load_mask(self, image_id):
        """Generate instance masks for shapes of the given image ID.
        """
        global iter_num
        print("image_id", image_id)
        info = self.image_info[image_id]
        count = 1  # number of object
        img = Image.open(info['mask_path'])
        num_obj = self.get_obj_index(img)
        mask = np.zeros([info['height'], info['width'], num_obj], dtype=np.uint8)
        mask = self.draw_mask(num_obj, mask, img, image_id)
        occlusion = np.logical_not(mask[:, :, -1]).astype(np.uint8)
        for i in range(count - 2, -1, -1):
            mask[:, :, i] = mask[:, :, i] * occlusion

            occlusion = np.logical_and(occlusion, np.logical_not(mask[:, :, i]))
        labels = []
        labels = self.from_yaml_get_class(image_id)
        labels_form = []
        for i in range(len(labels)):
            if labels[i].find("b_sidewalk") != -1:
                # print "car"
                labels_form.append("b_sidewalk")
            elif labels[i].find("z_crossing") != -1:
                # print "leg"
                labels_form.append("z_crossing")
            # elif labels[i].find("well") != -1:
            #     # print "well"
            #     labels_form.append("well")
        class_ids = np.array([self.class_names.index(s) for s in labels_form])
        return mask, class_ids.astype(np.int32)


def get_ax(rows=1, cols=1, size=8):
    """Return a Matplotlib Axes array to be used in
    all visualizations in the notebook. Provide a
    central point to control graph sizes.
    Change the default size attribute to control the size
    of rendered images
    """
    _, ax = plt.subplots(rows, cols, figsize=(size * cols, size * rows))
    return ax


# 基础设置
dataset_root_path = "datasets/"
img_floder = dataset_root_path + "pic"
mask_floder = dataset_root_path + "cv2_mask"
# yaml_floder = dataset_root_path
imglist = os.listdir(img_floder)
count = len(imglist)

# train与val数据集准备
dataset_train = DrugDataset()
dataset_train.load_shapes(count, img_floder, mask_floder, imglist, dataset_root_path)
dataset_train.prepare()

# print("dataset_train-->",dataset_train._image_ids)

dataset_val = DrugDataset()
dataset_val.load_shapes(count, img_floder, mask_floder, imglist, dataset_root_path)
dataset_val.prepare()

# print("dataset_val-->",dataset_val._image_ids)

# Load and display random samples
# image_ids = np.random.choice(dataset_train.image_ids, 4)
# for image_id in image_ids:
#    image = dataset_train.load_image(image_id)
#    mask, class_ids = dataset_train.load_mask(image_id)
#    visualize.display_top_masks(image, mask, class_ids, dataset_train.class_names)

# Create model in training mode
model = modellib.MaskRCNN(mode="training", config=config,
                          model_dir=MODEL_DIR)

# Which weights to start with?
init_with = "coco"  # imagenet, coco, or last

if init_with == "imagenet":
    model.load_weights(model.get_imagenet_weights(), by_name=True)
elif init_with == "coco":
    # Load weights trained on MS COCO, but skip layers that
    # are different due to the different number of classes
    # See README for instructions to download the COCO weights
    # print(COCO_MODEL_PATH)
    model.load_weights(COCO_MODEL_PATH, by_name=True,
                       exclude=["mrcnn_class_logits", "mrcnn_bbox_fc",
                                "mrcnn_bbox", "mrcnn_mask"])
elif init_with == "last":
    # Load the last model you trained and continue training
    model.load_weights(model.find_last()[1], by_name=True)

# Train the head branches
# Passing layers="heads" freezes all layers except the head
# layers. You can also pass a regular expression to select
# which layers to train by name pattern.
model.train(dataset_train, dataset_val,
            learning_rate=config.LEARNING_RATE,
            epochs=10,
            layers='heads')

# Fine tune all layers
# Passing layers="all" trains all layers. You can also
# pass a regular expression to select which layers to
# train by name pattern.
model.train(dataset_train, dataset_val,
            learning_rate=config.LEARNING_RATE / 10,
            epochs=10,
            layers="all")
下载好coco的权重mask_rcnn_coco.h5放在目录下
修改第26行主目录
53行类别数=背景数+类别数
122、123行类别名
161-166行,类别数较多的可以继续写elif
186行 训练数据集(就是里面包含四个文件夹的)
240行头部训练epoch
249行fine tune的epoch
2. config.py
打开mrcnn/config.py文件修改:
55行BACKBONE = “resnet50” 可选101和50
73行NUM_CLASSES 这里好像不含背景
其他参数也可以试着修改
在Ubuntu系统中训练的环境配置如下:
# Name                    Version                   Build  Channel
_libgcc_mutex             0.1                        main
_tflow_select             2.1.0                       gpu
absl-py                   0.9.0                    py36_0
astor                     0.8.1                    py36_0
backcall                  0.2.0                    pypi_0    pypi
blas                      1.0                         mkl
c-ares                    1.15.0            h7b6447c_1001
ca-certificates           2020.6.24                     0
certifi                   2020.6.20                py36_0
cudatoolkit               10.1.243             h6bb024c_0
cudnn                     7.6.5                cuda10.1_0
cupti                     10.1.168                      0
cycler                    0.10.0                   pypi_0    pypi
decorator                 4.4.2                    pypi_0    pypi
freetype                  2.10.2               h5ab3b9f_0
gast                      0.4.0                      py_0
google-pasta              0.2.0                      py_0
grpcio                    1.27.2           py36hf8bcb03_0
h5py                      2.10.0           py36hd6299e0_1
hdf5                      1.10.6               hb1b8bf9_0
imageio                   2.9.0                    pypi_0    pypi
importlib-metadata        1.7.0                    py36_0
intel-openmp              2020.1                      217
ipython                   7.16.1                   pypi_0    pypi
ipython-genutils          0.2.0                    pypi_0    pypi
jedi                      0.17.2                   pypi_0    pypi
jpeg                      9b                   h024ee3a_2
keras                     2.0.8                    pypi_0    pypi
keras-applications        1.0.8                      py_1
keras-preprocessing       1.1.0                      py_1
kiwisolver                1.2.0                    pypi_0    pypi
lcms2                     2.11                 h396b838_0
ld_impl_linux-64          2.33.1               h53a641e_7
libedit                   3.1.20191231         h14c3975_1
libffi                    3.3                  he6710b0_2
libgcc-ng                 9.1.0                hdf63c60_0
libgfortran-ng            7.3.0                hdf63c60_0
libpng                    1.6.37               hbc83047_0
libprotobuf               3.12.4               hd408876_0
libstdcxx-ng              9.1.0                hdf63c60_0
libtiff                   4.1.0                h2733197_1
lz4-c                     1.9.2                he6710b0_1
markdown                  3.2.2                    py36_0
matplotlib                3.3.1                    pypi_0    pypi
mkl                       2020.1                      217
mkl-service               2.3.0            py36he904b0f_0
mkl_fft                   1.1.0            py36h23d657b_0
mkl_random                1.1.1            py36h0573a6f_0
ncurses                   6.2                  he6710b0_1
networkx                  2.4                      pypi_0    pypi
ninja                     1.10.0           py36hfd86e86_0
numpy                     1.19.1           py36hbc911f0_0
numpy-base                1.19.1           py36hfa32c7d_0
olefile                   0.46                     py36_0
opencv-python             4.4.0.42                 pypi_0    pypi
openssl                   1.1.1g               h7b6447c_0
parso                     0.7.1                    pypi_0    pypi
pexpect                   4.8.0                    pypi_0    pypi
pickleshare               0.7.5                    pypi_0    pypi
pillow                    7.2.0            py36hb39fc2d_0
pip                       20.2.2                   py36_0
prompt-toolkit            3.0.6                    pypi_0    pypi
protobuf                  3.12.4           py36he6710b0_0
ptyprocess                0.6.0                    pypi_0    pypi
pygments                  2.6.1                    pypi_0    pypi
pyparsing                 2.4.7                    pypi_0    pypi
python                    3.6.10               h7579374_2
python-dateutil           2.8.1                    pypi_0    pypi
pytorch                   1.6.0           py3.6_cuda10.1.243_cudnn7.6.3_0    pytorch
pywavelets                1.1.1                    pypi_0    pypi
pyyaml                    5.3.1                    pypi_0    pypi
readline                  8.0                  h7b6447c_0
scikit-image              0.17.2                   pypi_0    pypi
scipy                     1.5.0            py36h0b6359f_0
setuptools                49.6.0                   py36_0
six                       1.15.0                     py_0
sqlite                    3.32.3               h62c20be_0
tensorboard               1.14.0           py36hf484d3e_0
tensorflow                1.14.0          gpu_py36h3fb9ad6_0
tensorflow-base           1.14.0          gpu_py36he45bfe2_0
tensorflow-estimator      1.14.0                     py_0
tensorflow-gpu            1.14.0               h0d30ee6_0
termcolor                 1.1.0                    py36_1
tifffile                  2020.8.13                pypi_0    pypi
tk                        8.6.10               hbc83047_0
torchvision               0.7.0                py36_cu101    pytorch
traitlets                 4.3.3                    pypi_0    pypi
wcwidth                   0.2.5                    pypi_0    pypi
werkzeug                  1.0.1                      py_0
wheel                     0.34.2                   py36_0
wrapt                     1.12.1           py36h7b6447c_1
xz                        5.2.5                h7b6447c_0
zipp                      3.1.0                      py_0
zlib                      1.2.11               h7b6447c_3
zstd                      1.4.5                h9ceee32_0
选择合适的CUDA 版本配置好环境即可。
3. 训练
在终端激活安装的环境,cd到train.py目录下,运行python train.py即可开始训练
首先读取数据: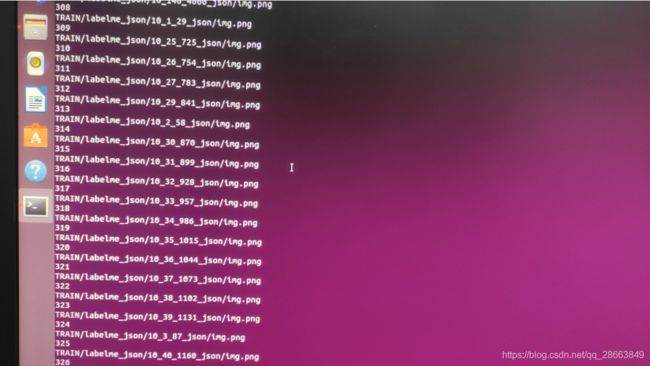
训练中:

生成的模型会在log目录下一个epoch生成一个模型文件,尽量保证盘内空间充足,训练时可使用tensorboard cd到log目录下查看训练的损失情况。
三、评估
训练完成后的模型需要进行评估,步骤如下:
主目录下建立map.py文件,代码如下:
# -*- coding: utf-8 -*-
import os
import sys
import random
import math
import re
import time
import numpy as np
import cv2
import matplotlib
import matplotlib.pyplot as plt
import tensorflow as tf
from mrcnn.config import Config
# import utils
from mrcnn import model as modellib, utils
from mrcnn import visualize
import yaml
from mrcnn.model import log
from PIL import Image
import tensorflow as tf
from keras import backend as K
config = tf.ConfigProto()
config.gpu_options.allow_growth=True
sess = tf.Session(config=config)
K.set_session(sess)


# Root directory of the project
ROOT_DIR = os.path.abspath(r"E:\Github\Mask_RCNN-master")
# ROOT_DIR = os.getcwd()
MODEL_DIR = os.path.join(ROOT_DIR, "logs")

iter_num = 0

# Local path to trained weights file
COCO_MODEL_PATH = os.path.join(ROOT_DIR, "mask_rcnn_coco.h5")
# Download COCO trained weights from Releases if needed
if not os.path.exists(COCO_MODEL_PATH):
    utils.download_trained_weights(COCO_MODEL_PATH)


class ShapesConfig(Config):
    """Configuration for training on the toy shapes dataset.
    Derives from the base Config class and overrides values specific
    to the toy shapes dataset.
    """
    # Give the configuration a recognizable name
    NAME = "shapes"

    # Train on 1 GPU and 8 images per GPU. We can put multiple images on each
    # GPU because the images are small. Batch size is 8 (GPUs * images/GPU).
    GPU_COUNT = 1
    IMAGES_PER_GPU = 5

    # Number of classes (including background)
    NUM_CLASSES = 1 + 2  # background + 3 shapes

    # Use small images for faster training. Set the limits of the small side
    # the large side, and that determines the image shape.
    IMAGE_MIN_DIM = 256
    IMAGE_MAX_DIM = 512

    # Use smaller anchors because our image and objects are small
    RPN_ANCHOR_SCALES = (8 * 6, 16 * 6, 32 * 6, 64 * 6, 128 * 6)  # anchor side in pixels

    # Reduce training ROIs per image because the images are small and have
    # few objects. Aim to allow ROI sampling to pick 33% positive ROIs.
    TRAIN_ROIS_PER_IMAGE = 50

    # Use a small epoch since the data is simple
    STEPS_PER_EPOCH = 50
    # use small validation steps since the epoch is small
    VALIDATION_STEPS = 20


config = ShapesConfig()
config.display()


class DrugDataset(utils.Dataset):
    # 得到该图中有多少个实例(物体)
    def get_obj_index(self, image):
        n = np.max(image)
        return n

    # 解析labelme中得到的yaml文件,从而得到mask每一层对应的实例标签
    def from_yaml_get_class(self, image_id):
        info = self.image_info[image_id]
        with open(info['yaml_path']) as f:
            temp = yaml.load(f.read(),Loader=yaml.FullLoader)
            labels = temp['label_names']
            del labels[0]
        return labels

    # 重新写draw_mask
    def draw_mask(self, num_obj, mask, image, image_id):
        # print("draw_mask-->",image_id)
        # print("self.image_info",self.image_info)
        info = self.image_info[image_id]
        # print("info-->",info)
        # print("info[width]----->",info['width'],"-info[height]--->",info['height'])
        for index in range(num_obj):
            for i in range(info['width']):
                for j in range(info['height']):
                    # print("image_id-->",image_id,"-i--->",i,"-j--->",j)
                    # print("info[width]----->",info['width'],"-info[height]--->",info['height'])
                    at_pixel = image.getpixel((i, j))
                    if at_pixel == index + 1:
                        mask[j, i, index] = 1
        return mask

    def load_shapes(self, count, img_floder, mask_floder, imglist, dataset_root_path):
        """Generate the requested number of synthetic images.
        count: number of images to generate.
        height, width: the size of the generated images.
        """
        # Add classes
        self.add_class("shapes", 1, "b_sidewalk")  # 脆性区域
        self.add_class("shapes", 2, "z_crossing")
        for i in range(count):
            # 获取图片宽和高

            filestr = imglist[i].split(".")[0]

            mask_path = mask_floder + "/" + filestr + ".png"
            yaml_path = dataset_root_path + "labelme_json/" + filestr + "_json/info.yaml"
            print(dataset_root_path + "labelme_json/" + filestr + "_json/img.png")
            cv_img = cv2.imread(dataset_root_path + "labelme_json/" + filestr + "_json/img.png")

            self.add_image("shapes", image_id=i, path=img_floder + "/" + imglist[i],
                           width=cv_img.shape[1], height=cv_img.shape[0], mask_path=mask_path, yaml_path=yaml_path)

    # 重写load_mask
    def load_mask(self, image_id):
        """Generate instance masks for shapes of the given image ID.
        """
        global iter_num
        print("image_id", image_id)
        info = self.image_info[image_id]
        count = 1  # number of object
        img = Image.open(info['mask_path'])
        num_obj = self.get_obj_index(img)
        mask = np.zeros([info['height'], info['width'], num_obj], dtype=np.uint8)
        mask = self.draw_mask(num_obj, mask, img, image_id)
        occlusion = np.logical_not(mask[:, :, -1]).astype(np.uint8)
        for i in range(count - 2, -1, -1):
            mask[:, :, i] = mask[:, :, i] * occlusion

            occlusion = np.logical_and(occlusion, np.logical_not(mask[:, :, i]))
        labels = []
        labels = self.from_yaml_get_class(image_id)
        labels_form = []
        for i in range(len(labels)):
            if labels[i].find("b_sidewalk") != -1:
                # print "box"
                labels_form.append("b_sidewalk")
            elif labels[i].find("z_crossing")!=-1:
                #print "column"
                labels_form.append("z_crossing")

        class_ids = np.array([self.class_names.index(s) for s in labels_form])
        return mask, class_ids.astype(np.int32)


def get_ax(rows=1, cols=1, size=8):
    """Return a Matplotlib Axes array to be used in
    all visualizations in the notebook. Provide a
    central point to control graph sizes.
    Change the default size attribute to control the size
    of rendered images
    """
    _, ax = plt.subplots(rows, cols, figsize=(size * cols, size * rows))
    return ax


def list2array(list):
    b = np.array(list[0])
    for i in range(1, len(list)):
        b = np.append(b, list[i], axis=0)
    return b


def text_save(filename, data):  # filename为写入CSV文件的路径,data为要写入数据列表.
    file = open(filename, 'a')
    for i in range(len(data)):
        s = str(data[i]).replace('[', '').replace(']', '')  # 去除[],这两行按数据不同,可以选择
        s = s.replace("'", '').replace(',', '') + '\n'  # 去除单引号,逗号,每行末尾追加换行符
        file.write(s)
    file.close()
    print("保存txt文件成功")


# 测试集设置
dataset_root_path = "test-dataset/"
img_floder = dataset_root_path + "pic"
mask_floder = dataset_root_path + "cv2_mask"
imglist = os.listdir(img_floder)
count = len(imglist)

# 准备test数据集
dataset_test = DrugDataset()
dataset_test.load_shapes(count, img_floder, mask_floder, imglist, dataset_root_path)
dataset_test.prepare()


# mAP
# Compute VOC-Style mAP @ IoU=0.5
# Running on 10 images. Increase for better accuracy.
class InferenceConfig(ShapesConfig):
    GPU_COUNT = 1
    IMAGES_PER_GPU = 1


inference_config = InferenceConfig()

# Recreate the model in inference mode
model = modellib.MaskRCNN(mode="inference",
                          config=inference_config,
                          model_dir=MODEL_DIR)

model_path = os.path.join(MODEL_DIR, "res-50-399.h5")  # 修改成自己训练好的模型

# Load trained weights
print("Loading weights from ", model_path)
model.load_weights(model_path, by_name=True)

img_list = np.random.choice(dataset_test.image_ids, 85)
APs = []
count1 = 0

# 遍历测试集
for image_id in img_list:
    # 加载测试集的ground truth
    image, image_meta, gt_class_id, gt_bbox, gt_mask = \
        modellib.load_image_gt(dataset_test, inference_config,
                               image_id, use_mini_mask=False)
    # 将所有ground truth载入并保存
    if count1 == 0:
        save_box, save_class, save_mask = gt_bbox, gt_class_id, gt_mask
    else:
        save_box = np.concatenate((save_box, gt_bbox), axis=0)
        save_class = np.concatenate((save_class, gt_class_id), axis=0)
        save_mask = np.concatenate((save_mask, gt_mask), axis=2)

    molded_images = np.expand_dims(modellib.mold_image(image, inference_config), 0)

    # 启动检测
    results = model.detect([image], verbose=0)
    r = results[0]

    # 将所有检测结果保存
    if count1 == 0:
        save_roi, save_id, save_score, save_m = r["rois"], r["class_ids"], r["scores"], r['masks']
    else:
        save_roi = np.concatenate((save_roi, r["rois"]), axis=0)
        save_id = np.concatenate((save_id, r["class_ids"]), axis=0)
        save_score = np.concatenate((save_score, r["scores"]), axis=0)
        save_m = np.concatenate((save_m, r['masks']), axis=2)

    count1 += 1

# 计算AP, precision, recall
AP, precisions, recalls, overlaps = \
    utils.compute_ap(save_box, save_class, save_mask,
                     save_roi, save_id, save_score, save_m)

print("AP: ", AP)
print("mAP: ", np.mean(AP))

# 绘制PR曲线
plt.plot(recalls, precisions, 'b', label='PR')
plt.title('precision-recall curve')
plt.xlabel('Recall')
plt.ylabel('Precision')
plt.legend()
plt.show()

# 保存precision, recall信息用于后续绘制图像
text_save('Kpreci.txt', precisions)
text_save('Krecall.txt', recalls)
修改29行根目录
56行类别数
118-119行类别名称
154-159行类别名
194行测试集路径(格式与训练集一致)
221行你需要测试的模型
运行后输出P-R曲线图,PR坐标对及AP、mAP值
四、检测demo
在主目录下建立demo.py文件,代码如下:
import os
import sys
import random
import math
import numpy as np
import skimage.io
import matplotlib
import matplotlib.pyplot as plt
import cv2
import time
from mrcnn.config import Config
import tensorflow as tf
from datetime import datetime
config = tf.ConfigProto(gpu_options=tf.GPUOptions(allow_growth=True))
sess = tf.Session(config=config)


# Root directory of the project
ROOT_DIR = os.path.abspath(r"E:\Github\Mask_RCNN-master")

# Import Mask RCNN
sys.path.append(ROOT_DIR)  # To find local version of the library
from mrcnn import utils
import mrcnn.model as modellib
from mrcnn import visualize
# Import COCO config
sys.path.append(os.path.join(ROOT_DIR, "samples/coco/"))  # To find local version
import samples.coco


# Directory to save logs and trained model
MODEL_DIR = os.path.join(ROOT_DIR, "logs/")

# Local path to trained weights file
COCO_MODEL_PATH = os.path.join(MODEL_DIR ,"****.h5")
# Download COCO trained weights from Releases if needed
if not os.path.exists(COCO_MODEL_PATH):
    utils.download_trained_weights(COCO_MODEL_PATH)
    print("cuiwei***********************")

# Directory of images to run detection on
IMAGE_DIR = os.path.join(ROOT_DIR, "images")
class ShapesConfig(Config):
    """Configuration for training on the toy shapes dataset.
    Derives from the base Config class and overrides values specific
    to the toy shapes dataset.
    """
    # Give the configuration a recognizable name
    NAME = "shapes"

    # Train on 1 GPU and 8 images per GPU. We can put multiple images on each
    # GPU because the images are small. Batch size is 8 (GPUs * images/GPU).
    GPU_COUNT = 1
    IMAGES_PER_GPU = 1

    # Number of classes (including background)
    NUM_CLASSES = 1 + 1  # background + your classes num

    # Use small images for faster training. Set the limits of the small side
    # the large side, and that determines the image shape.
    IMAGE_MIN_DIM = 320
    IMAGE_MAX_DIM = 384

    # Use smaller anchors because our image and objects are small
    RPN_ANCHOR_SCALES = (8 * 6, 16 * 6, 32 * 6, 64 * 6, 128 * 6)  # anchor side in pixels

    # Reduce training ROIs per image because the images are small and have
    # few objects. Aim to allow ROI sampling to pick 33% positive ROIs.
    TRAIN_ROIS_PER_IMAGE =100

    # Use a small epoch since the data is simple
    STEPS_PER_EPOCH = 100

    # use small validation steps since the epoch is small
    VALIDATION_STEPS = 50

class InferenceConfig(ShapesConfig):
    # Set batch size to 1 since we'll be running inference on
    # one image at a time. Batch size = GPU_COUNT * IMAGES_PER_GPU
    GPU_COUNT = 1
    IMAGES_PER_GPU = 1

config = InferenceConfig()
config.display()


# Create model object in inference mode.
model = modellib.MaskRCNN(mode="inference", model_dir=MODEL_DIR, config=config)

# Load weights trained on MS-COCO
model.load_weights(COCO_MODEL_PATH, by_name=True)

# COCO Class names
# Index of the class in the list is its ID. For example, to get ID of
# the teddy bear class, use: class_names.index('teddy bear')
class_names = ['BG', '*****']
# Load a random image from the images folder

# #视频检测:
# video_path = './video/2.mp4'
# cap = cv2.VideoCapture(video_path)
#
# while(1):
#     # get a frame
#     ret, frame = cap.read()
#     # show a frame
#     start =time.clock()
#     results = model.detect([frame], verbose=1)
#     r = results[0]
#     #cv2.imshow("capture", frame)
#     visualize.display_instances(frame, r['rois'], r['masks'], r['class_ids'],
#                             class_names, r['scores'])
#     end = time.clock()
#     print(end-start)
#     if cv2.waitKey(1) & 0xFF == ord('q'):
#         break
#
# cap.release()
# cv2.destroyAllWindows()


file_names = next(os.walk(IMAGE_DIR))[2]
#image = skimage.io.imread(os.path.join(IMAGE_DIR, random.choice(file_names)))#多图像检测images文件夹下
image= skimage.io.imread(r"E:\Github\Mask_RCNN-master\images\28.jpg")
# Run detection

results = model.detect([image], verbose=1)

# print(end-start)
# Visualize results
r = results[0]
visualize.display_instances(image, r['rois'], r['masks'], r['class_ids'],
                           class_names, r['scores'])
修改第19行主目录路径
32行模型路径
35行模型名称
42行检测图像路径
57行类别数(背景+你的类别数)
96行类别名
124行检测图像名称(使用skimage.io.imread不会生成蓝调风格图像)
运行即可得出检测结果
tips:输出no instance 是没有检测出目标的意思。
整个过程都可以运行,如有问题可留言
如有侵权请联系删除谢谢!转载请注明出处。