在python中调用ChatGPT,并使用tkinter打包成exe
在python中调用ChatGpt
- 一、前提
-
- 1. 安装库
- 2. 获取key
- 3. 调用示例
- 二、tkinter桌面应用
- 网页使用与python使用的对比
用它来搜题你将会知道什么叫爽
一、前提
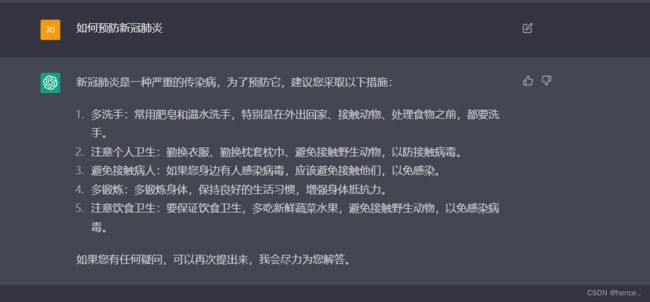
小伙伴们都知道,最近这两天ChatGpt最近很火爆,更重要的是他对中文的兼容性很好,比如我问他一个问题:
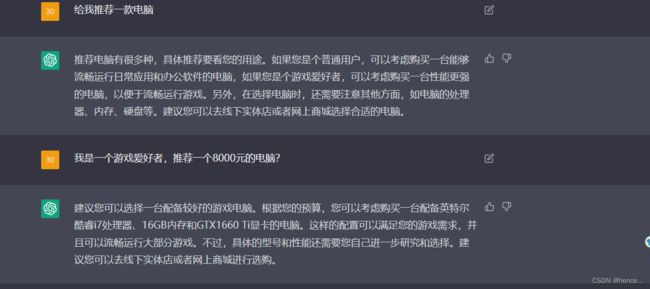
关于它的注册方式可以看这篇文章:OpenAI 推出超神 ChatGPT 注册攻略来了,建议大家选择印度的手机号。
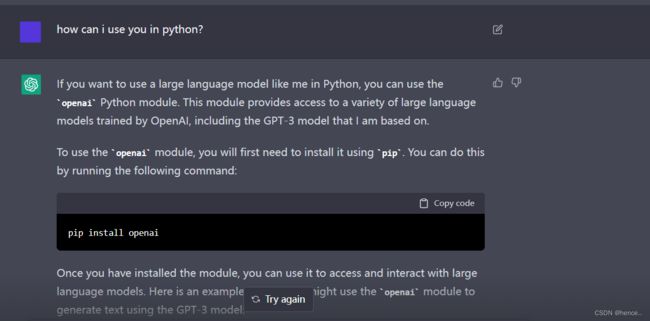
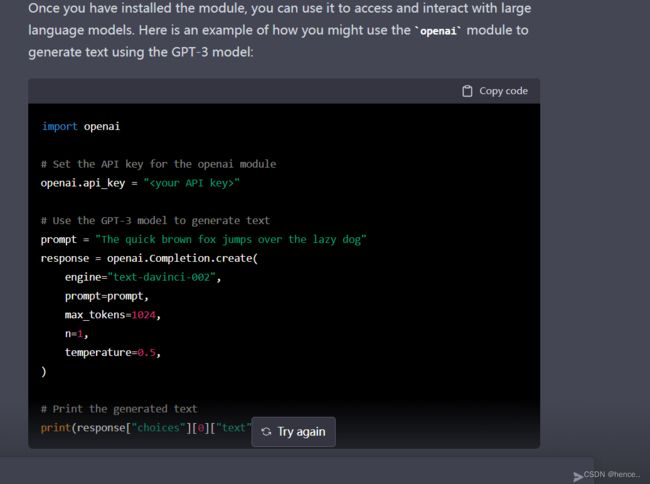
当我询问他如何在python中调用它时他给出了我这样的回复:
下面我们直接步入正轨,开始调用
1. 安装库
pip install openai
调用的基本操作:
2. 获取key
这个很简单,就不在叙述了。获取key的时候一定要第一时间保存,要不然就看不了了,还得重新弄一个kry
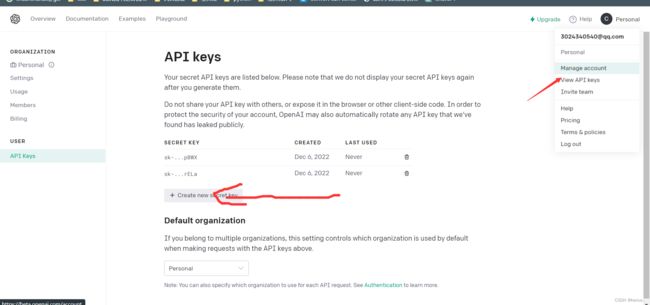
3. 调用示例
如果你用中文在前面加上# coding: utf-8
import openai
# Set the API key for the openai module
openai.api_key = "" #这里放入你的key,我这里隐藏了
# Use the GPT-3 model to generate text
prompt = "因子分析的定义"#这里放入自己的问题
response = openai.Completion.create(
engine="text-davinci-002",
prompt=prompt,
max_tokens=1024,
n=1,
temperature=0.5,
)
# Print the generated text
print(response["choices"][0]["text"])
看下输出:
因子分析是一种统计学方法,旨在通过对原始数据进行分析来确定其中的隐含因子。这些因子可以被视为潜在的结构,可以帮助研究人员更好地理解数据。因子分析可以用于不同类型的数据,包括调查问卷、实验数据、心理测量数据等。
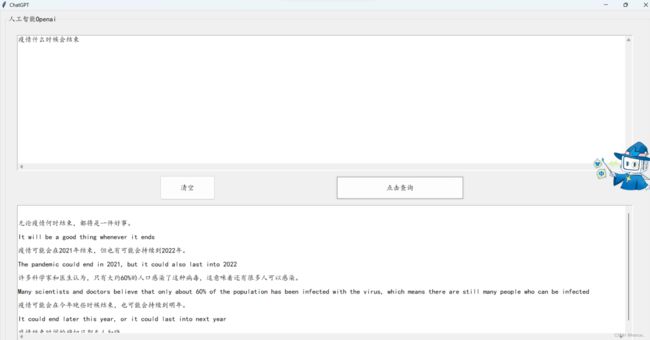
二、tkinter桌面应用
# coding=utf-8
# sk - njzWsK9qzW2tKq9DUJHHT3BlbkFJbKQKRmFD4RRqpuySpBWX
import openai
# -*- coding:utf-8 -*-
import os, sys
from tkinter import *
from tkinter.font import Font
from tkinter.ttk import *
# Set the API key for the openai module
openai.api_key = "这里放入你的key"
class Application_ui(Frame):
# 这个类仅实现界面生成功能,具体事件处理代码在子类Application中。
def __init__(self, master=None):
Frame.__init__(self, master)
self.master.title('ChatGPT')
self.master.geometry('955x500')
self.createWidgets()
def createWidgets(self):
self.top = self.winfo_toplevel()
self.style = Style()
self.style.configure('Tftitle.TLabelframe', font=('楷体', 12))
self.style.configure('Tftitle.TLabelframe.Label', font=('楷体', 12))
self.ftitle = LabelFrame(self.top, text='人工智能Openai', style='Tftitle.TLabelframe')
self.ftitle.place(relx=0.008, rely=0.017, relwidth=0.982, relheight=0.998)
self.stext = Text(self.ftitle, font=('楷体', 12), wrap=NONE, )
self.stext.place(relx=0.017, rely=0.036, relwidth=0.957, relheight=0.412)
# 垂直滚动条
self.VScroll1 = Scrollbar(self.stext, orient='vertical')
self.VScroll1.pack(side=RIGHT, fill=Y)
self.VScroll1.config(command=self.stext.yview) # 将文本框关联到滚动条上,滚动条滑动,文本框跟随滑动
self.stext.config(yscrollcommand=self.VScroll1.set) # 将滚动条关联到文本框
# 水平滚动条
self.stextxscroll = Scrollbar(self.stext, orient=HORIZONTAL)
self.stextxscroll.pack(side=BOTTOM, fill=X) # side是滚动条放置的位置,上下左右。fill是将滚动条沿着y轴填充
self.stextxscroll.config(command=self.stext.xview) # 将文本框关联到滚动条上,滚动条滑动,文本框跟随滑动
self.stext.config(xscrollcommand=self.stextxscroll.set) # 将滚动条关联到文本框
self.totext = Text(self.ftitle, font=('楷体', 12), wrap=NONE)
self.totext.place(relx=0.017, rely=0.552, relwidth=0.957, relheight=0.412)
self.VScroll2 = Scrollbar(self.totext, orient='vertical')
self.VScroll2.pack(side=RIGHT, fill=Y)
# 将滚动条与文本框关联
self.VScroll2.config(command=self.totext.yview) # 将文本框关联到滚动条上,滚动条滑动,文本框跟随滑动
self.totext.config(yscrollcommand=self.VScroll2.set) # 将滚动条关联到文本框
# 水平滚动条
self.totextxscroll = Scrollbar(self.totext, orient=HORIZONTAL)
self.totextxscroll.pack(side=BOTTOM, fill=X) # side是滚动条放置的位置,上下左右。fill是将滚动条沿着y轴填充
self.totextxscroll.config(command=self.totext.xview) # 将文本框关联到滚动条上,滚动条滑动,文本框跟随滑动
self.totext.config(xscrollcommand=self.totextxscroll.set) # 将滚动条关联到文本框
def cut(editor, event=None):
editor.event_generate("<>" )
def copy(editor, event=None):
editor.event_generate("<>" )
def paste(editor, event=None):
editor.event_generate('<>' )
def rightKey(event, editor):
menubar.delete(0, END)
menubar.add_command(label='剪切', command=lambda: cut(editor))
menubar.add_command(label='复制', command=lambda: copy(editor))
menubar.add_command(label='粘贴', command=lambda: paste(editor))
menubar.post(event.x_root, event.y_root)
menubar = Menu(self.top, tearoff=False) # 创建一个菜单
self.stext.bind("" , lambda x: rightKey(x, self.stext)) # 绑定右键鼠标事件
self.totext.bind("" , lambda x: rightKey(x, self.totext)) # 绑定右键鼠标事件
self.style.configure('Tcleartext.TButton', font=('楷体', 12))
self.cleartext = Button(self.ftitle, text='清空', command=self.cleartext_Cmd, style='Tcleartext.TButton')
self.cleartext.place(relx=0.239, rely=0.463, relwidth=0.086, relheight=0.073)
self.style.configure('Taddyh.TButton', font=('楷体', 12))
self.addyh = Button(self.ftitle, text='点击查询', command=self.addyh_Cmd,
style='Taddyh.TButton')
self.addyh.place(relx=0.512, rely=0.463, relwidth=0.2, relheight=0.073)
class Application(Application_ui):
# 这个类实现具体的事件处理回调函数。界面生成代码在Application_ui中。
def __init__(self, master=None):
Application_ui.__init__(self, master)
def cleartext_Cmd(self, event=None):
# TODO, Please finish the function here!
# 清空两个文本框
self.stext.delete(1.0, "end")
self.totext.delete(1.0, "end")
def addyh_Cmd(self, event=None):
# TODO, Please finish the function here!
cookiestext = self.stext.get(1.0, "end")
response = openai.Completion.create(
engine="text-davinci-002",
prompt=cookiestext,
max_tokens=1024,
n=1,
temperature=0.5,
)
answer = (response["choices"][0]["text"]).split(".")
for i in answer:
self.totext.insert(1.0, i)
self.totext.update()
if __name__ == "__main__":
top = Tk()
Application(top).mainloop()
注:本代码借鉴了一位老哥添加headers的代码,本人对此深表感谢
