相机参数标定+透视变换
01.相机参数标定+透视变换
-
使用提供的02.摄像头内外参数标定.pdf文档,得到相机的参数。
-
然后,按照下图对参数进行修改

3.使用matlab的相机标定得到标定参数Dist和K,然后得到H,进行透视变换
# -*- coding:utf-8 _*-
"""
@Author  : 马祥
@Time    : 2022/05/08
"""
import cv2
import matplotlib.pyplot as plt
import numpy as np

np.set_printoptions(suppress=True, precision=4)

Dist = np.array([-0.36219,0.1660,-0.00005,-0.00131,0.00000 ], dtype=np.float32)
K = np.array([[393.67988, 0, 249.34451],
              [0, 394.10789, 120.61648],
              [0, 0, 1]], dtype=np.float32)

PointsImg = np.array([[162, 209],   # 左上角点开始,顺时针
                      [276, 209],
                      [293, 242],
                      [136, 242.]], dtype=np.float32)

# 世界坐标系、地面坐标系, 小车右侧是x,前方是y,向上是z, 坐标系原点设在光心在地面投影左移500mm的位置
distance = 150
PointsWorld = np.array([[429.99998903,249.99997399],
 [570.00001877,250.00000586],
 [570.0001411 ,150.00003663],
 [430.00010819,150.00004694]], dtype=np.float32)

Img = cv2.imread('0000.jpg', 0)

fig = plt.figure('Ori Image')#原始显示
plt.imshow(Img,'gray')
plt.scatter(PointsImg[:, 0], PointsImg[:, 1])#四个点像素坐标显示
plt.show()
#亚像素点提取
SubPointsImg = cv2.cornerSubPix(Img, PointsImg.copy(), (3, 3), (-1, -1), (cv2.TERM_CRITERIA_EPS + cv2.TERM_CRITERIA_MAX_ITER, 300, 0.0001))
#对四个角点畸变矫正
SubPointsImg = cv2.undistortPoints(SubPointsImg.reshape(-1, 1, 2), K, Dist)
#计算单应矩阵
SubPointsImgH = cv2.convertPointsToHomogeneous(SubPointsImg).reshape(-1, 3)
SubPointsImg = K.dot(SubPointsImgH.T).T[:, 0:2]
H = cv2.getPerspectiveTransform(SubPointsImg, PointsWorld)
print(H)
#对整个图像进行畸变矫正
UndistImg = cv2.undistort(Img, K, Dist)

plt.imshow(UndistImg,'gray')
plt.scatter(SubPointsImg[:, 0], SubPointsImg[:, 1])
plt.show()


#验证单应矩阵
SubPointsImgH=cv2.convertPointsToHomogeneous(SubPointsImg)[:,0,:]
WarpToWord = H.dot(SubPointsImgH.T).T  # H将图像点转换为世界坐标系下的点
print(cv2.convertPointsFromHomogeneous(WarpToWord)[:, 0, :])

#图像映射
WarpedImg = cv2.warpPerspective(UndistImg, H, (1000, 1000))  #
plt.imshow(WarpedImg)
# plt.gca().invert_yaxis()
plt.show()

[[ -0.8288 -4.1678 710.4997]
[ 0.0579 0.7031 -338.5836]
[ 0. -0.0081 1. ]]

[[430.     250.    ]
 [570.     250.    ]
 [570.0001 150.    ]
 [430.0002 150.0001]]
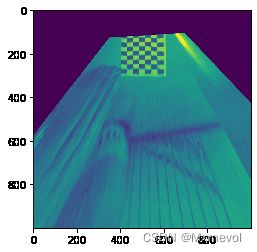
使用自己的的车道线图片测试
# for ImgPath in ImgPaths:
ImgPath='00.jpg'
print(ImgPath)
Img = cv2.imread(ImgPath)
UndistImg = cv2.undistort(Img, K, Dist)
WarpedImg = cv2.warpPerspective(UndistImg, H, (1000, 1000))
# plt.imshow(WarpedImg)
# 	# plt.show()
# SavePath = ImgPath.replace('JPEGImages', 'WarpedImg')
# os.makedirs(os.path.dirname(SavePath), exist_ok=True)
SavePath='84n.jpg'
cv2.imwrite(SavePath, WarpedImg)
Img=cv2.cvtColor(Img,cv2.COLOR_BGR2RGB)
plt.imshow(Img)
# plt.gca().invert_yaxis()
plt.show()
WarpedImg=cv2.cvtColor(WarpedImg,cv2.COLOR_BGR2RGB)
plt.imshow(WarpedImg)
# plt.gca().invert_yaxis()
plt.show()

