tensorrtx-yolov5代码分析
这篇文章的意义,便于以后自己复习。
1、utils.h头文件
static inline cv::Mat preprocess_img(cv::Mat& img, int input_w, int input_h) {
    int w, h, x, y;
    float r_w = input_w / (img.cols*1.0);
    float r_h = input_h / (img.rows*1.0);
    if (r_h > r_w) {
        w = input_w;
        h = r_w * img.rows;
        x = 0;
        y = (input_h - h) / 2;
    } else {
        w = r_h * img.cols;
        h = input_h;
        x = (input_w - w) / 2;
        y = 0;
    }
    cv::Mat re(h, w, CV_8UC3);
    cv::resize(img, re, re.size(), 0, 0, cv::INTER_LINEAR);
    cv::Mat out(input_h, input_w, CV_8UC3, cv::Scalar(128, 128, 128));
    re.copyTo(out(cv::Rect(x, y, re.cols, re.rows)));
    return out;
}
矩形推理,将图片补充为矩形,而不是正方形,宽大于高(这里有一个判断),if (r_h > r_w),且宽高都为32的倍数,补充为矩形,这样就不会有太多的灰度条,有利于提高网络的精度。
static inline int read_files_in_dir(const char *p_dir_name, std::vector &file_names) {
    DIR *p_dir = opendir(p_dir_name);
    if (p_dir == nullptr) {
        return -1;
    }

    struct dirent* p_file = nullptr;
    while ((p_file = readdir(p_dir)) != nullptr) {
        if (strcmp(p_file->d_name, ".") != 0 &&
            strcmp(p_file->d_name, "..") != 0) {
            //std::string cur_file_name(p_dir_name);
            //cur_file_name += "/";
            //cur_file_name += p_file->d_name;
            std::string cur_file_name(p_file->d_name);
            file_names.push_back(cur_file_name);
        }
    }

    closedir(p_dir);
    return 0;
}
读取目录中的头文件
2、yololayer.h头文件
namespace Yolo
{
    static constexpr int CHECK_COUNT = 3;
    static constexpr float IGNORE_THRESH = 0.1f;
    struct YoloKernel
    {
        int width;
        int height;
        float anchors[CHECK_COUNT * 2];
    };
    static constexpr int MAX_OUTPUT_BBOX_COUNT = 1000;
    static constexpr int CLASS_NUM = 80;
    static constexpr int INPUT_H = 640;  // yolov5's input height and width must be divisible by 32.
    static constexpr int INPUT_W = 640;

    static constexpr int LOCATIONS = 4;
    struct alignas(float) Detection {
        //center_x center_y w h
        float bbox[LOCATIONS];
        float conf;  // bbox_conf * cls_conf
        float class_id;
    };
}
Yolo命名空间定义了一些变量和结构的定义
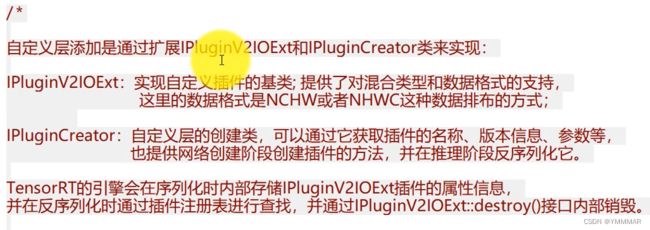
同样的 nvifer1命名空间也定义了两个插件,继承与上图中两个基类
namespace nvinfer1
{
    class API YoloLayerPlugin : public IPluginV2IOExt
    {


class API YoloPluginCreator : public IPluginCreator
    {
    public:
        YoloPluginCreator();

        ~YoloPluginCreator() override = default;

        const char* getPluginName() const TRT_NOEXCEPT override;

        const char* getPluginVersion() const TRT_NOEXCEPT override;

        const PluginFieldCollection* getFieldNames() TRT_NOEXCEPT override;

        IPluginV2IOExt* createPlugin(const char* name, const PluginFieldCollection* fc) TRT_NOEXCEPT override;

        IPluginV2IOExt* deserializePlugin(const char* name, const void* serialData, size_t serialLength) TRT_NOEXCEPT override;

        void setPluginNamespace(const char* libNamespace) TRT_NOEXCEPT override
        {
            mNamespace = libNamespace;
        }

        const char* getPluginNamespace() const TRT_NOEXCEPT override
        {
            return mNamespace.c_str();
        }

    private:
        std::string mNamespace;
        static PluginFieldCollection mFC;
        static std::vector mPluginAttributes;
}; REGISTER_TENSORRT_PLUGIN(YoloPluginCreator);register函数,对插件进行注册,注册之后就可使用
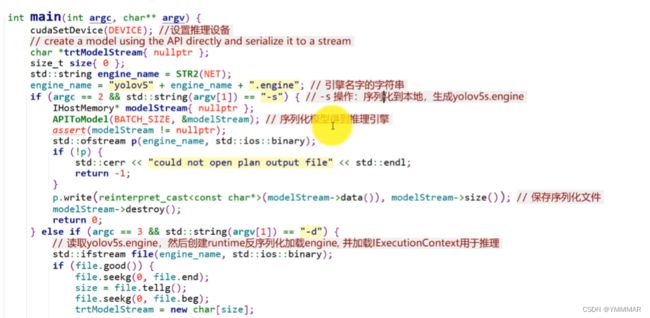
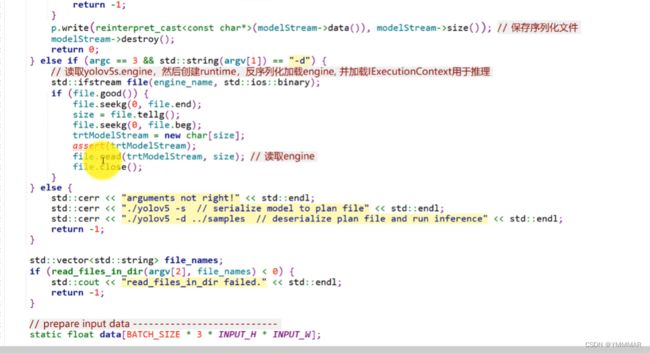
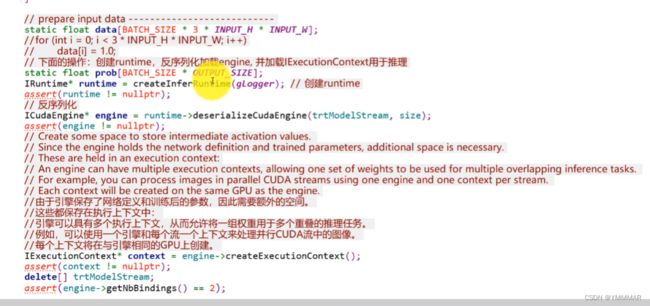
3、yolov5.cpp
