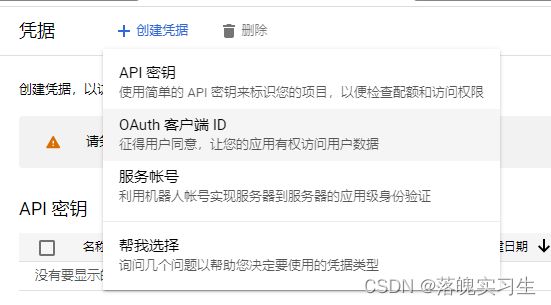
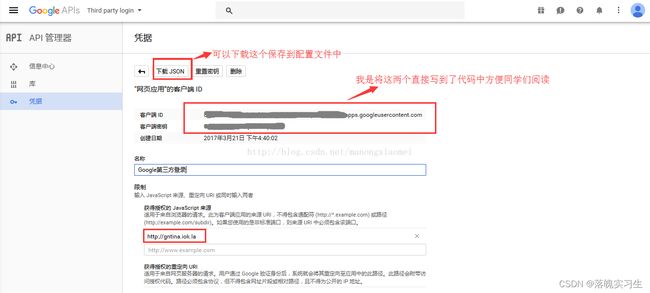
Java实现Google第三方登录
文章目录
- 前言
- 一、了解OAuth2.0
- 二、注册开发者账号
-
- 1.登录开发者平台
- 2.创建应用
- 三、代码实现
-
- 1.实现流程
-
- 1.点击登录
- 2.接受回调中的code获取accessToken
- 3.获取用户信息
- 2.注意事项
前言
Google API 使用 OAuth 2.0 协议进行身份验证和授权。Google 支持常见的 OAuth 2.0 场景,例如网络服务器、客户端、已安装的应用和输入有限的设备应用。
首先,从 Google API Console 获取 OAuth 2.0 客户端凭据。然后,您的客户端应用会从 Google 授权服务器请求访问令牌,从响应中提取令牌,然后将该令牌发送到您要访问的 Google API。
国内访问google需要架梯子。请自行准备好,不然会出现api超时的情况
一、了解OAuth2.0
官方文档:https://developers.google.com/identity/protocols/oauth2

二、注册开发者账号
1.登录开发者平台
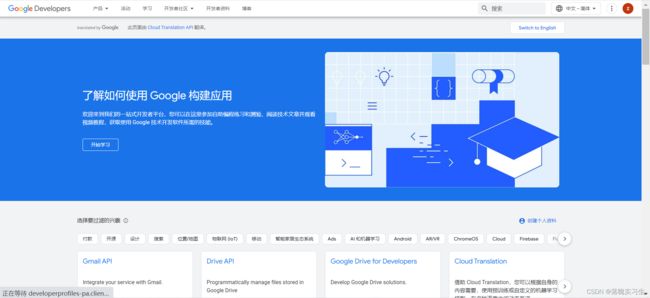
登录Google的开发者平台,创建账号 https://developers.google.com/
2.创建应用
官方地址:https://console.developers.google.com/apis/credentials
三、代码实现
登录开发者平台 https://developers.google.com/ 然后跟着截图一步一步往下走


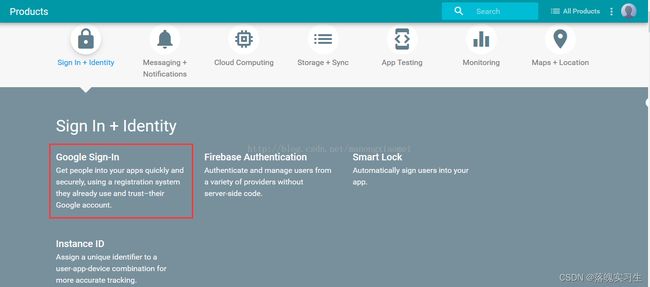
https://developers.google.com/identity/choose-auth

先照着官网写个页面体验一下,直接复制粘贴就可以https://developers.google.com/identity/sign-in/web/
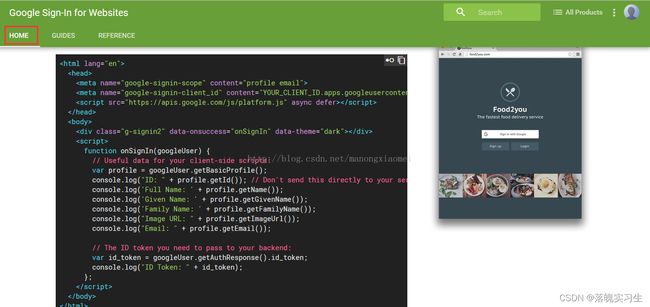
体验完之后到guides页面,将基本的四部参照文档完成https://developers.google.com/identity/sign-in/web/devconsole-project

上面的四步是web页面,下面做后台验证https://developers.google.com/identity/choose-auth


上面的5步做完之后来这找获取用户信息的API(我做的时候这个接口找的很费劲)
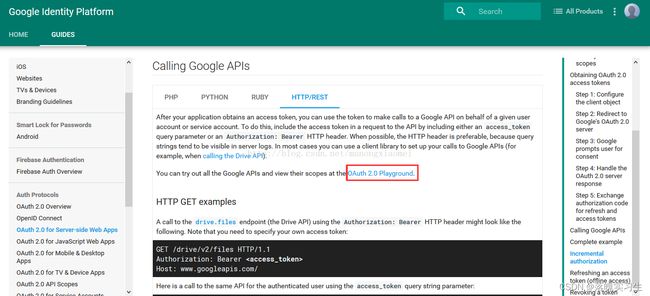
获取用户信息选这个

想查询请求url点第二个红框,requestUrl会自动填充(这一步就是想找到获取用户信息的Url,获取到url就可以在后台调用接口了)

1.实现流程
- 用户点击google登录跳转到google登录页面
- google回调地址会给我们一个code我们取到code获取accessToken
- 根据accessToken再去调用userInfoApi获取用户信息。并根据googleId和自己的业务关联
- 最后返回登录状态给前端
1.点击登录
点击google登录触发
此处就是拼接一个google登录地址也可以用后端实现
const handleClickGoogle=()=>{
  const url="https://accounts.google.com/o/oauth2/v2/auth?" +
      "scope=https%3A//www.googleapis.com/auth/userinfo.email%20https://www.googleapis.com/auth/userinfo.profile%20openid&" +
      "access_type=offline&" +
      "include_granted_scopes=true&" +
      "response_type=code&" +
      "redirect_uri=回调地址"+
      "client_id=谷歌clientId &" +
      "state=可以添加参数用于回调接受"
  window.location.href=url
}
之后会跳转google登录
2.接受回调中的code获取accessToken
public void getGoogleAccessToken(String code) {
	        MultiValueMap params = new LinkedMultiValueMap<>();
        params.add("client_id", clientId);
        params.add("redirect_uri", redirectUrl);
        params.add("client_secret", clientSecret);
        params.add("grant_type", "authorization_code");
        params.add("code", form.getCode());
        WebClient client=WebClient.create();
        client = getWebClient(client, isProxy, proxyHost, proxyPort);
        //获取google access_token
        Mono<GoogleTokenDto> googleTokenDtoMono = client
                .post()
                .uri(googleTokenUrl)
                .contentType(MediaType.APPLICATION_FORM_URLENCODED)
                .body(BodyInserters.fromFormData(params))
                .retrieve()
                .bodyToMono(GoogleTokenDto.class);
		     System.out.println(googleTokenDtoMono.block());
	}
3.获取用户信息
public static voidgetUserInfo(String accessToken) {
	String url = "https://oauth2.googleapis.com/tokeninfo?id_token="+accessToken;
	WebClient client=WebClient.create();
	Mono<String> stringMono = client.get().uri(url).retrieve().bodyToMono(String.class);
}
2.注意事项
我这里使用的是WebClient调用的接口
        <dependency>
            <groupId>org.springframework.boot</groupId>
            <artifactId>spring-boot-starter-webflux</artifactId>
        </dependency>
实体对象
GoogleTokenDto
import com.fasterxml.jackson.annotation.JsonProperty;
import lombok.Data;

@Data
public class GoogleTokenDto {

    @JsonProperty("access_token")
    private String accessToken;

    @JsonProperty("expires_in")
    private long expiresIn;

    private String scope;

    @JsonProperty("token_type")
    private String tokenType;

    @JsonProperty("id_token")
    private String idToken;
}
GoogleDto
import com.fasterxml.jackson.annotation.JsonIgnoreProperties;
import com.fasterxml.jackson.annotation.JsonProperty;
import lombok.Data;

@Data
@JsonIgnoreProperties(ignoreUnknown = true)
public class GoogleDto {
    private String error;
    @JsonProperty("error_description")
    private String errorDescription;
    /**
     * token签发者,值为https://accounts.google.com或者accounts.google.com
     */
    private String iss;
    private String nbf;
    /**
     * client_id
     */
    private String aud;
    /**
     * 用户在该Google应用中的唯一标识,类似于微信的OpenID
     */
    private String sub;
    /**
     * 用户邮箱
     */
    private String email;
    /**
     * 邮箱是否已验证
     */
    @JsonProperty("email_verified")
    private String emailVerified;
    private String azp;
    /**
     * 用户名
     */
    private String name;
    /**
     * 用户头像
     */
    private String picture;
    /**
     * 名
     */
    @JsonProperty("given_name")
    private String givenName;
    /**
     * 姓
     */
    @JsonProperty("family_name")
    private String familyName;
    /**
     * 签发时间
     */
    private String iat;
    /**
     * 过期时间
     */
    private String exp;
    private String jti;
    private String alg;
    private String kid;
    private String type;
}
如果出现了访问超时。需要架梯子。
webclient需要配置代理。具体就要根据自己的梯子配置
    public static WebClient getWebClient(WebClient client, int isProxy, String proxyHost, int proxyPort) {
        if(isProxy ==0){
            HttpClient httpClient = HttpClient.create()
                    .tcpConfiguration(tcpClient ->
                            tcpClient.proxy(proxy -> proxy.type(ProxyProvider.Proxy.HTTP).host(proxyHost).port(proxyPort)));
            ReactorClientHttpConnector connector = new ReactorClientHttpConnector(httpClient);
            client = WebClient.builder().clientConnector(connector).build();
        }
        return client;
    }
本文参考https://blog.csdn.net/manongxiaomei/article/details/67633655
