二、训练yolox模型
训练yolox模型
前篇:配置yolox环境
一、准备工作
1、数据集配置
我用的是voc2007数据集,将标记好的数据转换成voc数据集格式(可存为labelme2voc.py,运行):
import os
import numpy as np
import codecs
import json
from glob import glob
import cv2
import shutil
from sklearn.model_selection import train_test_split
# 1.标签路径
labelme_path = "F:/Models/LabelmeData/" # 原始labelme标注数据路径
saved_path = "data/VOCdevkit/VOC2007/" # 保存路径
isUseTest = True # 是否创建test集
# 2.创建要求文件夹
if not os.path.exists(saved_path + "Annotations"): # xmls_path
os.makedirs(saved_path + "Annotations")
if not os.path.exists(saved_path + "JPEGImages/"): # images_path
os.makedirs(saved_path + "JPEGImages/")
if not os.path.exists(saved_path + "ImageSets/Main/"): # train_val_txt_path
os.makedirs(saved_path + "ImageSets/Main/")
# 3.获取待处理文件
files = glob(labelme_path + "*.json")
files = [i.replace("\\", "/").split("/")[-1].split(".json")[0] for i in files]
# print(files)
# 4.读取标注信息并写入 xml
for json_file_ in files:
json_filename = labelme_path + json_file_ + ".json"
json_file = json.load(open(json_filename, "r", encoding="utf-8"))
height, width, channels = cv2.imread(labelme_path + json_file_ + ".jpg").shape
with codecs.open(saved_path + "Annotations/" + json_file_ + ".xml", "w", "utf-8") as xml:
xml.write('\n' )
xml.write('\t' + 'VOC_data' + '\n')
xml.write('\t' + json_file_ + ".jpg" + '\n')
xml.write('\t\n' )
xml.write('\t\tVOC Data \n')
xml.write('\t\tflickr \n')
xml.write('\t\tNULL \n')
xml.write('\t\n')
xml.write('\t\n' )
xml.write('\t\t' + str(width) + '\n')
xml.write('\t\t' + str(height) + '\n')
xml.write('\t\t' + str(channels) + '\n')
xml.write('\t\n')
xml.write('\t\t0 \n')
for multi in json_file["shapes"]:
points = np.array(multi["points"])
labelName = multi["label"]
xmin = min(points[:, 0])
xmax = max(points[:, 0])
ymin = min(points[:, 1])
ymax = max(points[:, 1])
label = multi["label"]
if xmax <= xmin:
pass
elif ymax <= ymin:
pass
else:
xml.write('\t)
xml.write('\t\t' + labelName + '\n')
xml.write('\t\tUnspecified \n')
xml.write('\t\t1 \n')
xml.write('\t\t0 \n')
xml.write('\t\t\n' )
xml.write('\t\t\t' + str(int(xmin)) + '\n')
xml.write('\t\t\t' + str(int(ymin)) + '\n')
xml.write('\t\t\t' + str(int(xmax)) + '\n')
xml.write('\t\t\t' + str(int(ymax)) + '\n')
xml.write('\t\t\n')
xml.write('\t\n')
# print(json_filename, xmin, ymin, xmax, ymax, label)
xml.write('')
# 5.将图片复制到 VOC2007/JPEGImages/目录下
image_files = glob(labelme_path + "*.jpg")
print("copy image files to VOC007/JPEGImages/")
for image in image_files:
shutil.copy(image, saved_path + "JPEGImages/")
# 6.split files for txt
txtsavepath = saved_path + "ImageSets/Main/"
ftrainval = open(txtsavepath + '/trainval.txt', 'w')
ftest = open(txtsavepath + '/test.txt', 'w')
ftrain = open(txtsavepath + '/train.txt', 'w')
fval = open(txtsavepath + '/val.txt', 'w')
total_files = glob("data/VOCdevkit/VOC2007/Annotations/*.xml")
total_files = [i.replace("\\", "/").split("/")[-1].split(".xml")[0] for i in total_files]
trainval_files = []
test_files = []
if isUseTest:
trainval_files, test_files = train_test_split(total_files, test_size=0.15, random_state=55)
else:
trainval_files = total_files
for file in trainval_files:
ftrainval.write(file + "\n")
# split
train_files, val_files = train_test_split(trainval_files, test_size=0.15, random_state=55)
# train
for file in train_files:
ftrain.write(file + "\n")
# val
for file in val_files:
fval.write(file + "\n")
for file in test_files:
# print(file)
ftest.write(file + "\n")
ftrainval.close()
ftrain.close()
fval.close()
ftest.close()
生成的VOC数据集文件目录如下所示:

2、修改yolox配置
参考文档:https://blog.csdn.net/weixin_40920183/article/details/120387381
修改标签类别
exps/example/yolox_voc/yolox_voc_s.py,将num_classes修改为标签类别数量,此处为2。
若为windows系统,yolox/exp/yolox_base.py将self.data_num_workers设为0,因为在windows中不能使用多个子进程加载数据,在linux系统中可以。
yolox/data/datasets/voc_classes.py文件,VOC_CLASSES修改为自己的类别名,此处为aircraft和oiltank。
修改数据集目录信息
exps/example/yolox_voc/yolox_voc_s.py文件中:
- 修改训练集
修改中dataset中的data_dir和image_sets。data_dir是数据的路径,images_sets修改为[‘train’]。
- 修改验证集
修改valdataset中的exps/example/yolox_voc/yolox_voc_s.py中的data_dir和image_sets。data_dir是数据的绝对路径,images_sets修改为[‘val’]。
删去年份信息
若为自己的数据集,需去掉年份信息,yolox/data/datasets/voc.py文件中:
- 去掉VOCDetection类中的年份信息
#for (year, name) in image_sets:
    # self._year = year
    # rootpath = os.path.join(self.root, "VOC" + year)

for name in image_sets:
    rootpath = self.root
    for line in open(
        os.path.join(rootpath, "ImageSets", "Main", name + ".txt")
    ):
        self.ids.append((rootpath, line.strip()))
- 删掉_get_voc_results_file_template方法对year信息的调用:
# filedir = os.path.join(self.root, "results", "VOC" + self._year, "Main")
filedir = os.path.join(self.root, "results")
- 在_do_python_eval方法中:
# rootpath = os.path.join(self.root, "VOC" + self._year)
# name = self.image_set[0][1]
rootpath = self.root
name = self.image_set[0]

# cachedir = os.path.join(
#     self.root, "annotations_cache", "VOC" + self._year, name
# )
cachedir = os.path.join(
	self.root, "annotations_cache"
)

# use_07_metric = True if int(self._year) < 2010 else False
use_07_metric = True
修改完后执行python setup.py install重载代码。
python setup.py install
二、训练模型
1、训练生成权重文件
模型预训练:首先,在一个原始任务上预先训练一个初始模型,然后在目标任务上使用该模型,针对目标任务的特性,对该初始模型进行精调,从而达到提高目标任务的目的。在本质上,这是一种迁移学习的方法,在自己的目标任务上使用别人训练好的模型。
使用预训练模型yolox_s.pth,yolox_voc_s.py为解释文件训练模型:
python tools/train.py -f exps/example/yolox_voc/yolox_voc_s.py -d 1 -b 4 -c yolox_s.pth
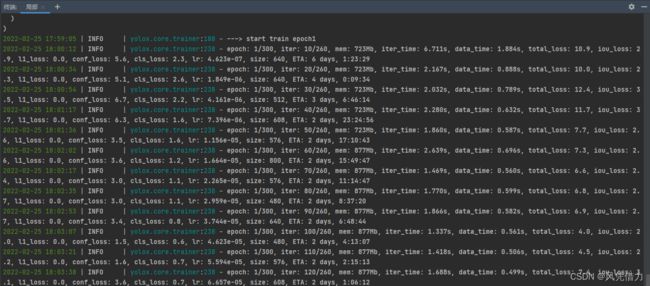 可在yolox_base.py中修改epoch信息,每训练一个epoch会重新生成一个latest_ckpt.pth文件,训练完成后会生成一个best_ckpt.pth文件。
使用Ctrl+C可以终止训练。
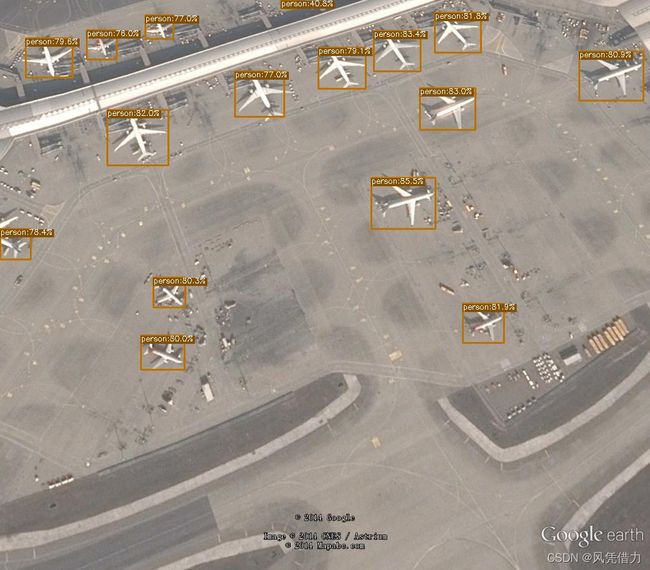
2、检测图片
得到训练好的权重文件后,需要在yolox/data/datasets/init.py文件中导入VOC_CLASSES。
在tools/demo.py中将COCO_Datesets改为VOC_Datesets,对demo.py文件的parser进行修改可运行得到检测结果,path参数可以为文件夹路径(批量检测);也可使用命令行对图片进行检测:
python tools/demo.py image -f exps/example/yolox_voc/yolox_voc_s.py -c YOLOX_outputs/yolox_voc_s/latest_ckpt.pth --path ./assets/aircraf
t_4.jpg --conf 0.3 --nms 0.65 --tsize 640 --save_result --device gpu
3、结果保存为txt文件
测试时将结果保存在一个txt文件中。
检测时将结果画上图片用到的方法是yolox.utils.visualize.py中的vis方法,在这个方法中用一个result_list记录我们需要的文字信息,并返回。在demo.py的predicate.visual()方法中可以接收到返回的result_list。
image_demo()调用此方法,再次返回result_list参数,在image_demo()方法中将这些信息用一个txt文件存起来,就得到了识别结果的数据信息。
三、遇到的错误
- error1
RuntimeError:DataLoader worker (pid(s) 4184, 8092, 10972, 14404) exited unexpectedly
PyTorch的DataLoader中有一个参数叫做num_workers。在windows中不能使用多个子进程加载数据,在linux系统中可以。所以在windows中要将num_workers设置为0。
解决方法:在yolox/exp/yolox_base.py,设置self.data_num_workers = 0。
- error2
OMP: Error #15: Initializing libiomp5md.dll, but found libiomp5md.dll already initialized.
出现的原因是因为有两个重复的文件libiomp5md.dll在python环境中。
解决方法:在tools/train.py添加代码使用临时环境变量:
import os
os.environ["KMP_DUPLICATE_LIB_OK"] = "TRUE"
- error3

训练生成权重时:cuda out of memory
解决:
1、减小batchsize的大小。如果使用的是命令行执行方式,减小-b的数值。若是执行train.py文件,则在parser解析器中修改。
2、去掉命令中的–fp16 -o,这个命令意味着使用混合精度进行训练。
- error4
标签出现“person”而不是自己设置的名称:
demo.py中默认使用的COCO_classes,将其改为VOC_classes。我使用的是voc数据集,故yolox/data/datasets/coco_classes.py中类的名称没有更改,使用时需注意换成voc_classes。
- error5
RuntimeError: Error(s) in loading state_dict for YOLOX:
size mismatch for head.cls_preds.0.weight: copying a param with shape torch.Size([80, 128, 1, 1]) from checkpoint, the shape in current model is torch.Size([
3, 128, 1, 1]).
size mismatch for head.cls_preds.0.bias: copying a param with shape torch.Size([80]) from checkpoint, the shape in current model is torch.Size([3]).
这个问题我找了很久,主要有以下两种说法,不过都没有很好的解决我的问题:
1、shape不匹配,预训练模型与当前网络结构不同,最终类部数与自己的类别数不一致。
https://www.jb51.net/article/212184.htm
2、类的路径或设置没有改,可以仔细检查一下:
(1)可能是train.py里面的num_classes没改。
(2)model_path没改。
(3)classes_path没改。
https://blog.csdn.net/impact_10/article/details/118752248
我的解决方法:将train.py中的resume改为False,则只会得到警告,接下来可以继续训练。

- error6
AssertionError: assert img is not None
cv2.read返回为none的情况:https://blog.csdn.net/weixin_43341953/article/details/120614449
因此检查路径是否正确或数据集中是否缺少了某张图片。
四、其他
- 参考文档1
- 参考文档2
- VOC与COCO:两个比较有名的数据集,yolox预训练模型是根据它们的shape做的
- parser:解析器,ckpt:检查点,exp:解释文件